There’s so much that can go wrong with a battery. From its charger to the very cells inside of the battery that power it, there are a bunch of things to look out for when troubleshooting them.
For a Makita battery that’s not charging, though, there are a few things you’ll want to look at in particular. I’ll detail them below, so start ruling them out to resolve your battery’s issue!
5 Things To Check Out If Your Makita Battery Is Not Charging
- Rule Out The Charger
The charger is the first thing I think users should look at. It’s a likely culprit. There’s no point doing all that complicated troubleshooting for a Makita battery if it’s not even to blame.
You need either another battery or another charger to test this out. If you have a spare battery, check if that charges or not. In case it doesn’t, the charger is probably what’s causing the issue.
If you have another Makita charger, like the one I have in the photo below, use that on the battery that’s not charging. If it doesn’t charge even then, then you know the battery is to blame.
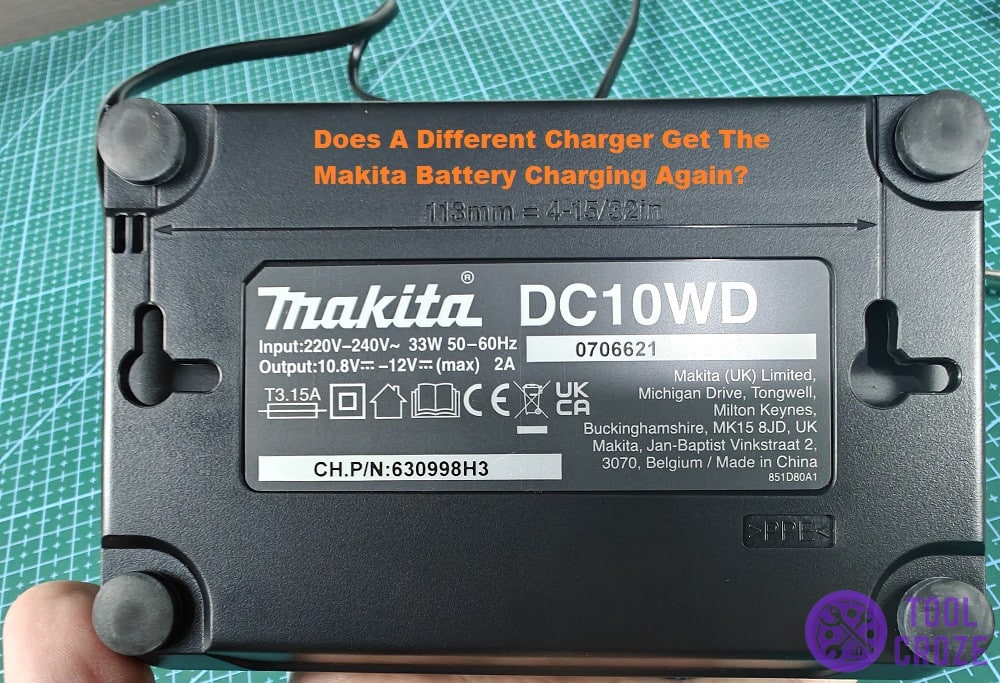
In either of these cases, it’ll be easy to determine if the charger is in the all-clear and if you should start troubleshooting the battery. Once you know, move on to the other fixes.
- Clean The Connection Points
Clean the prongs on the Makita battery and charger regularly. They’re the connection points that connect both of them and allow for the charge to pass through.
But, dirty connection points stop that from happening. The dirt and debris on them cause problems during the connection. That leads to the battery not charging.
I highlighted the prongs I’m referring to in the image down here. These are the ones on the Makita battery, and you’ll find similar ones on the charger as well. Clean them both often.
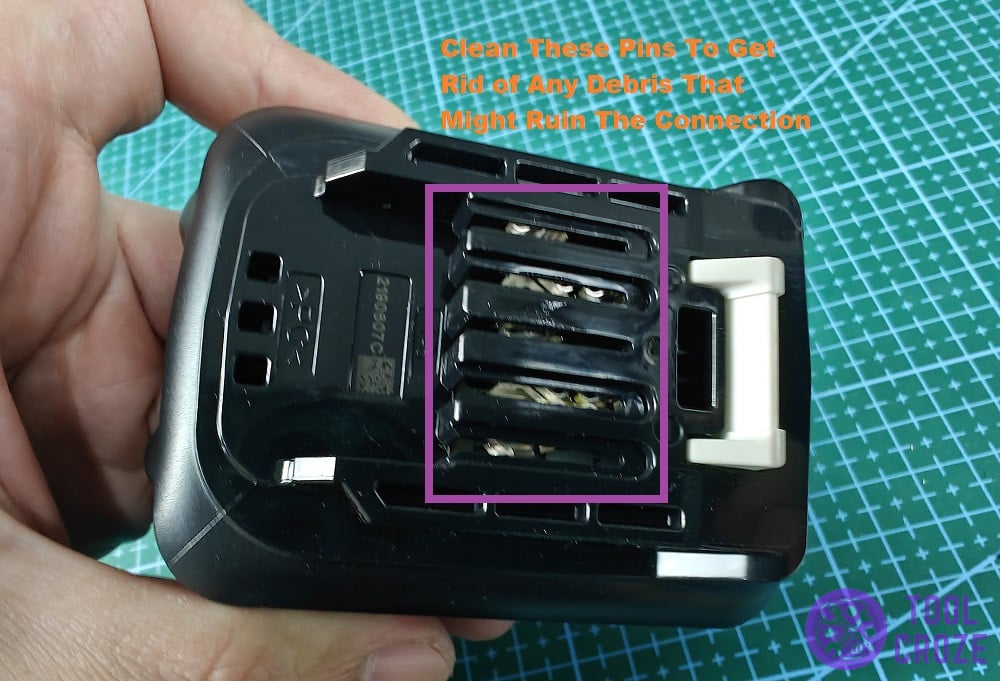
Use a can of compressed air or cotton swabs to scoop out the debris. While you’re cleaning, check the pins on these connection points to see if any of them are particularly out of shape.
Bending leads to problems with establishing a proper connection between your Makita battery and its charger, so make sure the pins are all in order.
- Flashing Red and Green But Not Charging
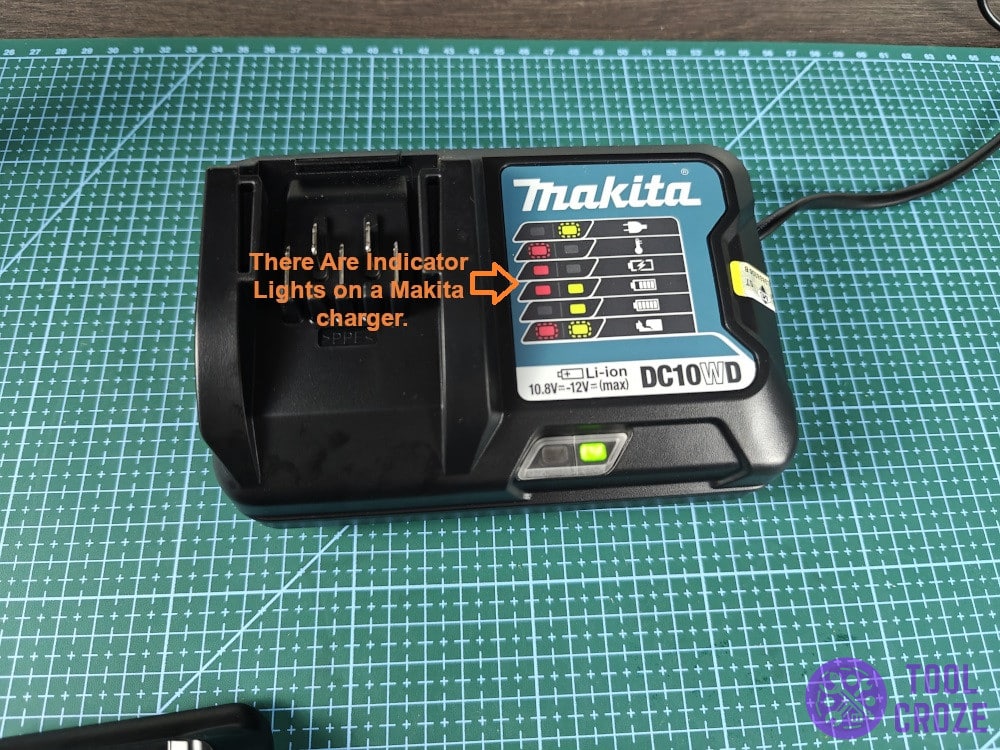
There are two lights on the Makita charger. One is green, and the other is red. Both flash in various ways to highlight different situations, like normal charging, full batteries, and certain issues.
But, what does it mean when both of those lights start flashing at the same time? Well, sometimes it’s just an improper connection between the battery and charger.
It isn’t inserted all the way and needs to be pushed in further to make a proper connection. Debris and dirt, like I talked about in the last suggestion, can also cause this.
Those scenarios aside, the main of the red and green lights flashing at once, like in the picture below, is to tell users that the battery they’re trying to charge is dead.
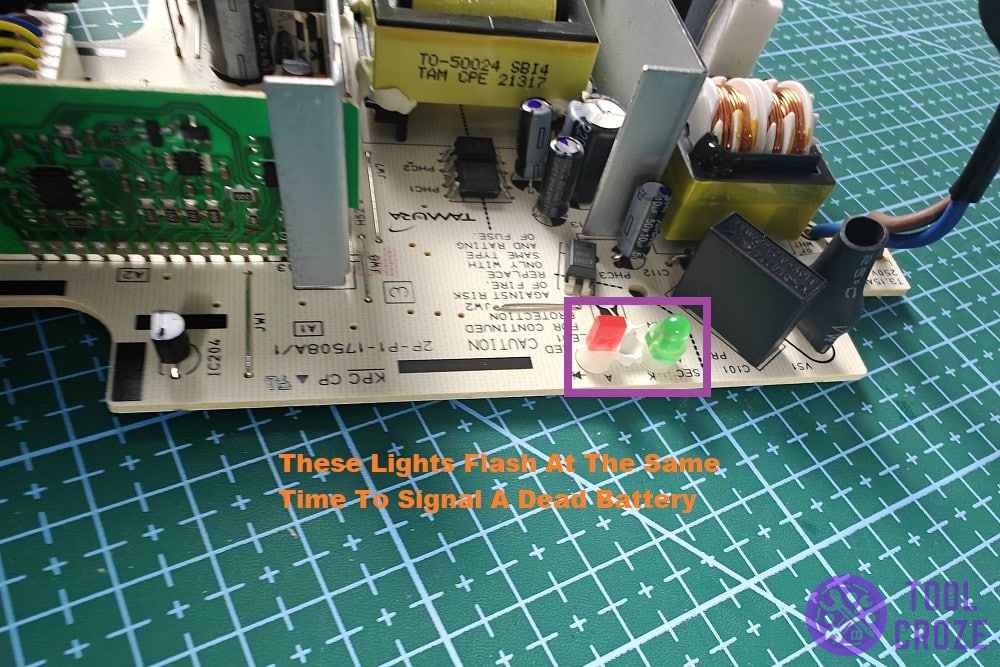
If what I said earlier about pushing the Makita battery in and cleaning the pins doesn’t help, it’s likely the battery is dead. A replacement is necessary since this one can’t charge anymore.
The charger can’t send power to it properly, which is why it’s flashing red and green. It won’t charge during this, and it’s best not to keep trying.
I also have a video which shows how you can fix your Makita battery if it’s not charging, and it’s blinking both red and green light. You can watch it below.
As you can see from my video, the Makita charger blinks both red and green light after I put the battery. This means the battery isn’t healthy anymore.
You need to reset the battery in order to fix this, and you would need another healthy Makita battery with a similar voltage. Connect the positive and negative terminals of the two batteries.
Remove the connection wire after 15 seconds. Then, put the battery back on the Makita charger and it should now be charging normally.
I also have a video about the meanings of the different indicator lights on a Makita battery charger. This will help you know if there’s a problem with your battery. You can watch it below.
If you see a blinking green, it means it’s ready to charge the battery. A solid red means it’s charging the battery.
A solid red and green means the battery is almost full. This will turn into a solid green once the battery is fully charged.
A blinking red meanwhile means a temperature issue, the battery is either too hot or too cold. Lastly, a blinking red and green indicates a bad battery.
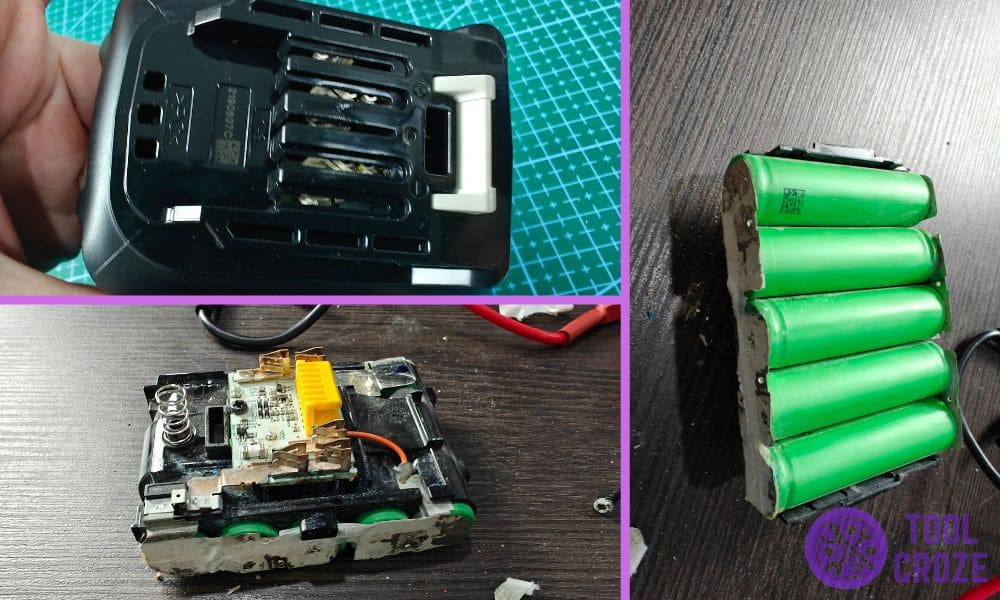
- Swap The Battery Management System
Makita batteries come with a BMS (battery management system) inside of them. It’s what helps maintain battery health and proper functioning.
These systems are excellent for rechargeable batteries because they help with safe use and make sure the battery lasts long. But, it’s also why a battery may stop working and charging.
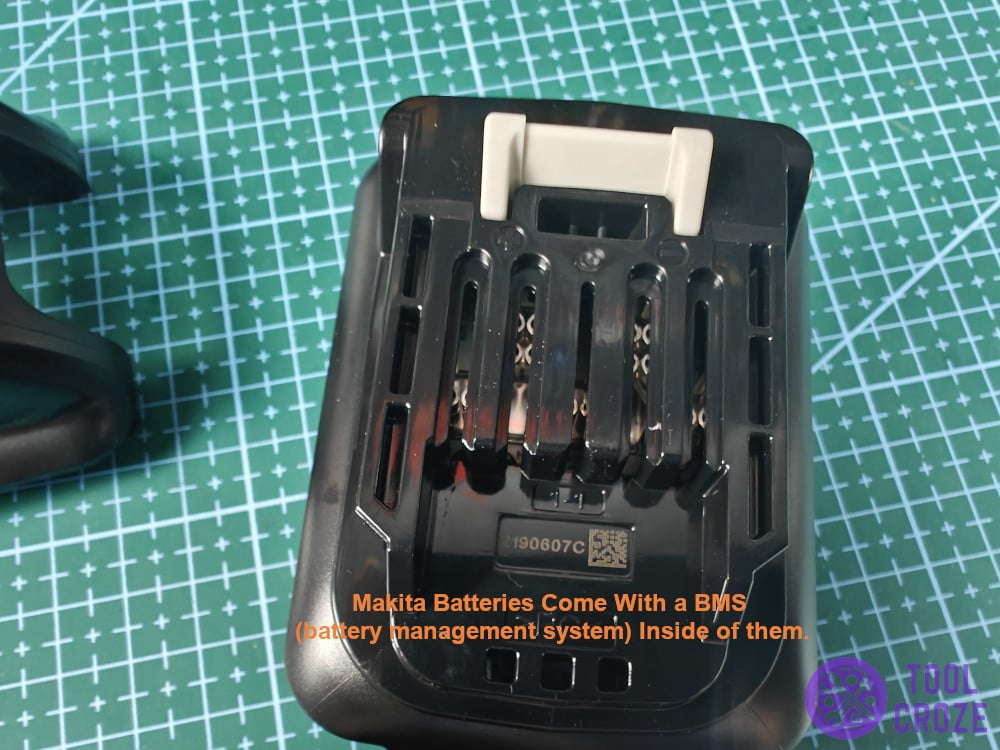
Once the BMS inside goes bad, Makita batteries stop working in all ways. They won’t hold more charge, and you won’t be able to use them with any tools.
As the BMS is what reads temperatures and cell voltages to manage functions, it doesn’t work without it. This image shows what that system looks like inside of a Makita battery.
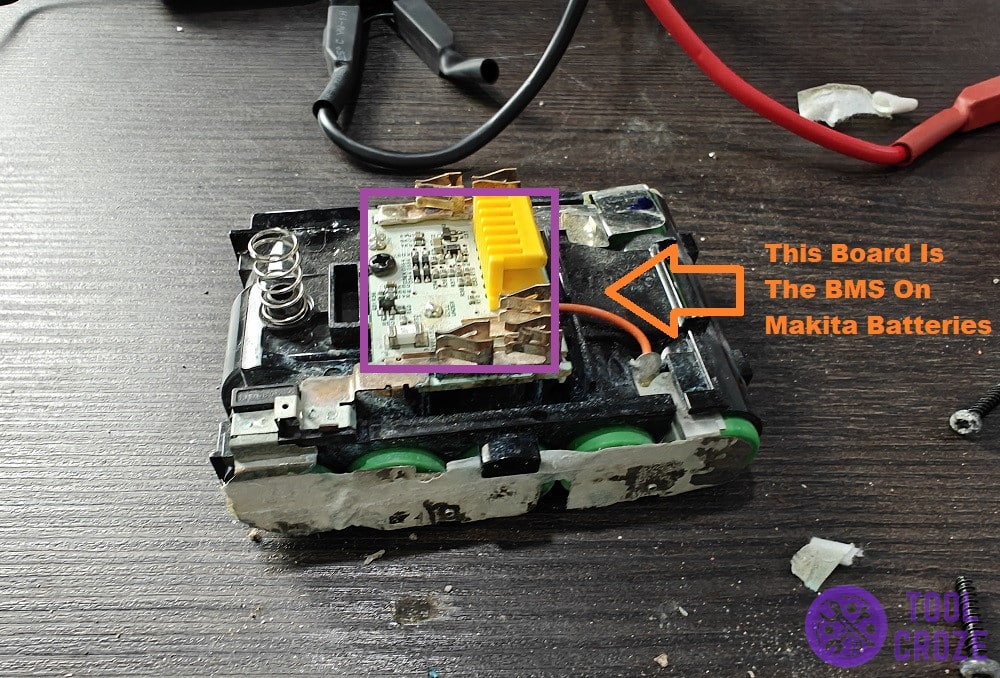
That little board is what holds the entire battery together. Replacing it is the only way to get your Makita battery back to work, so the first step is to buy a BMS that fits the battery.
You should be able to find them for a good price online. Once you have a new board, swap it with the old one. This is a delicate procedure because of how sensitive the board and its connections are.
I recommend getting someone with more experience, like a repairman, to do it for you once you have the BMS. That way, you can guarantee nothing goes wrong.
- Measure Cell Voltages
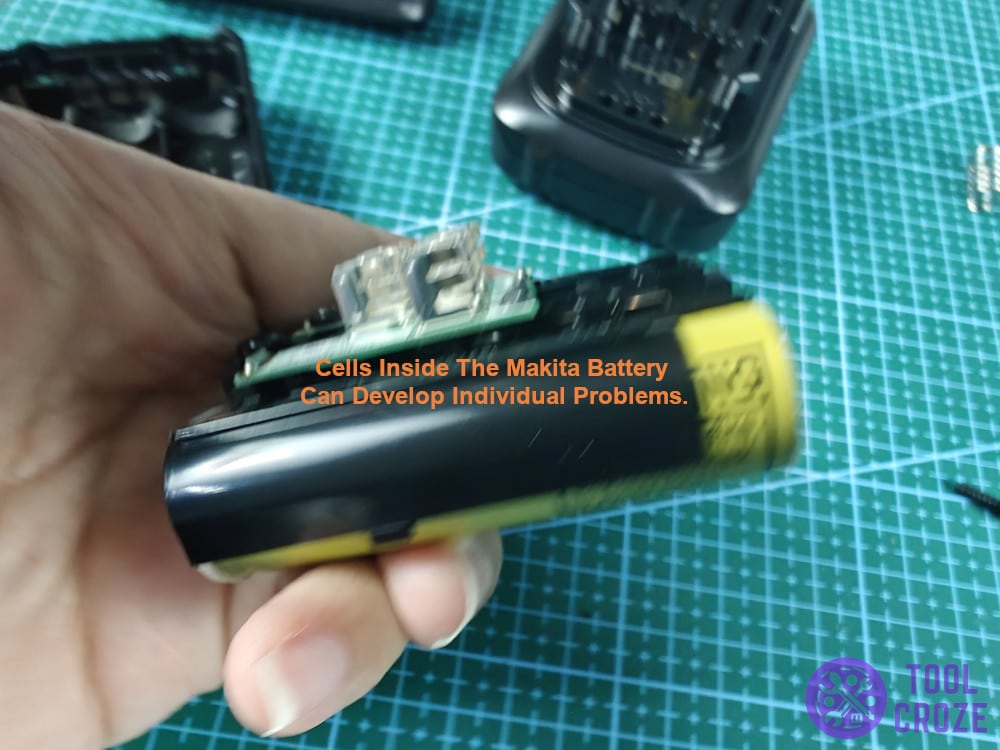
Cells inside of the Makita battery can develop individual problems. They all work as a group to power tools together. But, if even one of those cells goes bad, the entire system collapses.
Most of the time, it’s one of the cells having a higher or lower voltage than the others. It stops holding in as much power as the others, and that stops the battery from charging right.
That’s probably what’s happening with your Makita battery. So, open the covers and get a look at the individual cells inside, like I have in this picture.
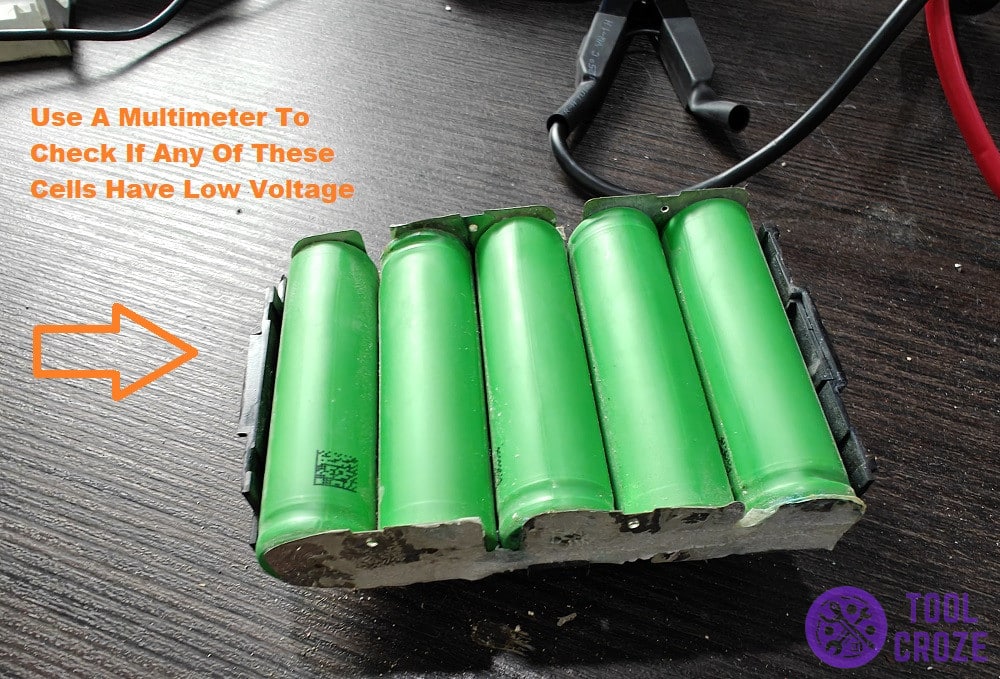
You’ll want to use a multimeter to check on each of them one by one. Make sure that their voltages are around ~0.05V. Higher than that, and you know that the cell is failing.
Root out the cells responsible for the Makita battery not charging, and get them out of the pack. Replace them with suitable cells of the same size and voltage.
Once you reassemble the battery after that, it should work as intended. You’ll be able to charge it without any problems, and get it to power your tools again like it always does!\
You can also identify an unhealthy Makita battery cell by checking its internal resistance. I have a video which shows how you can do this and you can watch it below.
Most of the healthy battery cell would record a stable internal resistance of greater than 30mΩ. If there’s one battery cell which records an internal resistance lower than that, it means it’s not healthy anymore.
