Got a Makita 18V battery giving you trouble? Maybe it’s flashing red and green lights like a little warning sign every time you try to charge it. Annoying, right?
Don’t listen to anyone that says you need to throw it away, though. Let me walk you through three simple ways to reset your Makita 18V battery and get it working again!
Before you continue reading this article, you can first watch the short video I’ve made which shows the 3 ways how you can reset an 18V Makita battery. You can watch the video below.
The first way is by using another healthy 18V Makita battery. The next method is by using another 18V to 20V tool battery from other brands. And lastly, you can also use a DC power supply to reset to reset your Makita 18V battery.
3 Ways to Reset Makita 18V Battery
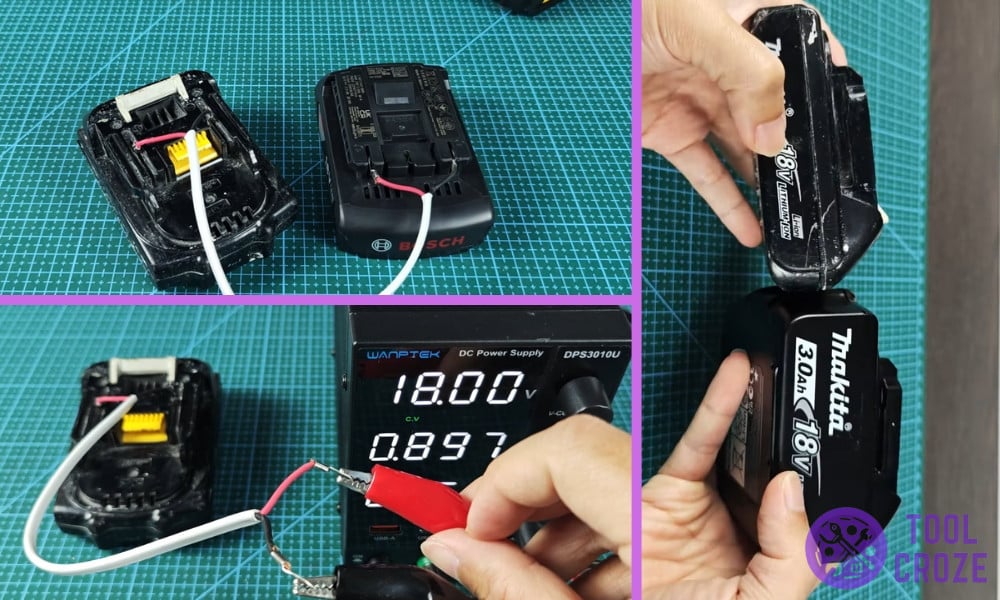
- Use Another Healthy Makita 18V Battery
If you happen to have a second Makita 18V Battery around, go find it. A healthy battery can give your problematic one the little push it needs to revive.
First, follow the symbols around the terminals to locate the positive (+) and negative (-) terminals on each battery. Now, connect them using parallel battery cables.
Attach the positive terminal of the working battery to the positive on the troublesome battery, then do the same with the negative terminals. This will allow them to transfer charge.

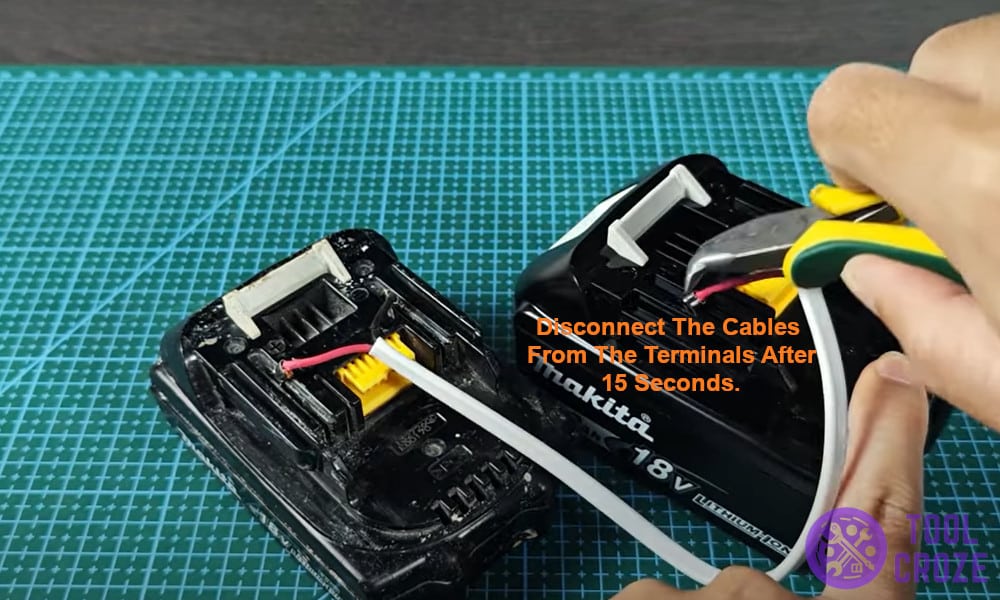
Let them stay connected for about 15 seconds. No need to do more than that, because it could ruin both batteries and even lead to potential user harm.
Finally, disconnect the cables from the terminals, and slide the “reset” battery back into place on the charger. It should be charging just fine now.
- Use a Different Brand’s Tool Battery
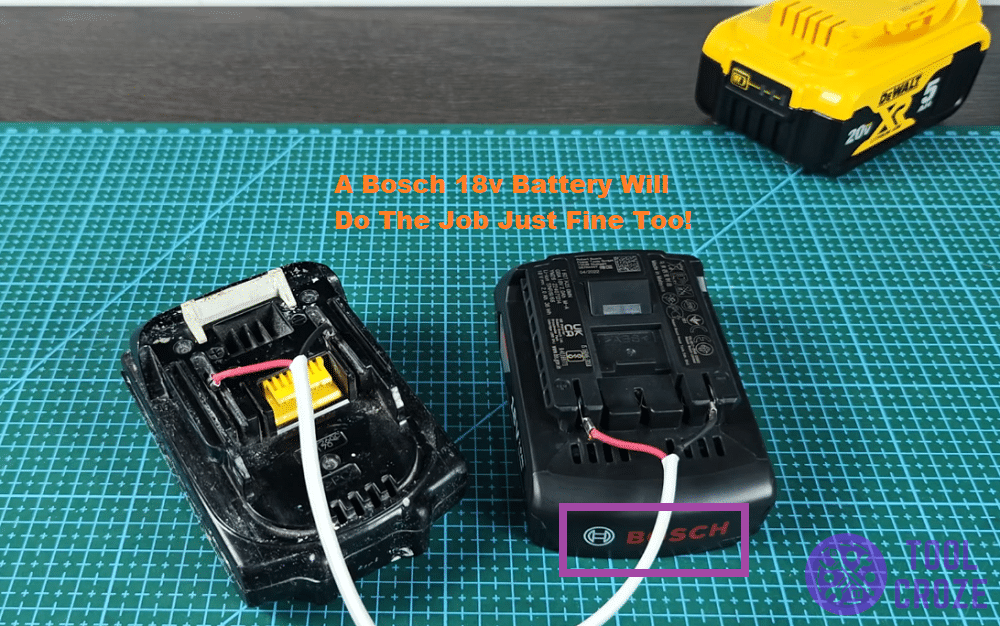
If you don’t have another Makita battery handy, don’t worry. Batteries from other tool brands in the 18V-20V range can do the job too.
For example, Bosch, DeWALT, or Milwaukee might just save the day. The process is pretty much the same. For this tutorial, I used a Bosch 18V Battery to reset my Makita 18V.
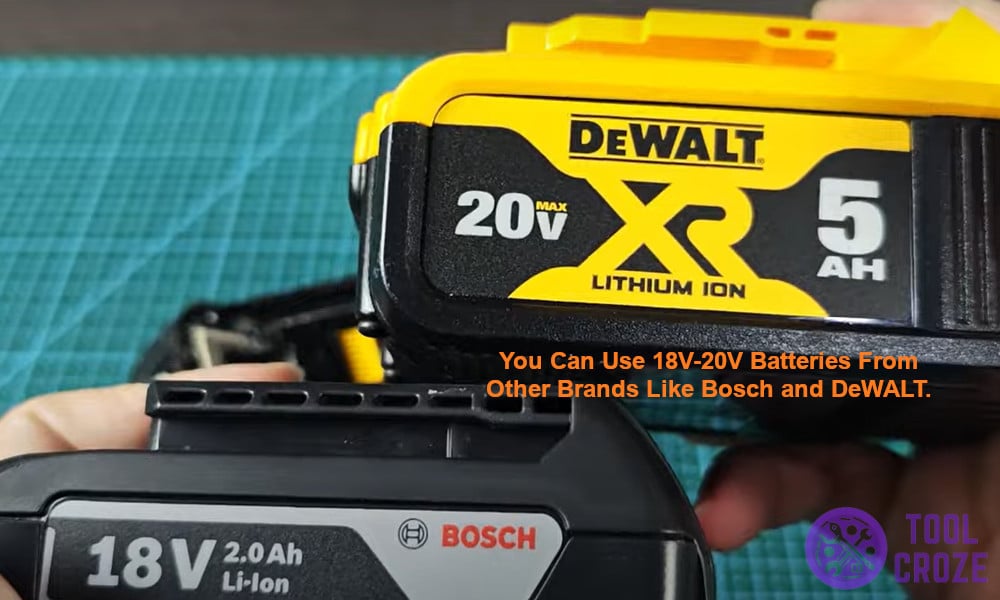
Begin by finding the positive and negative terminals on both batteries. They should be on opposite sides of the terminals from each other.
Once you’ve located them, use battery cables to connect the positive terminal from one battery to another, and then do the same thing with the negative terminals.
Look at the image above to get an idea of how to connect them. Wait about 10-15 seconds, then unplug the terminals from each other.
You only need a brief connection for the reset to work. After you’re done with that, use the charging port to check if your Makita battery is ready to cooperate again.
- Use a DC Power Supply to Reset Your Makita 18V Battery
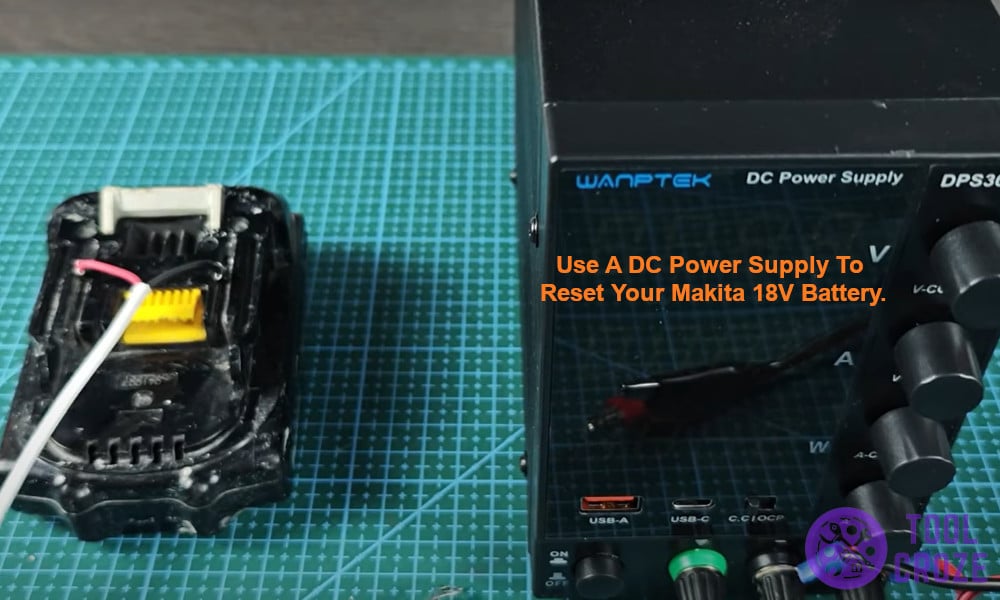
If you have a DC power supply (or know someone who does), this method is practically foolproof at fixing your battery’s charging issues.
Grab your DC power supply, then adjust the voltage to 18V and the current to 1A. Set it at those exact values to avoid any issues with your Makita 18V battery.
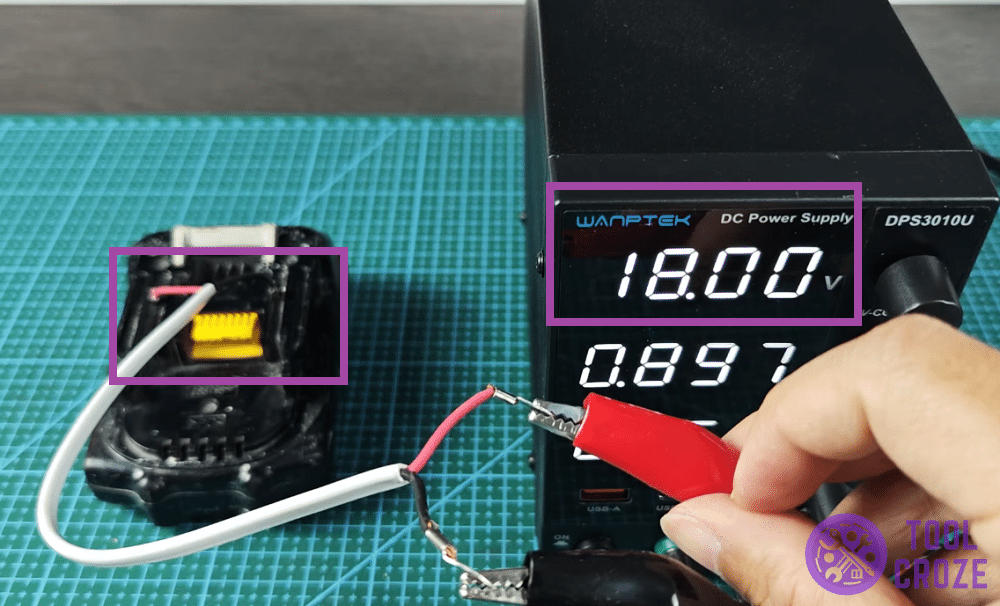
Next, connect the positive terminal of the power supply to the positive terminal of your battery, and do the same for the negative.
Let it stay connected for around 10-15 seconds, then disconnect. Once that’s done, pop your Makita battery back on the charger and see if it’s still giving you any trouble.
Related: Makita Battery Charger Flashing Red Only: What It Means and What You Should Do
Conclusion
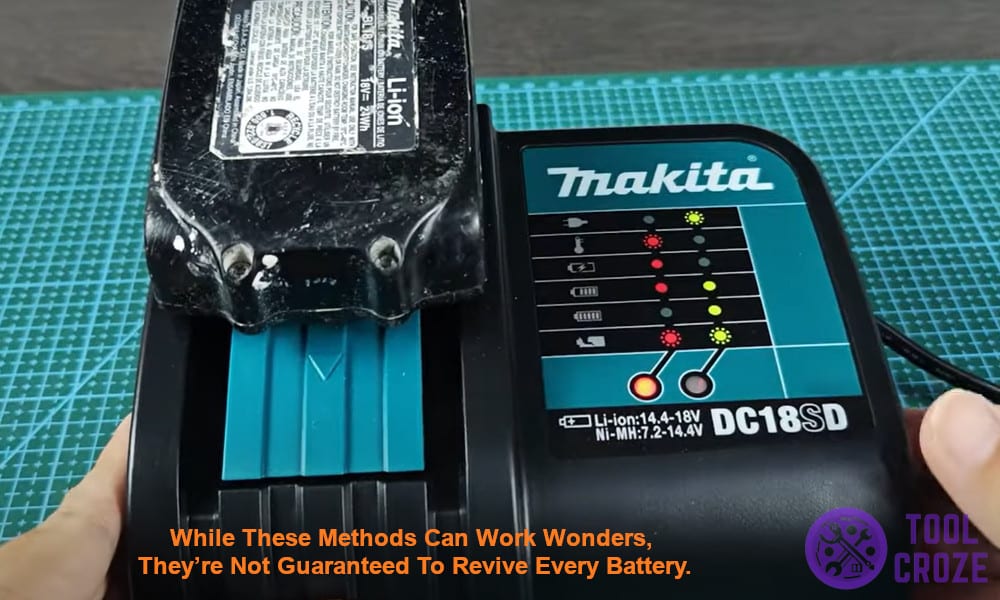
While these methods can work wonders, they’re not guaranteed to revive every battery. If your Makita 18V battery still refuses to charge or hold power for long, it might be entirely dead.
Batteries with completely dead cells inside can’t be reset. Users either have to either replace the cell pack inside, or get a new Makita 18V battery in that case.
That said, trying these tricks could help some luckier users save the cost of a new battery. So, why not give them a go and see if they can help you too?
