
Makita drills are a great budget option for anyone looking to buy power tools. The quality is pretty neat for the price range, and they’re quite reliable. Well, they’re quite reliable USUALLY…
Every now and then, they might give users some trouble. But, with the troubleshooting tips here, you’ll be able to handle the most common Makita 12V hammer drill problems.
Troubleshooting 5 Common Makita 12V Hammer Drill Problems
- Rattling Sound During Use
Stop using the Makita 12V hammer drill if you hear a rattling sound during operation. Sounds like that are often because of a loose drill bit hitting the sides of the drill chuck.
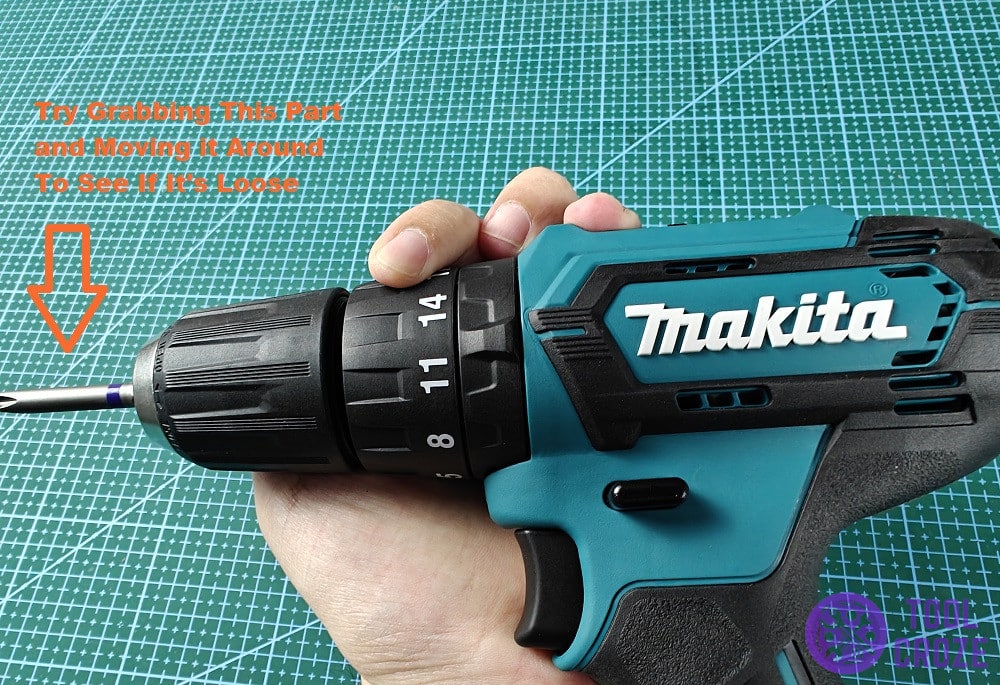
While the tool is still off, shake it around a little while keeping the drill bit area close to your ears. Do you hear some kind of rattling when you do that? If yes, it’s a loose drill bit.
Another way to test this is by moving the drill bit around with your hands. Shake it to see if it moves around easily. If so, that means the drill chuck isn’t holding it right, which is why it’s rattling.
Drill bits can lose their shape and start having trouble fitting into the drill chuck properly after a lot of regular use. There’s no avoiding that, and the only way to fix it is with a new drill bit.
A new one should fit perfectly inside the drill chuck. There shouldn’t be any more rattling. However, if there still is, it’s probably a loose component inside of the tool itself.
You’ll have to take the covers apart to see if anything is hanging loose or completely disconnected and put it back in place.
- Drill Bit Stuck
A drill bit gets stuck when the jaws are clamping down too tight. It may happen randomly because of extra pressure, or because users put on a drill bit that wasn’t the right size for the drill chuck.
But, there’s a method I use to get it out whenever this happens with my Bosch 12V hammer drill, and it should work for you too! First things first, adjust the settings as necessary.
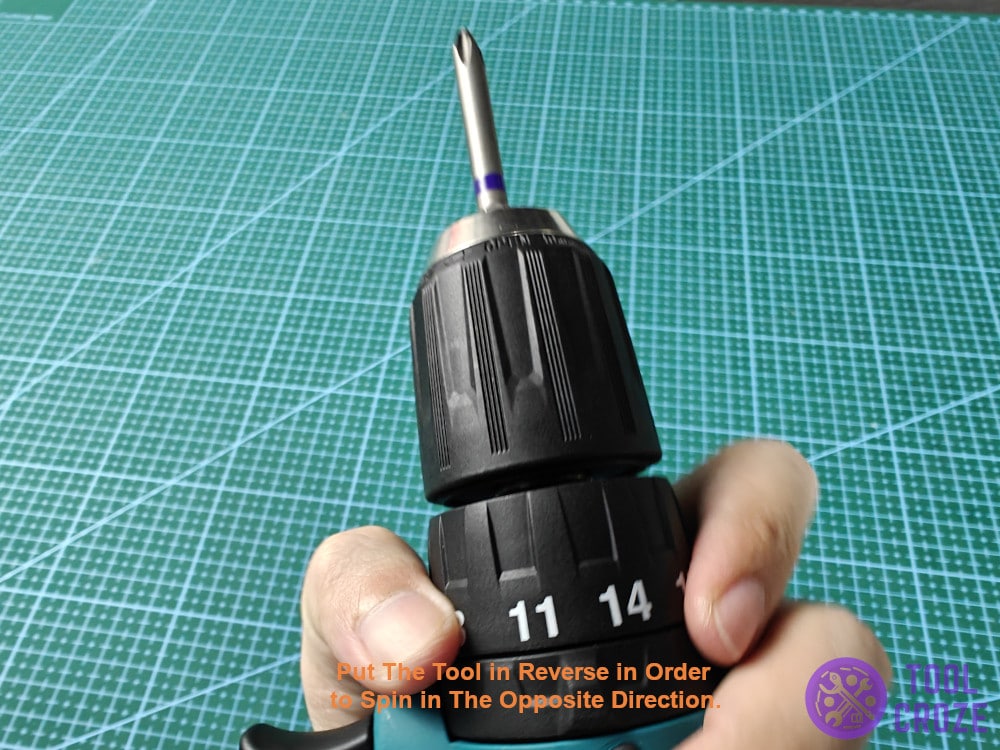
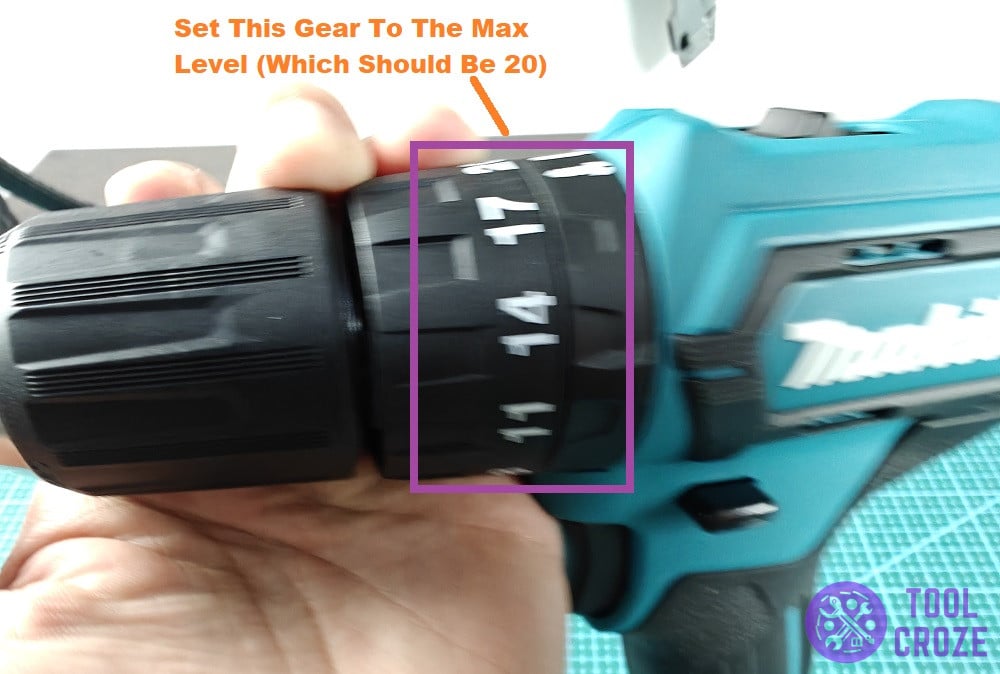
Change the mode to reverse, and put it on speed setting 1 from the knob on top. Set the gear level to maximum, as I’m doing in the photo down there, and then grab onto the drill chuck with your dominant hand.
After shifting to those settings and having your hand wrapped firmly around the drill chuck, run the drill. While spinning in reverse with maximum torque, the drill bit will spin its way out!
Just like that, it will be free from the jaws and fall right out after a few moments of spinning.
- Burning Smell From Drill
A burning smell coming from the Makita 12V hammer drill is no doubt a bad thing. Unfortunately, it’s likely because the armature burnt out and is no longer functional.
It might have been due to an overload in voltage, overheating, or something else. Regardless, it’s not safe to use that drill with the burnt-out armature inside of it.
The first step is to confirm if the smell is coming from the armature. Take the covers off the tool and get a close sniff near the area I highlighted in this photo.
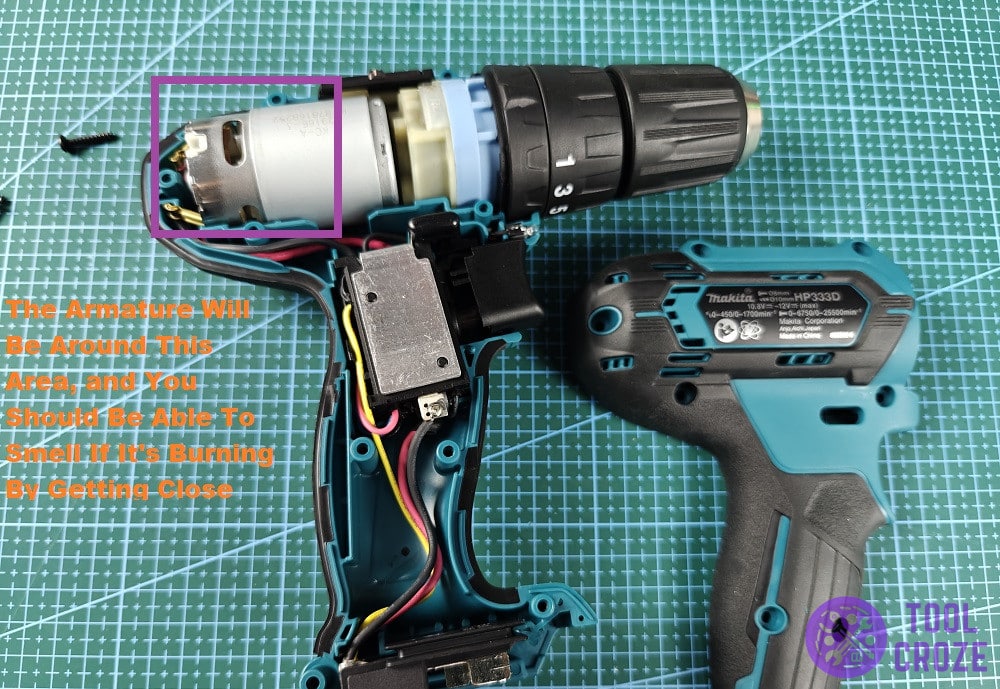
This was a really common problem with earlier Makita hammer drills, like the XPH03 model. I honestly don’t recommend troubleshooting this particular problem.
Repairing the armature and its surrounding components will cost you nearly as much as a new Makita 12V hammer drill. It’s much better to just buy a new one that’s not infamous for this issue.
- Makita 12V Battery Issues
The most common issues with batteries include things like overheating, low battery life, not charging, and things like that. These are regular parts of their life cycle and often mean you need a new battery.
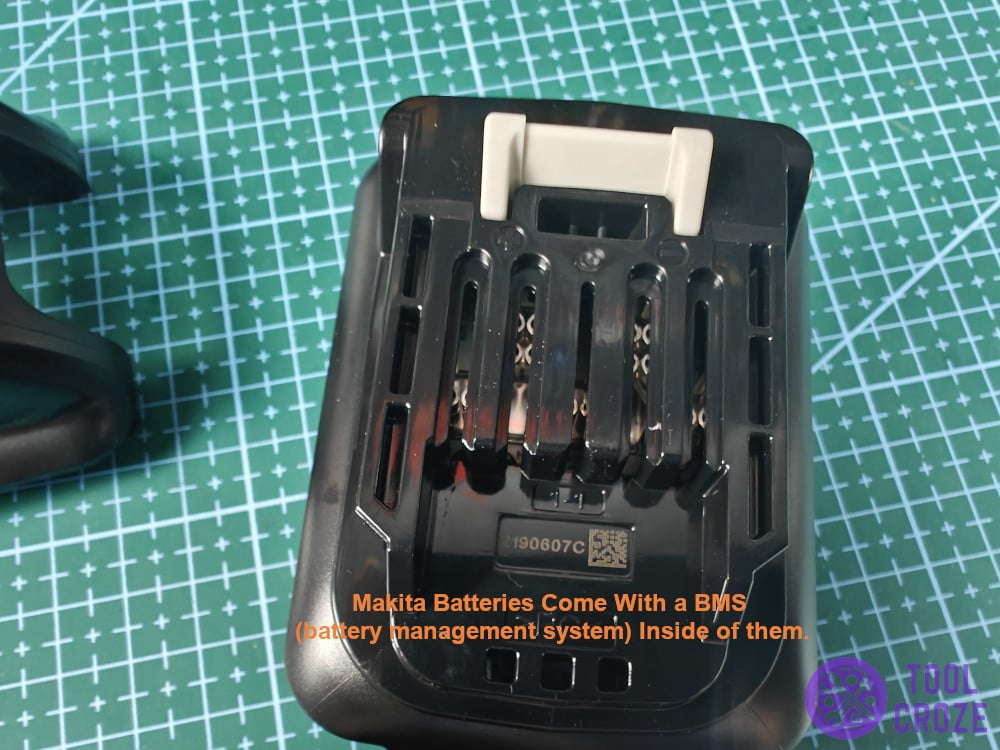
However, one issue common with Makita batteries in particular has to do with the battery management system (BMS) inside them. The BMS is what handles most of the battery’s safety and functions.
When a BMS detects serious issues, it locks itself out and stops the battery from working. This can be a result of overcharging, voltage issues, cell aging, and more.
Regardless of its cause, you need to replace the locked-out BMS with a new one to get the Makita 12V battery working again. This little board in the image down here is what the BMS is.
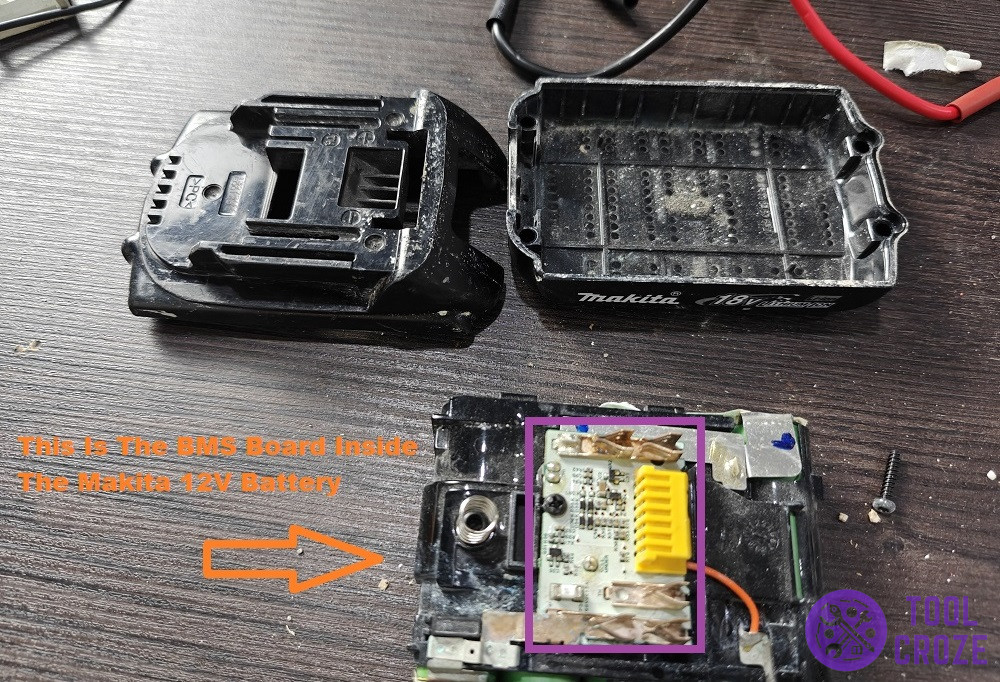
Users need to get that out of the battery and replace it with a new BMS. They’re easy to find in online stores where people sell used parts, like eBay. The hard part, however, is installing them.
I reckon it’s better to get someone else to do it if you aren’t sure how to handle the delicate procedure. But, a video guide should also make it easier to do it yourself if you wish to.
In case you encounter a situation in which your Makita battery isn’t charging, and it’s blinking both red and green light I have here a video on how you can fix this problem.
You must have another healthy Makita battery with a similar voltage. Use a wire to connect its positive and negative terminals to the unhealthy battery.
After 15 seconds, remove the connection wire between the two batteries. Put the battery back on the Makita charger again it should be charging normally now.
I also have another video which will guide you about the different meanings of the indicator lights on a Makita battery charger. You can watch it below.
If you see a blinking green it means the battery is ready to charge. A solid red means it’s charging the battery.
A blinking red isn’t a good sign because it indicates a temperature issue, either it’s too hot or too cold.
A solid green means it has fully charged the battery while a solid red and green means it’s just almost full.
And as mentioned before, a blinking red and green means it detected a bad battery.
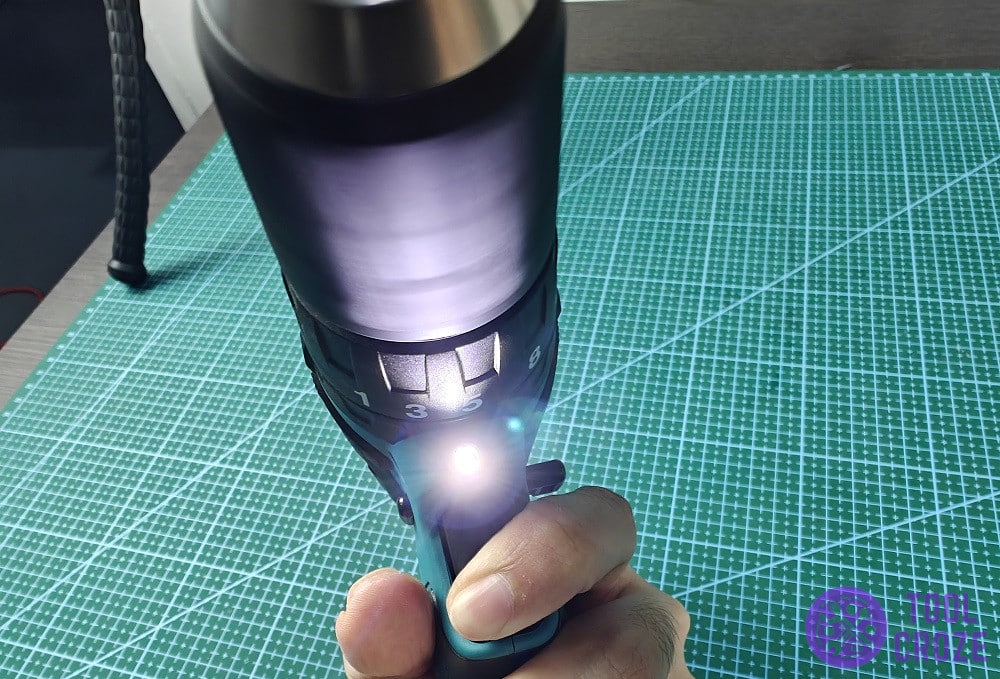
- Light On But Drill Not Working
Does your drill’s light turn on but it doesn’t work despite that? Since the light is turning on, fortunately, the problem isn’t with the battery. Instead, it likely has to do something with the trigger.
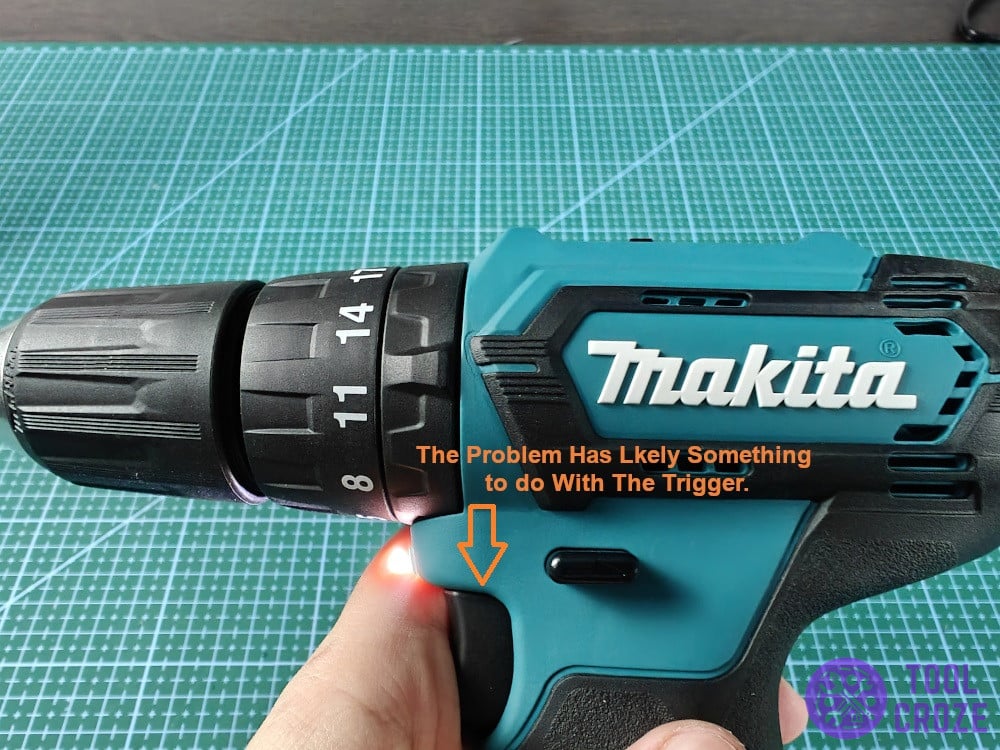
There’s a small part behind the trigger known as part number 650583-6. This is a board that directs power to parts of the drill, including the motor when the trigger is pressed.
Your drill isn’t working despite the light being on because PN 650583-6 isn’t directing power to the motor. While power is regularly flowing to the light, there’s nothing going to the motor.
That explains why the light is turning on but the drill isn’t working, like in the image below.
Open the covers to get a look at PN 650583-6. Check its wires to see the voltages and see if the one leading to the motor is supplying enough voltage.
Order the part and replace the current one with it. The installation isn’t that hard, so there shouldn’t be an issue. After a new PN 650583-6 is installed, the light will turn on and so should the rest of the drill.
