I’ve found my Black and Decker trimmer to be pretty useful. It’s a nice device that’s usually reliable.
But, it’s not completely without issues. I have encountered a few of them over the years, and I want to share some here, along with there solutions.
That way, you can learn from my experience with common Black and Decker trimmer problems and their troubleshooting.
So, whether you’re considering buying these tools or already have one and need help, here’s some common problems you should watch out for.
Here’s my video demo how the internal mechanism of the Black and Decker trimmer work, you might find useful inspiration to fix your problem.
Read: Common Black and Decker Drill Problems Troubleshooting
Common Black and Decker Trimmer Problems Troubleshooting
- Motor Problems
The motor is one of the most important, but also most sensitive parts of a Black and Decker trimmer.
It’s responsible for your tool’s power, and if it runs into issues then your whole device stops working as intended.
There are quite a few common problems with the motor.
For example, it’s possible for it to get clogged around the vents, which needs to be dealt with soon. Not cleaning up clogs can lead to worse performance, and cause overheating too.
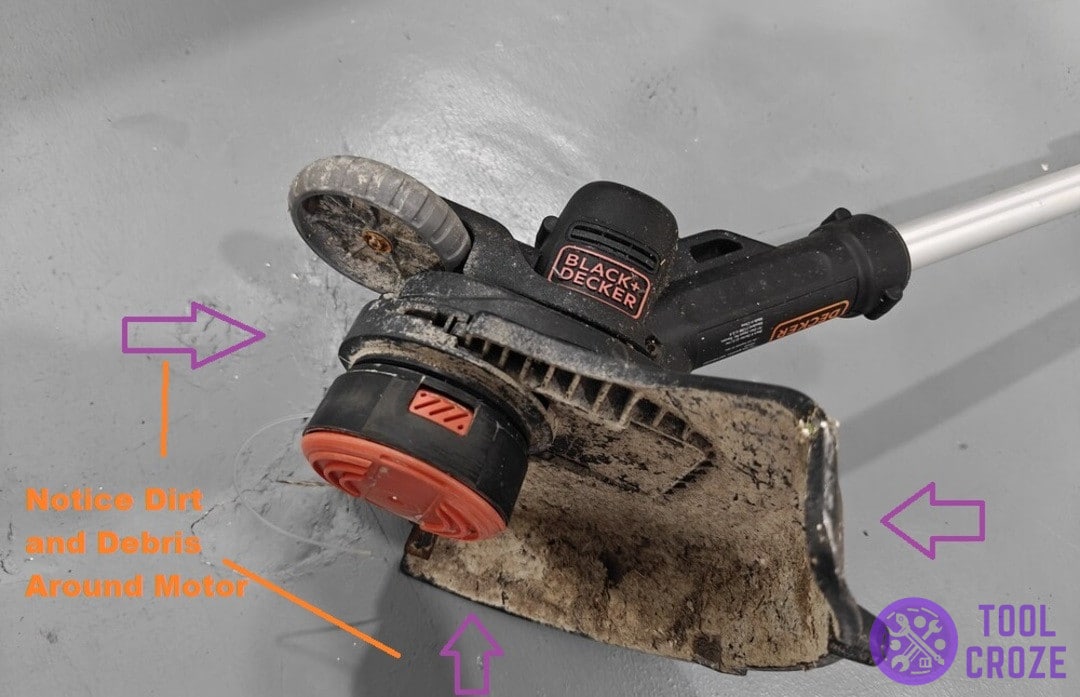
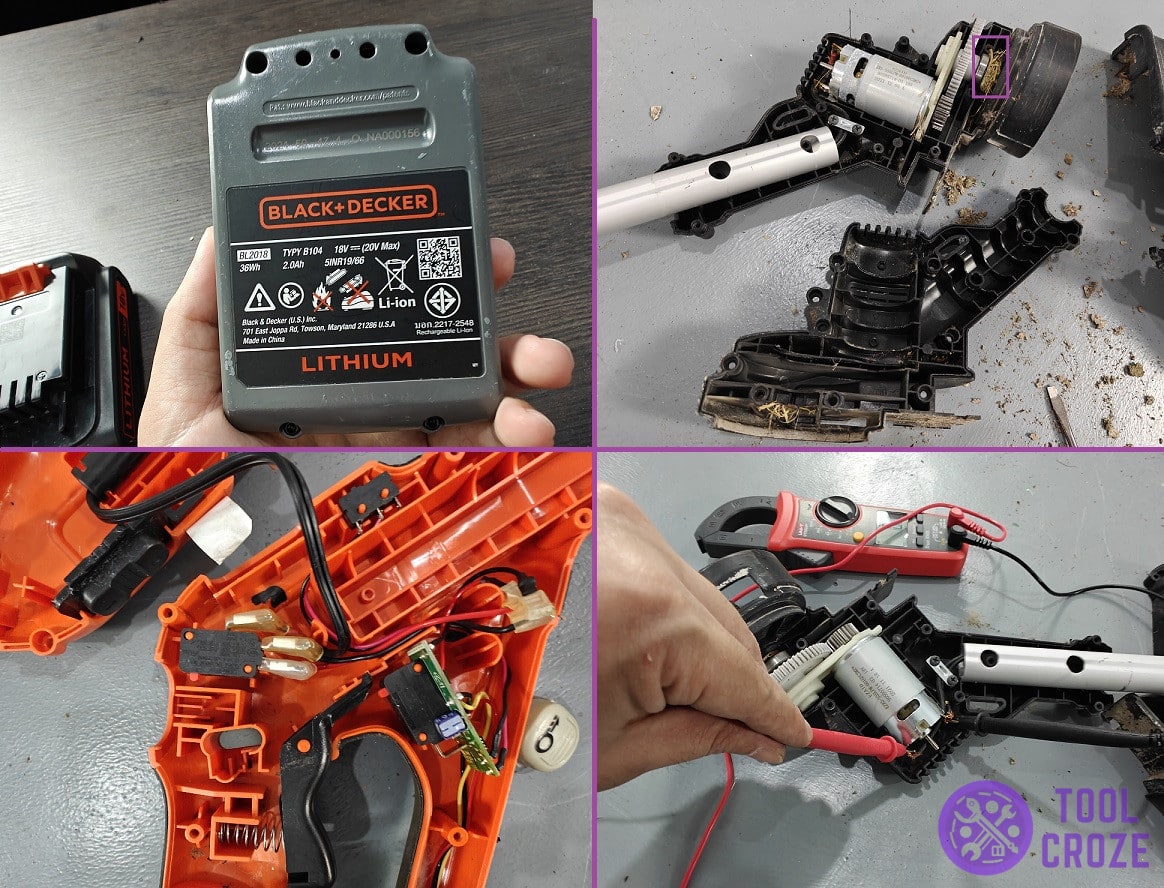
Look at the image above. The area around the motor is pretty dirty after use, and not keeping it clean can cause clogging.
Make sure you keep it clean and prevent any kind of problems for the motor.
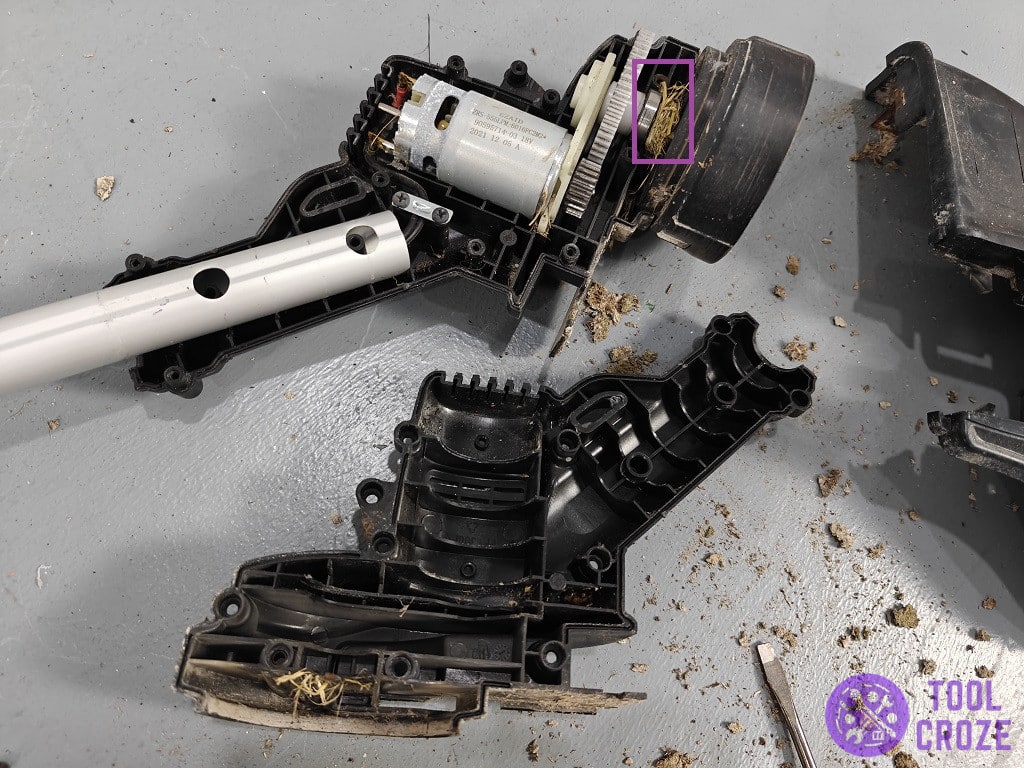
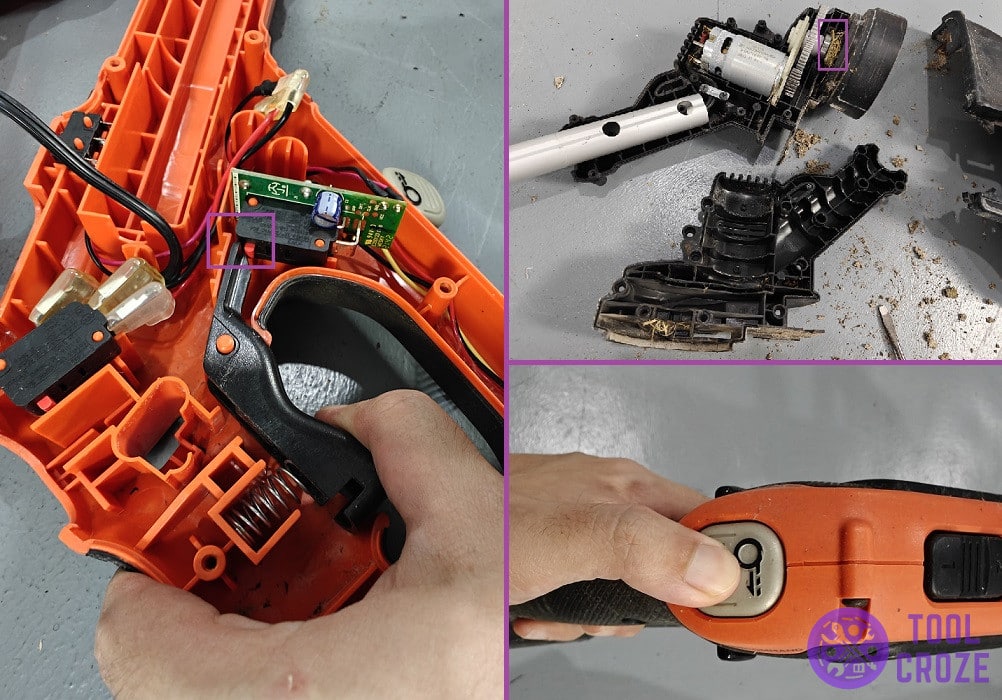
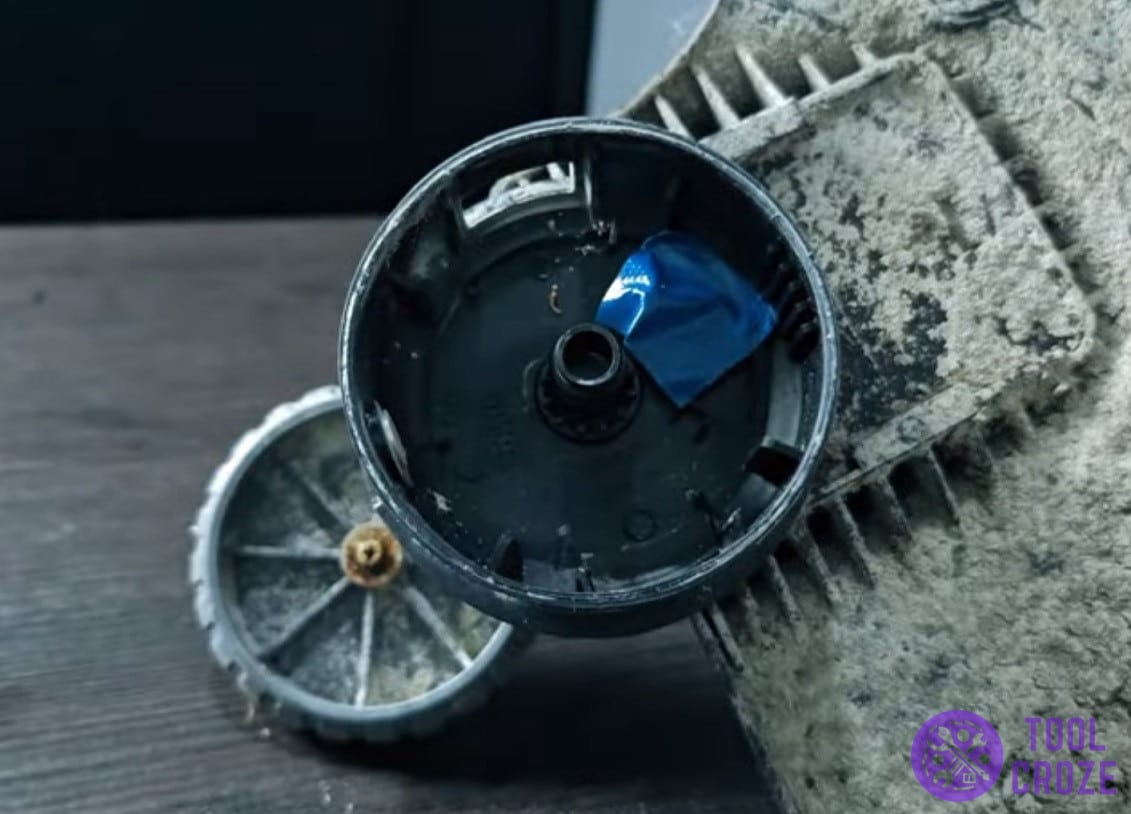
One part you have missed when cleaning the dry grass are the stuck dry grass around the gear as shown in the image below.
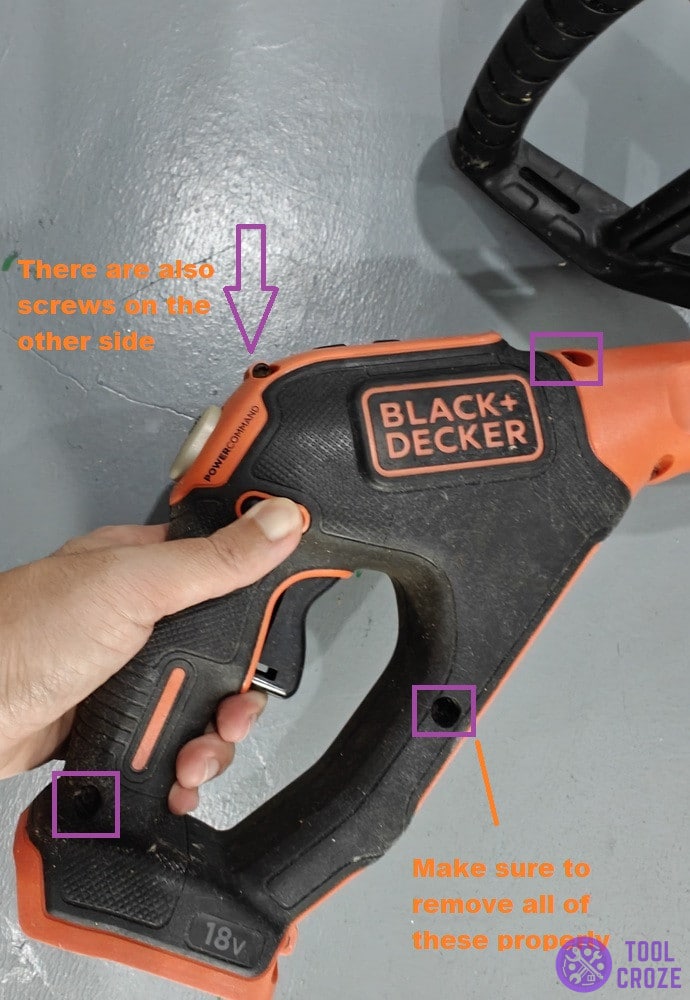
There are lots of screws to be removed before you can reach this part!
I especially recommend that you take breaks and plan out your trimming if you’re dealing with a lot of vegetation at once.
Overworking the motor can make it overheat, and sometimes kill it completely.
If you don’t give it a break or try to use it for tasks that are too much, it can cause serious issues and make the motor worse for wear.
Yes, I encountered the burned motor issue once and I have replaced the trimmer motor as shown in the video below.
- Battery Problems
I have a cordless Black and Decker trimmer, and this next problem is only for those that have the same kind.
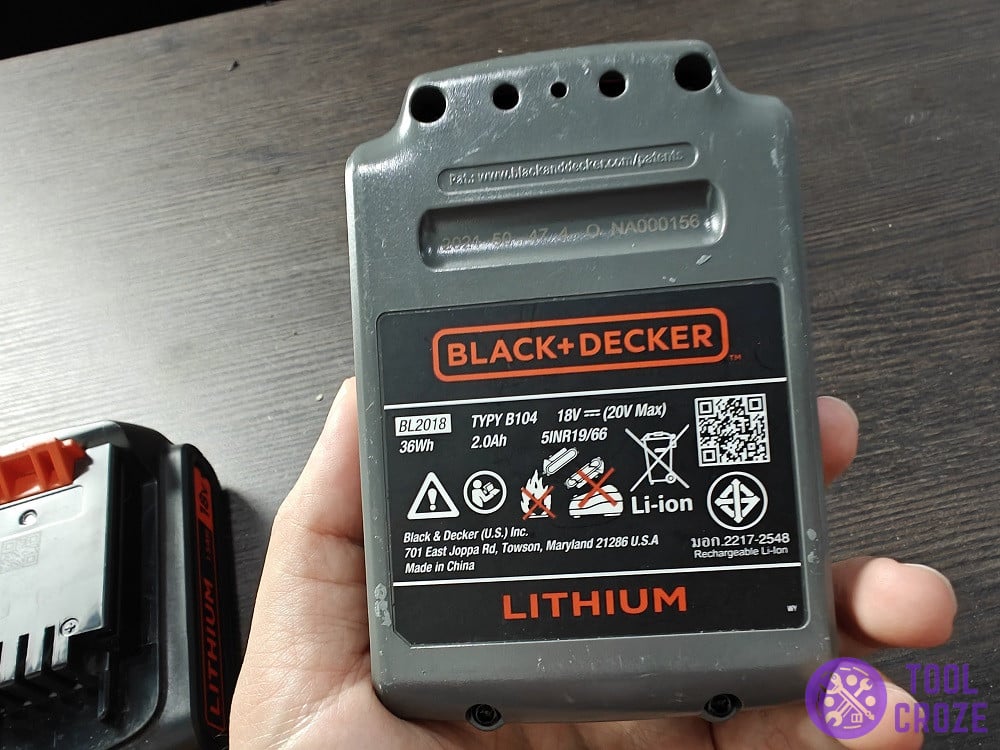
The charging on these trimmers don’t last a long time, especially if you have a 1.5AH or 2.0Ah battery like mine in this image.
You should keep that low battery life in mind while using the trimmer for long jobs.
Plus, another thing I want to point out is that the batteries will need replacing in little time, depending on how often you use the trimmer.
For most people, the battery can last more than a year. But, if you use it too often, it might stop holding charge and die out in less time than that.
Read: Meaning of light on Black and Decker Charger
Before you throw the battery, I would suggest you to use a simple trick the reset the battery as shown in my video below.
My experience told me that this trick will fix most of the battery related problem.
Connect Positive to Positive terminal, and Negative to Negative terminal.
Another possible issue is overheating, which is especially common for people that live in warmer environments.
When you’re doing yardwork in the heat, it’s easier for the battery to get hot and potentially burn out.
Besides, when you are charging the Black and Decker battery, if the environment is either too hot or too cold, it would trigger the Hot Cold Relay of the Black and Decker Charger.
My video below show the meanings of each light on the charger.
If the red light is blinking on black and decker battery, it can be due to either
- Bad battery
- Hot Cold Relay
Just observe blinking red light pattern to confirm whether it is bad battery or Hot Cold Relay.
- Uneven Cutting
You might notice at times that your Black and Decker trimmer isn’t cutting grass evenly.
That’s a huge problem for anyone doing yard work and something I find so annoying. This can happen after a long time of use as the cutting line gets damaged or dull in places.
While it’s possible to adjust your technique to accommodate this uneven cutting line, I don’t recommend doing it for too long.
Instead, when you notice your cutting line getting too lose, try to get a replacement for it as soon as possible.
Now, one thing I can’t stress enough is that it’s super important to get a cutting line that matches your Black and Decker trimmer.
I would normally search through the official Black and Decker website for suitable trimmer line.

Don’t just use something that’s awfully generic, or something that isn’t suitable. It will just cause problems with the tool, and make it hard to trim.
You can see in this image how my cutting line is adjusted to a size that’s perfect for my Black and Decker.
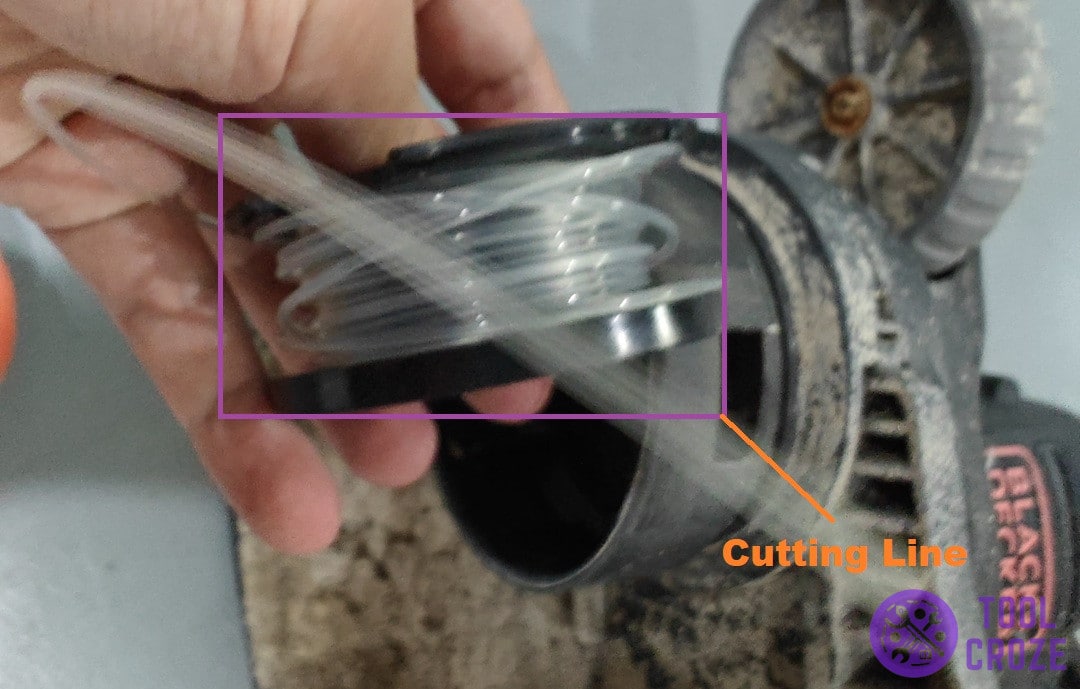
A new line that’s compatible will make your trimmer feel like brand new. It’ll cut much smoother and evenly, which makes the job easier for you too.
I recommend checking Amazon or any other online retailers in your area that would have the cutting lines you need.
- Line Keeps Breaking
Speaking of the line, another big problem I’ve seen people have is that their line keeps breaking when they’re using the trimmer.
I mentioned earlier that a low-quality cutting line can be problematic, and this is one of the ways how.
If you recently replaced your cutting line, and noticed breaking since then, I don’t have to tell you what’s wrong.
It’s obvious you have a cutting line that isn’t suitable with your trimmer or one that’s just a cheap quality wire that needs to be replaced with something better.
However, for people that know the quality of their cutting line is good, I recommend taking a look at the terrain you’re cutting around.
If you’re using your trimmer in an area where the surface is quite hard, like concrete or rocks, that can damage the cutting wire.
Try to avoid coming into contact with places like these. Make sure you immediately stop when the surface feels harder than what you usually use your Black and Decker trimmer on.
Another thing I recommend checking is the cutting head, as it can get worn out.
If you aren’t familiar with what the cutting head is, it’s the black support your wire hangs around. I’ve marked it in the photo below for you to see.
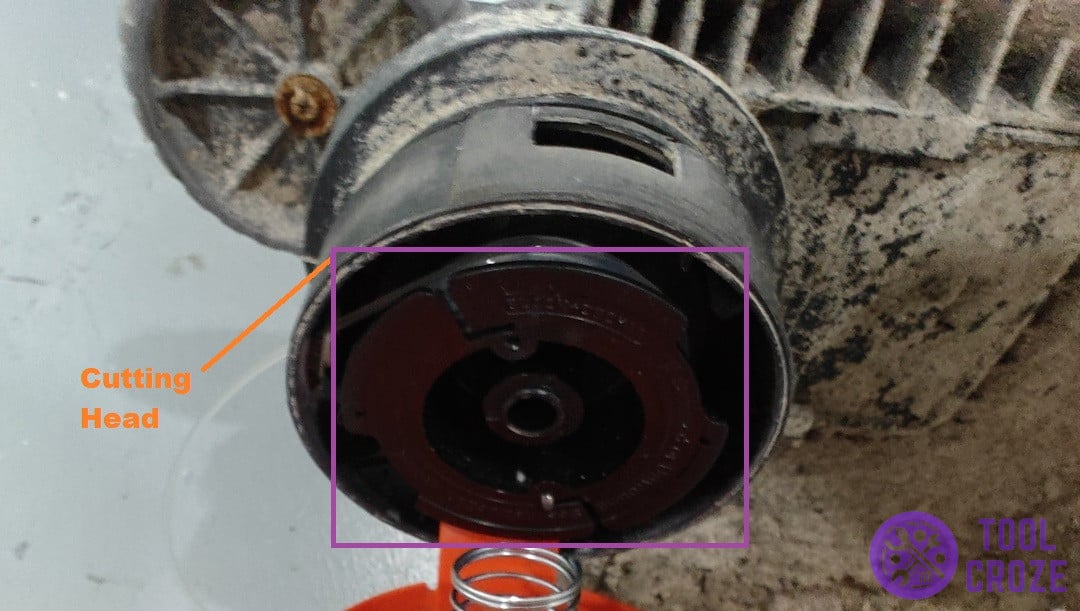
If your cutting head is notably damaged or old, you should get a replacement as it might be what’s breaking your cutting line.
- Vibration or Unusual Noises
Something I noticed after more than a year of using my Black and Decker trimmer was a weird noise coming from inside the device.
It was pretty distracting, so I got my tools, opened it up, and tried to inspect it. That helped me figure out what was wrong.
If you ever notice weird vibrations or noises of your own inside the trimmer, I suggest you do the same.
When I opened my device, I noticed some of the screws were loose, as well as a component inside, near the handle.
These kinds of loose components and screws are usually responsible for these noises.
While that itself isn’t that harmful, I recommend you take care of it anyway, because it can eventually turn into a big problem.
For example, if there’s a loose screw that opens up completely when you’re working with the device, that could cause everything to fall apart.
That might cause safety concerns, or cause other components inside to get damaged.
- Trimmer Suddenly Stops
If your Black and Decker trimmer stops in the middle of use, there could be any number of problems for this.
When it happened to me, I reliased the most common reasons that caused this problem was due to stuck grass and line release button.
Another thing you should check when this problem occur is the trigger.
Makes sure the trigger can keep turning on the red power button as shown in the image above.
- Black and Decker Trimmer Feeds Too Much Line
I believe this is one of the most common complaints about this trimmer.
The trimmer auto feed feature would release too much line and the line would hit the cover.
To fix this, I would normally use a tape to fix the lever as shown in the image belowso that it won’t be able to release too much line.
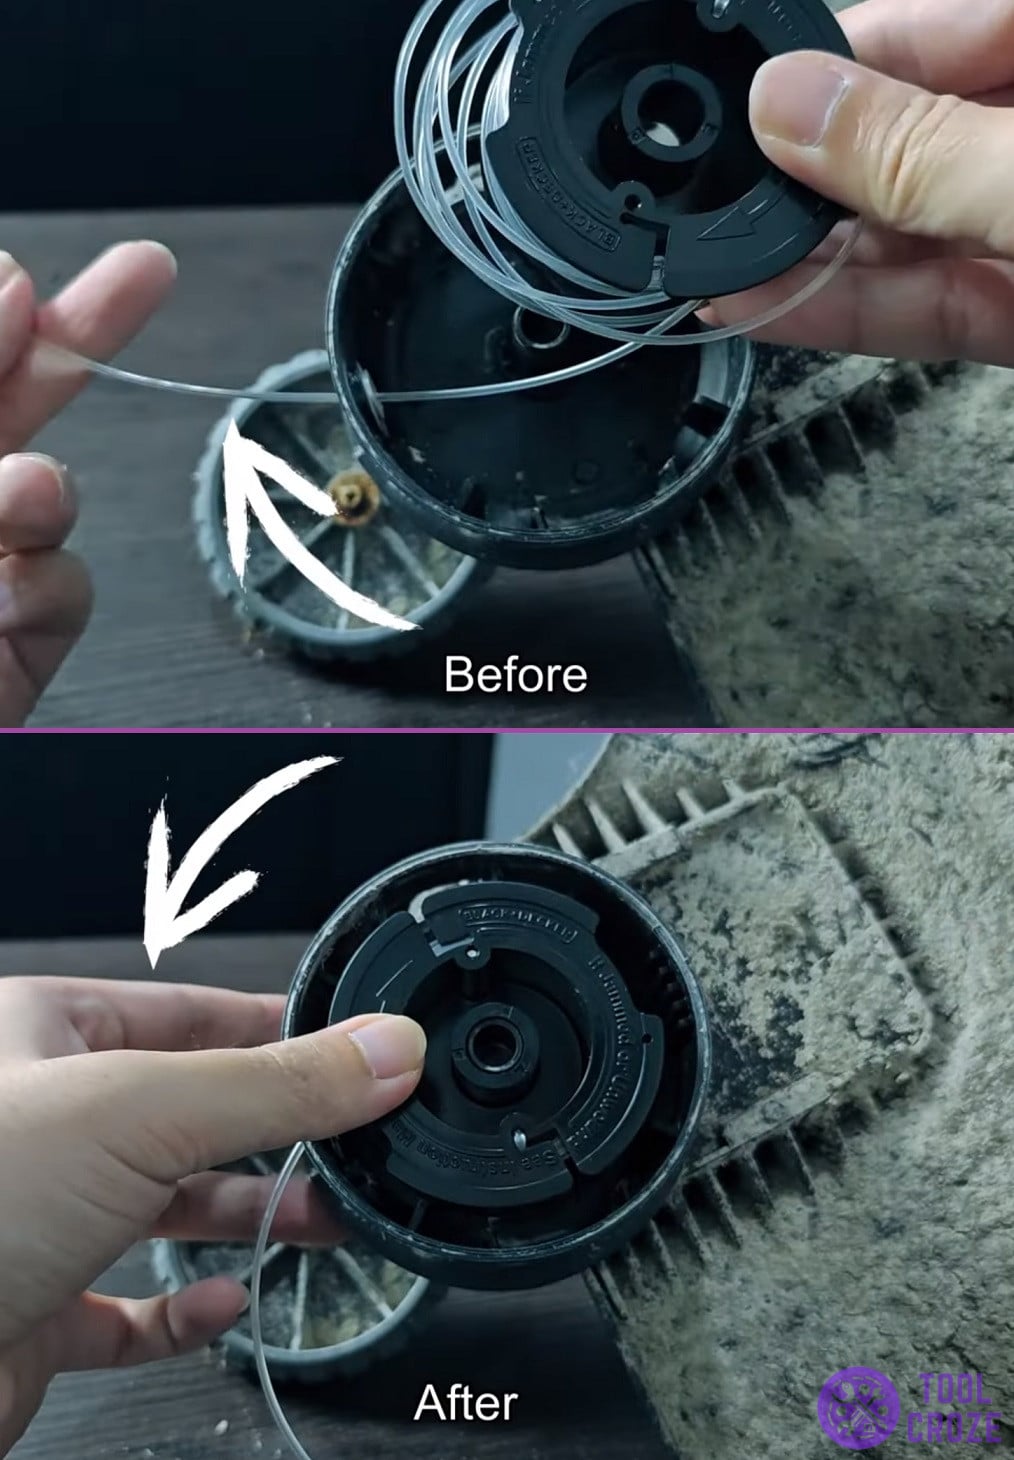
 Another way to disable the auto feed is to rewind the line in opposite direction.
I have written a post about fixing trimmer release too much line problem and even recorded a video as shown in the below.
The opposite of this is when the trimmer won’t feed line. I’ve also written an article here about the solutions you can do if your Black and Decker trimmer won’t feed line.
- Auto Feed Not Working
Although personally I do not really like the auto feed feature on my Black and Decker trimmer, other people might find it useful.
If the auto feed is not working, it is probably due to the lever.
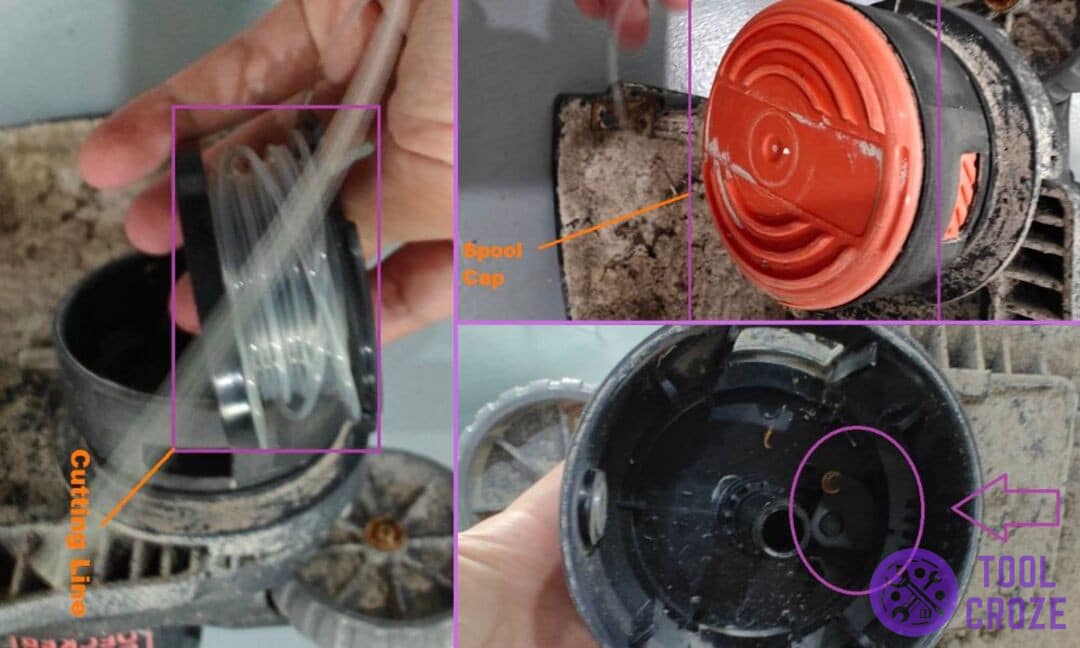
Besides, incorrect line size, loosen spool cap and “Auto Feed” mode being disable are the most common reasons for this problem.
I have written a post dedicated to solve this auto feed not working issue on Black and Decker Trimmer.
