I’ve done my fair share of research on Black and Decker drills. Just look at some of my other work on this website, and you’ll see I’ve used them and written a lot about them.
But, today, instead of talking about something specific, I want to talk about all of the most common Black and Decker drill problems and how you can go about troubleshooting them.
So, if you plan to buy a new Black and Decker drill or have an old one with complications, this guide should help you out!
Common Black and Decker Drill Problems Troubleshooting
- No Power
The biggest thing people complain about when it comes to their Black and Decker drill is it does not have power. Now, no power on a drill could be due to any number of reasons.
I’ll talk more about different reasons later, in lots of detail. But, for now, I want to focus on the most common cause of no power, which is the battery.
Usually, this just signals that a battery is dead and you have to get a new one to use your drill. It’s unfortunate, but pretty common since batteries get weaker as time passes
The reason why I started with this is because battery problems are the most common. But, all of these problems have the same solution, which I’m holding in my hand below; a new battery.

Old batteries can hardly ever be revived depending on their age and how much wear they’ve been through.
So, consider getting a new battery if your Black and Decker drill always has problems with powering on. It’ll start working much better, and the investment will last you a couple of years at least.
But before you buy a new Black and Decker battery I suggest you first try to reset it to fix the no charging issue. I have made a video about this which you can watch below.
First, you must have a another battery with similar or around the same voltage with the battery which doesn’t work.
Connect the positive terminal of the 2 batteries. Do the same with their negative terminals. After a few seconds, the faulty battery should have be reset successfully.
- Charging Issues
Charging issues are usually because of the battery too. But, that’s not always the only reason for it. Sometimes, the charger you’re using might be to blame too when your Black and Decker drill is not charging.
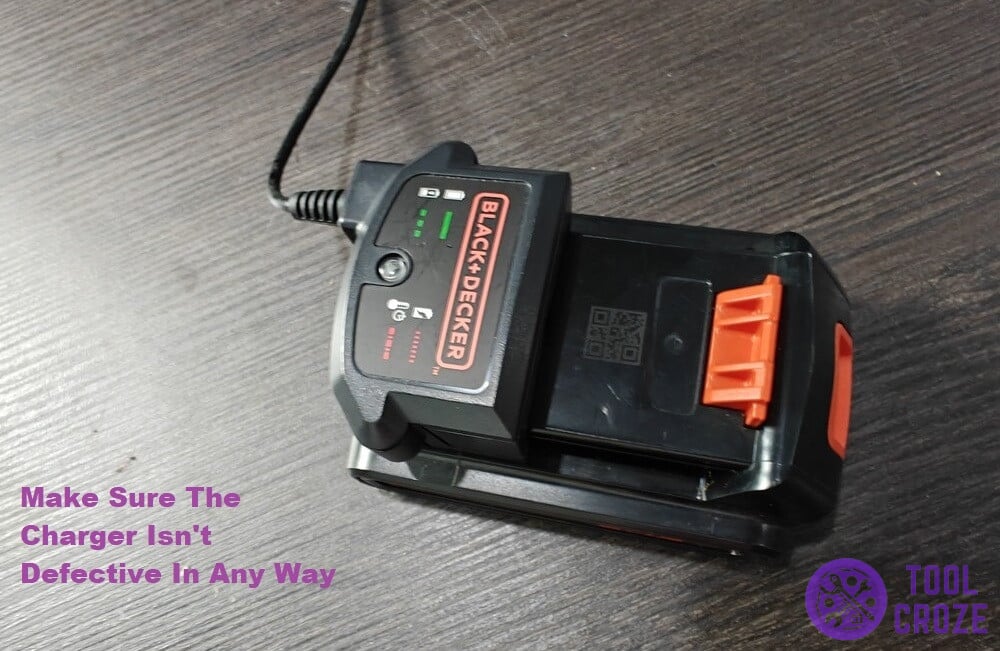
The inconvenient part about this is that it’s hard to diagnose when the charger is truly to blame. In lucky cases, it’s obvious since the charger has visible damage or its lights don’t turn on.
But, in other cases, everything might look fine on the surface but there’s some kind of internal issue. This could be something like faulty wiring or a sensor that won’t work anymore inside the charger.
You could try to get a new Black and Decker charger and use that on your drill’s battery. They aren’t expensive and it will help you determine if the battery or the charger is to blame for this issue.
If the new charger works, you know the charger was to blame. But, if even the new charger didn’t do any good, your problem likely lies with the battery.
Once again, like I said before, you probably need a new battery. But, just to be safe, you could clean the charging pins and use a multimeter to confirm if the battery is still of any use.
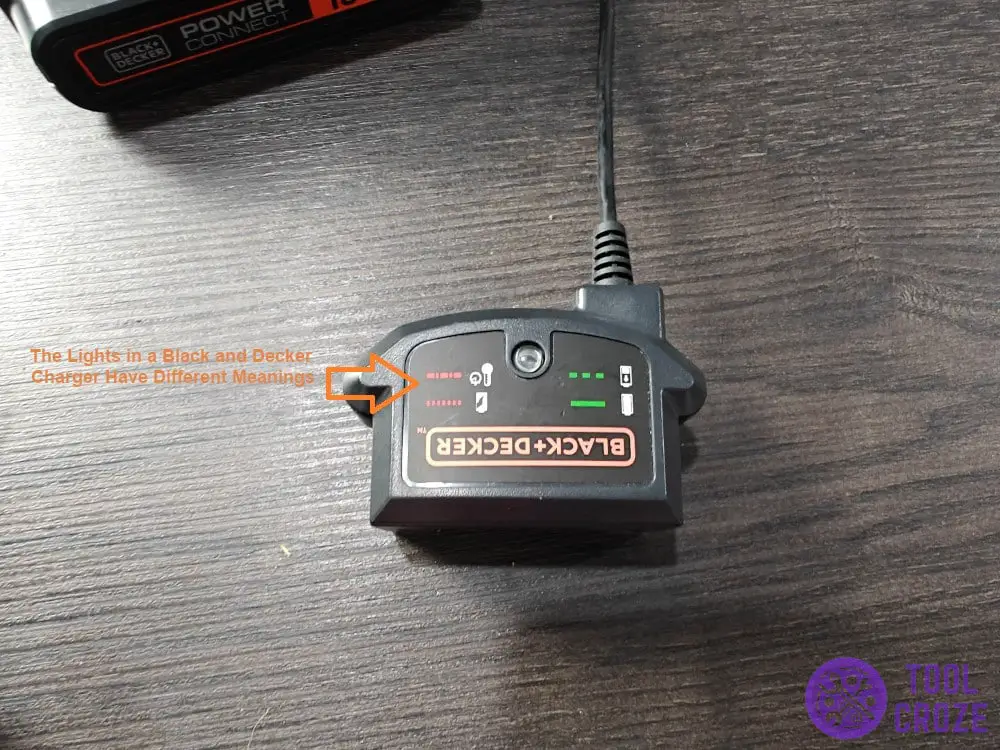
I have a video about the different meaning of the lights in a Black and Decker charger. You can watch it below.
For the green lights, if it’s blinking it means the battery is actively charging and a solid green light means the battery is fully charged.
For the red lights, a regular red blinking means it detected a bad battery, and an irregular blinking means a trigger hot/cold relay.
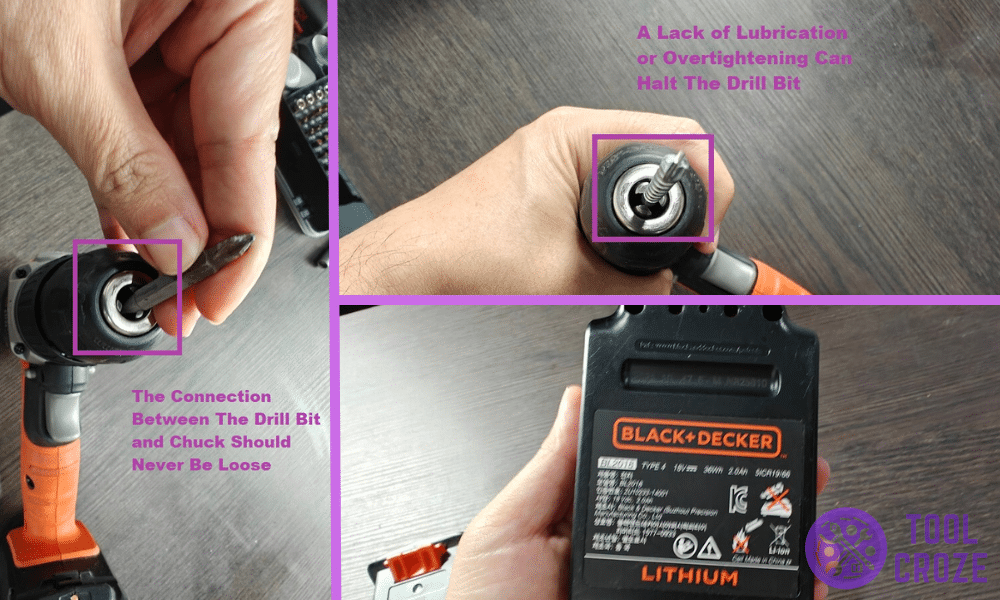
- Drill Bit Won’t Release or Tighten
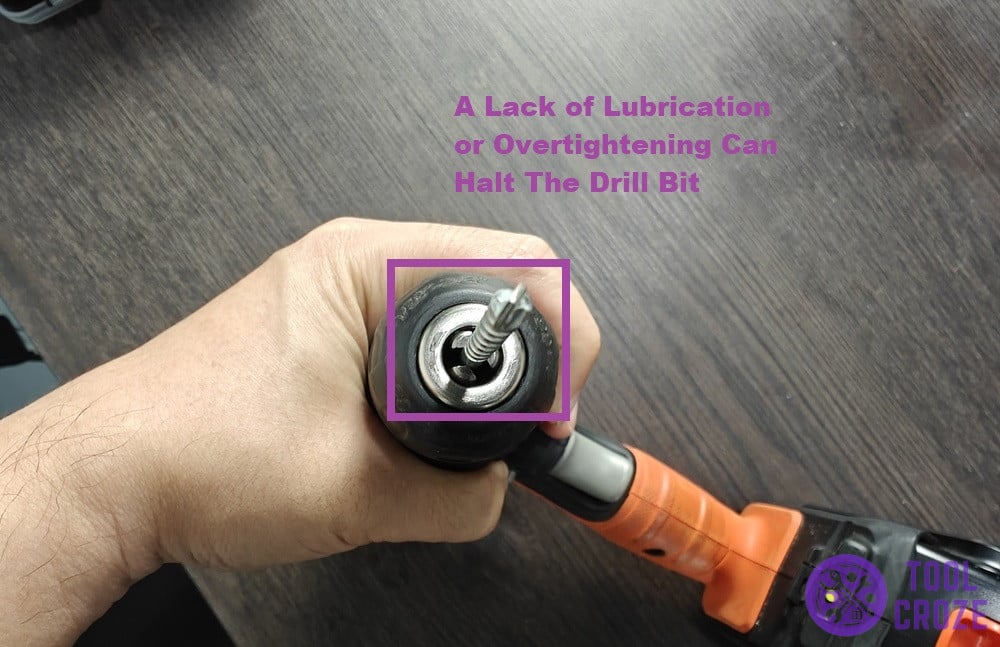
A drill bit that won’t move is often stuck because of the chuck. The chuck might be holding it at an awkward angle. It’s also possible that the drill bit is rusted and attached to the chuck.
If that happens to your Black and Decker drill, the first thing I recommend is using something like WD-40 around the drill bit. A lubricant like that should be able to free it and get it to move.
But, if that doesn’t work, you could try a more drastic measure. For that, you need to hold the chuck in your hand and use the drill in reverse.
Spin the drill bit in reverse on high torque while holding the chuck, and it will make the drill bit spin right out. It’s a great way to release this component whenever it gets stuck.
Related: Black and Decker Drill Reverse Switch and Trigger Problem: The Solution I Recommend
I also made a video about how you can release the chuck if the drill bit on your Black and Decker drill got stuck. You can watch it below and it shows 2 ways how you can do this.
For the first way, you need to have a tape and a plier.
Wrap the tape around the chuck. Then use the lower part of the plier to hold the chuck and activate the drill in counter-clockwise direction. This will help to release the drill bit.
For the second way, you must have a water hose.
Wrap the water hose around the chuck. Then, let the Black and Decker drill run slowly in a counter-clockwise direction.
The friction between the water hose and the chuck would help to release the chuck.
- Drill Not Spinning
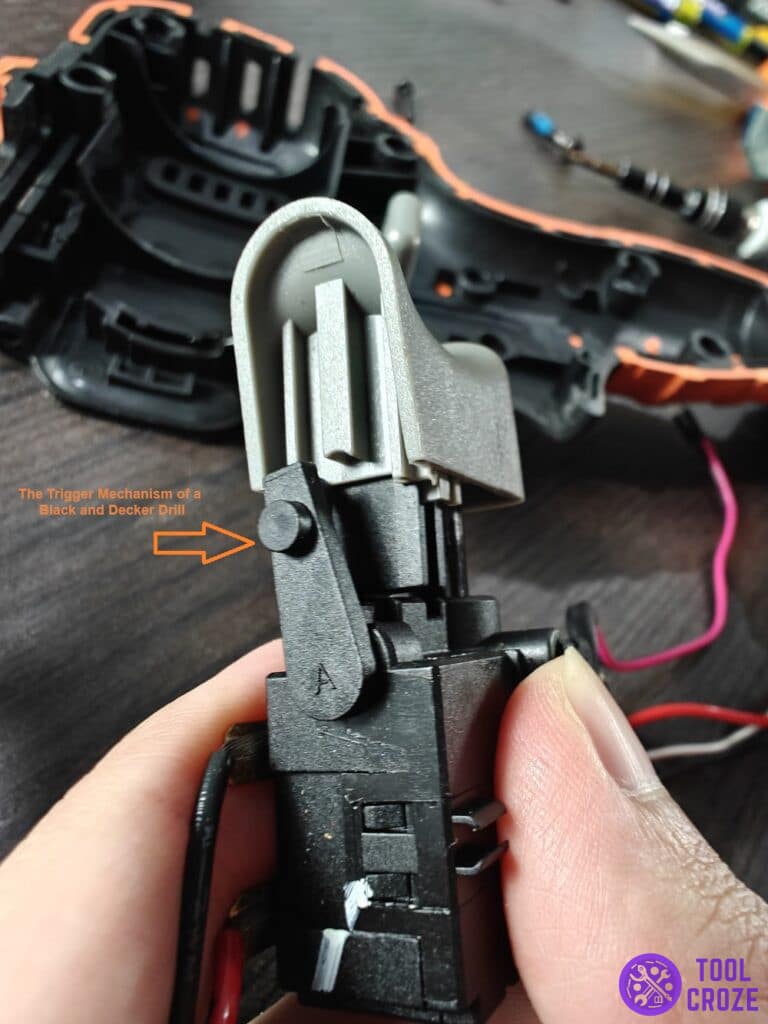
Often when your entire device seems completely fine but the drill still will not spin, it’s a complication with the trigger mechanism.
The job of the trigger is something everyone knows. It’s an on/off switch of sorts, and every electronic device has one of those. But, everyone also knows when the on/off switch stops working.
Something as little as the trigger mechanism failing can make the whole drill useless. But, it’s usually not that hard to fix.
Put your finger around the trigger like I’m doing in this image, and then press it. Do you notice anything strange when this happens? By that, I mean any kind of extra force/lack of force, or a weird sound?
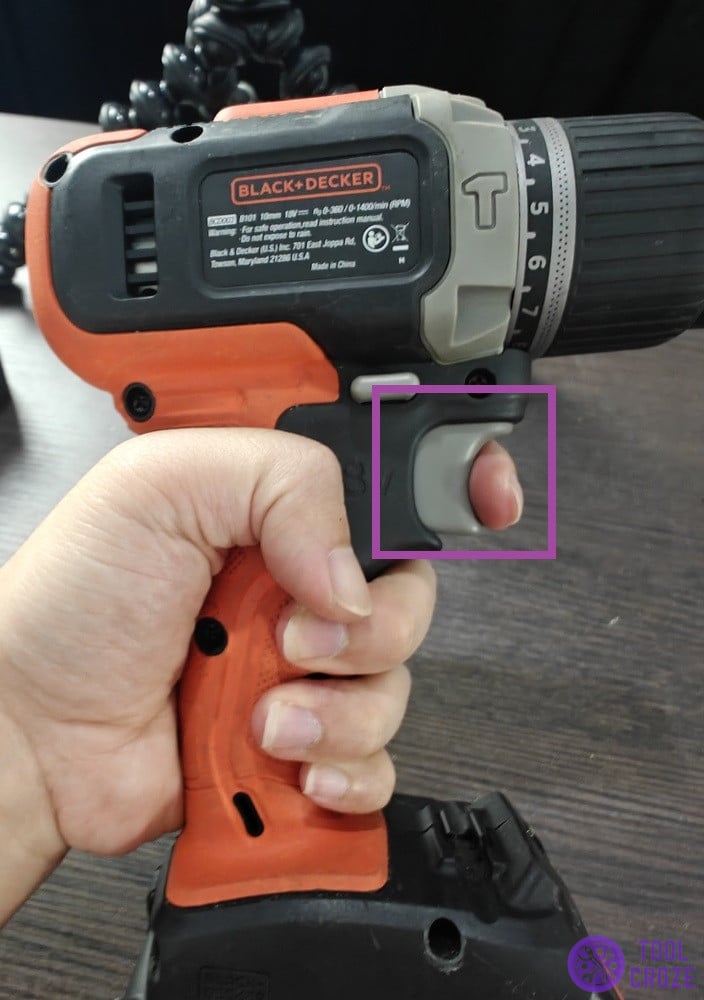
In either case, it’s a sign that your Black and Decker drill’s trigger mechanism is faulty. You will need to open the device’s cover and clean around the mechanism.
At the same time, you have to watch out for breakage on the trigger itself, or any loose springs around it. There’s surely something like that there. Once you fix/replace it, your drill will spin as usual.
- Loose/Broken Drill or Screw Bit
Because of the hard surfaces that the drill bit comes into contact with at such force, it’s sure to experience wear and tear. Eventually, it can be so much that it completely breaks apart.
The drill bit will lose its strength and its shape with wear. That’s a thing that happens to any drill. How quickly it happens depends on your use and the type of surfaces the drill bit comes into contact with
If the shape of the drill bit changes, it might start to loosen or break entirely. When that happens, the drill won’t be safe to use as long as you have that same bit.
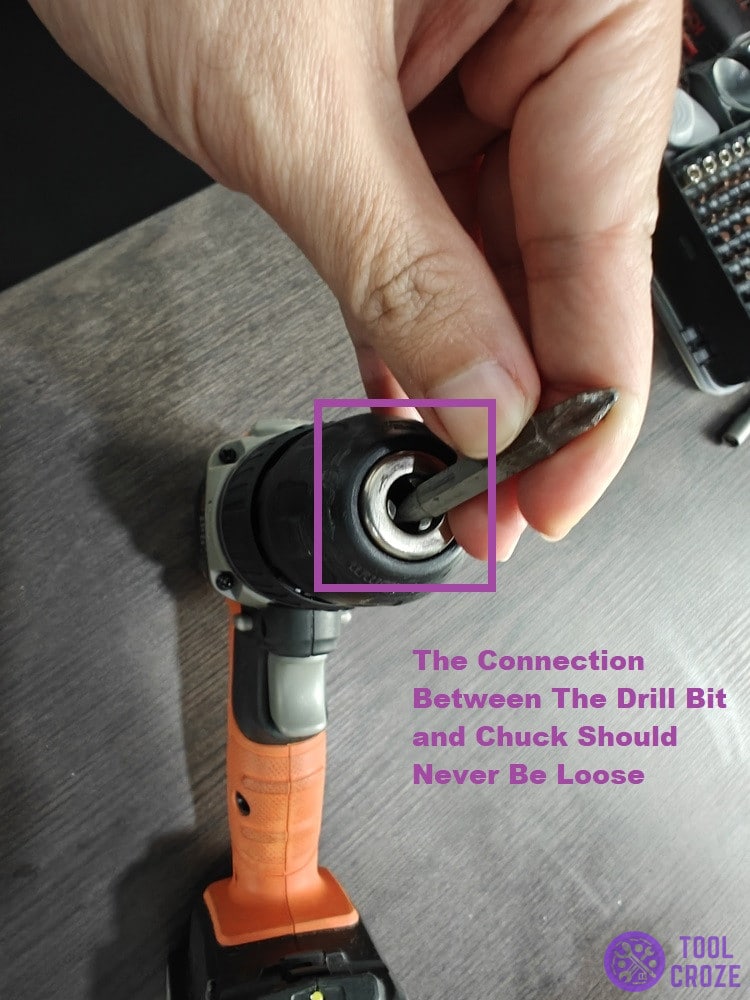
Since it doesn’t have its original shape, the drill bit can potentially break. This is a serious safety hazard for you and those around your Black and Decker drill.
You need to change your drill bit in this situation. The video I made below shows 2 ways how you can change the drill bit on your Black and Decker drill.
For the first way, I remove the battery from the Black and Decker drill. Then, I use my hand to grab the upper part of the chuck, please take note not to grab the lower part of the chuck.
After that, rotate the chuck in anti-clockwise direction, and the chuck is now loosen to release the drill bit. Get another drill you would like to use and rotate the chuck clockwise to tighten the chuck.
The second way is the fastest way for me. Put the battery back to the drill, then grab the upper part of the chuck.
Set the drill to anti-clockwise and press the drill trigger. The drill will now start to spin and the chuck would be loosen to remove the old drill bit.
With same procedure, set the drill direction to forward and press the trigger slowly to tighten the new drill bit
Fortunately, you can easily purchase drill bits of different sizes online. Getting any of those will deal with this for you, and keep you sorted for the future..
