When I tested my Kobalt 24V Max brushless drill for switching between bits for various tasks, my goal was to find which swapping mode truly works best during actual work. This drill has a keyless chuck as standard, so no separate tools are needed. But there are two different methods, and each shines depending on the situation.
The first method is entirely manual: only your hands do thewhole work. I held the chuck with one hand and turned it counterclockwise to loosen it and release the bit, that sat inside. Almost no effort was needed, because the chuck loosened smoothly without big resistance.
The old bit slipped right out, and putting in a new one was almost the same steps, only reversed: slide the backup bit in the chuck jaws until it sits well and flat, then turn clockwise to tighten everything. Simple and pretty natural method.
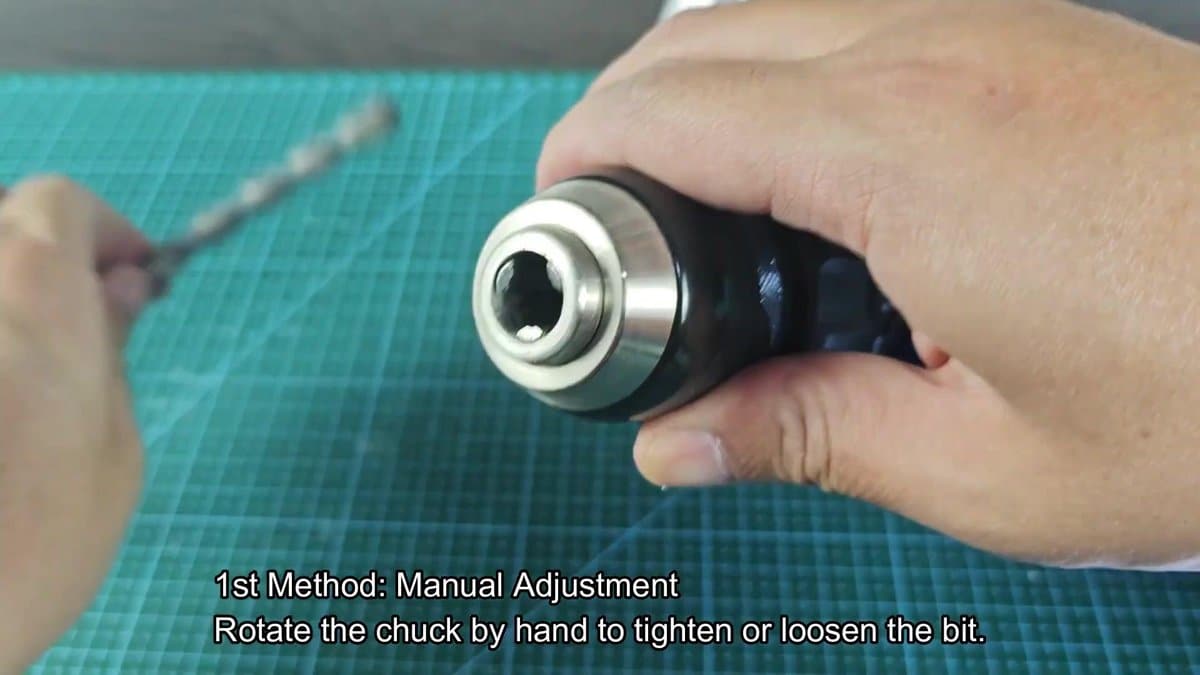
The real key here is to get a good hold on the chuck while you turn it. Sweaty palms, or even a slim layer of dust on the surface, can make it surprisingly hard to create enough grip for a firm twist. I noticed that a fast wipe with a shop rag before any change made a terrific differecne.
That manual method is especially useful for fast bit changes when the drill is disconnected from power, or in tight places where running the motor simply is not practical.
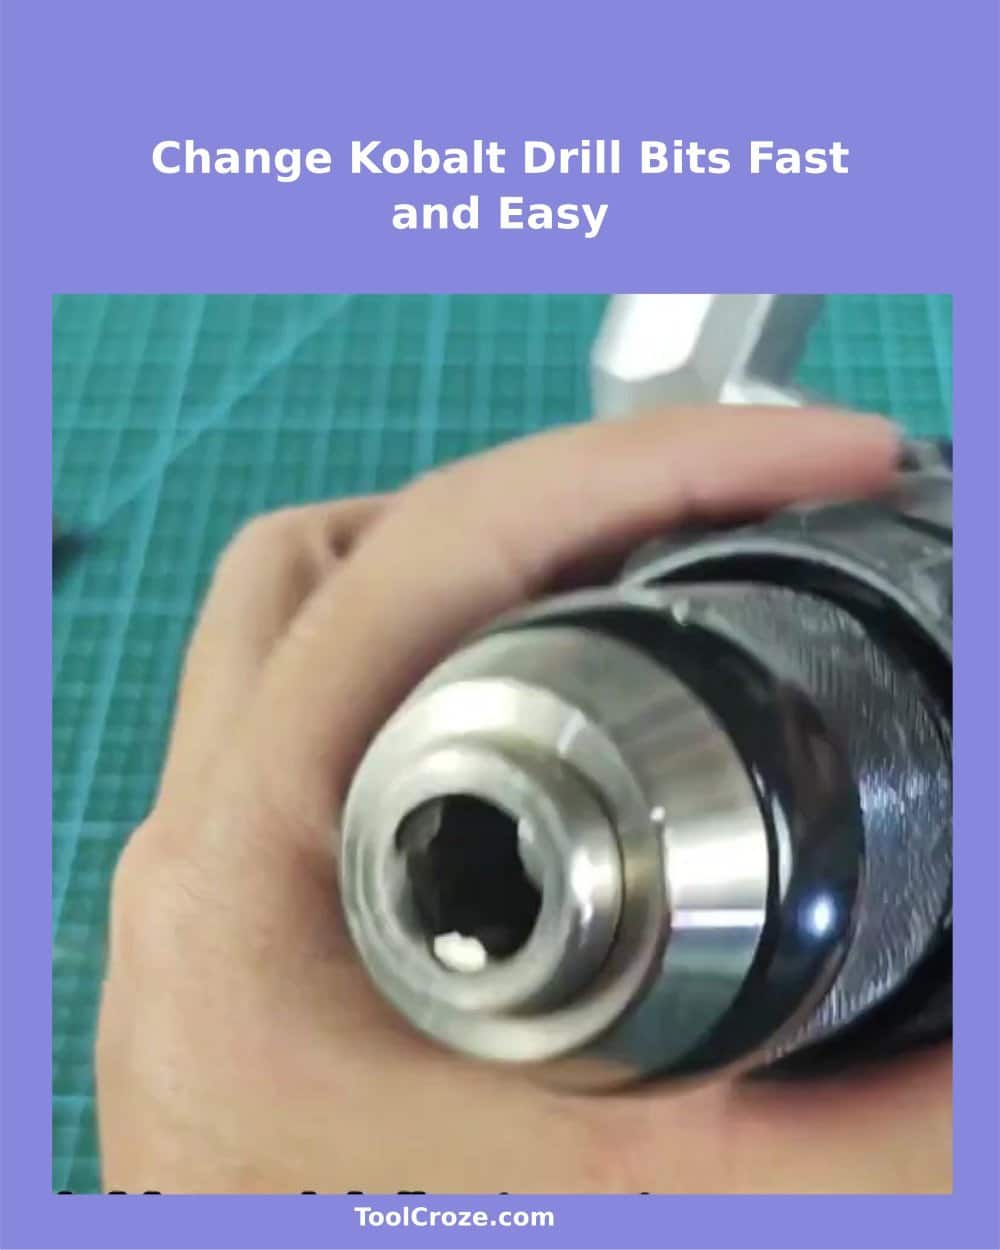
Two Easy Methods to Change Bits on a Kobalt Keyless Drill

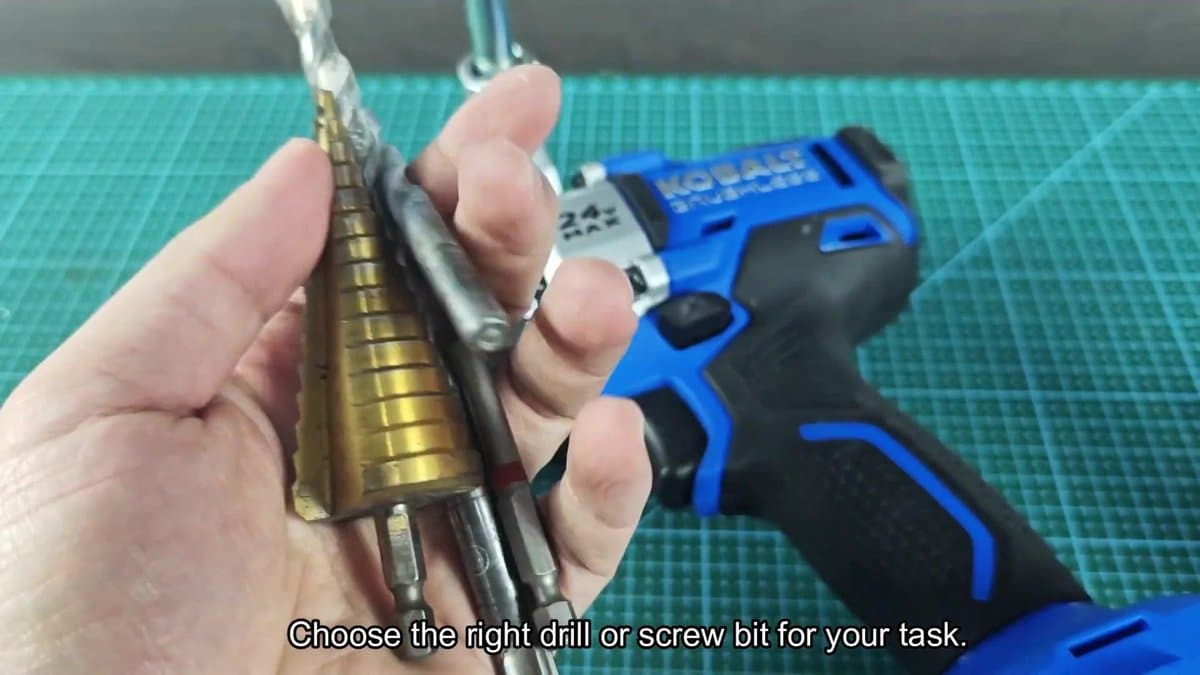
Many folks almost do not think much about the choice of bit before making a change. I usually lay several different bits beside the drill, twist drill bits, screwdriver bits, even stepped cone drills meant for sheet metal. Because they range in shaft size and length, it is worth confirming that the bit actually enters the opening of the chuck before trying to tighten it.
Round shafts and hex shafts both sit in the Kobalt chuck without any trouble.
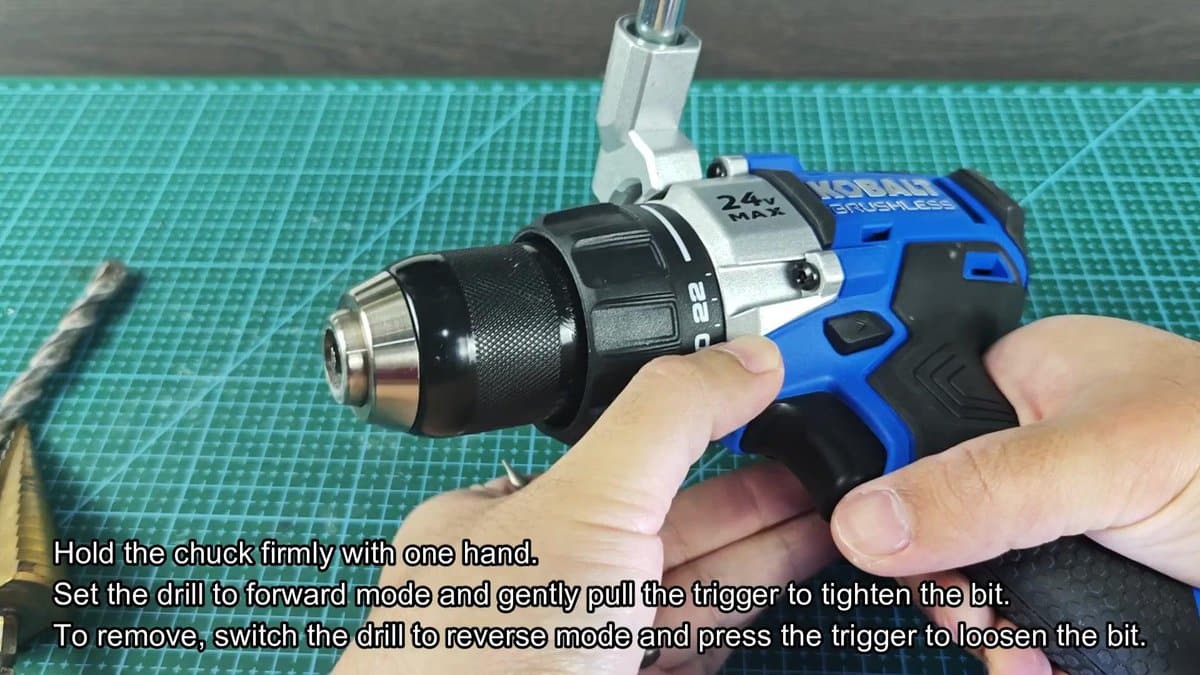
I calls the second mode "power assisted", and it basically uses the motor of the drill to tighten or loosen the chuck. When I finally caught its rhythm, that method proved faster. Start with a lower setting on the torque ring, that helps a lot.
I set mine somewhere around 18 to 20 on the ring, too high risks over-tightening and maybe damaging the chuck threads. Keeping the torque a bit lower simply gives more control during tightening.

I set the torque setting and held the chuck flat with my left hand, so that it would not simply twist together with the body. Then I pushed the bit down in the jaws until it fully entered. It matters to truly keep the chuck still during that step, if you skip that, the chuck can only rotate with the motor without actually clamping anything.
That is especially annoying when it happens.
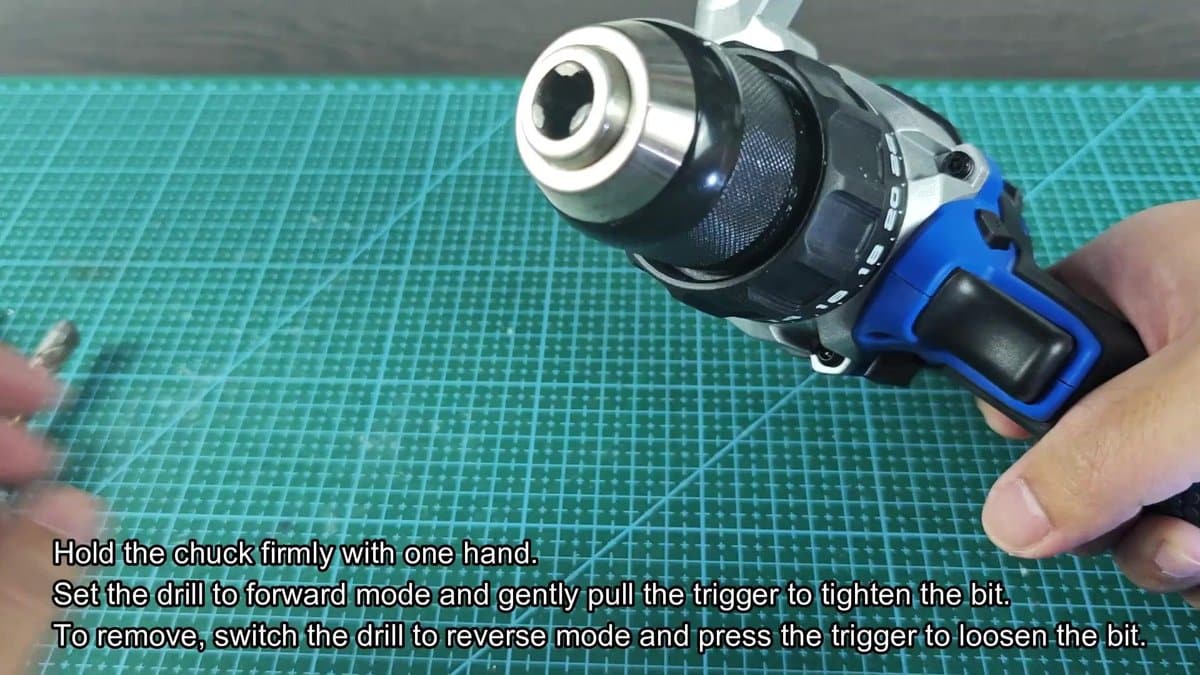
After the bit was in place and my hand firmly wrapped around the chuck, I switched the direction to forward. I gave light pressure too the trigger, and the drill body turned while the chuck stayed still in my hold. About two seconds was enough so that the jaws clamped flat around the shaft.
There is a clear tap and feeling when everything seats fully (you hardly miss that). Thanks to the torque limit, the motor gives a tiny "slip" when it reaches the preset limit, so things are not too intense. The whole process went as smooth as it could be.
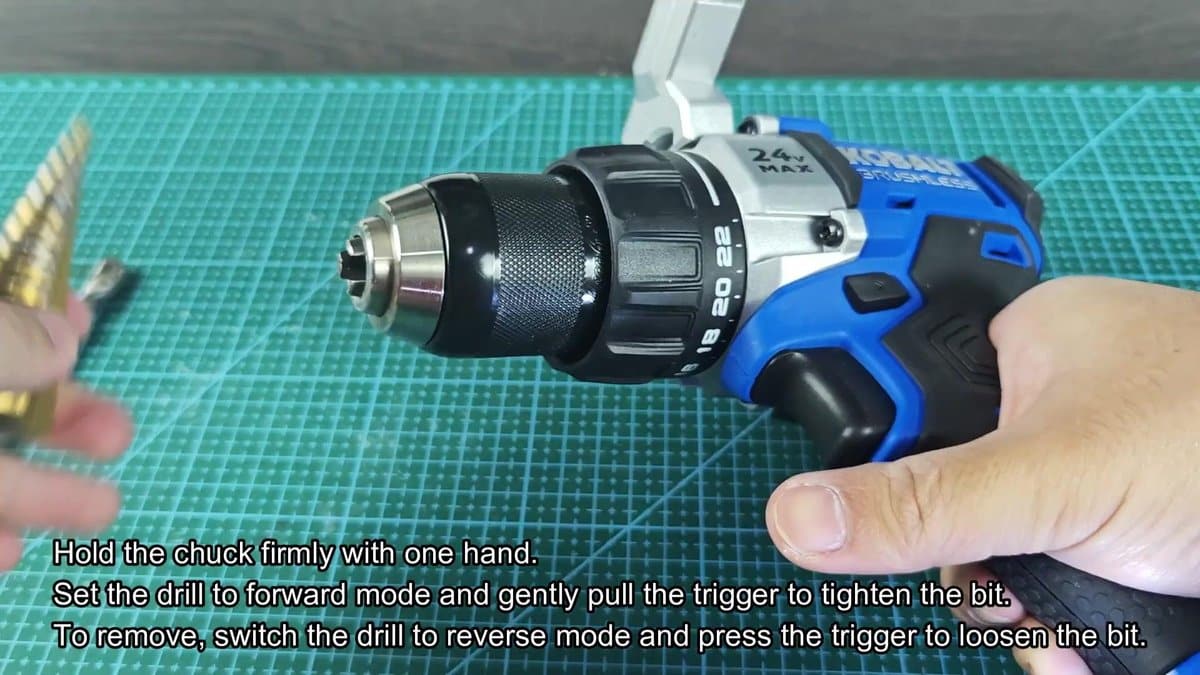
Removing a bit works the same, only reversed. With one hand holding the chuck, I switched the drill to reverse and gave the trigger a fast, gentle press. The motor turned the body against the still chuck, and that opened the jaws.
When they spread wide enough, the bit slipped out without any trouble. I tried that with some different bits to truly test the method… Phillips screwdriver bit, gold stepped drill, and some others.
There was not even one slip or chatter during tightening or removal.
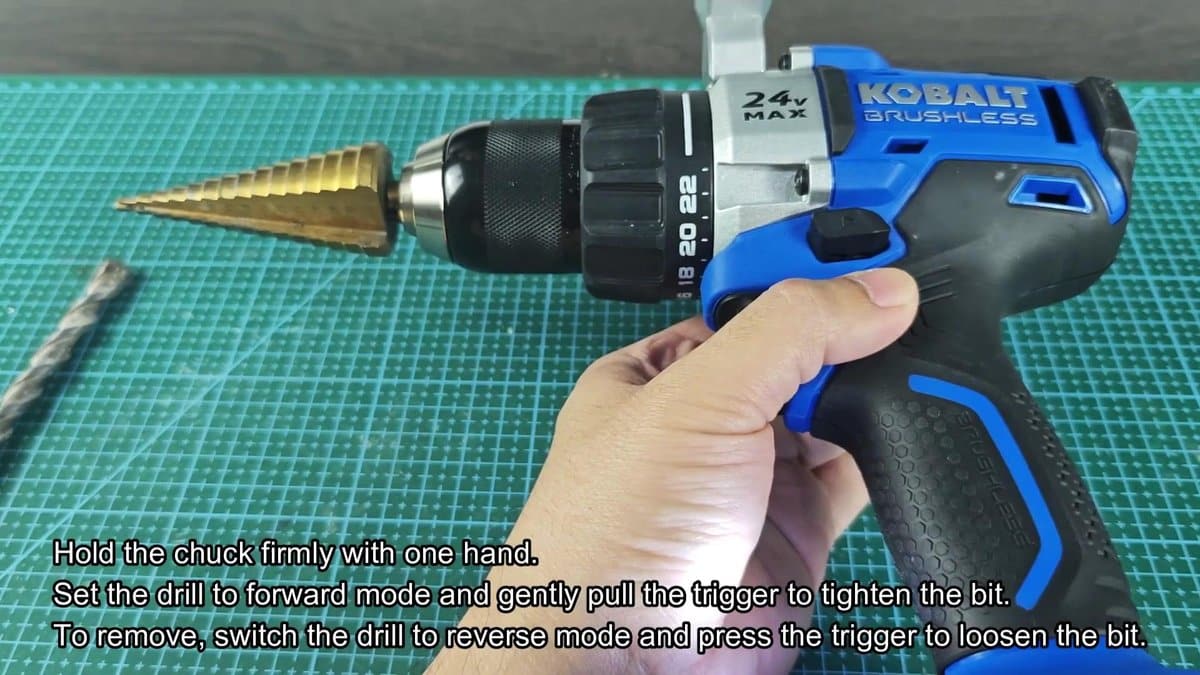
Locking the stepped drill followed the same routine as with smaller bits. Slide it in the open chuck, hold the chuck body with the left hand, switch to forward and give the trigger a fast tap. Done, the bit seated tightly and safely.
Where the power assisted method truly shines is during projects that require changing bits over and over. My hands stayed fresher, instead of getting tired from manual turning of the chuck over and over. That alone made a terrific difference.
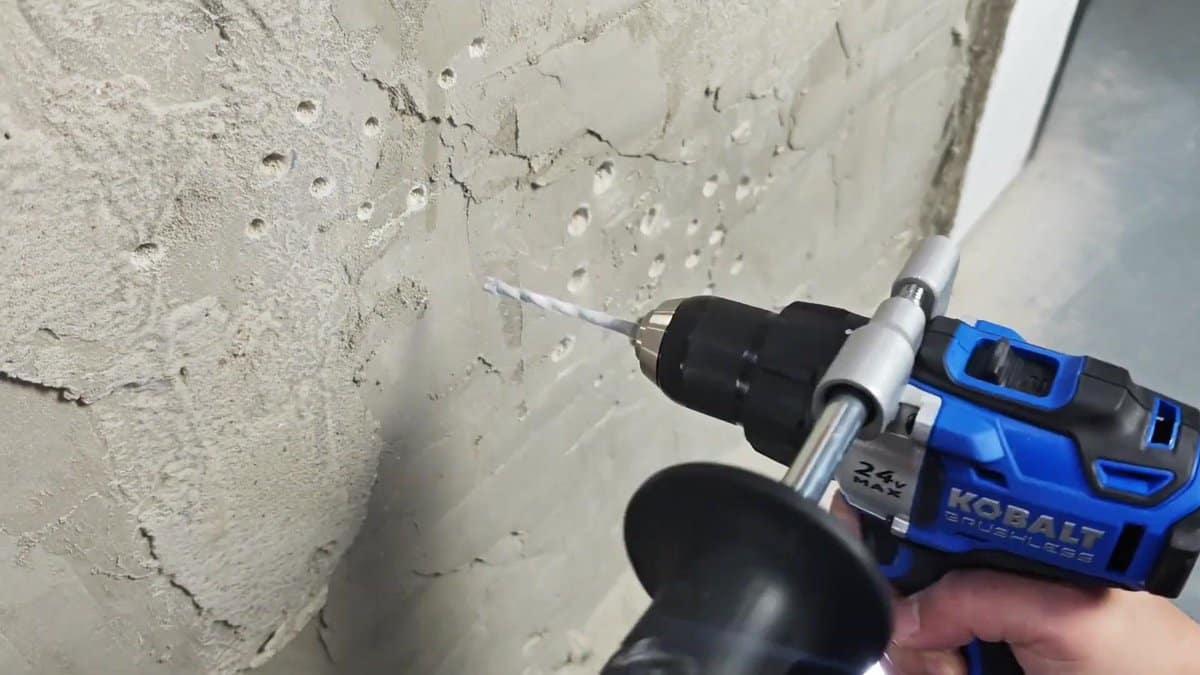
After the bit was firmly locked, I brought the drill to a concrete wall for a real test of how well the chuck would hold under actual drilling pressure. I added the side handle for extra stability, and the twist drill was placed against the rough concrete surface. Pressure on the trigger, and the bit right away bit into the wall.
No wobble, no skating from the chuck at all. The Kobalt motor had more than enough force to chew through concrete at a nice steady pace.
I kept stable, even pressure while the bit went deeper into the wall, and the side handle did great work to keep everything tracking straight. Even with all the shaking and pushback during drilling through masonry, the chuck stayed tight, not even a tiny sign of loosening. The bit stayed rock solid from start to finish, through the whole hole.
That is a pretty clear sign that both methods, manual tightening and power assisted… Hold well when the work gets more demanding.
After I tested both methods through several projects, the manual method truly works for fast mid-task changes or for those moments when the battery already died. But the power assisted way proved faster and much less tiring during days full of frequent bit changes. Either way, the Kobalt chuck design handled everything I threw at it, without real problems.
That keyless system is a real time saver compared to older drills that required using a chuck key, and the brushless motor delivered enough torque to tighten bits flat with the automatic method No extra tools, no complex steps. Only simple bit changes that help get the work done.
