The Worx batteries are one of the best batteries I have ever used for my power tools. It has been a key part of my toolset for a very long time but a few days ago it bailed on me.
The battery refused to take a charge and the charger showed me a solid red light meaning, the battery was dead.
I knew I could fix this and with the help of the internet, and I came up with various methods which worked flawlessly for me.
But before you go on reading this article, you could also first watch the short video I made about this topic. You can watch it below.
On my video I demonstrated how you can reset a Worx 20V battery by using another healthy Worx 20V battery, an 18–20V battery from another brand, and a DC power supply.
How to Reset a Worx 20V Battery in 3 Ways
If you are stuck in a similar situation as I was, here are 3 methods by which you can reset your Worx 20V battery and bring it back from the dead.
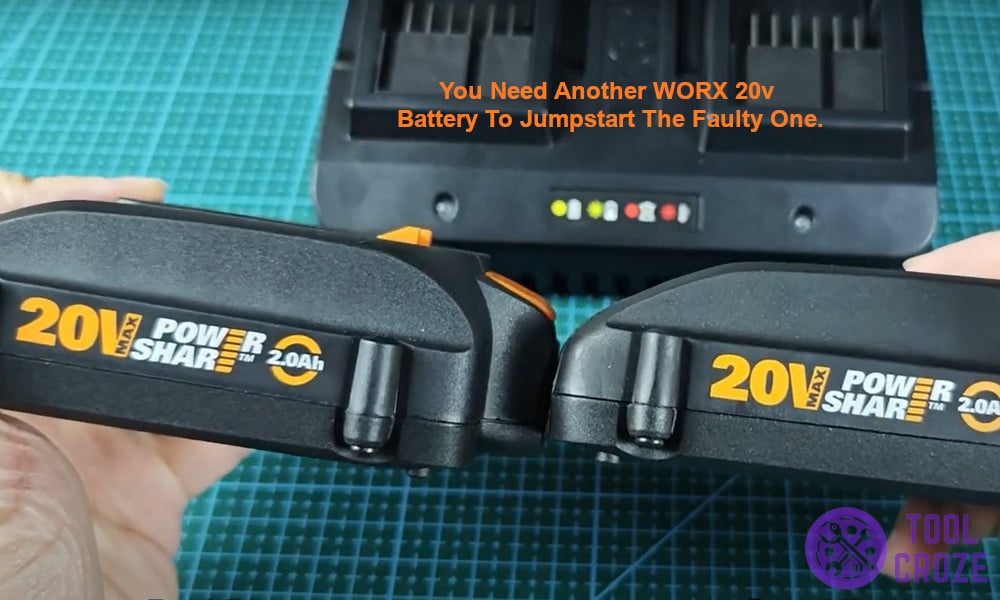
Method 1: Reset Using Another Worx 20V Battery
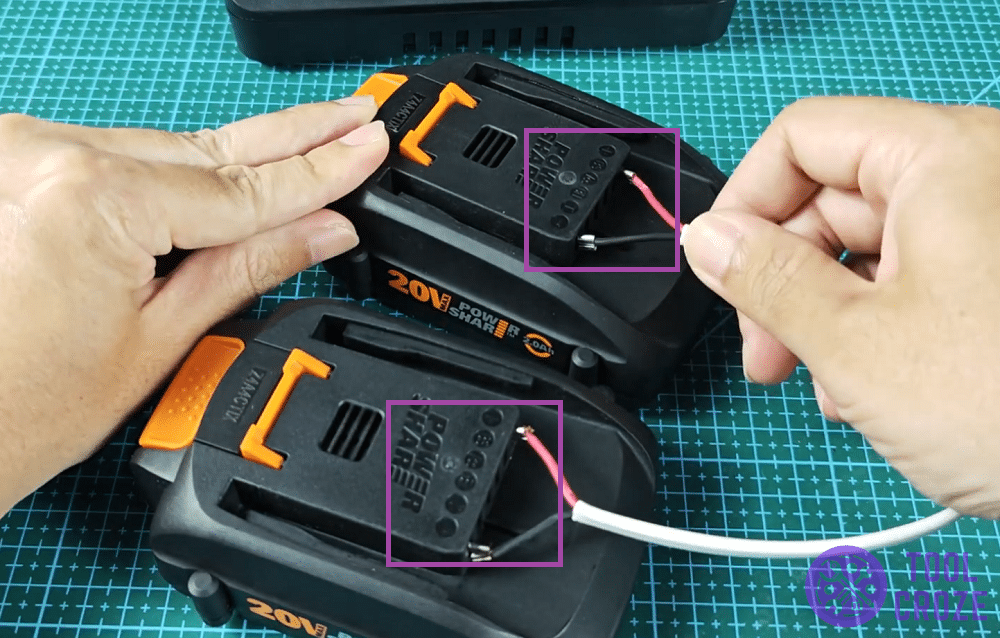
1. If you have another Worx battery laying around that works properly, you are in luck. First, look for the + and – signs on both the batteries. These are your positive and negative terminals respectively.
2. Now grab a pair of male-to-male jumper wires. Connect the positive which is the + of the healthy battery to the positive of the dead Worx battery, and then do the same for the negative terminals.
Hold the connection steady for at least 15 seconds before disconnecting both the batteries.
3. You don’t need to keep the connection for too long, just enough to provide the dead battery with enough power to be recognised by the charger. Try charging the battery again and the problem should now be resolved.
Method 2: Reset Using a Different Brand of Battery
1. Now if you don’t have another Worx battery lying around, don’t worry, you can use a 20V battery from another brand. Just make sure it’s 20V.
2. First, look for the plus (+) and minus (-) signs on both the batteries. Some brands may use different labels such as B+ or B-, but technically they mean the same thing. Just find the positive and negative terminals.
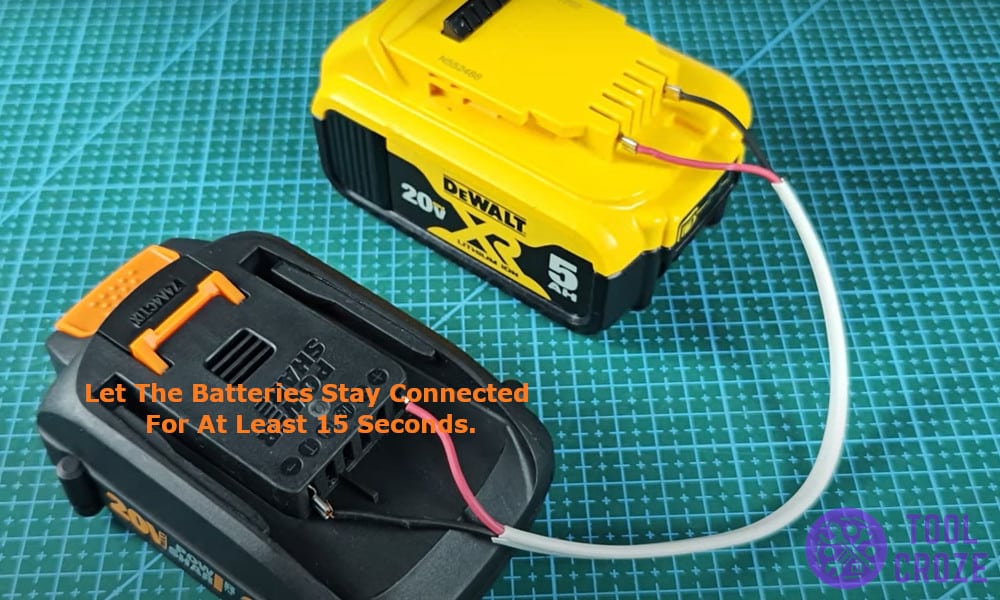
3. Then, grab a male to male jumper wires and connect positive to positive, negative to negative terminals. Just match the + and – signs up and connect them together.
4. Let the batteries stay connected for at least 15 seconds, this will generate enough burst of energy in the dead battery to be charged back up again and work normally.
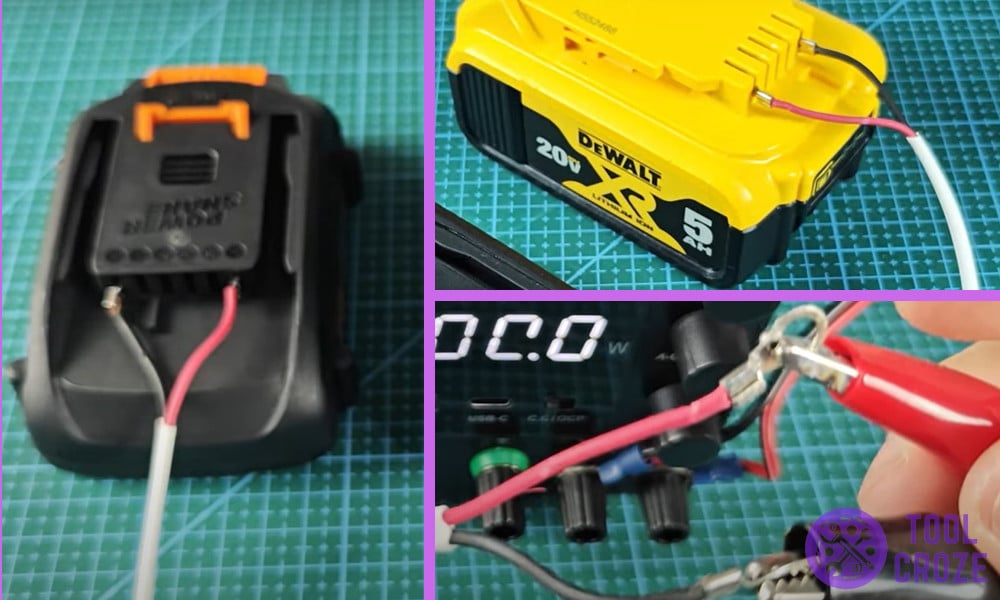
Method 3: Reset Using a DC Power Supply
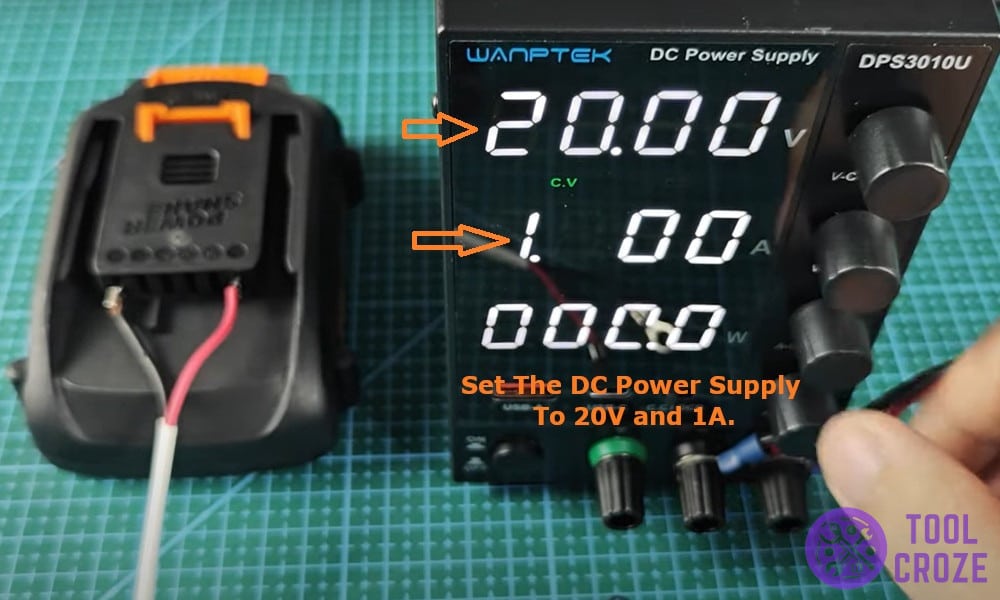
1. If you happen to have a DC power supply at home, you can easily reset your Worx 20V battery. Set it to 20V and 1A, don’t crank it up to high power output or you might end up damaging your battery.
2. Hook the battery to the power supply by connecting its positive terminals to positive and negative to negative.
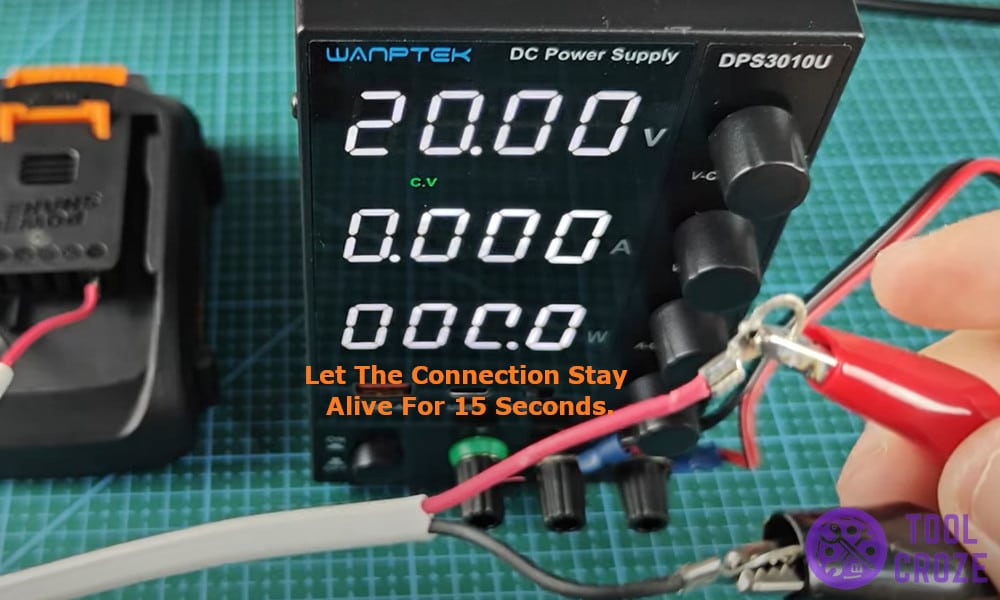
3. Let the connection stay alive for 15 seconds, then disconnect it. This will generate enough voltage and should give the battery a new life.
And before I end this article, I would like to share to you another short video I’ve made about the different meanings of the Worx battery charger lights. This is very important so you’ll know what’s going on with your battery.
A blinking green means the battery is charging and this will turn into a solid green once the battery is fully charged. A blinking red means a hot/cold delay and as mentioned earlier, a solid red means a bad battery.
