Whenever you put a WORX battery on its charger, it’ll show you a blinking green light to let you know it’s charging. At least, that’s the ideal scenario.
Some users might see a red light after putting their WORX battery on charge instead, which means it’s not charging. Here’s a detailed guide on why this happens, what it means, and how to fix it.
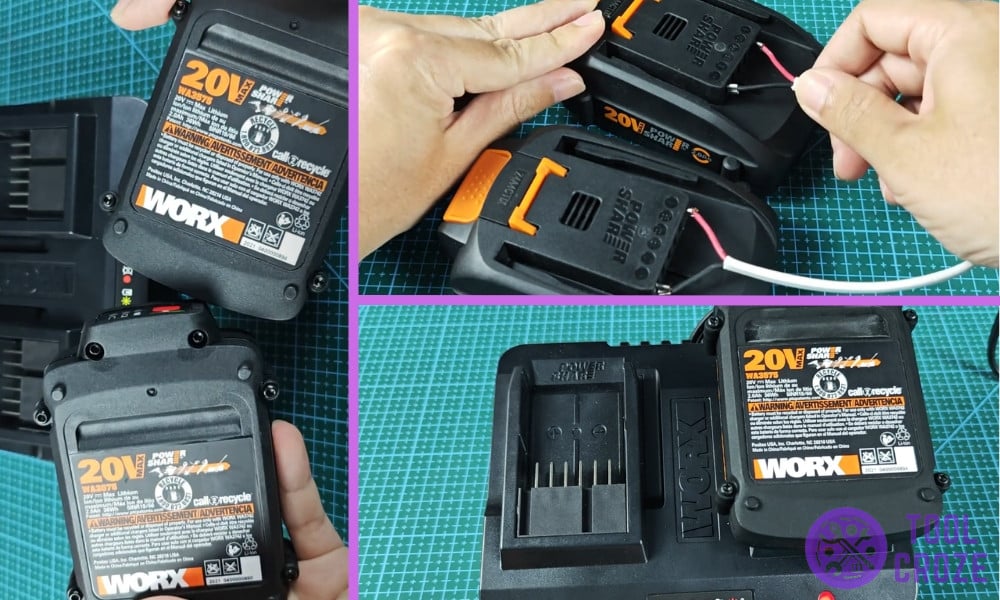
I own WORX drill that comes with 20V battery. I made a short video which shows how I reset it when I encountered this problem. You can watch the video below.
You would need another good and healthy 20V WORX battery. Connect positive and negative terminals of the two batteries.
Let the batteries stay connected for around 15 seconds. Disconnect them afterwards then try to put the WORX battery back to charge again.
WORX Battery Not Charging Red Light
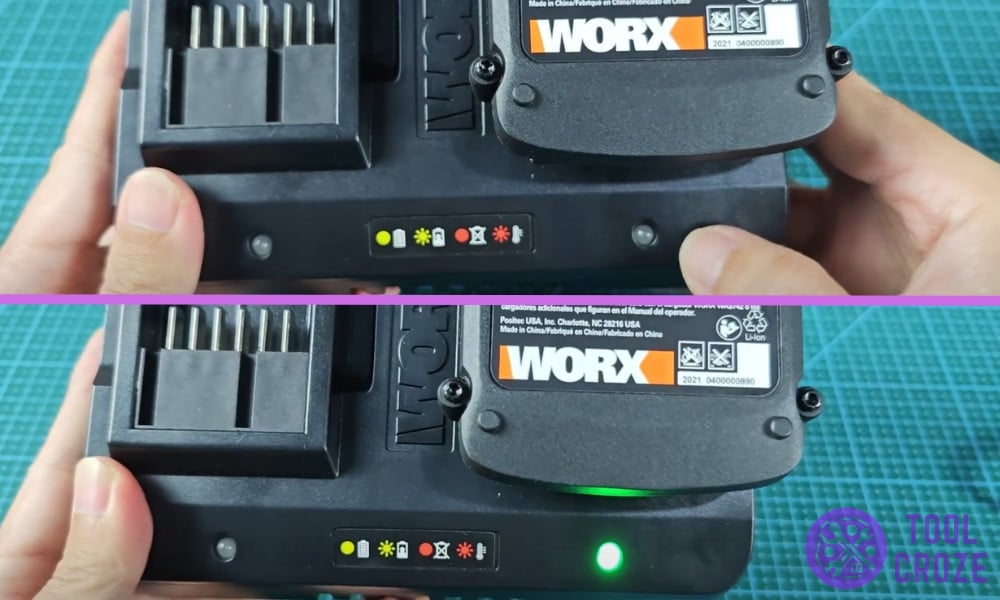
WORX chargers have a sticker on top that highlights all the possible light patterns and what they mean. This includes the red light you’re seeing right now.
Take a look at that sticker, and you’ll know that the red light means there’s something wrong with the battery. In other words, it isn’t accepting charge like it should.
Related: Meanings of WORX battery charger indicator
Here’s a picture of the sticker I’m talking about. Long story short, the red light obviously isn’t good news. It signals issues with the battery currently on charge.

When a battery doesn’t charge, it’s often because its cells can’t hold any more power. In other words, the cells are dying and losing their capacity.
Batteries left alone for a long time without use can lose their capacity like this. It’s also common among older batteries since they naturally lose capacity with constant use.
Why your battery lost its capacity doesn’t matter much. What matters is how to fix it and get rid of the red light so your WORX battery charges again.
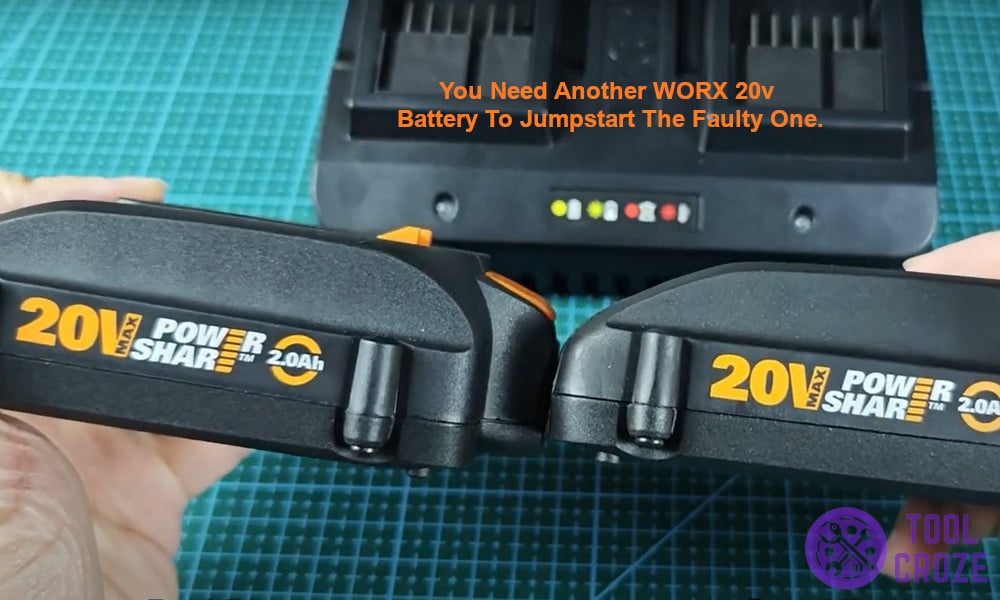
Another battery is going to be necessary if you want to do that. That’s because the only way to get a bad battery working again is to reset its voltage by jumpstarting it!
I have a WORX 20v battery that was showing me the red light some time ago. Luckily, I had another WORX 20v battery to help me jumpstart the faulty one.
It doesn’t have to be another battery identical to your WORX one, though. Any other tool battery pack with the same voltage should do the job just as well.

Other than the batteries, connection cables are necessary for this too. You’ll need two of them to join the two batteries together and flow power from the good battery to the bad one.
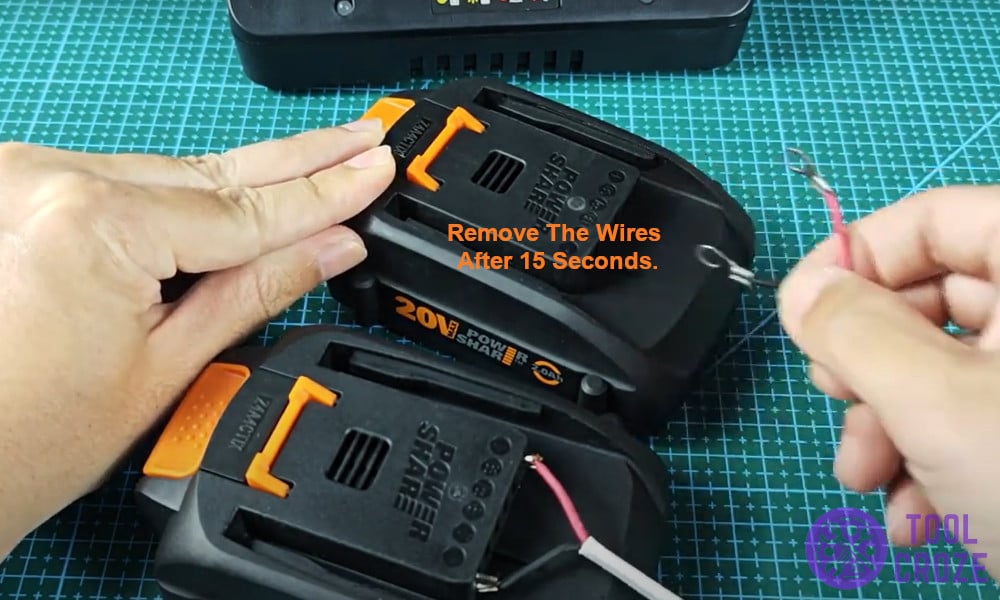
Put the faulty and functional batteries together on a table. Then, use the connect cables to join the two of them together like I have in the image below this.
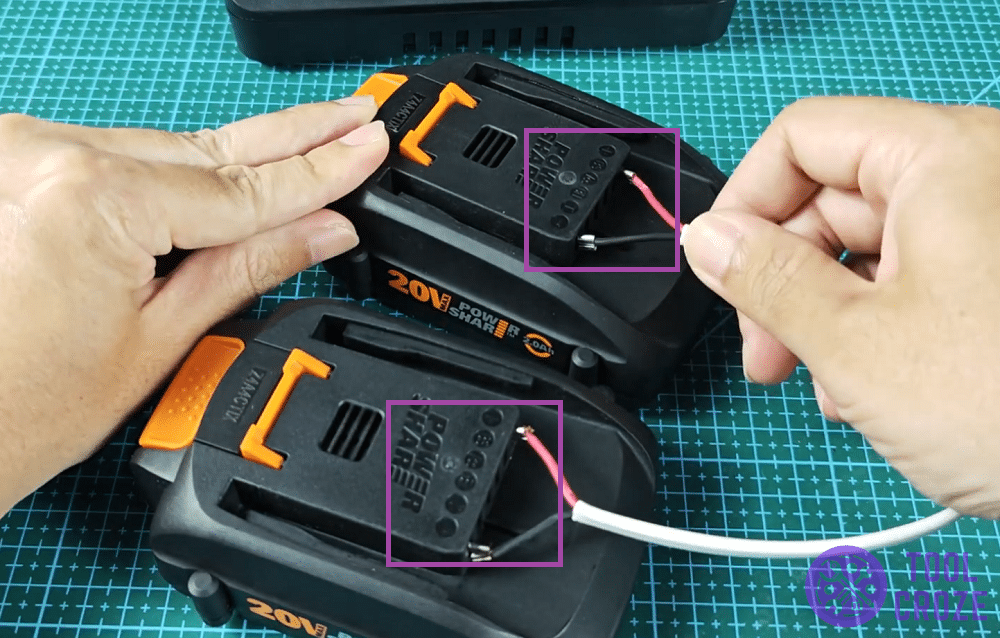
Each of the connection cables has a specific function during this. You need to join the positive terminals of both batteries, as well as the negative terminals.
One of the cables will go in both of the positive terminals. Meaning that one of its ends will go on the positive terminal of the functioning battery, and the other end on the faulty battery’s.
When that’s done, use the second cable to do the same thing with the negative terminals next. Make sure to not put the wires on any other terminal.
Don’t mix the two terminals either. That’ll lead to serious issues with both of the batteries and could harm you too. So, carefully connect the same terminals and only those.
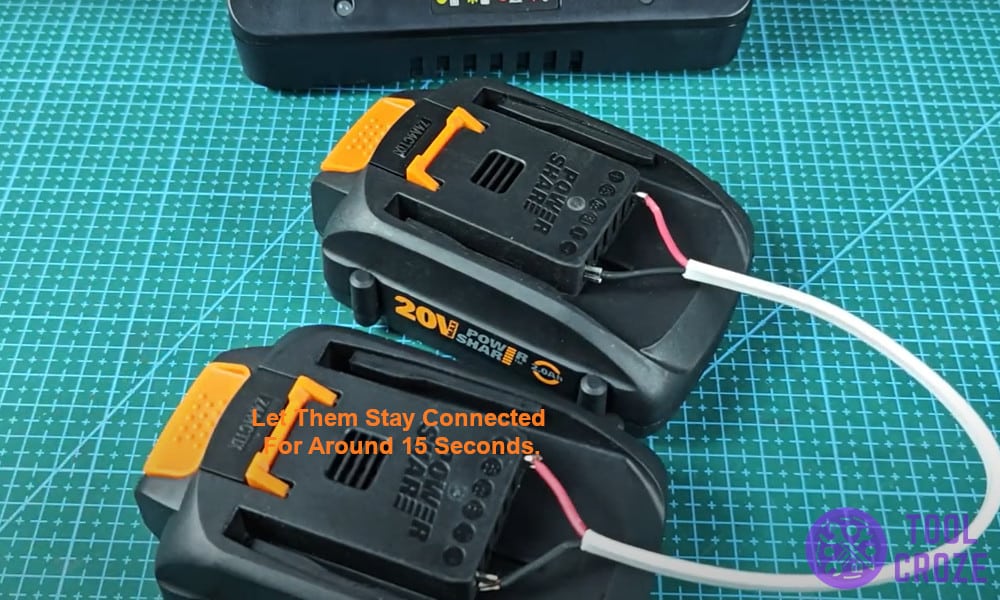
Anyway, once you have the cables in place, wait for around 15 seconds. That’s enough time for power to flow between the two batteries and reset the faulty one.
Once those 15 seconds pass, you can take the connection cables out of the functioning battery. Don’t keep the cables in for much longer than that, to avoid overcharging and potential issues.
Your WORX battery’s cells will have their voltage set back to normal after this whole process. There shouldn’t be any trouble with their capacity either.
All that’s left now is to test if it did the trick for you or not! Put the WORX battery on its charger to see if there’s a red light on it this time or not.
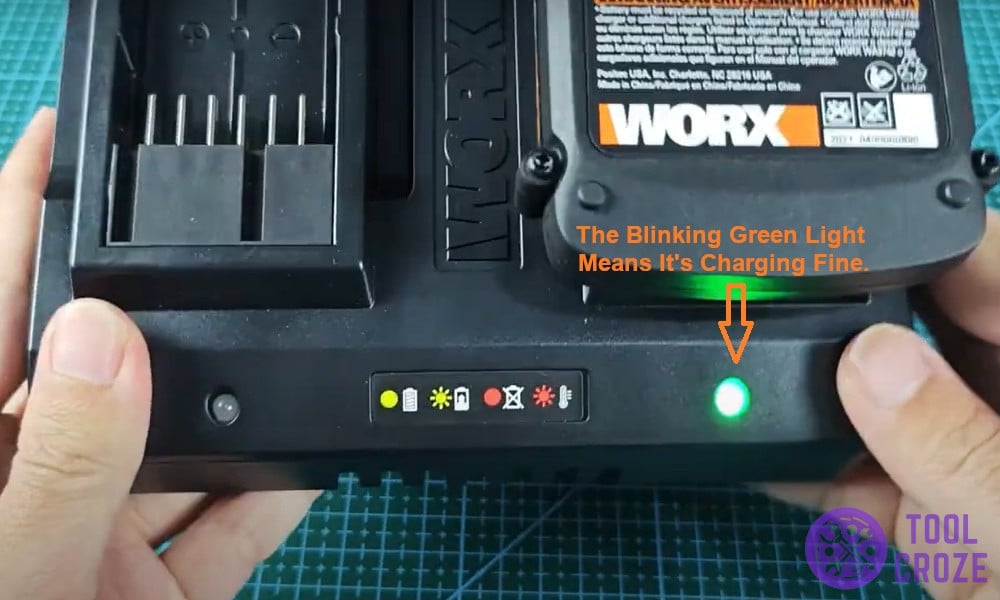
Back when I had to do all this with my own problematic WORX battery, this method worked great for me. At the end of it all, it was blinking green again, which you can see down here:
Hopefully, after following all the steps in this guide, the same happens with your WORX battery. The green blinking light means that there are no issues and the battery is charging like normal.
Although, if the red light still doesn’t go away, that means your battery’s cells are completely dead. The cells inside are near 0 voltage, and you’ll have to buy a new battery.
This happens when a battery is too old. Most batteries no longer function after a few years, so if your WORX battery is that old then it would explain the red light.
There’s no way to revive completely dead cells. You have to either replace the cells, or the entire battery.

Where to buy battery connection cables?
Just a normal cable will do
100% works! I was getting ready to replace my Worx Pro by spending over $60 for one battery through Amazon and for some reason decided to see what other people were saying about this particular brand of battery. I found this page and read the answer and thought “no way this works” I found an old power supply cord and clipped and stripped the wires to make it look like it does in the picture. It didn’t even take 15 seconds. There was a little spark and I could tell the gauge was too small because it started heating up immediately, so I quit. I didn’t think it worked, but I decided to plug it into the charger anyway to see if it did anything and it totally started charging again! My battery is less than a year old and if I try it again I’ll definitely use a larger 12 or 13 gauge wire, but it totally worked for me!! Thanks so much for sharing this information!!