
Craftsman tools are pretty good for value. They do their job and are reliable for most things. Though, you can’t do anything with them if they don’t have any power to work with.
Regularly, a quick charge would handle that. If your Craftsman battery is not charging, that’s another story. You won’t be able to use any tools while it’s acting like this, so let’s get it back in order!
4 Causes For A Craftsman Battery Not Charging
- Dirty Contacts
Contact points on batteries and chargers like the ones from Craftsman can get dirty pretty easily. That’s because of the way they’re designed, and how dirt tends to burrow up inside the crevices they have.
While that isn’t an immediate issue, it’s still best to clean those contact points often to avoid it eventually becoming one. Dirt in tight spaces like that doesn’t tend to go away on its own.
Dirt will pile up to the point where it starts getting in the way of both things if you don’t clean it out. That’s going to ruin the connection and stop the battery from charging when you plug it in.
Cleaning the contact points is how to bring the connection back to normal and resume the flow of charge. The parts highlighted in the picture under this are what you want to clean up.
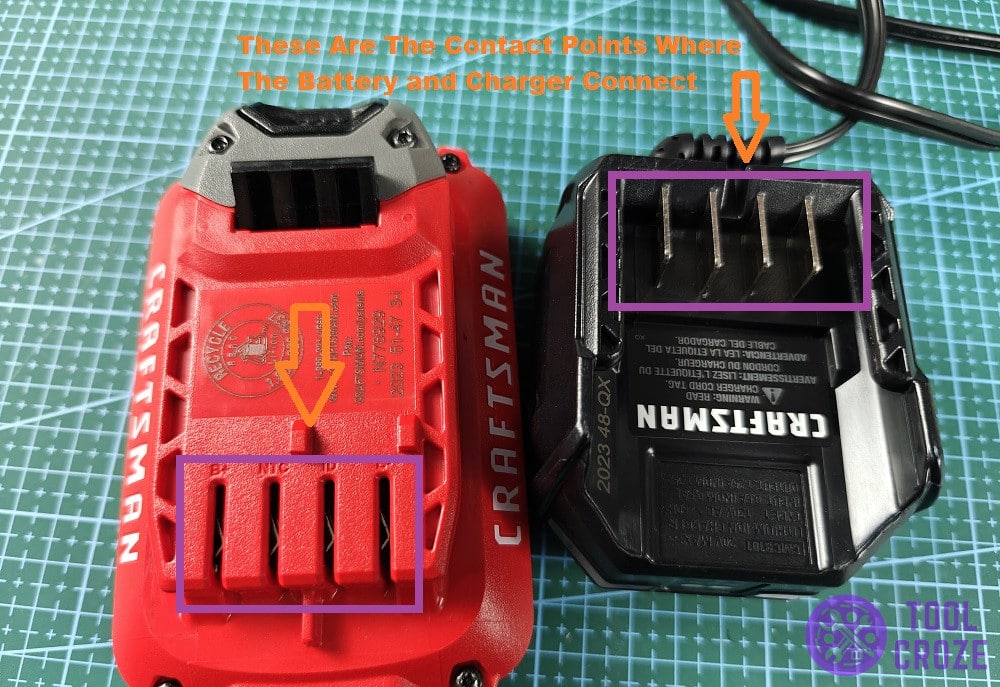
For the ones on the charger, you can just wipe them clean and that should do the trick since they’re in the open. It’s a lot more common for the ones on the battery to get dirty, because of their design.
Those are harder to clean out too. One way to do it would be to take the covers off and get a close look at the contact points so you can get dirt off of them. But, that can be a hassle, even if effective.
If you want to about it the easier way, that involves using compressed air. Blowing it between the spots will free debris piling up inside, but don’t blow it inward to trap debris even further inside the battery.
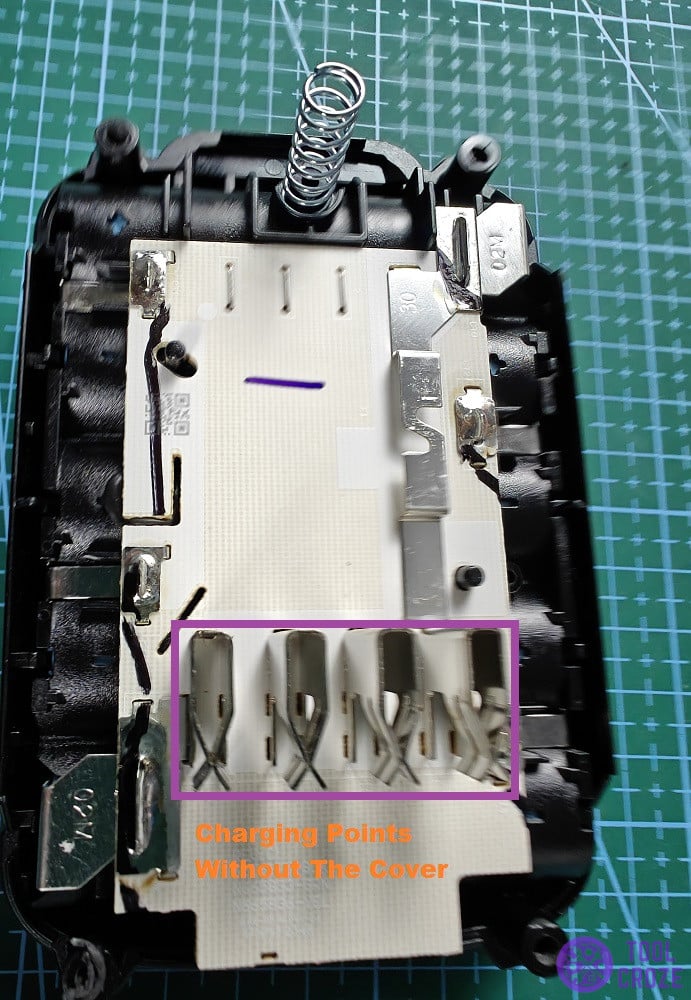
Personally, I think taking the covers off to clean is the better option. While it might take some more time, it’s a much more effective way to clean contact points on the battery.
- Where Are The Cells From?
Even though it might sound a little weird, I want you to check the cells inside your Craftsman battery for their origin. What country were they manufactured in?
Certain Craftsman batteries use cells from different parts of the world. Surprisingly, that plays a big role in the performance of the battery, and also in this particular issue.
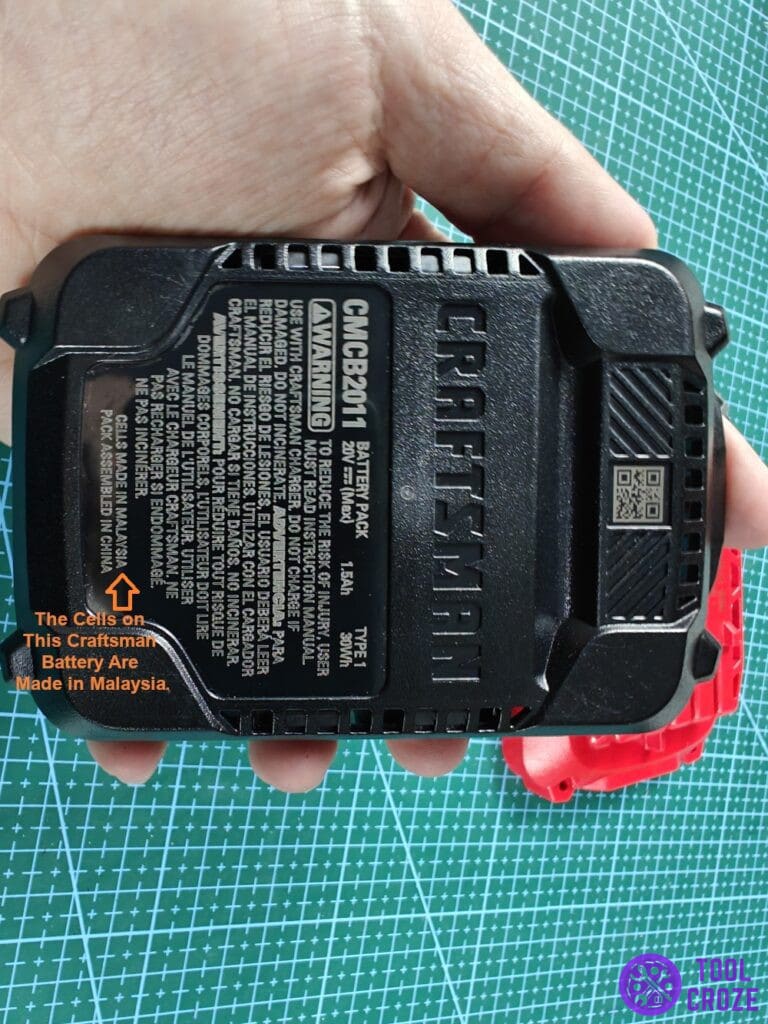
Cells do better or worse depending on their country of origin. This likely has to do with the parts and manufacturing process involved. There’s no way to know until you check the cells.
Do exactly that by opening the covers on your Craftsman battery and checking the cells inside, like I’m doing in the image below. On the battery pack, you’ll be able to see more info on each cell.
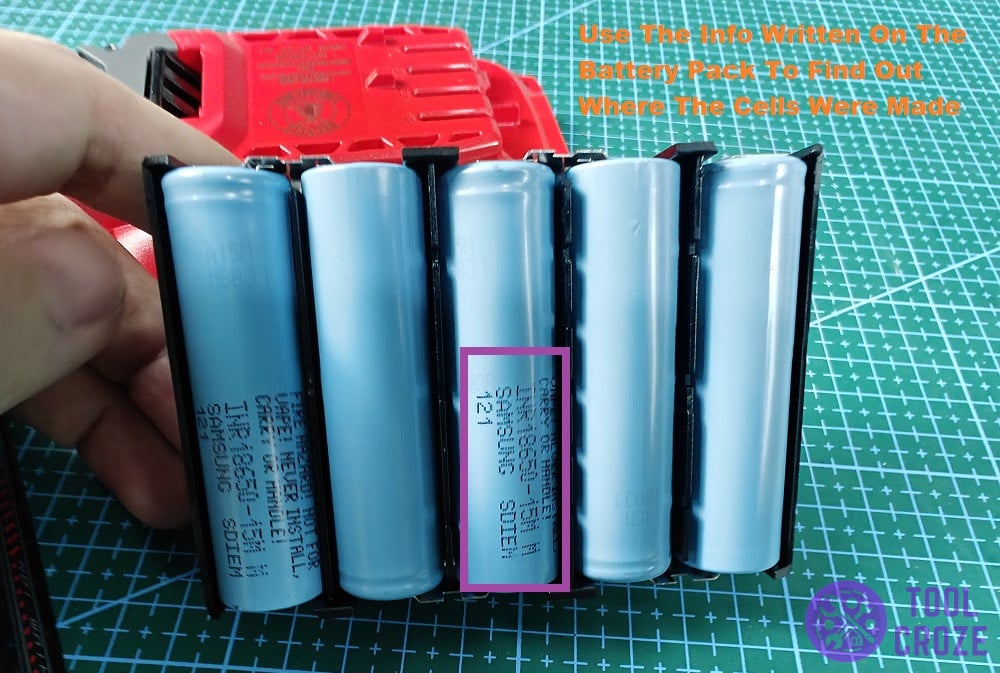
Ideally, the ones inside your battery are from Korea or Mexico. After doing a ton of research on this, this charging issue mainly seems to be with Craftsman batteries that have cells from China.
These seem to have a worse lifespan compared to cells from other countries. While I did think that this was a coincidence at first, there are too many examples of this for it to be just that.
So, if your battery has Chinese cells inside it, they’ve likely gone bad much sooner than they should have. The effort to revive them isn’t worth it, and it’s much better to get a replacement.
- Have You Tried Another Charger?
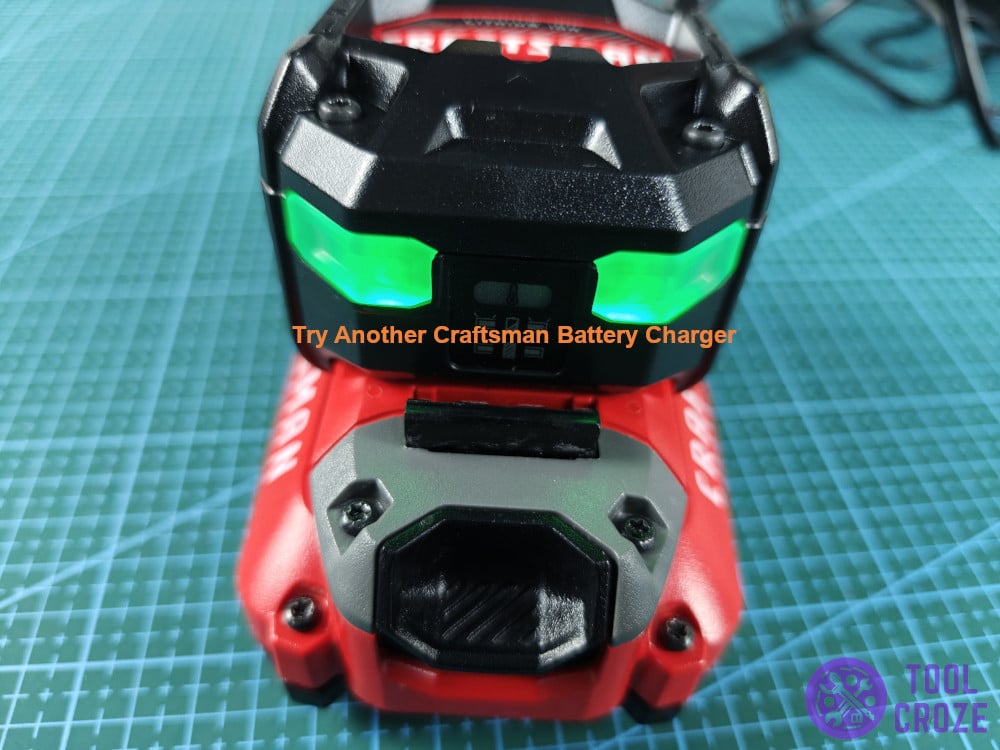
While writing this up, it dawned on me that maybe the battery doesn’t have anything wrong with it. Maybe it’s the charger that’s the reason for your Craftsman battery not charging.
If you have a spare charger lying around, that should be pretty easy to check. Just put the Craftsman battery on that extra charger as I have in the photo below to see if it charges or not.
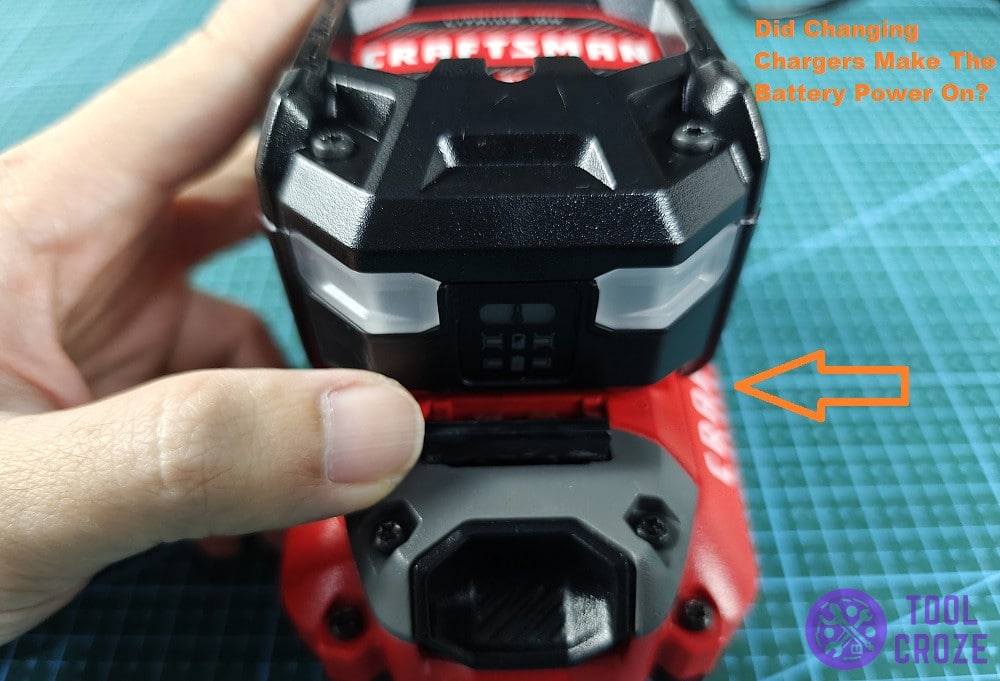
In case it does charge, you know the battery isn’t faulty. If it doesn’t charge, you know that it is. It’s something easy to rule out, so might as well get it out of the way.
Chargers don’t usually go bad like batteries do, but sometimes a fuse can blow. There’s also the possibility of faulty boards and sensors that can stop it from working too.
- Revive The Battery
For the last tip, you needed an extra charger. For this one, you’re going to need an extra Craftsman battery instead. That’s because my last tip to you is to try reviving the battery.
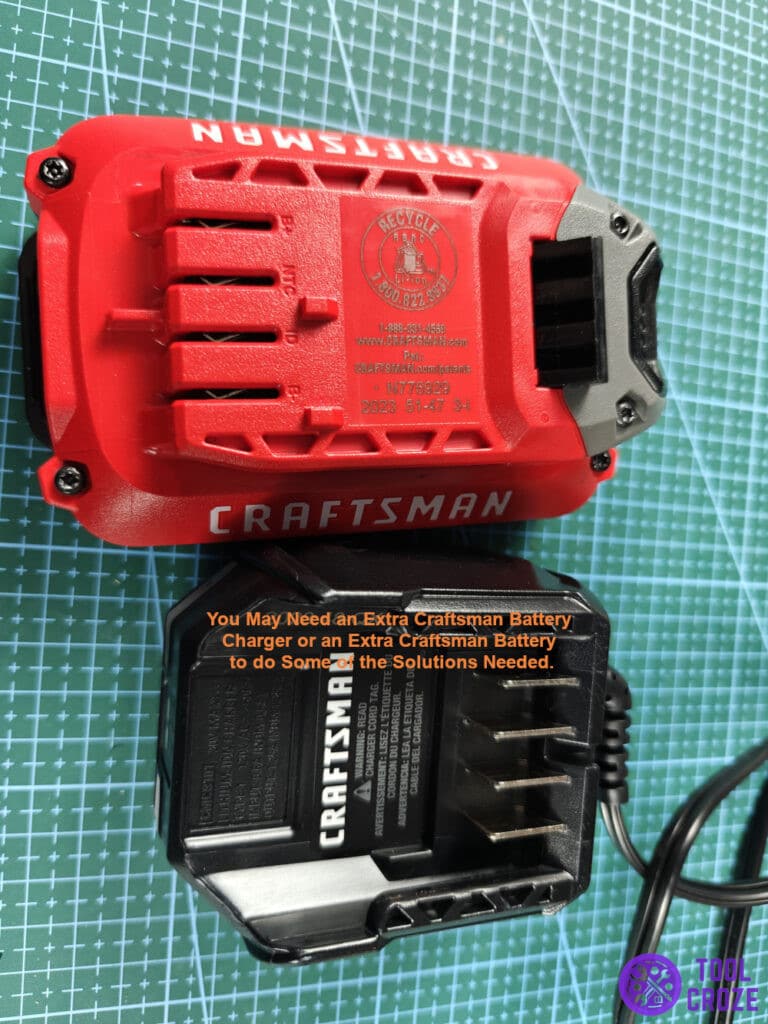
Another battery is necessary for that since it’s what’ll give your current battery the extra kick it needs to start working again. So, get another battery, and two wires to connect both of them.
After you get two wires, connect them to the positive and negative terminals of each Craftsman battery. Here’s a photo of what both those terminals look like, so there’s no confusion.
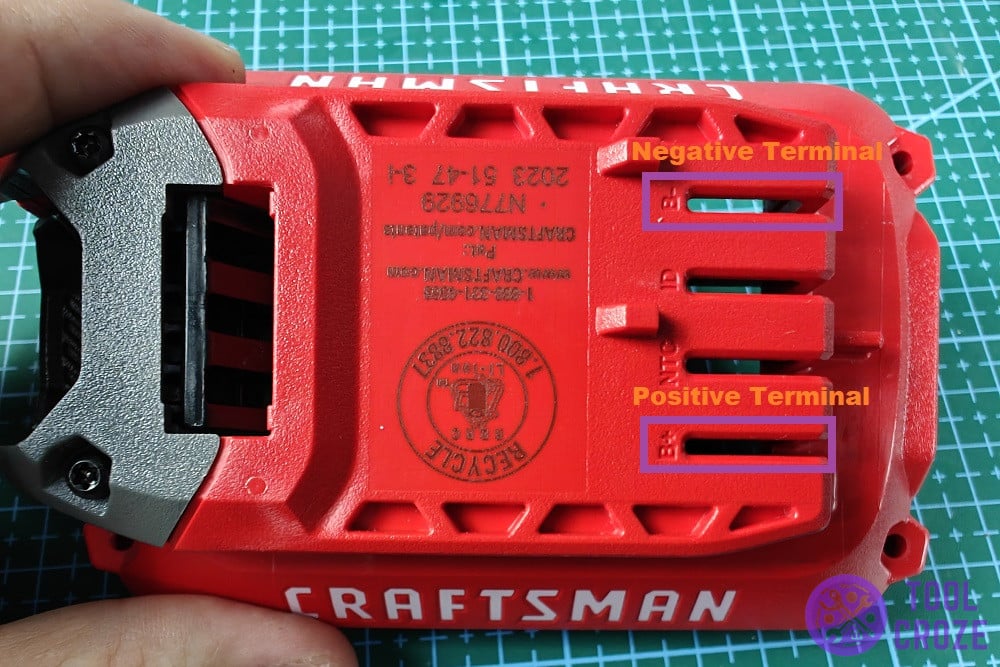
Place one end of a wire around the positive terminal of the dead battery. Just like that, place one end of the wire on the negative terminal of the bad battery too.
With the wires on the bad battery, hold the other ends of the two wires in your hands. Now, put both those ends in the corresponding terminals.
The wire connected to the positive terminal of the bad battery should go to the positive terminal of the good battery, and the same goes for the negative one. Keep holding them in place for a few seconds.
Some moments of that charge should be enough to jumpstart the bad battery. Put it on the charger to see if it is accepting power now, and then you can use it like normal again if it is!
I have made a short video which shows how you can do this and you can watch below.
As shown in the video, you need another Craftsman battery with similar specs. Connect the B+ to B+ terminal, and B- to B- terminal of the two batteries.
Let the two batteries stay connected for around 15 seconds and then disconnect them. Try to recharge the problematic battery again and it should be charging fine now.
In the video above, you may have noticed that it’s very important to know the different meanings of the indicator lights on a Craftsman battery charger. I also have a video about this which you can watch below.
A blinking green light on the Craftsman battery charger means it’s charging the battery. When the battery becomes fully charged, this will turn into a solid green.
But if you see a red light, it indicates a hot/cold delay. If you see no light from the charger, it indicates a bad battery. A solid green light but the battery indicator is not full also means a bad battery.
I also have a short video about what you can do if you see a solid green light but the battery indicator is not full. You can watch this video below.
To fix this issue, you also need to reset the Craftsman battery. Just do the steps mentioned in the first video and after that, press the Craftsman battery indicator. Now, it should be full bars and charging fine again.
