A Craftsman charger will let users know when the battery connected to it is done charging. A green light will pop up on the indicators, which will signal that it’s time to take the battery off charge now.
But, what if that light comes on wrong? I’ve heard a lot of complaints about how users’ Craftsman battery just does NOT charge to full bars, despite the charger saying it did. Let’s fix it together.
Before you go on reading this article, you could also first watch the video I’ve made about how you can fix a Craftsman battery which does not charge. You can watch it below.
In the video, I connected the B+ to B+ terminal, and B- to B- terminal of the two Craftsman batteries which have a similar voltage. I let them stay connected for around 15 seconds and then I tried to recharge the bad battery again.
After that, the bad Craftsman battery is now charging fine.
Craftsman Battery Does Not Charge To Full Bars – Fixed
I won’t sugarcoat it- it’s usually a dead dead battery that makes this kind of thing happen. It’s no longer charging as it should, which is messing with the sensors on the charger as well.
That’s why your Craftsman charger is telling you that it got to 100% power. But, before deciding that the battery being dead is the case, I suggest trying another charger first.
Related: Ways to Fix a Craftsman Battery Charger Not Working No Lights
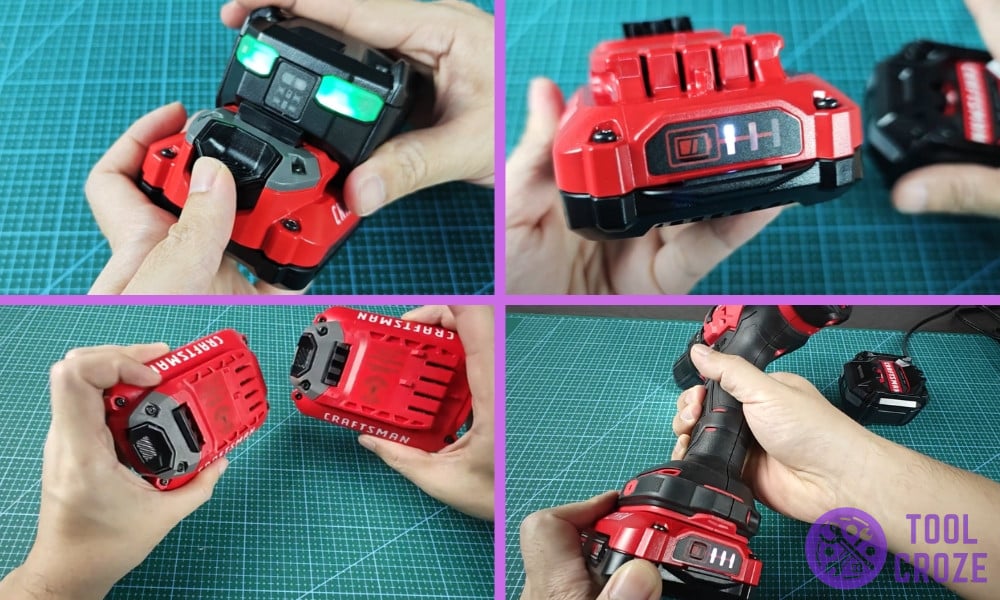
If other Craftsman chargers are giving you the same result and you still see the same scenario as in this picture below, that means there’s definitely something wrong with the battery.
You need to know the different meanings of the indicator lights on the Craftsman charger. I have a video which discuss them and you can watch it below.
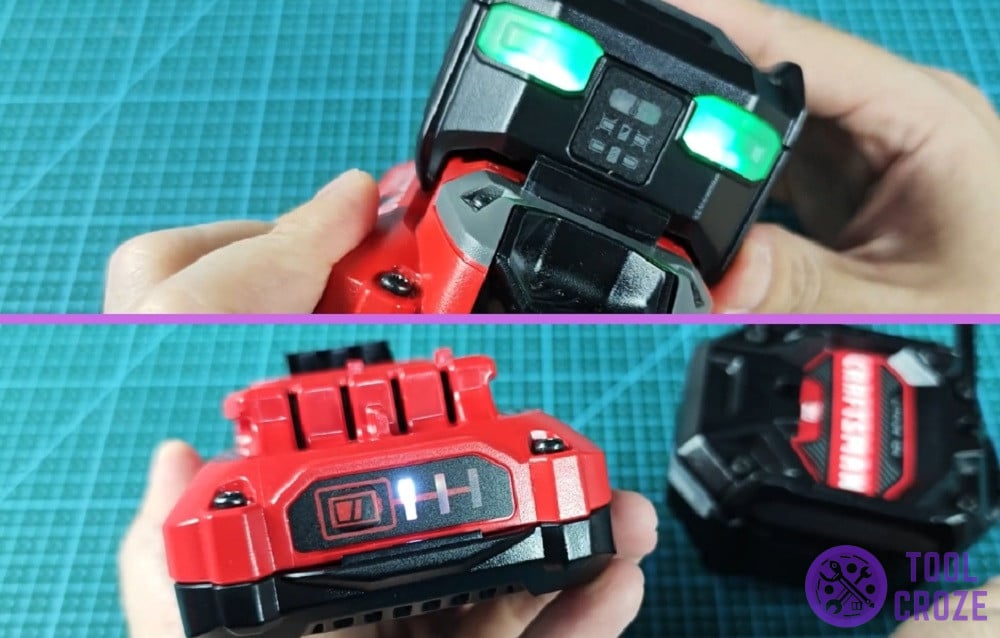
Here’s the summary of what each light means on the charger. A blinking green means it’s charging the battery. This will become a solid green once the battery becomes fully charged.
It’s bad news if you see a red light because this indicates a hot/cold delay. It’s also not good if there’s no light at all because this means it detected a bad battery.
And lastly, if you see a solid green light but the battery indicator is not full this also means a bad battery.
Now, there are two ways to deal with a dead battery, and they’re how you’ll fix this issue. The first and easiest way to do it is to just replace the dead battery.
Whether you have a warranty or need to buy a whole new Craftsman battery, a new battery will take care of the matter. But, this is also the more costly of the two options.
The other way to fix it is by reviving the dead battery. There are two main steps to do this, so let’s start with those right away!
Step 1: Check The Voltage On The Cells
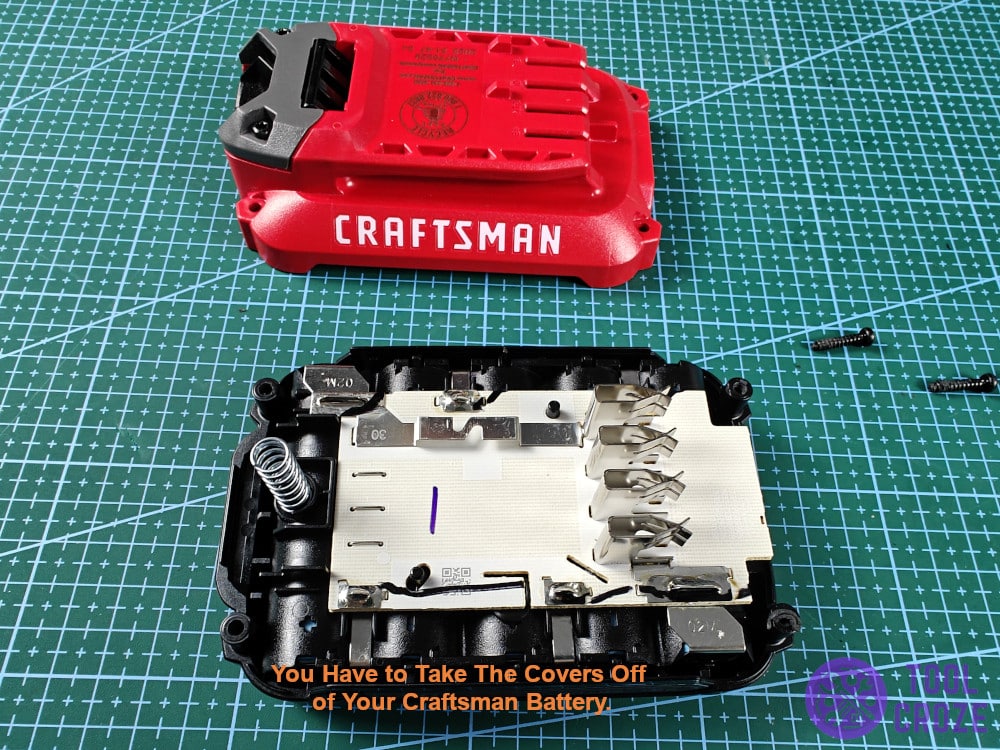
First of all, you have to take the covers off of your Craftsman battery. You need to do this in order to expose the cells inside. That’s important since we need to inspect those cells.
Doing this will determine whether or not it’s possible to revive a battery at all. If the voltage on the cells seems right, that means they can be revived. If it’s too low, you’ll surely need to buy a replacement.
After you have the cells exposed, use a multimeter on them to see if their voltage is right. Use your battery’s manual to check what the voltage on each cell should be.

If your cells show a similar voltage that isn’t much lower, it’s possible to revive them. But, if it’s too low, that means they’re fully dead and users are going to need a new battery now.
Step 2: Connect The Bad Battery To A Good Battery
Now, time for the fix. If the voltages were normal and your battery can be revived, you’ll need an extra Craftsman battery for the job. Most people have a spare, so buying another won’t be necessary.
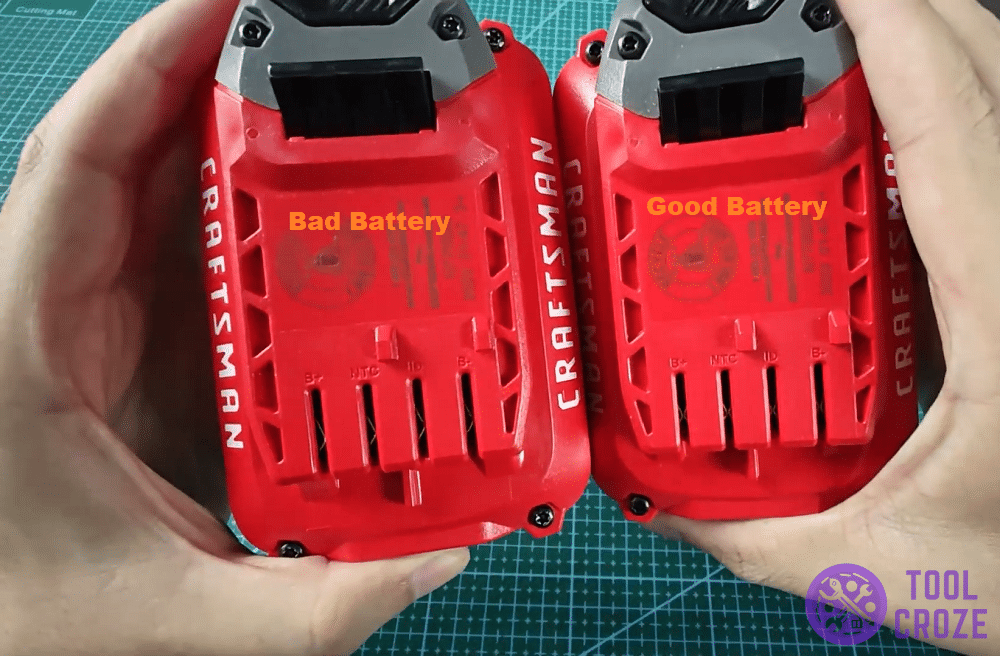
Ideally, the two batteries should be the same model, like mine in the picture up there. After you have both batteries, the next step is to connect both of them together.
For this, you’ll need two separate wires, with all their ends exposed.
Place one wire on the positive terminal of both batteries, and the other wire on both negative terminals. This is what will allow the good battery to transfer power to the bad battery to revive it.

Also, don’t worry about anything happening to the good battery. This whole process is completely safe if you made sure that the voltages are in order like I said earlier.
To give you a better idea, I did the same thing with both of my batteries. You can see it in the image down here. Use safety gloves to avoid getting a shock!
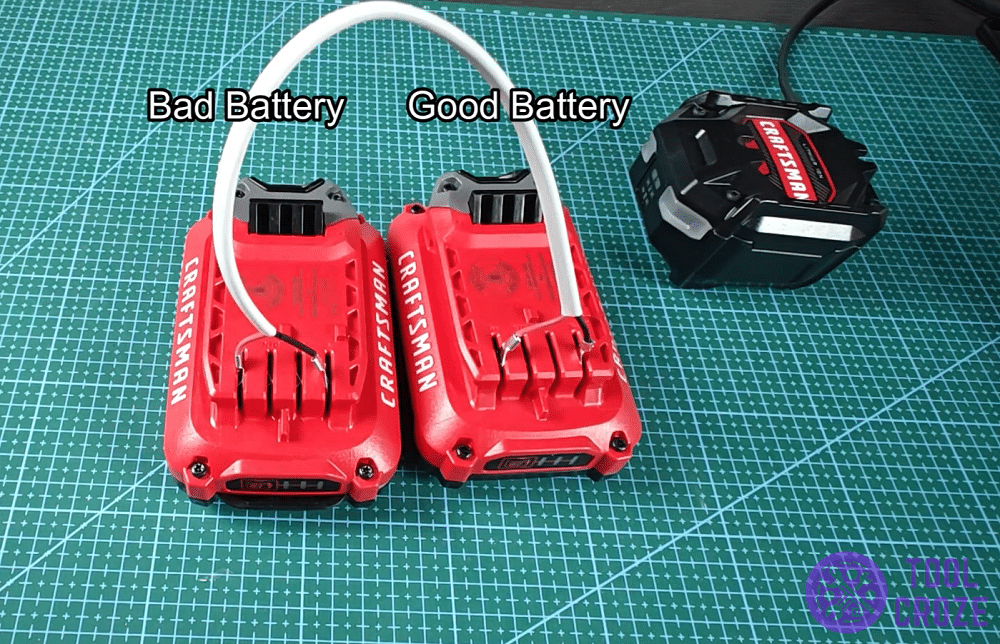
After connecting one wire to both B- terminals and the other wire to both B+ terminals, wait for 15 seconds. That should be enough time for the good battery to revive the bad battery, and fix this!
Try Charging The Bad Battery Now
With that whole process complete, now it’s time for the moment of truth! You need to put the Craftsman battery you just revived on the charger to see what happens this time.
Ideally, the battery should charge just fine now! The charging indicator won’t show up wrongly anymore.
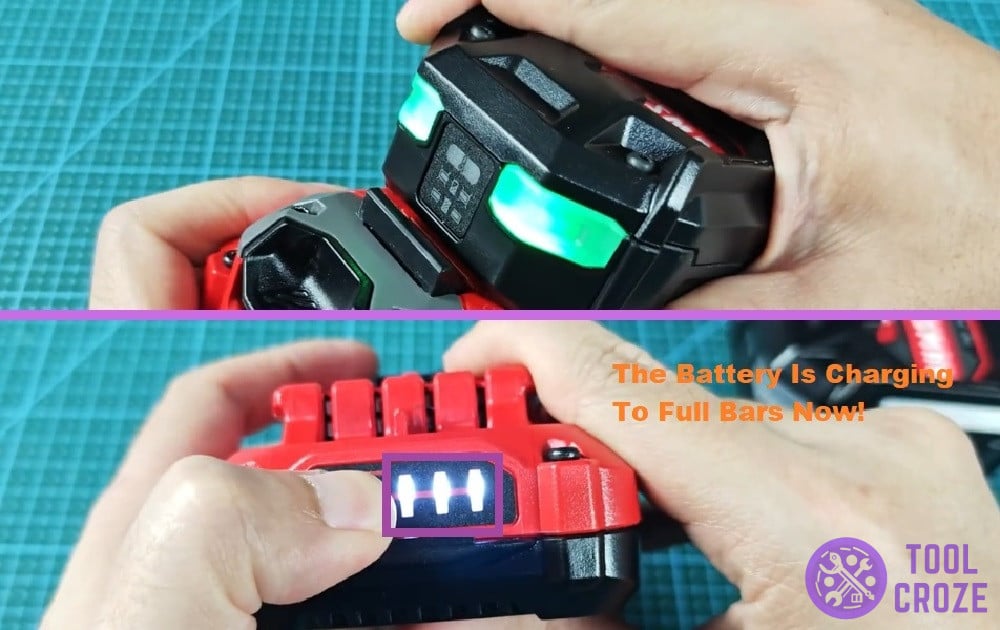
I’ve revived a lot of batteries this way, and you can see in the picture up there how I was able to do it with my dead Craftsman as well! It works like a charm each time if the cells are within a good voltage range.
On the off chance it doesn’t work out for you, it likely means one or two cells inside the battery pack are completely dead. You’ll have to get a new battery after all, because this one won’t work.
