The drill bit on any drill should never be too tight nor too loose. It prevents proper movement and reduces functionality. You’ve probably noticed that already if your Black and Decker drill won’t tighten & release the drill bit.
Overtightening is usually why this happens. But, what can you do to counter it? Well, the main goal is to get the drill bit out first before adjusting it again, so let’s see how you can get your drill to release it.
Read: How You Can Drill a Hole Through Metal With a Hand Drill
I also made a video about how to change the drill bit on your Black and Decker drill. I know 2 ways on how to do it and I’ve shown them both on my video which you can watch below.
For the first method, I remove the battery from the drill. Then, I use my hand to grab the upper part of the chuck ( don’t grab the lower part of the chuck).
After that, rotate the chuck in a counter-clockwise direction. This will loosen the chuck and release the drill bit.
Then, get another drill which you would like to use and rotate its chuck clockwise to tighten it.
For the second method, grab the upper part of the chuck, set the drill to counter-clockwise and press the drill trigger.
As the drill spins, the chuck would be loosen and this will remove the old drill bit. Following the same procedure, set the drill direction to forward and press the trigger slowly to tighten the new drill bit.
Black and Decker Drill Won’t Tighten & Release Bit
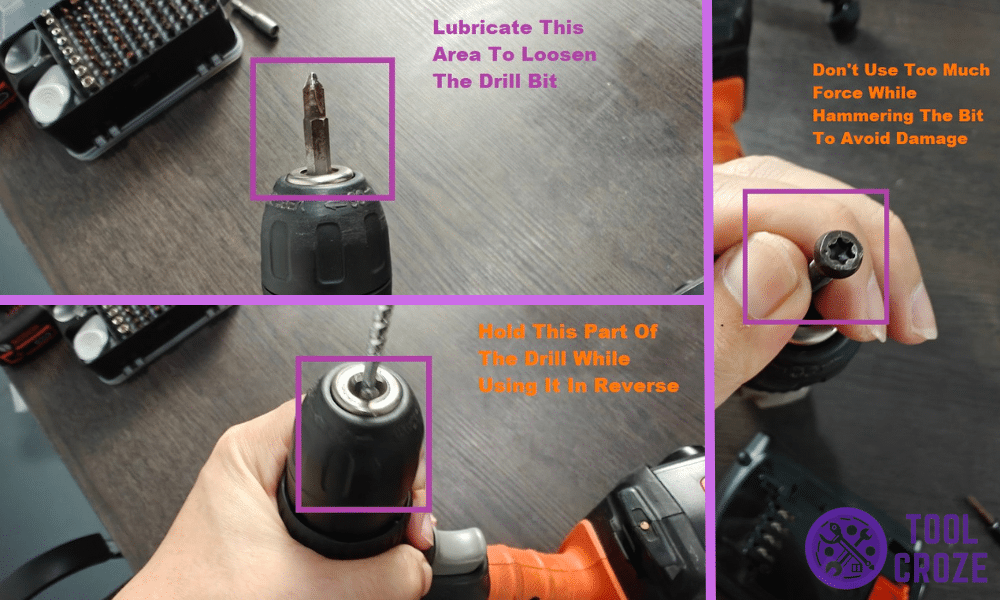
- Lubricate The Drill Bit
Since overtightening or some other kind of burden on the drill bit stops it from tightening or releasing, lubrication is often the answer to this. All you need is some suitable lubricant for your Black and Decker drill.
You’ll need to use a different type of lubricant depending on the material of your drill bit. Cutting oil or kerosene will probably work for most of them, though.
Once you have the lubrication you plan to use, apply some directly around the drill bit. Make sure to not use too much of it and let it seep into the device. Just use enough to coat the bit and its surroundings.
I highlighted the area you need to lubricate above. After you’re done applying it, let the drill bit sit aside for a few minutes before trying to yank the drill bit out.
Because of the lubrication, it should be spinning around more freely. That should make it easy to twist with your hands or a tool (like pliers) and take the bit out of your Black and Decker drill.
Related: Ways to Fix a Black and Decker Drill Not Spinning
- Use Force To Release Jaws
There are jaws on your Black and Decker drill’s chuck. These jaws are what hold the bit in place and give it room to spin around when the drill is in operation.
The light on your Black and Decker drill turns on when it’s in operation. If this light turns on but the drill doesn’t work then there’s a problem.
I have written an article here about how you can solve the problem if your Black and Decker drill’s light is on but it’s not working.
But, when there’s overtightening, the jaws clamp down on the drill bit too hard, or at an angle that makes it hard for the bit to move. So, you need to find a way to loosen their grip.
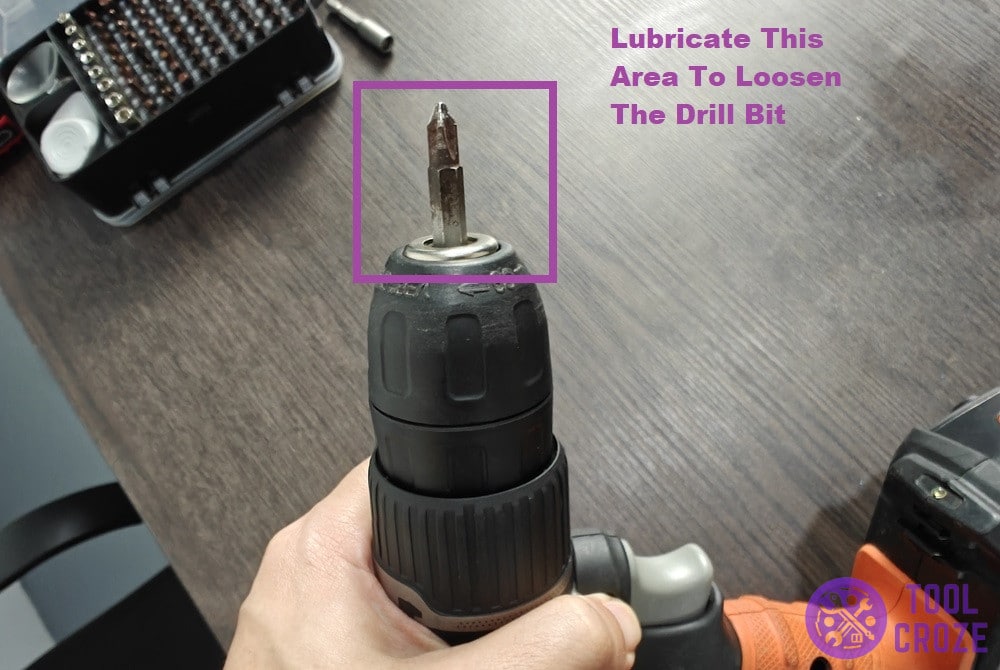
One way you can do this is with a hammer. But don’t just use it to break the jaws apart. That’s not how it works unless you want to ruin your entire Black and Decker drill.
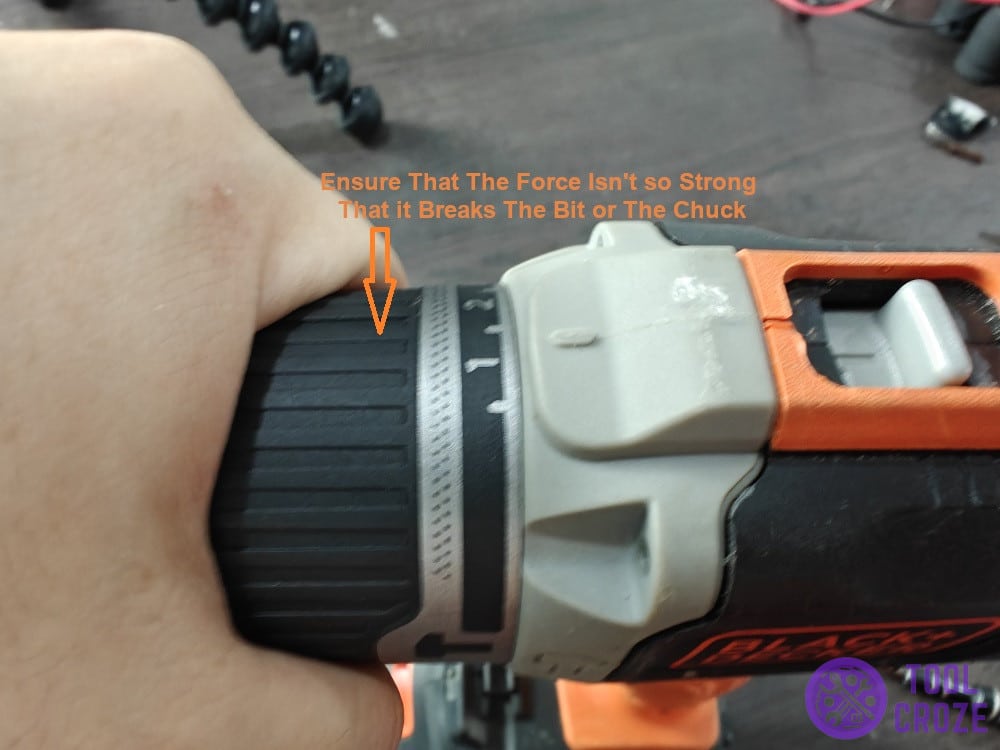
It’s possible to make the jaws release their hold on a drill bit by using force. In this case, I want you to use a hammer to hit the drill bit, but in a very specific way. You don’t want to use too much strength.
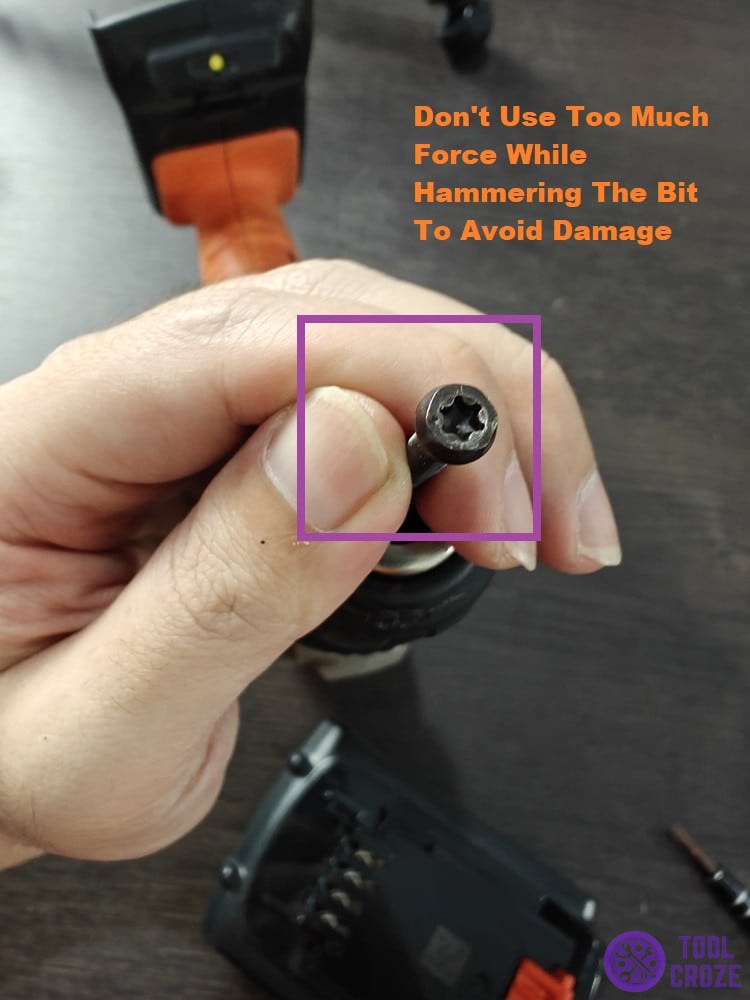
Hold the drill bit with your finger and thumb like I’m doing in the image above. Then, use your other hand to slowly but firmly hammer the drill bit in the direction of loosening it.
Ensure you’re using enough force to slightly push the bit inside. However, also ensure that the force isn’t so strong that it breaks the bit or the chuck. Just firm taps of the hammer in the right direction will do.
Keep hammering towards the chuck, and eventually, you’ll feel the jaws release. That’s when you know the bit is free and you can twist it out of your Black and Decker drill.
On a side note, using lubrication like I mentioned in my first suggestion can make this easier too.
Now in case the chuck is stuck and you need to release it in order to release the drill bit, I have here a video which will guide you on how to do that.
There are 2 methods to do this.
For the first method, you need to use a tape and a plier. Wrap the tape around the chuck.
Then, use the lower part of the plier to hold the chuck and activate the drill in anti-clockwise direction. This helps to release the drill bit.
For the second method, you must use a water hose. Wrap the water hose around the chuck as shown in the video.
Start the drill slowly in anti-clockwise direction. The friction between the water hose and the chuck would be able to help to release the chuck.
- Spin It Out
Another way you can release the bit is by forcing it through the torque produced by your Black and Decker drill. You can do this by setting the spin movement to reverse.

If you hold the chuck while the drill is set to reverse, that will force to drill to keep spinning in place. Since it’s going in reverse, the movement will be counter-clockwise.
Now in case the reserve switch of your Black and Decker drill is not working, I have here a video which shows how to solve this problem. You can watch it below.
The switch could be jammed inside, so you need to remove the cover of the drill and test the reverse switch with your hand. Then, remove any obstacles that may have blocked the reverse switch.
That’s the direction you need to twist the bit to release it anyway, so you can use this little trick to make the job much easier for you. Just make sure you set the torque setting all the way to 10 while doing this.
Once you put the device on reverse and have the torque on maximum, hold the chuck where I’m going to mark below. You can use something like WD-40 to make it easier for the drill bit to spin out.
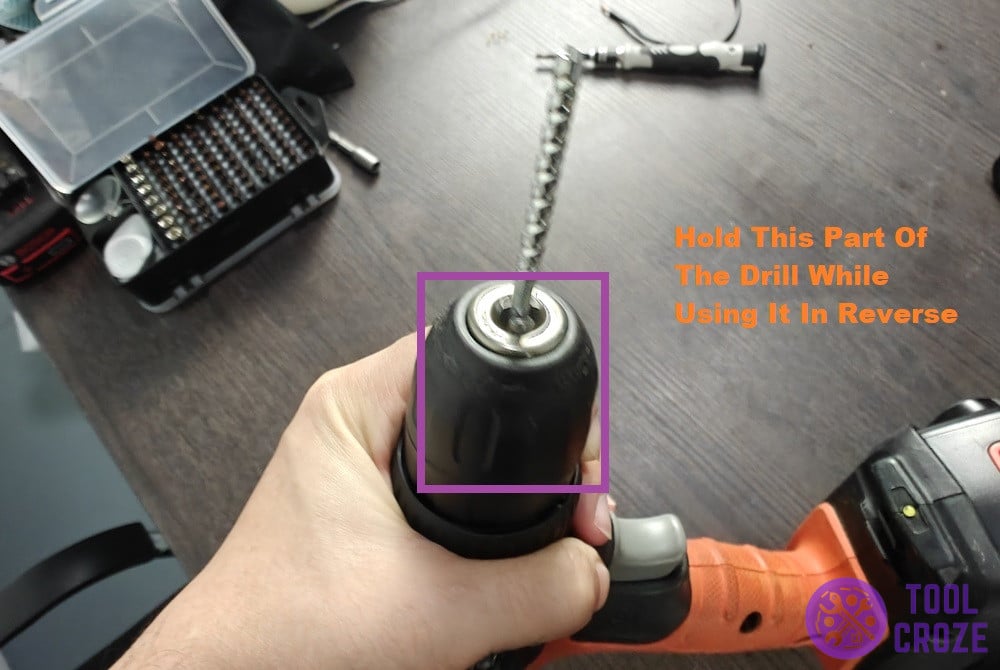
One thing I want you to remember before you try this is that the chuck will spin quite hard when the torque is at 10. It won’t hurt your hands or anything, so don’t worry about that.
But, it might be too hard to control with just your hand. As it’s important to keep the chuck completely still during this solution, you could use a large wrench to hold it tight.
That should give you a solid grip on the chuck, and help you release the drill bit. After that, you can release or tighten the bit on your Black and Decker drill however you want!
