The Waterpik Flosser is definitely an excellent gadget to have on your home, but there might be an instance when it won’t charge. This article discuss some of the things you can do to fix this issue.
I also made a short video about this topic which I uploaded on my YouTube channel but you can also watch it down below.
On the video, I demonstrated how I solved this issue by opening my Waterpik Flosser to inspect its battery and charging unit in order to know what’s causing this problem.
How to Fix Waterpik Flosser Not Charging
It was not a very difficult task to come with the thought that the problem was isolated to the battery or the charging unit itself.
While there was no charging indicator like the usual LED light that lights up when the flosser is plugged into charging, my very first thought was to change the USB-C cable or the charging adapter itself.
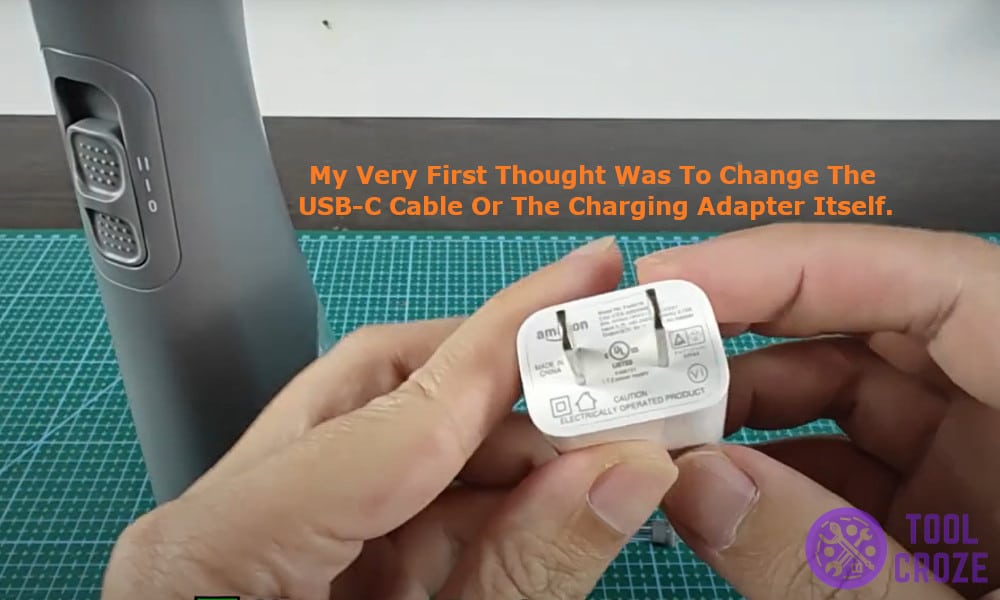
Make sure to use the right adapter as the flosser requires a charger with 5V and 1A of output. If replacing the charger fixed the issue then congratulations you don’t have to do anything more, but if you are unlucky like me here is what I did.
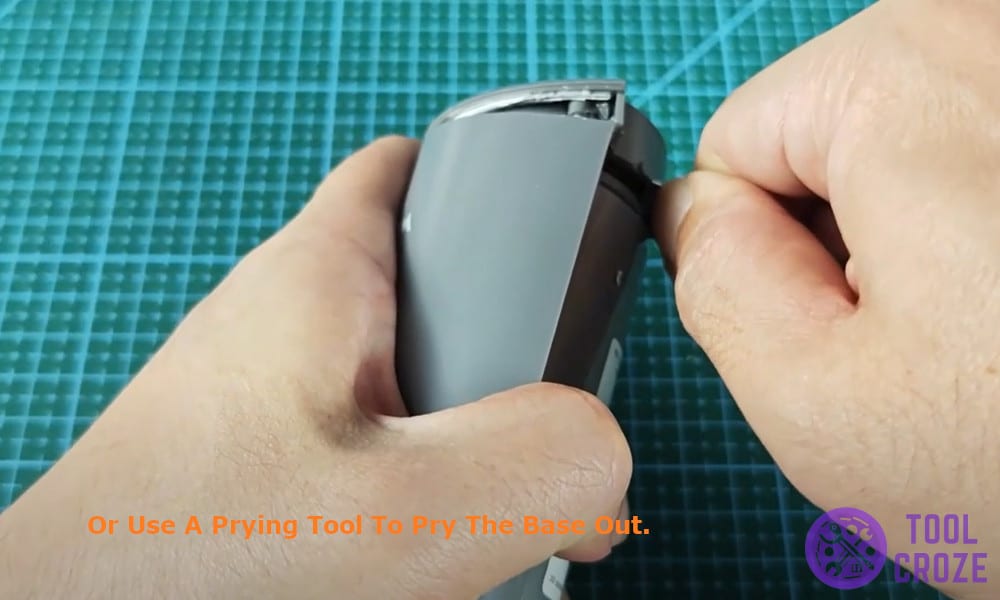
If there was no light indicator even after replacing the charger it meant that my battery or the charging unit was the problem so I quickly opened the base of the flosser to access its internals but I must warn you it was not easy.

First I wrapped a cloth around the base and tried knocking the base out, make sure to hit it generously and not to hard you don’t want to break any components.
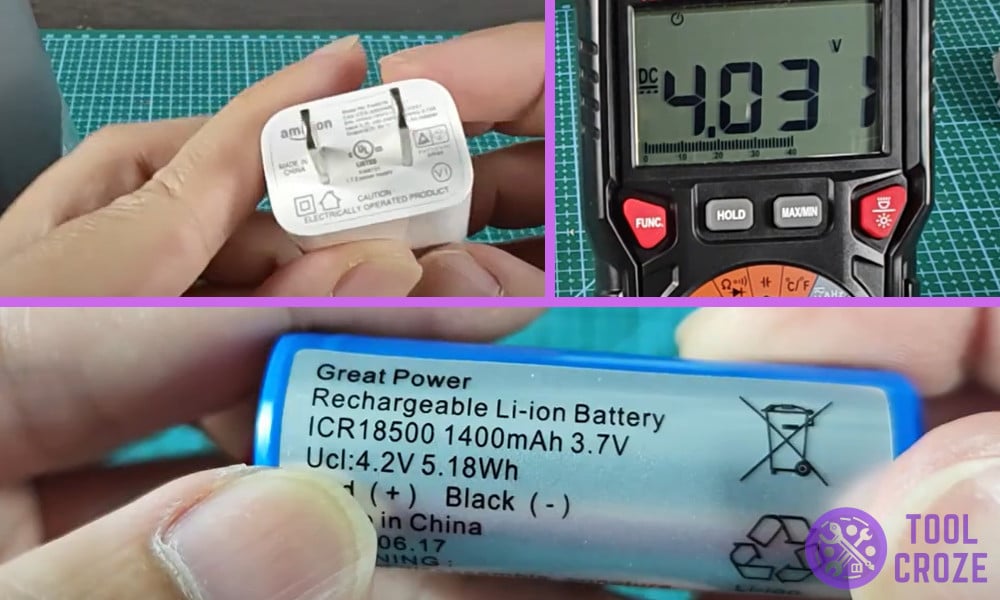
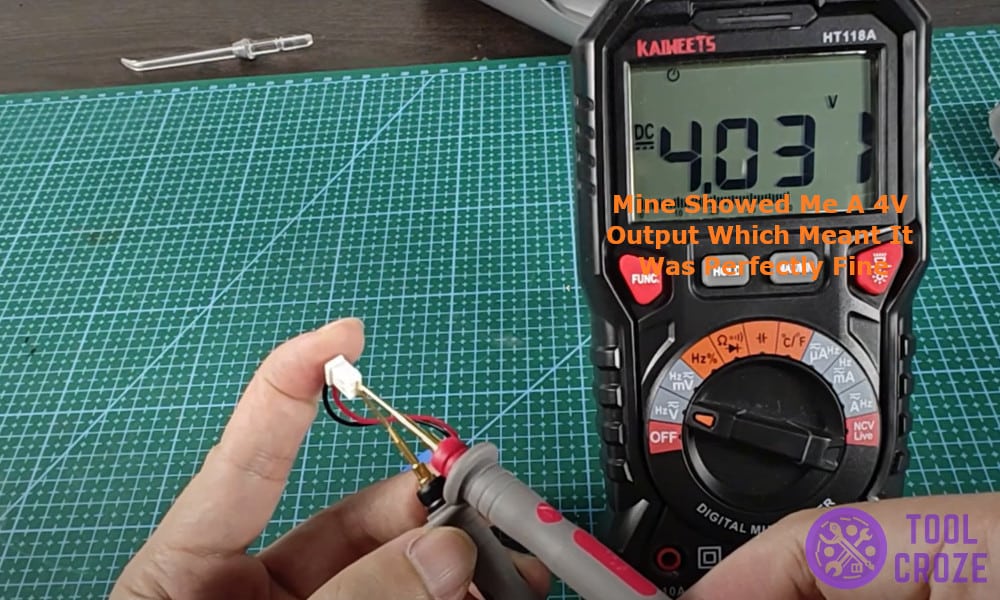
If this doesn’t work, use a prying tool to pry the base out. Once I had access to the battery and charging board I quickly disconnected the battery to test its voltage using a multimeter.
The battery should measure around 3.7V, mine showed me a 4V output which meant it was perfectly fine and there were no issues with the battery but if you measure a voltage that is way below the 3.7V mark then it means that the battery is dead and replacing it can fix the issue for you.
Related: What I Did When My Waterpik Flosser Not Pumping Water: 3 Tips
With the battery not being the problem for me I tested if the charging process was fine, for this I plugged in the charger and turned it on and then again using the multimeter I tested the voltage that the charging unit was outputting towards the battery.
You can test it by attaching measuring the voltage from the connecting points for the battery.
Related: Waterpik Water Flosser Not Turning On Not Working: 3 Solutions I Recommend
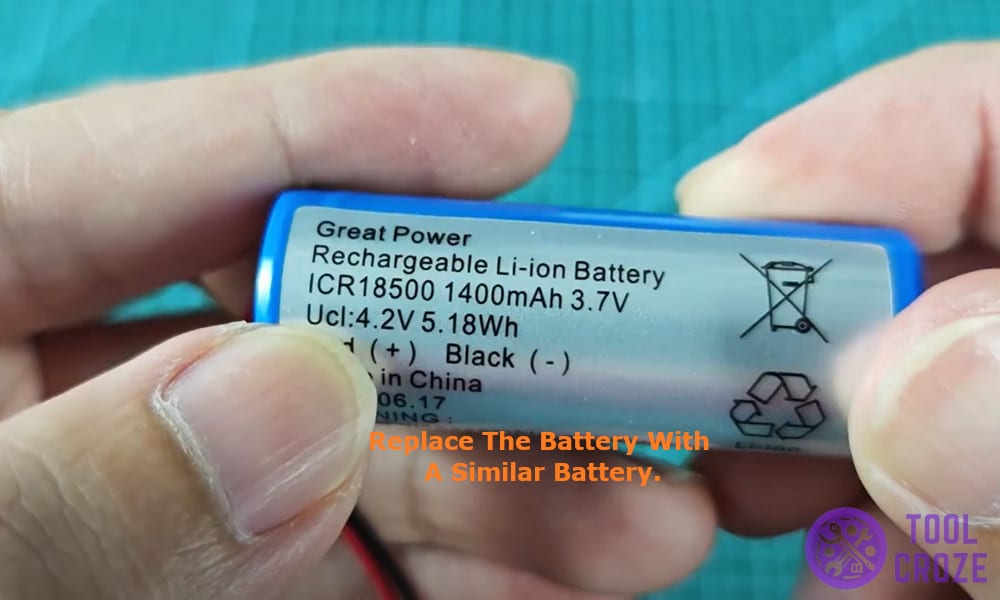
You should see a voltage of 4.2V which means that the battery is being charged properly but if everything is normal and the battery is still not being charged, replace the battery with a similar battery that you can easily find in the hardware stores or online store and insert the battery back into the bottom.
Test the flosser after closing the bottom cover, your flosser should now work like a new one now.
