Lots of wireless vacuum users regularly complain about the battery. Just take a look online and you’ll see a bunch of people talking about their battery giving them trouble.
A Tineco vacuum mop isn’t an exception, and that’s why I’m here to talk about it. If your Tineco vacuum mop is not charging, check the potential reasons below to help fix yours.
I also made a short video about the three different ways you can fix a Tineco vacuum mop that isn’t charging. You can watch it below.
First, you can try to place the Tineco vacuum mop again on its charging base properly. Second, you can use alcohol pads to clean the charging contact points. Lastly, you can replace its battery.
3 Troubleshooting Tips For A Tineco Vacuum Mop That’s Not Charging
- Place The Vacuum Upright
The position of the charging base may be why your Tineco vacuum mop isn’t charging. It has to do with how the device sits on the base. It won’t charge if it’s not straight.
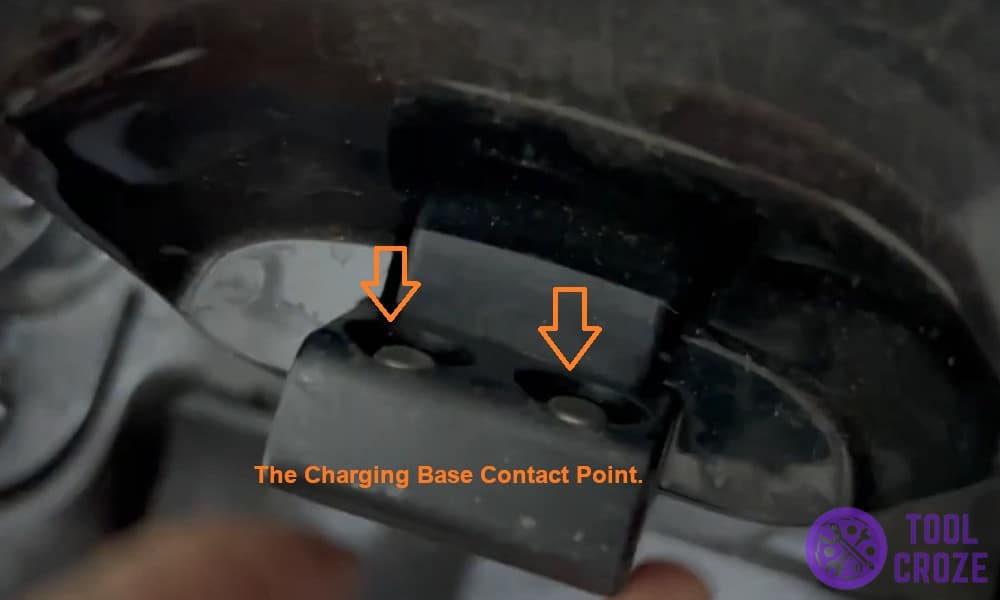
That’s because the contact points on these charging bases aren’t at the bottom. They’re actually near the top of the stand so that they line up with the vacuum’s display.
Because of that, if your Tineco vacuum mop isn’t standing completely straight on the base, it won’t charge. It’s important to position it properly due to that.
Place the charging stand on an even surface, and preferably have it next to a wall or something. That way, the vacuum mop won’t recline away from the contact points.
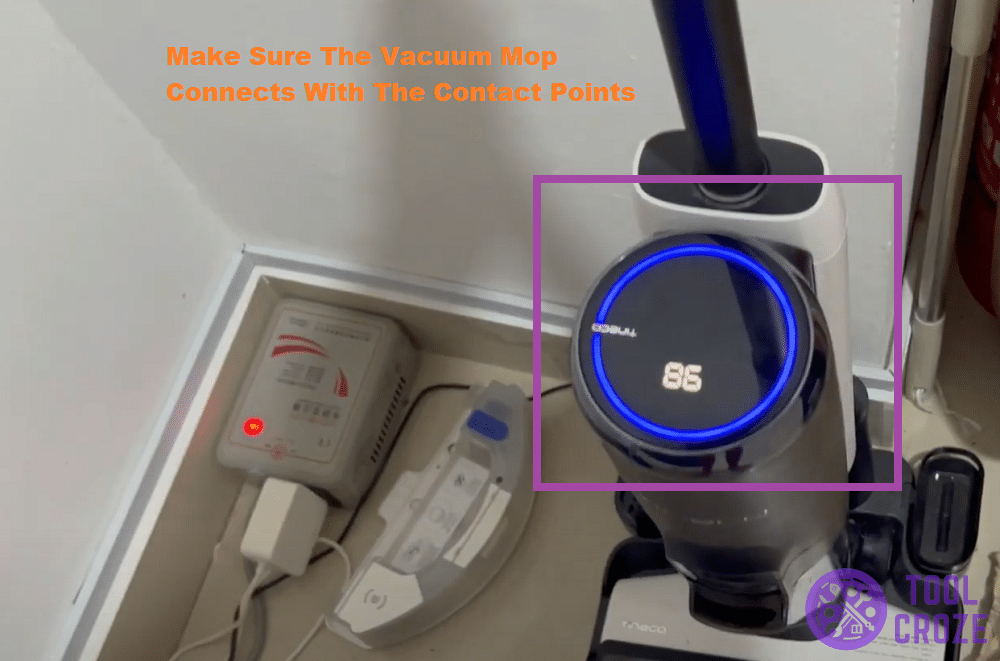
When placing the vacuum mop on its stand, try to push it until it hits the contact points. Push it back until the display is pretty much touching the base, like in this image:
Use your hand or foot to push down on the brush roller of the vacuum. Make it go down towards the bottom of the charging base so that the top half of the vacuum sits straight.
I have trouble getting my Tineco vacuum mop to sit straight on the charger sometimes too, and pushing the brush roller down seems to work every time.
Eventually, the display will light up to let users know their vacuum mop is charging. That’s when you know it’s safe to release it since it should stay on charge after that.
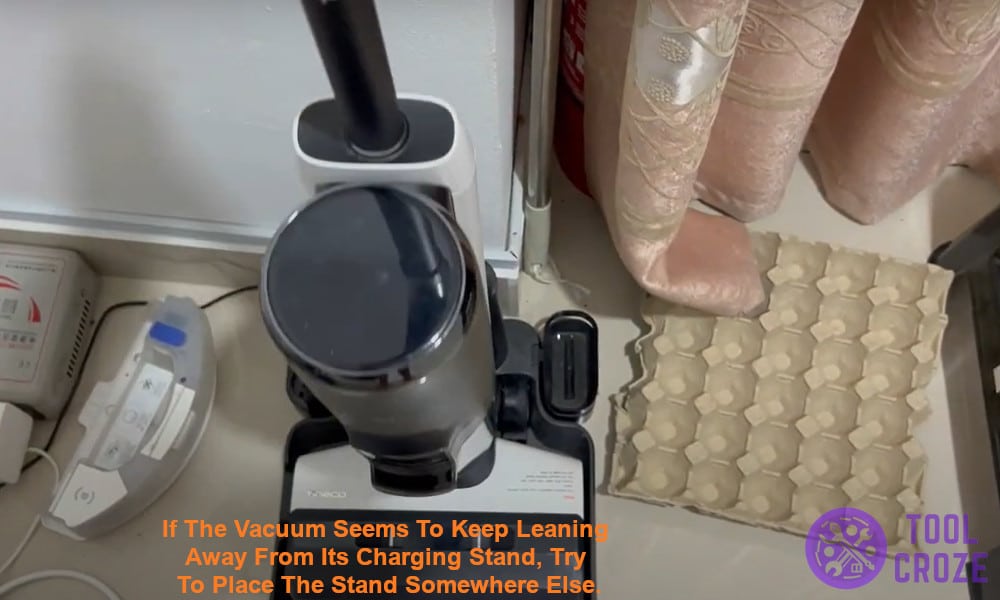
If the vacuum seems to keep leaning away from its charging stand, try to place the stand somewhere else. It’s probably sitting at an awkward angle which is causing that.
- Clean The Contact Points
No amount of adjustment will help the vacuum mop connect to the charging points if those points are dirty. That’s what we’ll look at next if the last fix didn’t work.
Debris from the environment can cover contact points. Even though it’s just some dirt, that’s still enough to get in the way of the vacuum and its charger.
In other words, the charging base won’t recognize the vacuum on it until its contact points are clean again. Let’s get them clean so the vacuum mop can charge again!
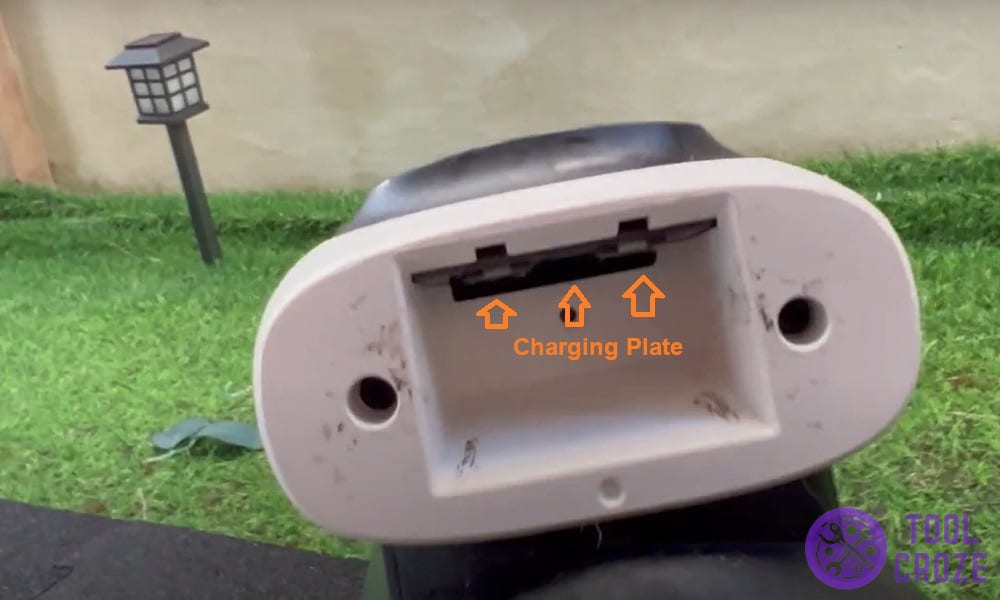
Use something like an alcohol pad for this, like I’m doing in the image below. With the pad, thoroughly wipe away the charging plate and the surrounding area.

Use a pad to clean the contact points on the vacuum itself when you’re done cleaning the ones on the base. Those can get dirty too, and it’s equally as important to keep them clean.
Put the vacuum on charge after cleaning to see if that did the trick. If not, you’re likely looking at issues with the Tineco vacuum mop’s battery.
- Replace The Tineco Vacuum’s Battery
A dead battery will stop any vacuum from charging. If the other two fixes didn’t work, and you’re sure there’s no issue with the charging base, the battery is likely faulty.
It’s no longer accepting charge, and users will have to replace it to get their Tineco vacuum mop working again. That isn’t exactly easy, though.
I already have a guide on how to replace a Tineco vacuum mop battery on the website. Plus, there’s a video on the official Tool Croze YouTube channel too!
You can watch the video below. It’s a step-by-step about how you can replace the battery on the Tineco vacuum mop/floor washer.
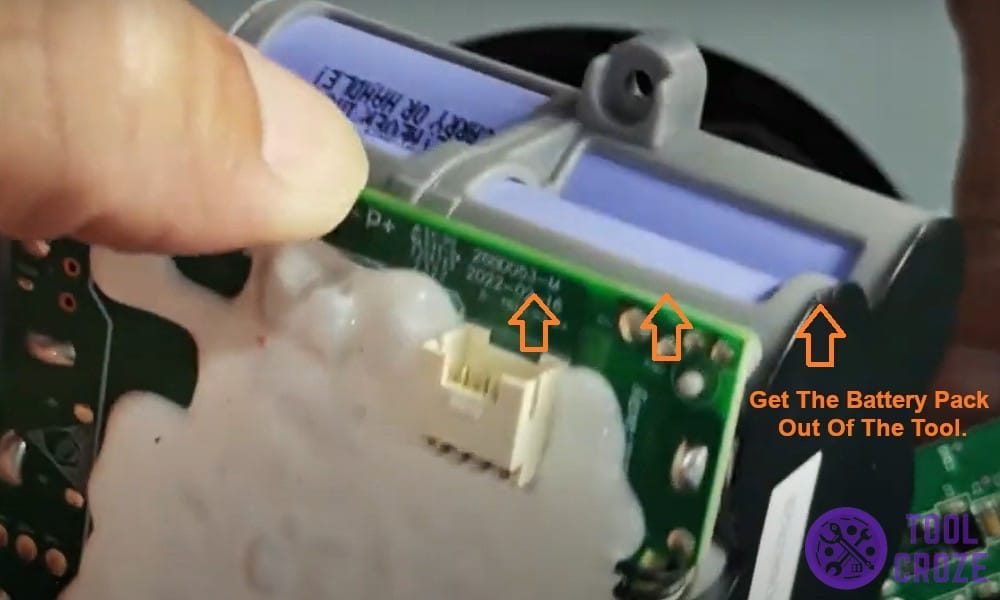
That’s why I’ll keep the info general here, and you can check either of those out for specifics when necessary. For now, the first step is to get the battery pack out of the tool.
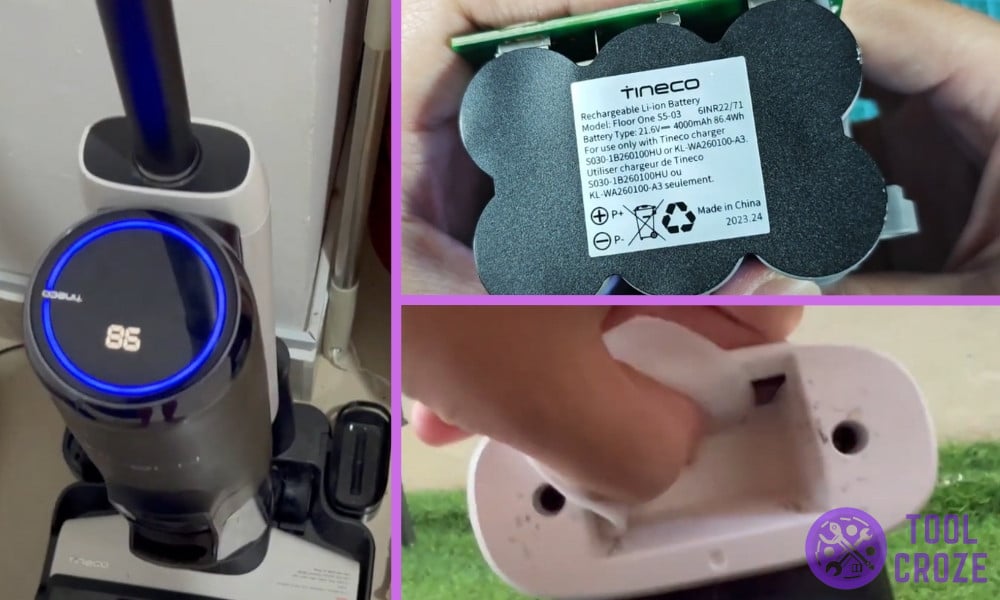
After taking the battery pack out, you can see that it’s a 21.6V pack of six batteries. Take a look at the image below which features the battery pack itself, and more info on it.
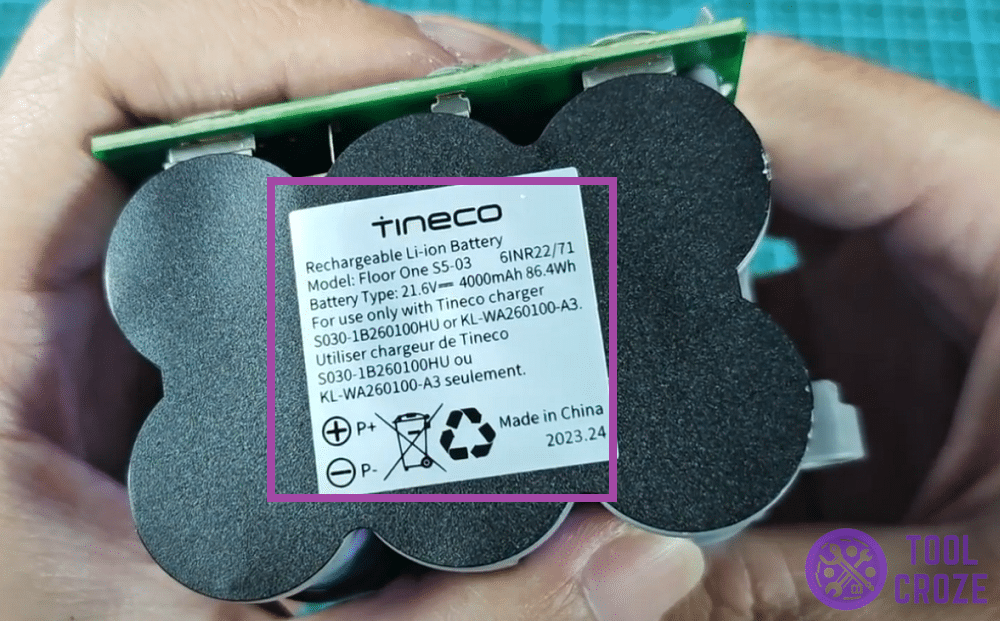
To replace the battery, users will have to replace the individual cells inside the pack. That will require six individual batteries identical to the ones inside your Tineco vacuum.
Replacement batteries should be easy to find on Amazon, or through other online sellers in your area. The hard part is inserting the batteries into the pack once you have them.
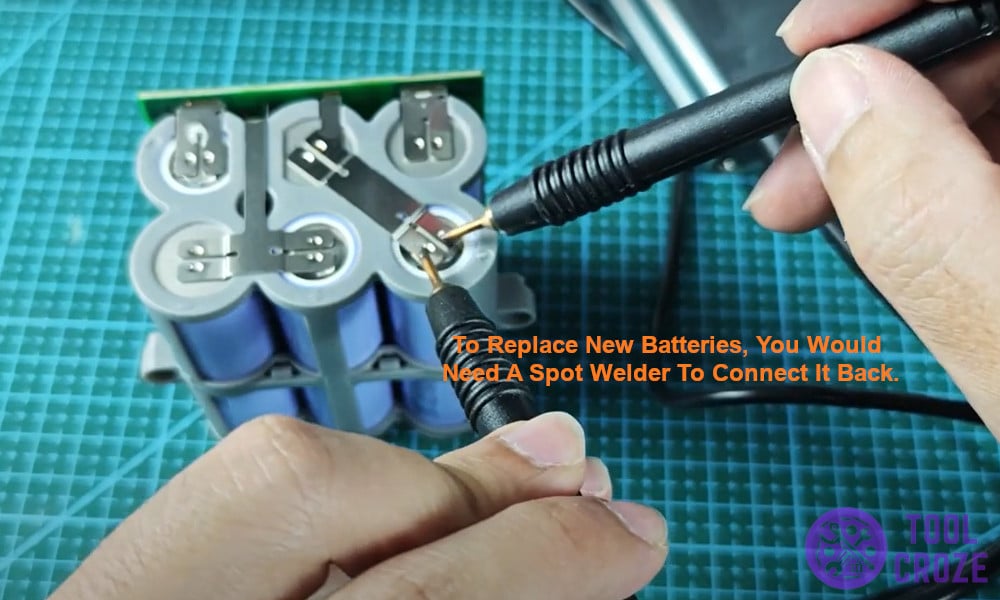
Adding these new batteries into the pack will require a spot welder. I recommend asking someone else for help with this if you don’t have much experience with spot welding.
But, once you have new cells inside the pack, insert it back into the Tineco vacuum mop, and the whole thing will start working without any further trouble!
