Tineco vacuum mop batteries can be quite hard to swap by yourself. They are not meant to be user-replaceable so it can be tough, if you don’t know what you are actually doing.
But it is possible, if you have right tools and knowledge. To learn how to replace a Tineco vacuum mop battery by yourself, try my detailed guide which is below:
Replace Tineco Vacuum Mop Battery
I will list my guide into steps, so that it is easier to understand even for users without too much experience. You will need some things firs to follow these steps.
To remove the battery bracket of the tineco vacuum mop, I would need 2 pliers, as I need both of them to grab pull the battery bracket out at the same time.
That also mean you must have spot welding tools in order to replace the Tineco vacuum mop battery. Once you have these things then use the following steps to remove it:
Removing Tineco Vacuum Mop Battery
Step 1: To start process, first it is important to remove the cover and to rotate display of the Tineco vacuum mop to do that.
As you can see from the image above, I rotated the display cover clockwise and it could be removed easily.
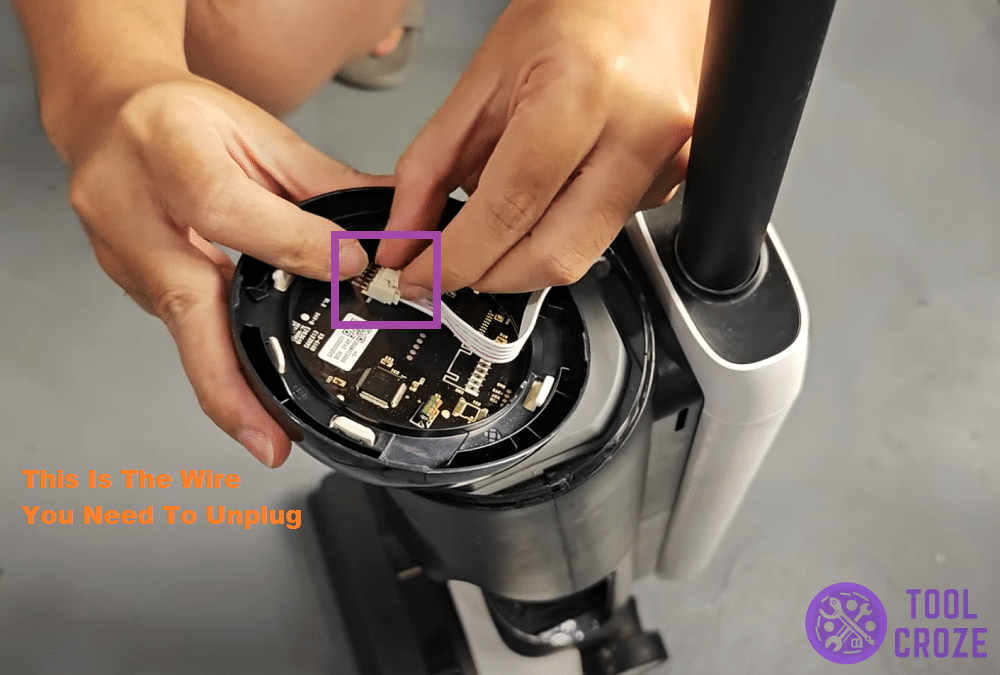
Step 2: There are many wires that connect to the display and the main circuit board. Gently use your finger to pull the wire out, so that you can have a clear view of the wire connection.
Step 3: You would see another layer of grey cover that protects the main circuit board. This layer of grey cover would need to be removed too.
Step 4: After the gray color cover is being removed, you now have access to the main circuit board and should be able to remove the 2 screws that holding the main PCB tight.
After removing the screws, I used my fingers to grab and lift the main PCB board up.

Step 5: You would find out that there is another layer of circuit board underneath. There are many screws holding this PCB too, remove all of them.
Step 6: After removing this PCB, you should be able to see the battery bracket now. There are 2 hidden screws that need to removed to loosen the battery bracket.
Step 7: Use both hands and fingers to remove all the wire connection between the battery bracket and the PCB.
Step 8: Now use 2 pliers to grab both sides of the battery bracket. Pull the battery bracket out at the same time, and you should be able to take out the entire battery bracket.
Replacing Tineco Vacuum Mop Battery
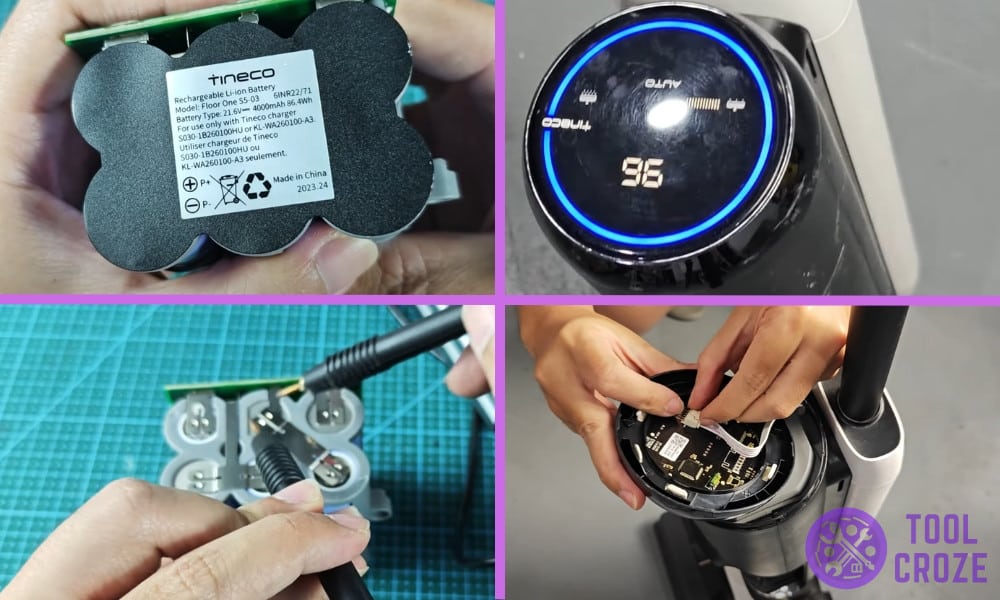
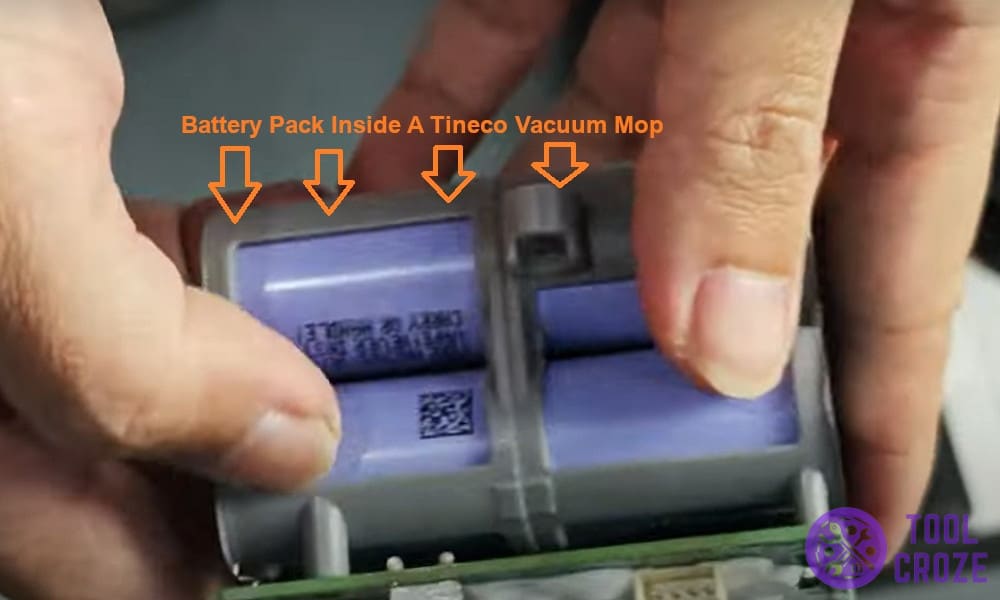
My model of tineco vacuum mop are comprised of 6 pieces of 21700 batteries, each piece of 21700 battery should output around 3.7V.
Use a multimeter to measure each of the cell to identify the bad battery cell. If certain battery cell has voltage far below the 3.7V, that’s mean that particular battery cell is faulty.

Sometimes a faulty individual battery cell could cause the entire battery pack not able to operate optimally.
If more than 3 battery cells are not in good condition anymore, I would suggest you to just replace all the battery cells in the battery pack as these battery cells might be too old and not able to perform as usual anymore.
The battery cells are connected using spot welding technique, and you would need a spot welder to join these battery cells together.
Make sure you choose good quality rechargeable 21700 batteries for the replacement of your tineco vacuum mop.

I am unable to on screw the screen any advice