I recently had a Ryobi batter seemingly give up on me. It was not charging anymore, and I figured it was dead. Odd thing about this was; it wasn’t an old battery.
Long story short, I was able to get it back running again after a bit of tinkering. So, instead of throwing that Ryobi batter away if it’s not charging, give these tips a try and you might get it to work again!
Before you go on and read this article, you can also watch the short video I have made which shows how you can solve this problem.
I fixed this issue by resetting the Ryobi battery. I used another healthy Ryobi battery and connected it to my Ryobi battery which isn’t good anymore.
I connected the positive terminal and negative terminals of the two batteries. I let them stay connected for around 15 seconds and then I disconnect them.
After this, I tried to charge the bad battery again and it’s now charging normally.
4 Methods To Deal With A Ryobi Battery That’s Not Charging
- Get It Exchanged
Now, I know I said earlier that even though my battery wasn’t that old, I still did some tinkering with it. That was more out of curiosity than anything else, and I don’t recommend that others do the same.
Depending on just how old your Ryobi battery is, I advise claiming the warranty much more. If you bought it new, there’ll be a warranty for up to 3 years, depending on the model you got.
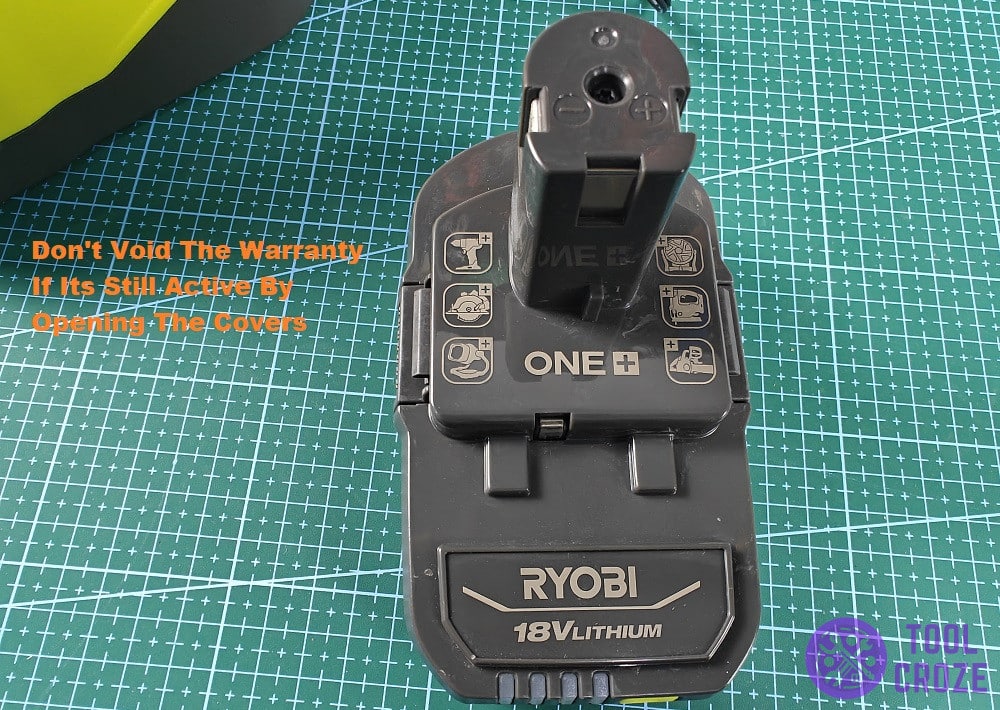
In case it hasn’t been that long yet, don’t bother with troubleshooting. Opening the covers will void the warranty and you won’t be able to cash in on it anymore.
The whole point of troubleshooting is to get the battery running again. But, why bother with that when you can cash in on the warranty and have a new battery that’s working, and will last longer?
Plus, there’s the off chance that troubleshooting doesn’t lead to anything productive. If you do all that just for the Ryobi battery to still not work, the warranty will go down the drain, and so will your money.
So, instead of taking risks that don’t need taking, go ahead and claim the warranty. Either Ryobi will repair your current battery for you, or send a new, fully functional one, free of risk and free of charge.
- What’s The Voltage On The Cells?

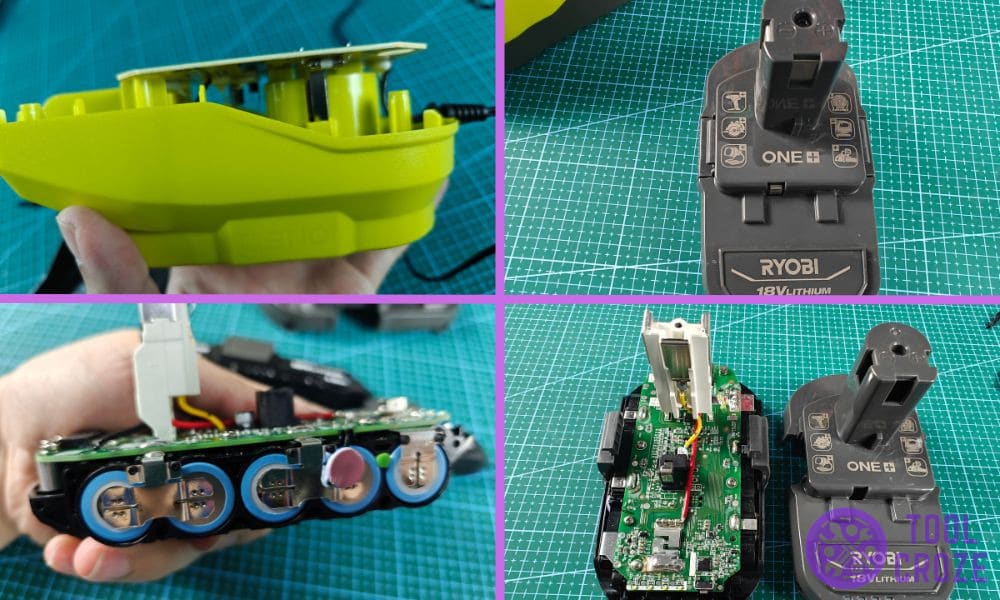
In case you don’t have any warranty active on the battery, it’s safe to open up the covers without worry. That’s exactly what I want you to do now, because the next step is to check the voltage on the cells.
Depending on their reading, the cells are what will determine what to do with the battery. So, get the casing off of your Ryobi battery and carefully extract the cell pack from inside.
Without exposing the cells, you won’t be able to take a reading on them. You’ll also need a good multimeter to get an accurate reading. Then, it’s as simple as checking each cell one at a time.
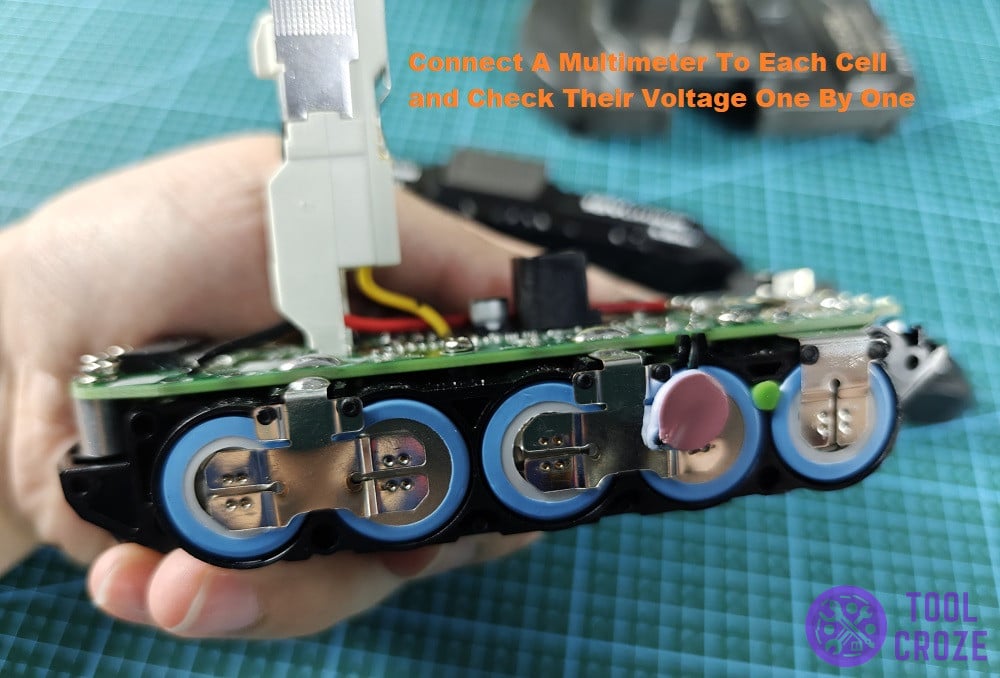
Now, the main thing you’re looking at here is how close the readings are to each other. Ideally, they should be around 19.5v for each battery, and not significantly lower than that.
If each cell reads normally, you know that the battery is still functional and you can try to repair it. But, on the off chance that the voltage on more than one cell is well under 19.5v, that’s a different story.
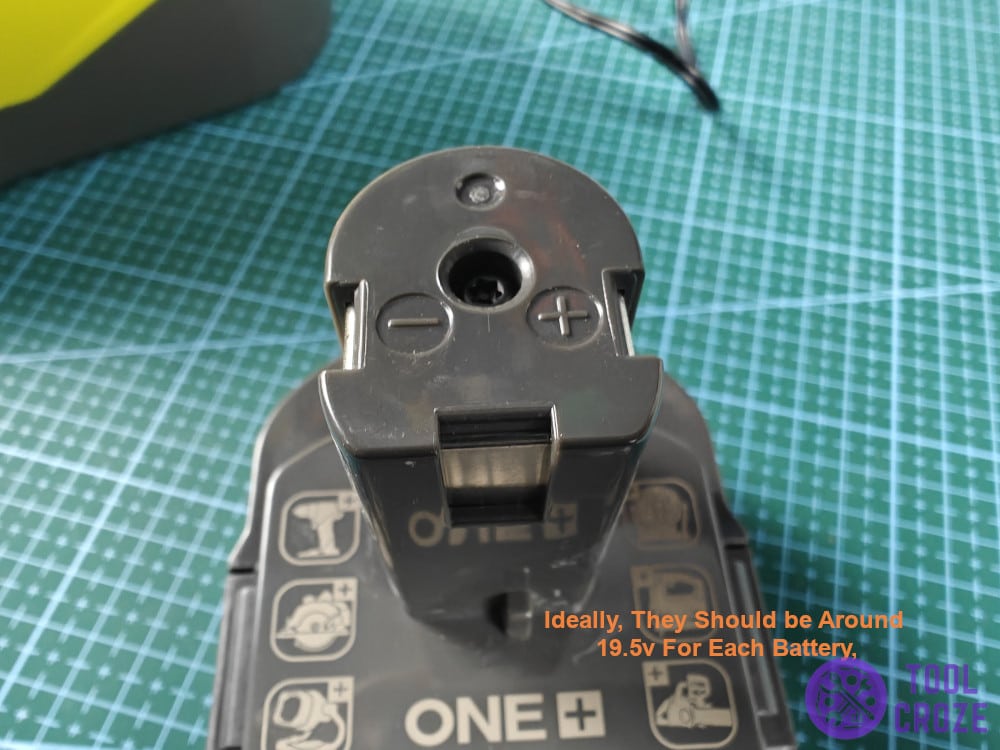
At that point, what you have is a dead battery pack. It’s not capable of powering the battery and any tools connected to it any longer. There’s no point troubleshooting cells at that low voltage because they’re dead.
You shouldn’t try to revive them either, because that’s dangerous when the voltages are so out of whack. Getting a new battery is the only option, because replacing the dead cells isn’t an option.
- Bypass The Battery Control Module
For those that have all their cells within normal voltage range, the next thing to do is to bypass the battery control module. In other words, I’m going to tell you how to get around the battery to force it to charge.
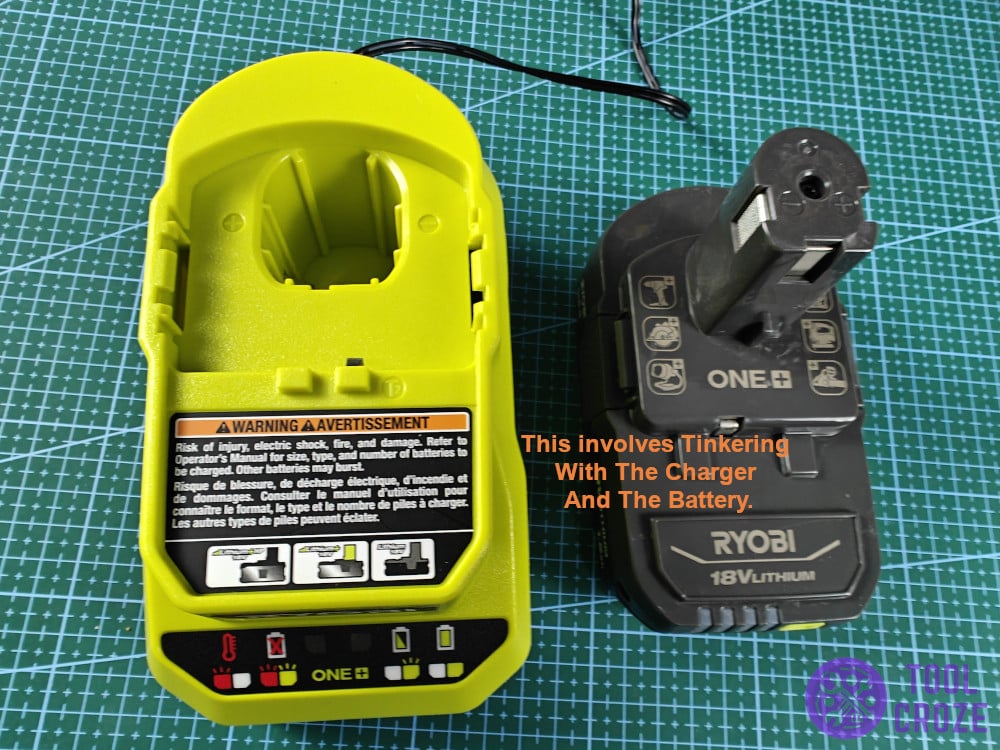
This involves tinkering with the charger and the battery. You’ll need three wires with exposed ends that can connect to the Ryobi charger and battery. Get safety goggles and gloves to avoid injury.
You know the point in the Ryobi charger where you insert the battery? Well, if you flash a light in there, you’ll see three prongs. Connect one end of each of the three wires to those prongs.
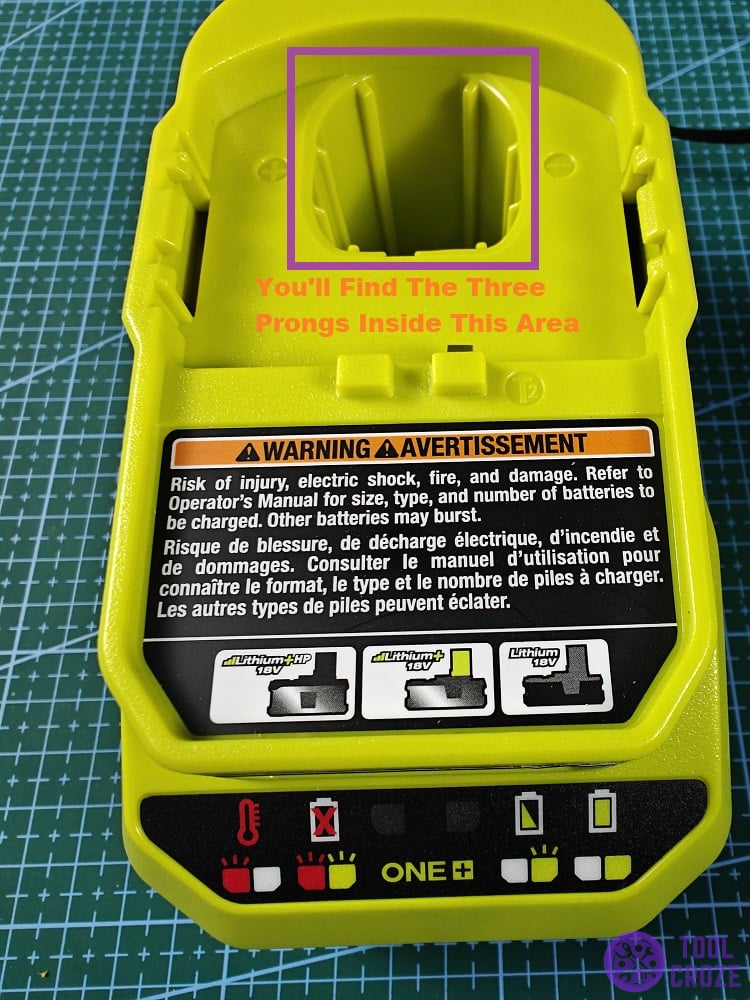
Each of those three prongs is a different terminal. The one on the left is a negative terminal, the one on the center is unlabeled, and the one on the right is the positive terminal.
After you connect a wire to all those terminals, expose the BMS. Depending on the exact Ryobi battery, this board will look very different. To avoid any confusion, I won’t name terminals due to that.
Instead, use the manual to find the positive terminal on the BMS, as well as the negative one. After locating both those points, turn the charger on, and hold the wires down on the points they go with.
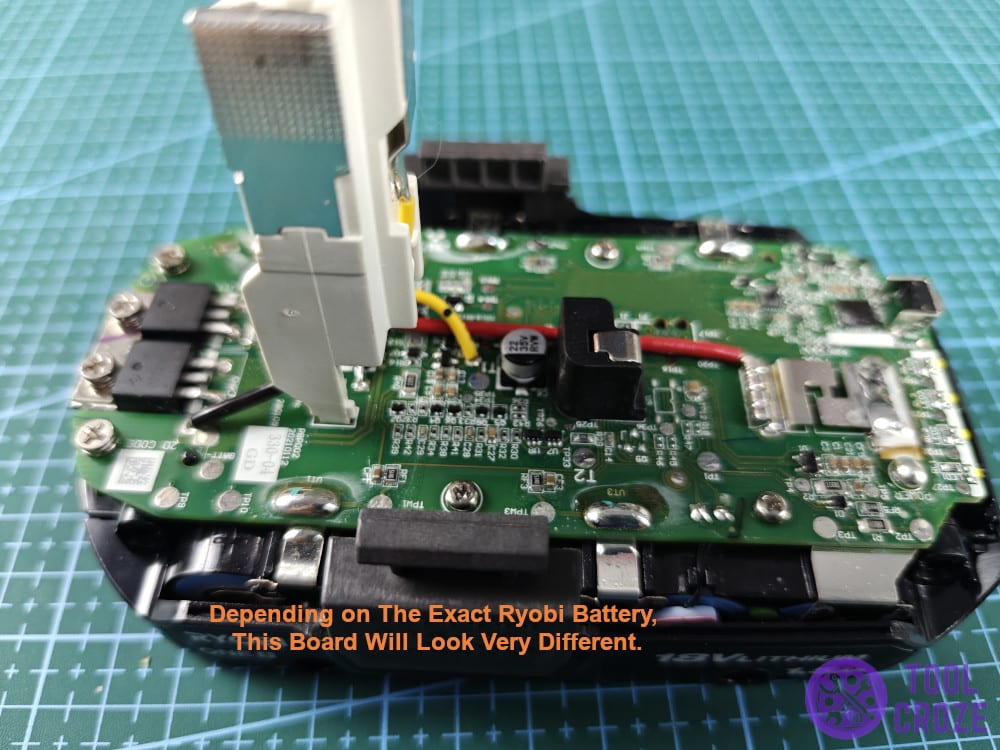
Put the positive wire on the positive terminal, and the negative one on the negative terminal. The third, unlabelled wire will also go on the negative terminal at the same time.
After just a few moments, the flowing charge will bypass the control module and revive the battery! You should see lights flashing on the charger, and be able to use the Ryobi battery as normal.
Related: How I Fixed My Ryobi Battery Charger Not Working No Lights
You know it’s also very important to know the different meanings of the indicator lights on a Ryobi charger. I have made a short video about this which you can watch down below.
First of all, I would like to mention that there are different types of Ryobi charger and each model has a different light code. This guide is applicable to the same model of the Ryobi charger that I have.
Here are what those lights mean: a blinking green means the battery is charging, a solid green means the battery is already fully charged, a Blinking red means a hot/cold delay, and a flashing red and green means a bad battery.
- Get A New BMS
The control module I just spent so long talking about in the last solution may be what’s stopping your Ryobi battery from charging. If the last tip didn’t help, that means the BMS board is dead.
It won’t let the battery charge as a result of that. If the cells are giving a normal voltage but you can’t jumpstart the battery regardless, you’ll need to get a different control module on the battery.

Swapping this board can be hard because even the slightest mistake will stop the new BMS from working with your battery. At this point, it’s often better to just get a whole new battery.
But, if you choose to go with replacing the BMS, get one that has the same specifications as the original board. If you use a board too weak, it’ll fry because of the high discharge, and be useless.
