No lights on a Ryobi battery charger isn’t good, since it can mean it’s not working. Even if it does work, it’s still not a good thing, since you need the lights to know about problems during charging.
Surprisingly, while looking online, I saw a bunch of other people have had it happen to them too. I made this list of things that helped me and others with it though, so maybe they might lend you a hand with this issue!
Ryobi Battery Charger Not Working and Showing No Lights – 4 Fixes
- Restricted Connection Points
A charger is never gonna work if the contact points on it have something wrong with them. While it may sound like I’m talking about something serious like damages, it can even just be dirt.
Something as little as dirt building up on the dock of your Ryobi charging can stop it from working. That’s because the dirt gets between the battery and its charger, leading to no transfer of power.
Because of this, the charger doesn’t work and doesn’t supply any power to the battery. When there’s no connection, there’s not going to be any lights on the Ryobi charger either. That would explain this issue.
It’s one of the most common charger issues out there, if you look at some of the other posts I’ve shared in the past. On the bright side, it’s also one of the easiest to deal with, since all it requires is cleaning.
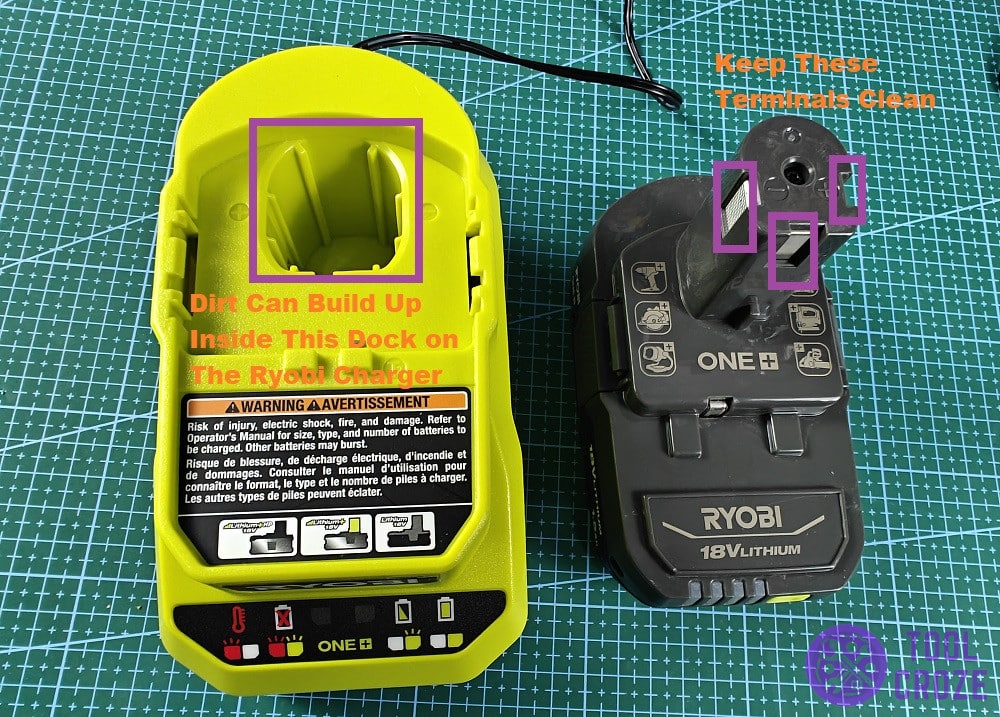
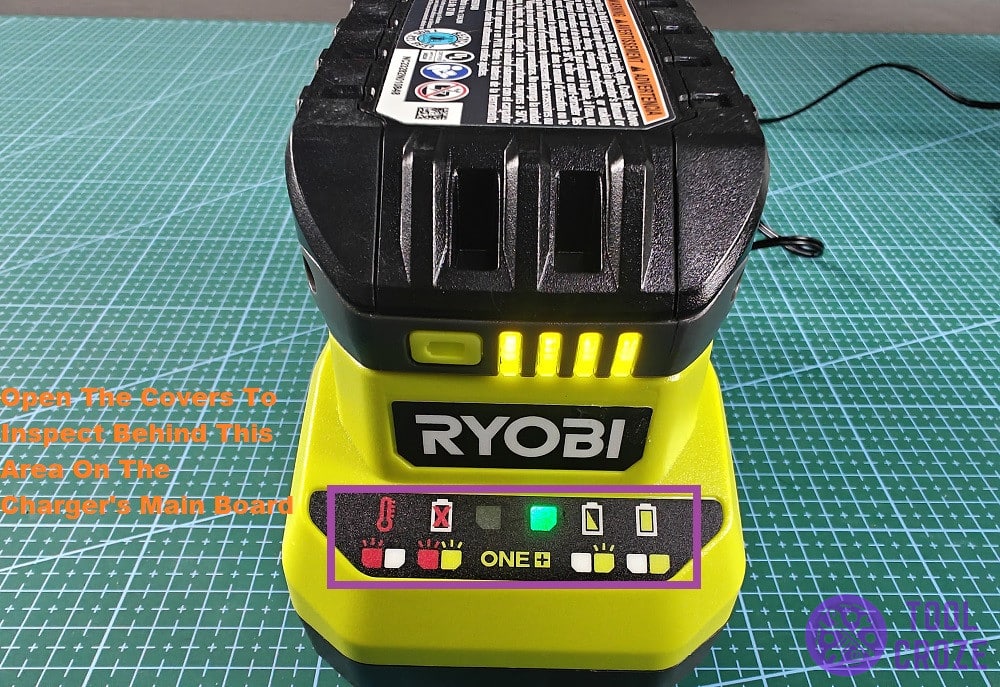
The two points that need cleaning are in the image above. Regularly wipe any dust off of them, and don’t let debris build up to the point where it could cause problems with the charger.
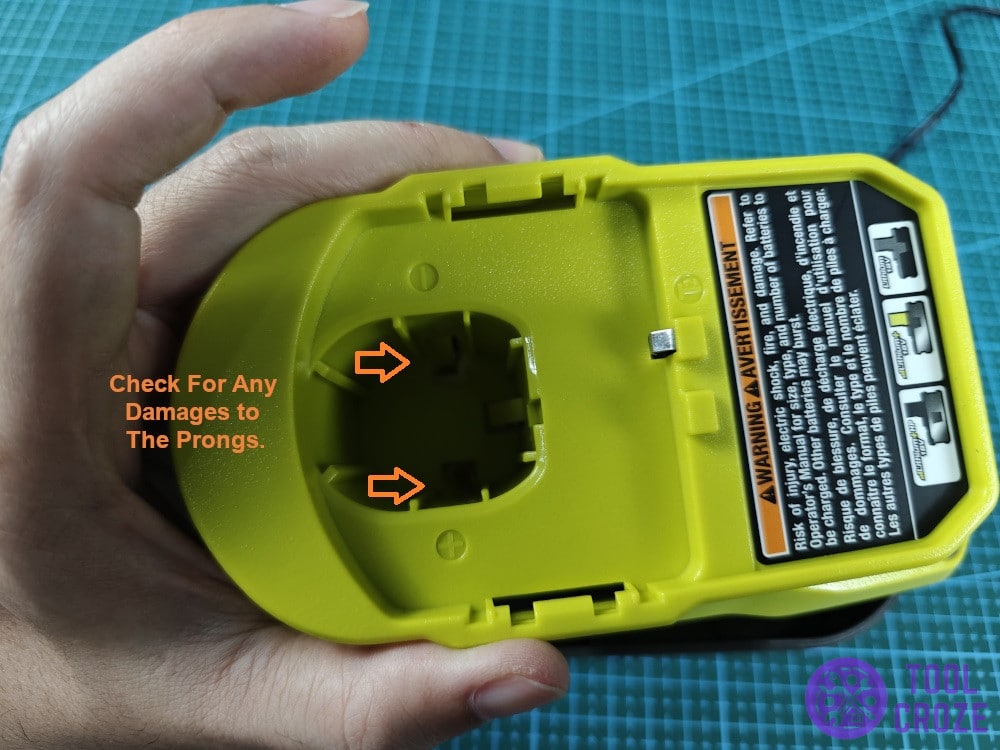
If this is your first time inspecting the charging dock, check for any damages to the prongs. They can get loose or develop other issues because of rough use.
On the off chance something seems out of order with them, you’ll need to repair them. Set them back in place, or get replacements if the current ones are broken and can’t be used anymore.
- No Power To The LEDs
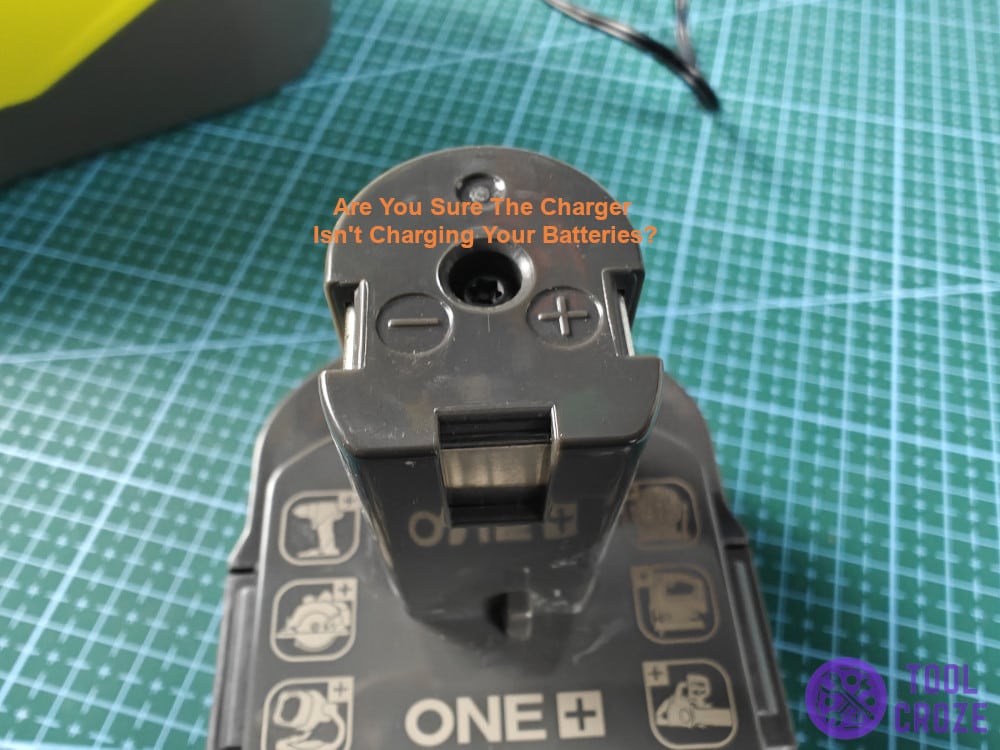
Are you sure the charger isn’t charging your batteries? Instead of it not working and not showing lights, maybe it’s just the lights that aren’t showing and everything else is fine.
This isn’t common, but it’s possible when there’s a fault in the power diverting to the LED indicators. When they don’t have any power flowing to them, they obviously aren’t gonna turn on.
Checking it is easy, but you’ll need a multimeter for it. After you have a multimeter nearby, the next step is to take the covers off of your Ryobi charger and take a look directly at the lights.
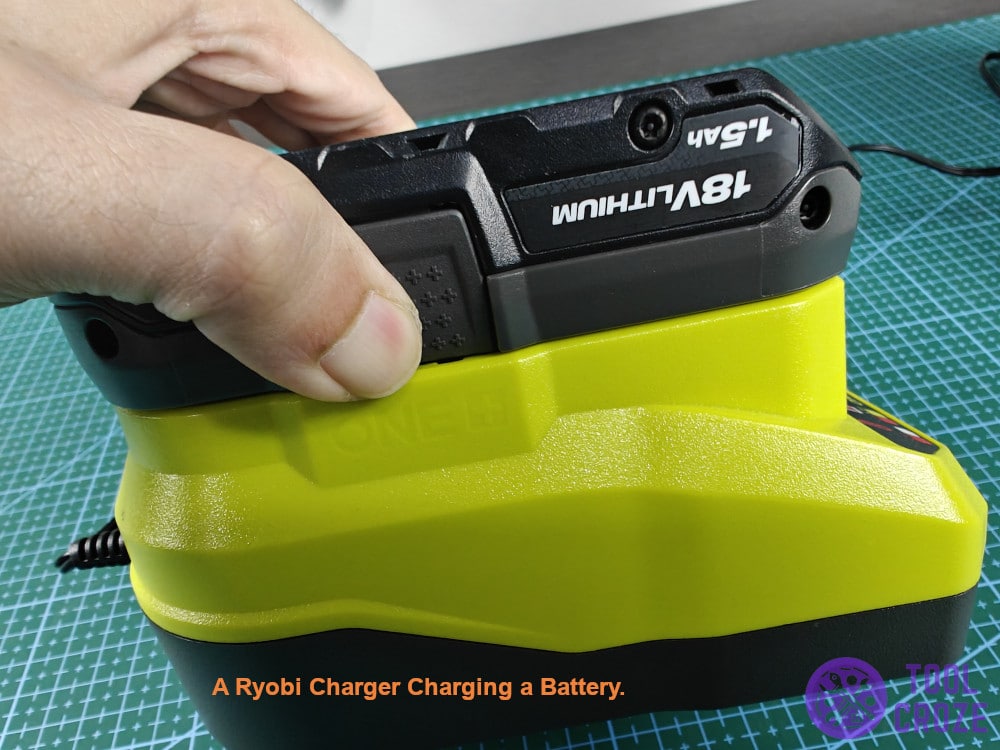
On any functioning charger, the lights turn on immediately. Even on mine in the picture beneath this, you can see the lights are on.
So, the only thing that would explain the rest of the charger working, but not the lights, is a lack of power to them. A multimeter on the lights’ terminals will confirm if that’s the case.
If there’s no reading, or it seems too low, you’ll confirm that the issue is with the LEDs specifically. Faulty circuitry will either need to be readjusted or replaced to get the lights back on.
On the off chance that the lights themselves are burnt out, get a replacement. That’s the only way for the charger to show lights again. It may be necessary to replace the whole board for this.
But in case the problem is really with your Ryobi battery, I have here a video which shows how you can fix this.
You the battery is bad when you put it on the Ryobi charger and the indicator lights flash red and green lights.
To fix this, I have to reset the Ryobi battery. I used another healthy battery which has a similar voltage and connect it the bad Ryobi battery.
I connect the positive and negative terminals of the two batteries. I let it stay connected for around 15 seconds.
Then, I disconnected the two batteries. I charge the battery again and it’s now charging normally.
To further guide you about the Ryobi charger, I also have a short video which discusses the different meanings of the LED indicator lights on a Ryobi charger.
Before I begin, I would like to mention there are different types of Ryobi charger and each model seems to have different light codes. This video is just for my Ryobi charger.
A blinking green means the battery is charging. A solid green means the battery is now fully charged.
A blinking red indicates a hot/cold relay and a blinking red and green means it detected a bad battery.
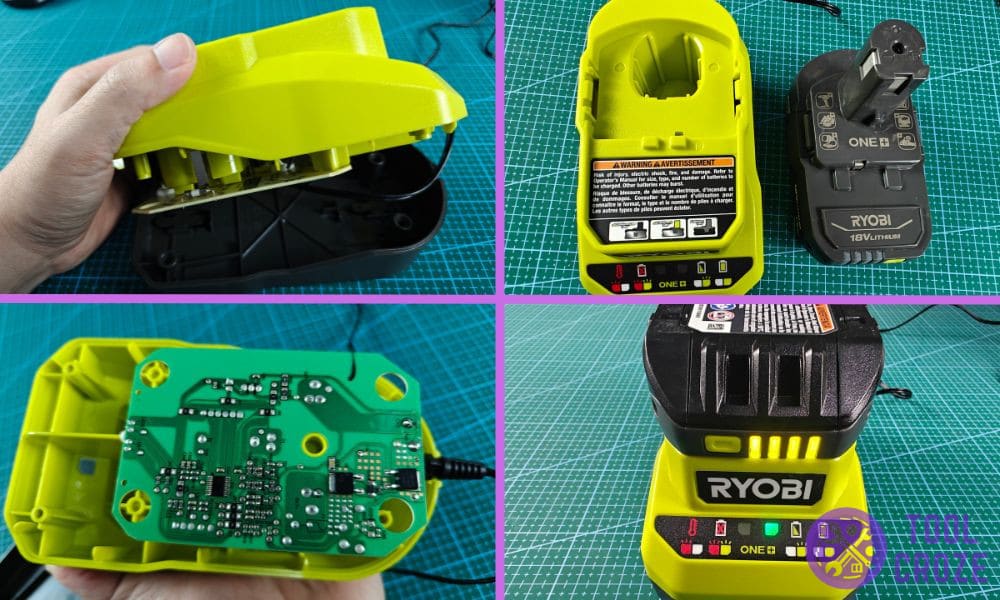
- Blown Fuse On The Board
Time to move on to the more serious possibilities; starting with bad fuses on the charger. These are probably the biggest reason for chargers like the ones from Ryobi going bad.
There aren’t a lot of things that can go wrong with a charger. But, if even one of its fuses shorts, then the whole thing doesn’t work. The fuses are there to protect the charger and battery from harm.
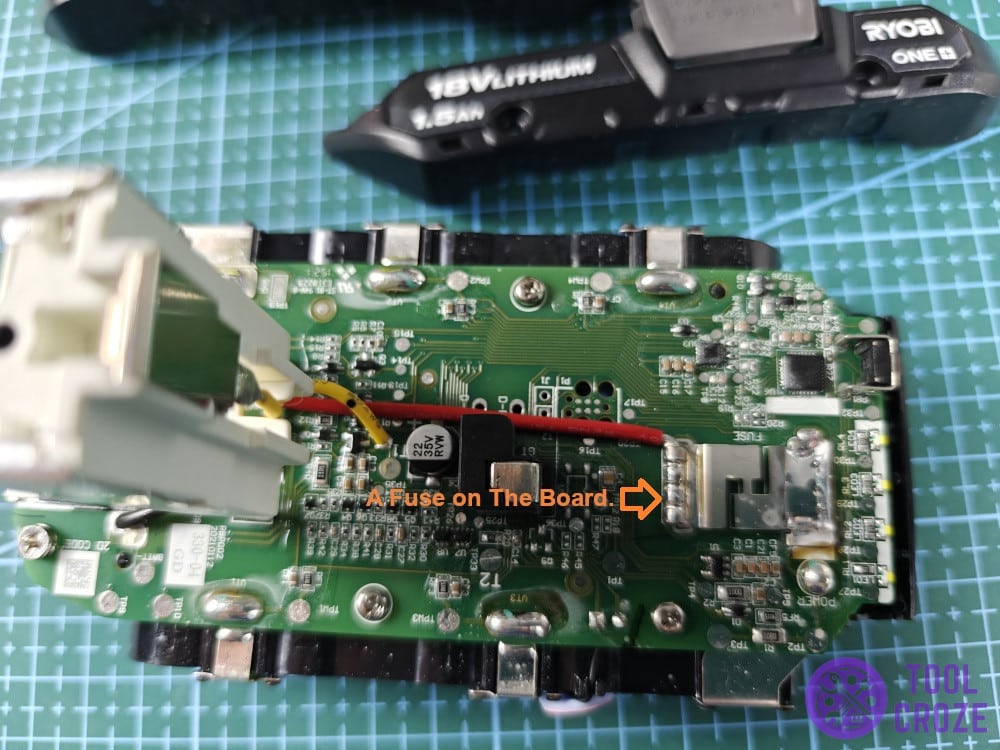
Without even a single one, there’s a risk to the battery, and risk of further damage to the charger. Until users change the problematic fuse with a new one that can do its job, the charger won’t work.
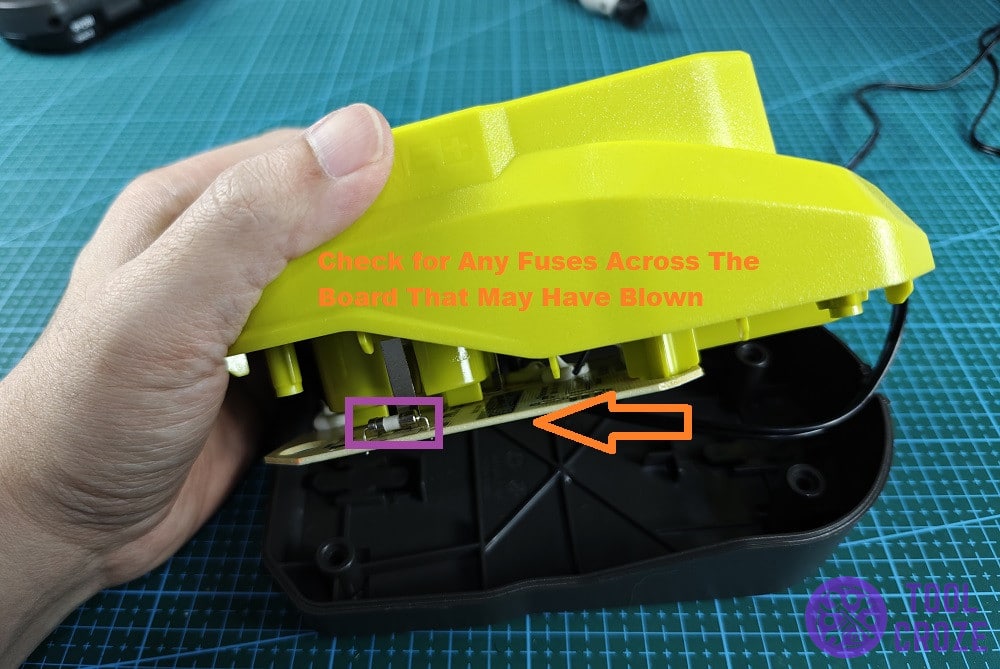
So, open the covers and look for all the fuses on the board. Here’s a photo of what they look like, as you can see one of the fuses on my own Ryobi charger:
Replacing the fuse isn’t going to be easy. While it’s easy to put them on, it’s hard to find one that matches the exact specifications for your Ryobi charger.
Do some searching depending on the charger you have, and get a fuse that works with it. Ensure it can handle the voltages the charger requires, and that it fits with the rest of the board.
- Replace The Charger
If it isn’t as simple as a fuse, then there’s probably more serious damage to the rest of the board of your Ryobi charger. At this point, I recommend getting another charger.
Ryobi chargers aren’t at all pricey. If you can easily find a replacement for yours, I’d recommend getting that instead. Replacing the whole board will end up costing you as much, after all.
Instead of wasting that money on a board that will need you to put in a lot more effort, a whole new charger that lasts longer will cost as much without any of the effort involved in the whole ordeal.

It may not be the solution you want to hear, but after so much experience, it’s my best suggestion for this. Especially since there’s no guarantee how long the “fixed” charger will last.
New chargers should last for years, and won’t cost much at all. It’s a much better investment than buying the board and putting it on yourself.
Once you have a new Ryobi charger, it should work with all your compatible batteries and the lights should turn on too! There won’t be any further issues for a long while.
