Porter-Cable batteries can’t power any tool when if they don’t have any charging. Unfortunately, charger issues are something that everyone deals with every now and then.
Even if your Porter-Cable battery is not charging, there’s a way to fix it so it powers your tools again. Follow the method below to revive your battery and get it working again.
I also made a short video in which I demonstrated how I reset my 20V Porter-Cable battery. You can watch the video below.
In order to do this, you need another Porter-Cable battery with similar voltage of 20V. Connect the terminals (positive to positive, negative to negative) of the two batteries.
After 15 seconds, disconnect the two batteries. Try charging the bad Porter-Cable battery again, and it should be now charging fine.
Reviving A Porter-Cable Battery That’s Not Charging
Before you can fix anything, you need to know what’s actually going on. The Porter-Cable 20V charger typically uses lights to tell you the battery’s charging status.
Ideally, you’ll see a green flashing light when the battery is charging correctly and a solid green light when it’s fully charged. On the flip side, there are two red-light patterns:
- Irregular Red Flashing (Hot/Cold Delay)

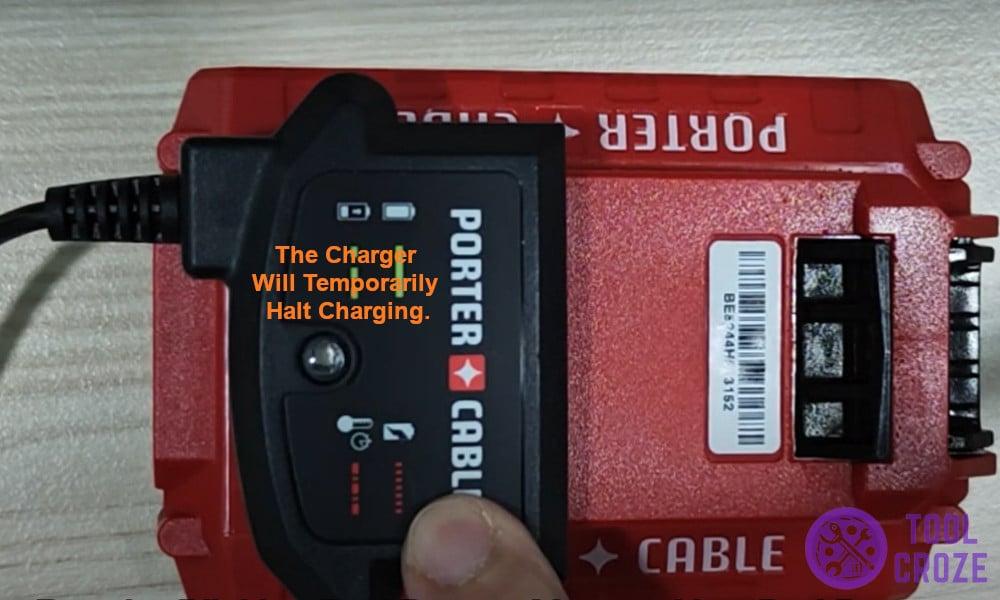
This pattern is somewhat unpredictable and usually signals that your battery is either too hot or too cold to charge safely.
If the battery is hot from being used non-stop or if you stored it in a very cold environment, the charger will temporarily halt charging.
After the battery returns to a safe temperature (which might take an hour or so in normal room conditions), it should start charging automatically.
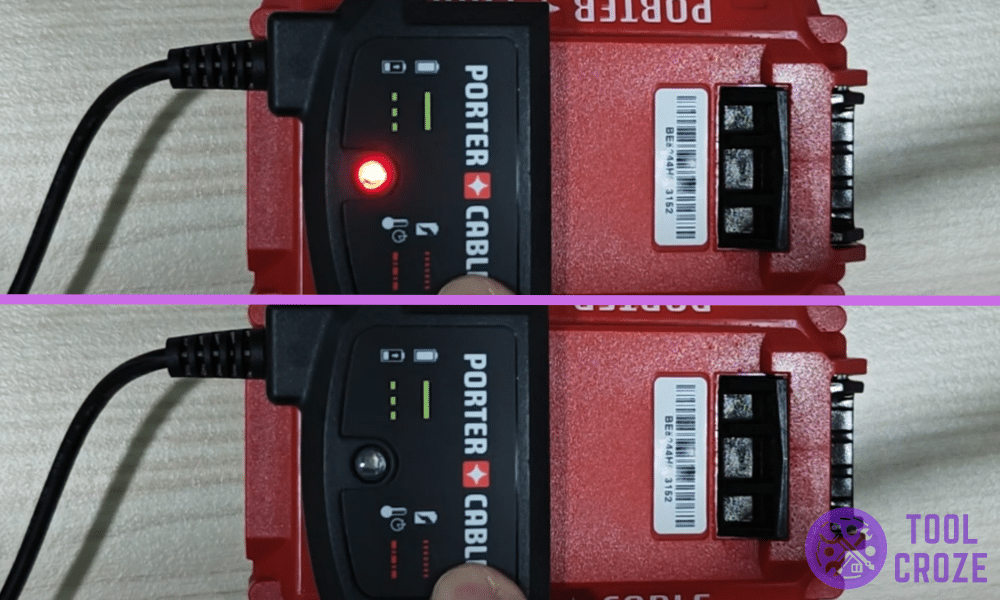
- Regular Red Flashing (Bad Battery Alert)
A continuous, rhythmic blinking red light typically means the charger detects your battery as “bad.” That doesn’t always mean it’s permanently dead, though.
In many cases, the battery’s voltage is just too low for the charger to detect. This is the situation I’m going to focus on in this guide.
It’s important you don’t mix up these two patterns. If it’s hot or cold, just let your battery rest for a while in a temperate spot before trying again.
But if you’re getting the regular, rhythmic red flashes even at room temperature, you’re dealing with a battery the charger considers bad.
You can watch the short video I’ve made down below to learn more about the different meanings of the indicator lights on a Porter-Cable battery charger.
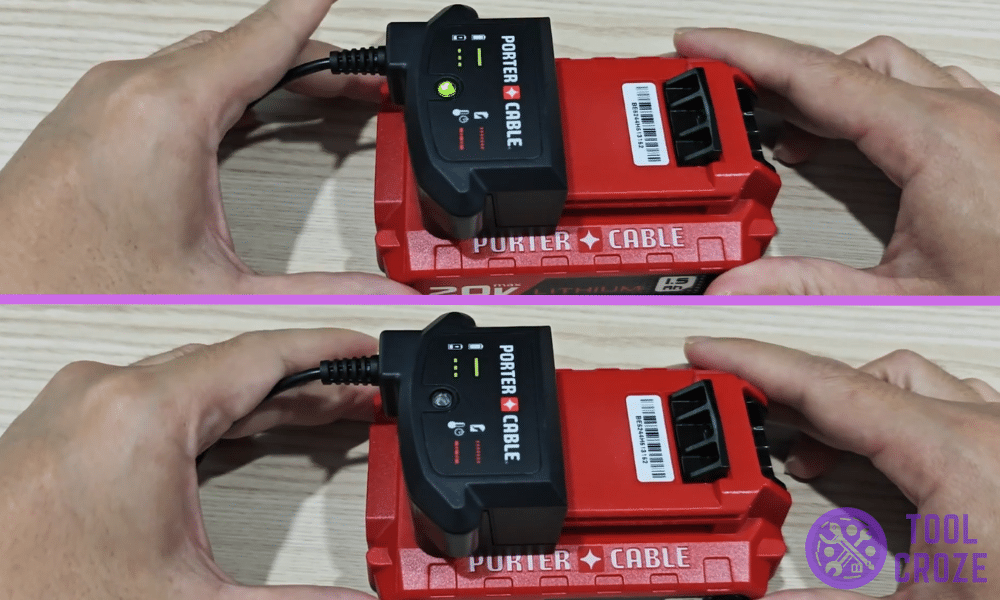
A single flashing green light means the battery is charging fine. This will turn into a solid green once the battery becomes fully charged.
An irregular flashing red light means the battery is either too hot or too cold for charging. Lastly, a fast and regular flashing red indicates a battery problem.
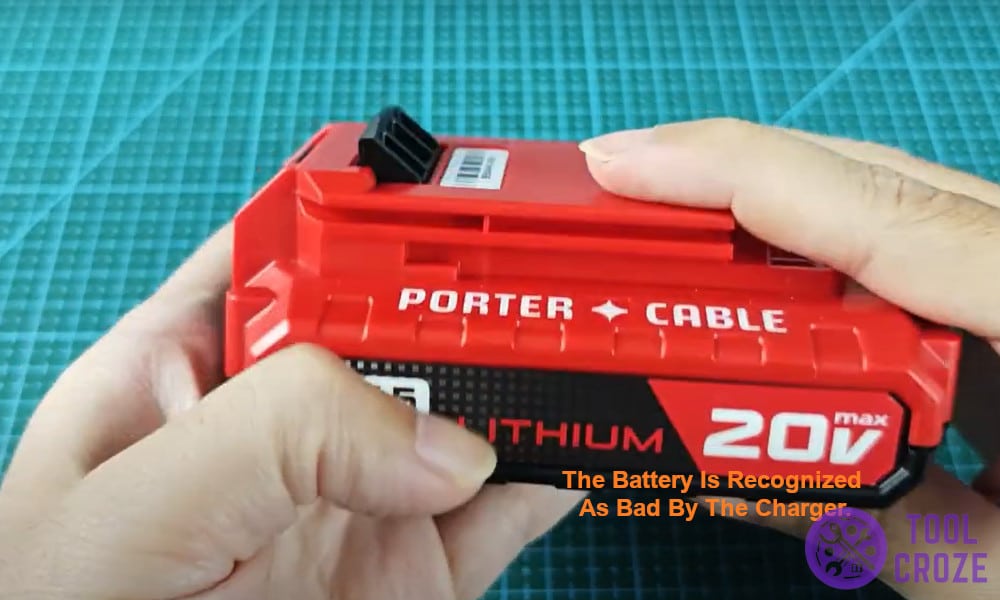
Confirming It’s a Bad Battery
Once you see the steady pattern of red flashes, you’ll want to verify it’s not a hot/cold delay issue.
If the battery is at room temperature and you’re still seeing that pattern, you’ve likely confirmed the battery is recognized as bad by the charger.
In some cases, you can go a step further by checking the battery’s voltage with a multimeter if you have one.
A reading that’s significantly below normal (e.g., a 20V battery reading at just 5-10 volts or less) means it’s too low for the charger to accept.
Of course, not everyone has a multimeter on hand, so the charger’s red light warning is often enough evidence that your battery needs some help.
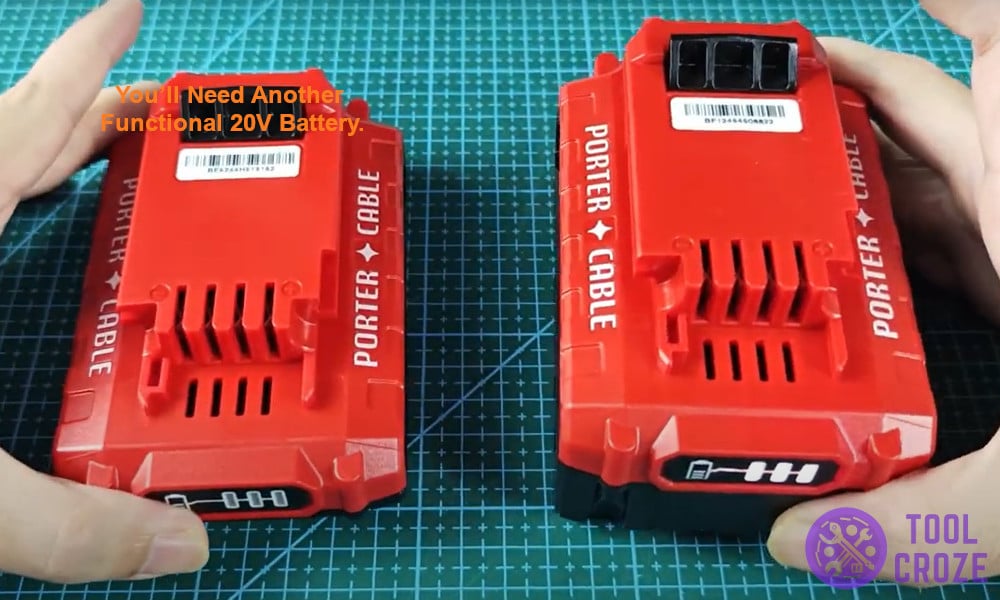
How to Jumpstart a Porter-Cable Battery
Jumpstarting is a method of reviving a battery by briefly connecting it to a healthy battery of the same voltage. In this case, you’ll need another functional 20V battery.
A Porter-Cable battery is preferable, but any similarly rated battery can work, provided the terminal layout is compatible. The voltage between both batteries should also be similar.

Other than that, you just need the connector cables for the terminals, and safety gloves. Once you have everything, put the two batteries together on a terminal and let’s get started.
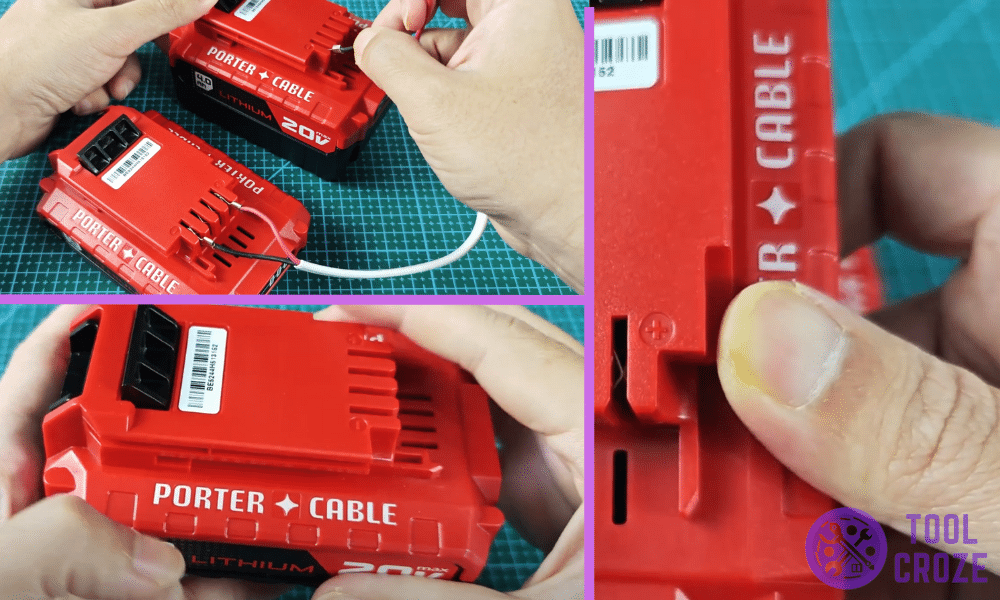
Step 1: Set Up Safely
Place both batteries on a stable, flat surface. Identify the positive (+) and negative (–) terminals. They’re usually labeled, and you want to be absolutely sure you know which is which.
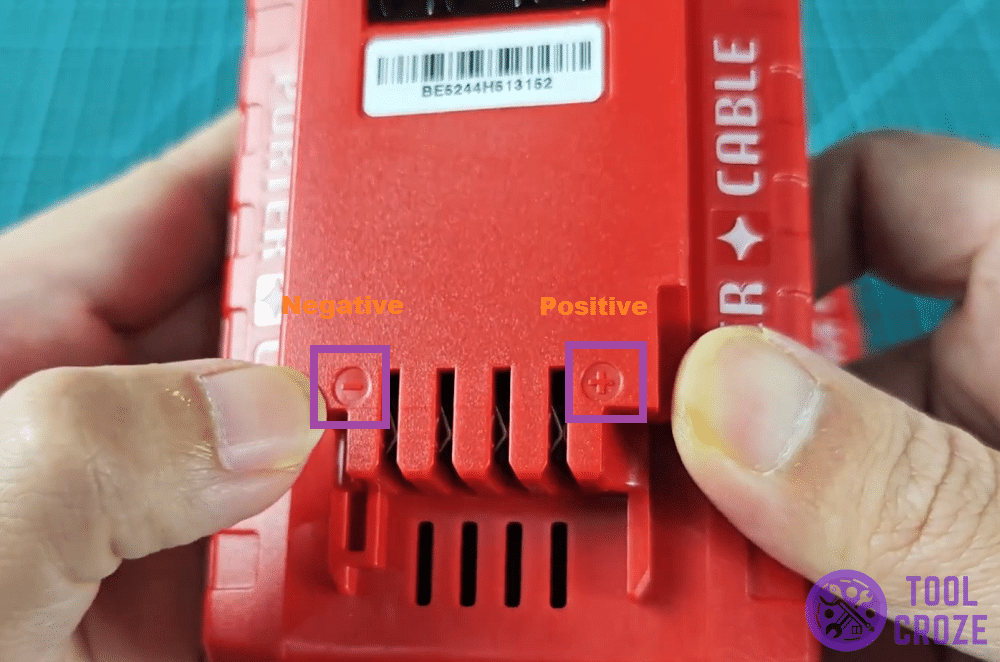
The image above will help you figure out which is which on a Porter-Cable battery. Mixing them up can cause serious damage to the batteries and can even be dangerous.
Step 2: Connect the Terminals
Take one cable and attach one end to the positive terminal of your healthy 20V Porter-Cable battery. Clip or connect the other end to the positive terminal of the problematic battery.
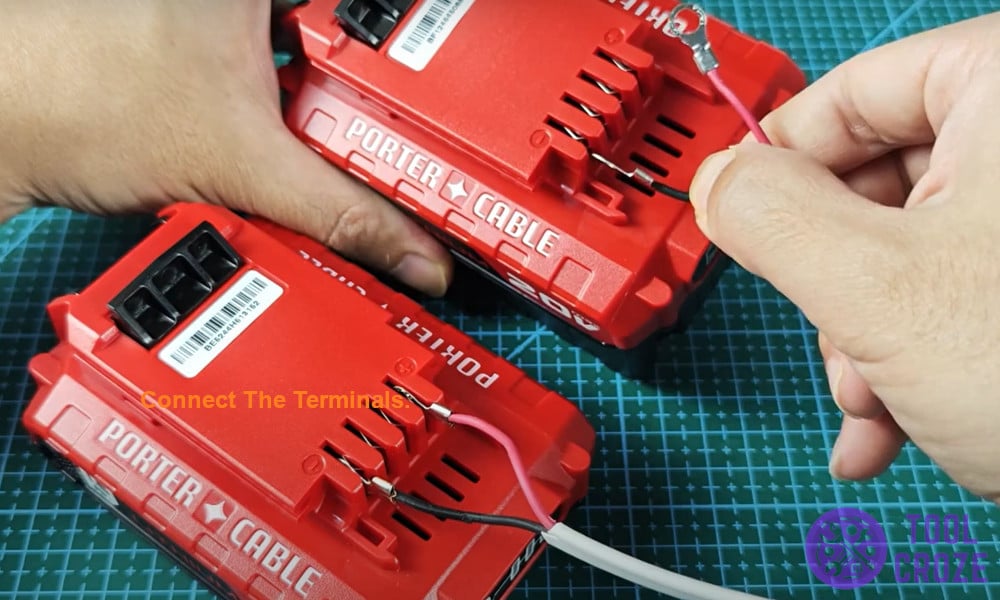
Next, take the second cable and connect the negative terminal of the healthy battery to the negative terminal of the faulty battery.
Step 3: Wait About 15 Seconds
Let the batteries stay connected for roughly 15 seconds. During this time, the healthy battery will “push” some current into the bad one, raising its voltage closer to the required threshold.

Be cautious not to leave them connected for much longer than 15 or 20 seconds. Overdoing it can risk overcharging or causing uneven cell voltages, leading to further damage.
Step 4: Disconnect and Charge
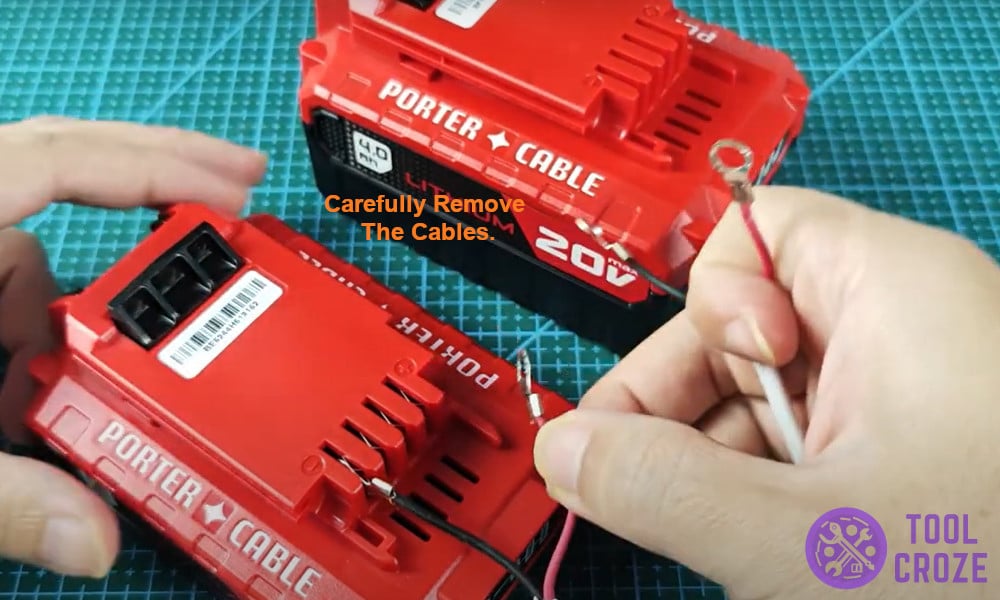
Carefully remove the cables—first the negative one, then the positive. Now take the formerly “bad” battery and place it back on the Porter-Cable charger.
Ideally, you’ll see a green flashing light like in the image below, indicating that it’s successfully charging again. In that case, congratulations—you’ve successfully revived your battery!
If, however, you still see the same regular red flashing pattern on the charger after jumpstarting, your battery may be permanently damaged.
In those instances, it might be time to purchase a new battery, particularly if your current one is several years old.
