I’m very pleased I’ve learnt how to reset my Porter-Cable 20V battery, because if I didn’t know how to do this, I’d be buying a new battery very often. Whenever I try to charge my battery and it fails (i.e. instead of a blinking green light I see a blinking red light), I know there’s a trick I can use.
The technique I have in mind comes in very handy, especially when I’m not able to tell what is the problem with battery. The trick I’m talking about is a battery reset.
I also have a short video in which I demonstrated how to reset a Porter-Cable 20V battery in 3 different ways. You can watch it below.
On my video, I showed how I reset a Porter-Cable 20V battery with another Porter-Cable 20V battery. Next, I used a different 18–20V tool battery to reset it. Lastly, I used a DC power supply to jump-start it.
3 Ways to Do a Porter-Cable 20V Battery Reset
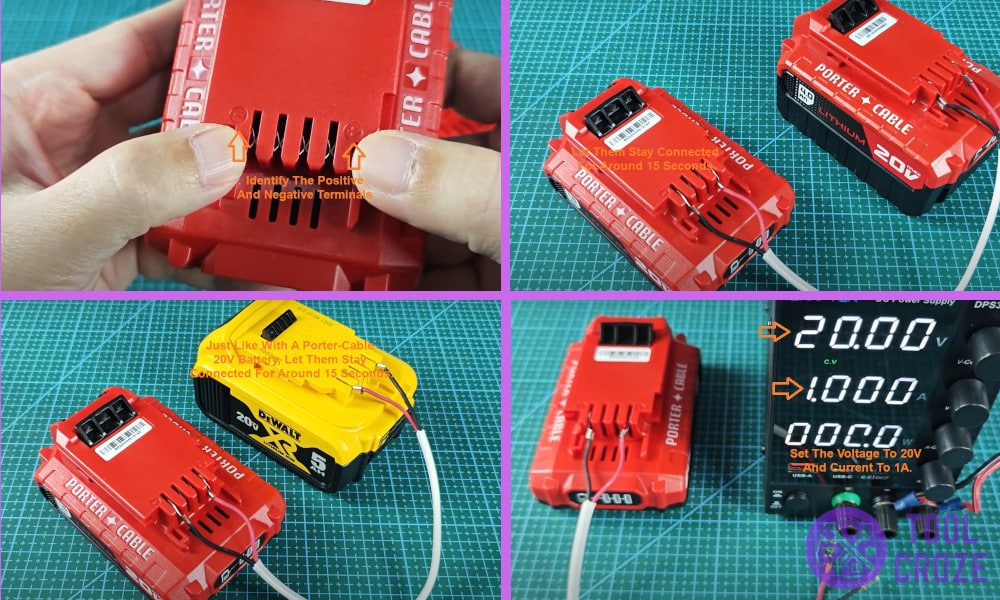
I’ll tell you how I go about resetting my Porter-Cable 20V battery. I actually know three ways of doing it. In the first one, I use a similar battery – meaning a 20V Porter-Cable battery.
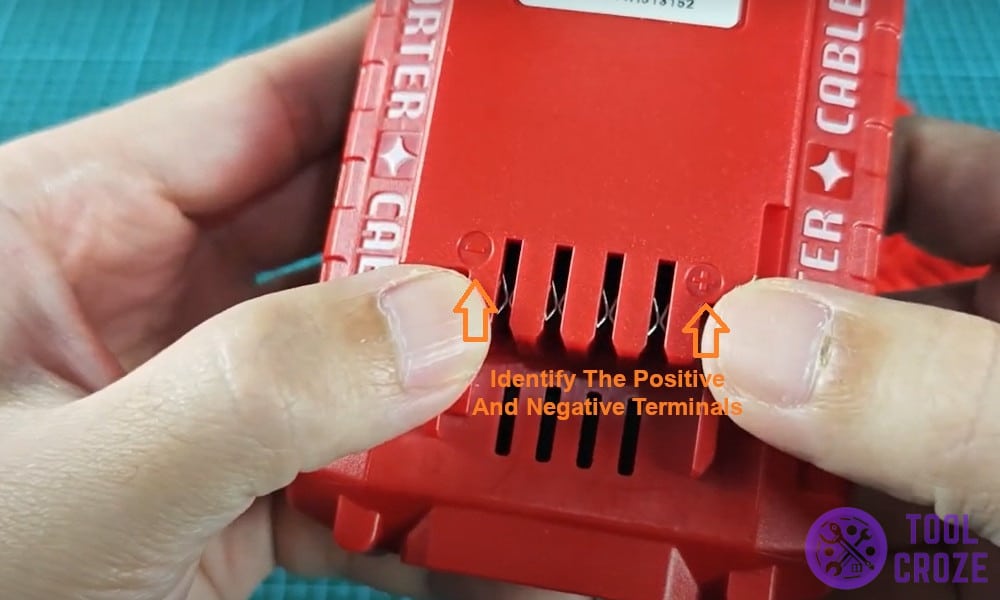
I begin by making sure I can clearly see the positive and negative power terminals in each of these batteries.
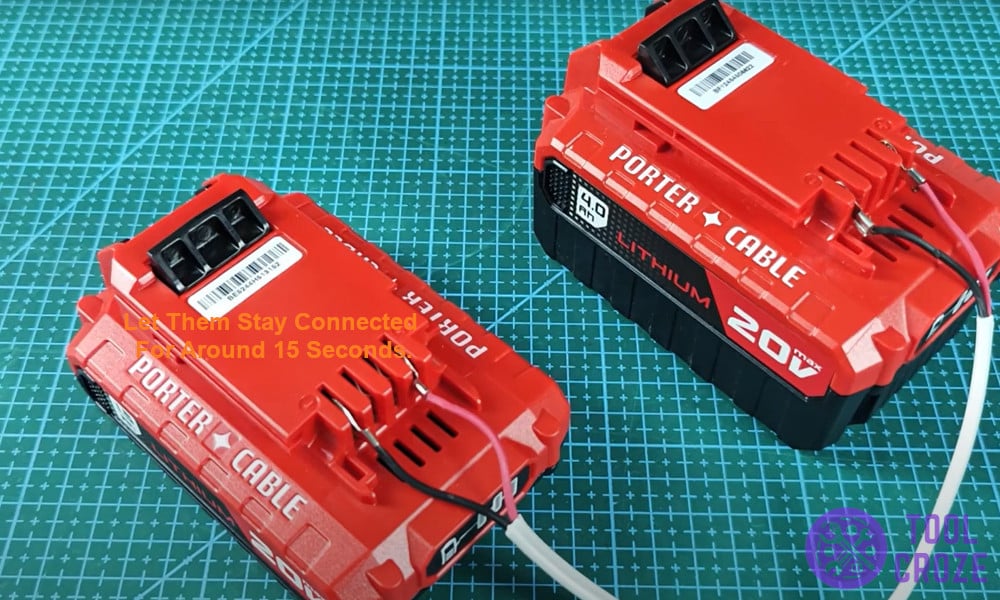
Next, I take a piece of electric power supply cable, and use it to connect the positive terminal of my original battery with the positive terminal of the good battery.
I also connect the negative terminal of my original battery with the negative terminal of my good battery.
Leaving these two batteries connected in this way for 15 seconds is enough to clear the problem that was making my old battery not charge.
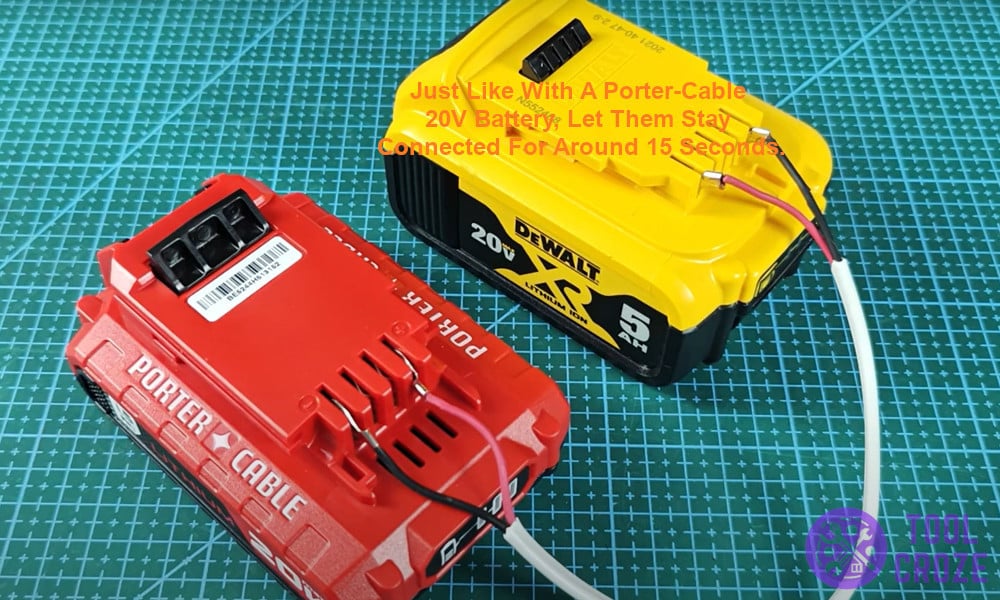
If I don’t have another Porter-Cable battery, I can use another brand. I prefer using a DeWALT. And although a DeWALT can work as long as it’s 18V to 20V, I personally use a 20V DeWALT battery.
I follow the same steps I previously used with the two 20V Porter-Cable batteries. This means I link the positive power terminals together, and the negative terminals too, using a piece of electric power supply cable.
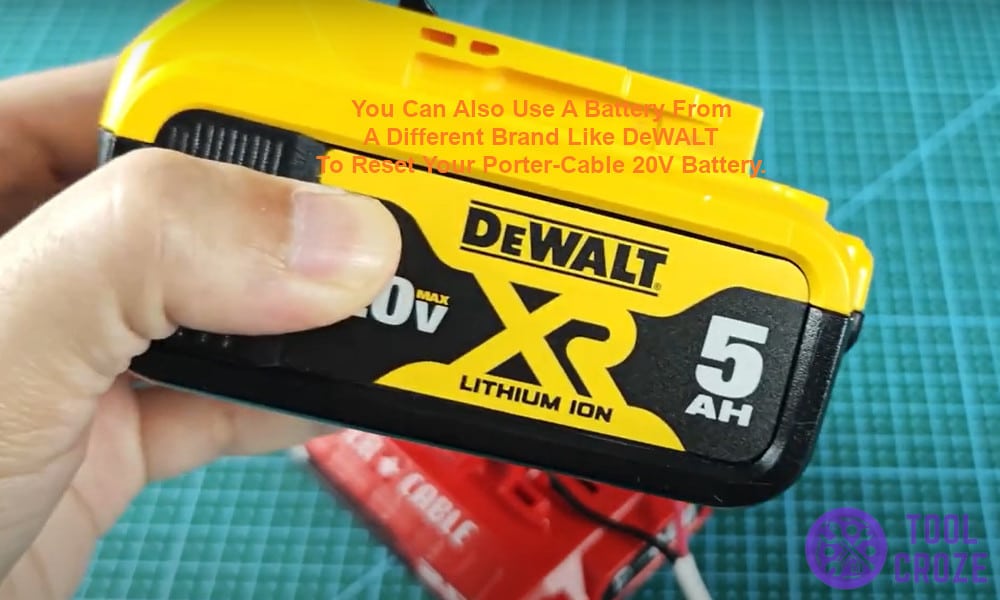
I must make sure I look clearly to identify the spot marked B+ on the DeWALT battery, because that’s the battery’s positive terminal. I also check to identify the spot marked B-, because that’s the battery’s negative terminal.
Once I’ve connected the two batteries, I leave them this way for 15 seconds. By the end of those few seconds, my problematic battery is ready for charging.
In case I don’t have another battery that I can use to reset my faulty battery, I’m not worried. As long as I can find a gadget with direct power supply – a DC power source – I’m fine.
When using this method, I begin by setting the DC power source voltage to 20V, and its current to 1A. This is easy to do since the place for adjusting the resistance and the current are clearly displayed on the power supply gadget.
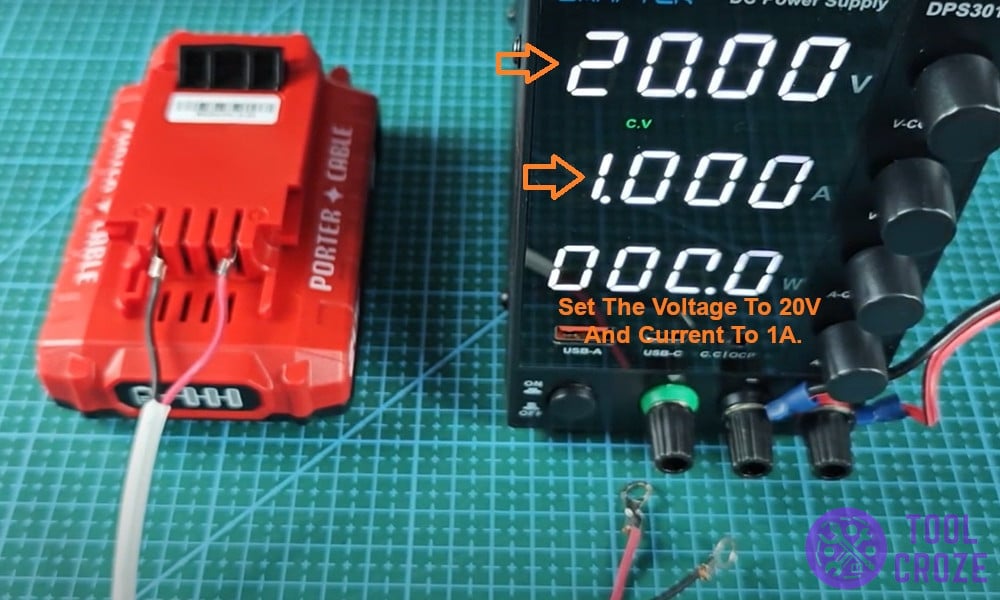
After adjusting these settings, I pick up a power supply cable and use its red wire to link the positive power terminal of my battery to the positive terminal of the DC power source. As for the negative terminals, I use the black wire to connect them.
Even when using a DC power supply, the reset still takes 15 seconds. And I can now recharge my 20V Porter-Cable battery without a problem.
