
When a Philips trimmer isn’t turning on or just not working at all, many things could be the reason why. It may be the battery, the motor, or anything inside the machine.
That’s why it’s tough to troubleshoot these things even though they aren’t that big. But, I’ve got all the possible fixes below, so check them out and troubleshooting will be a breeze.
Before you continue reading this article, you may also first watch the short video I’ve made about how to troubleshoot a Philips trimmer that is not turning on and not working. You can watch it below.
On the video, I checked the possible causes of this common problem like a bad battery, failed on/off button, or burned electronic board or electronic components .
I also checked its motor that’s not working. I used a 3 AAA batteries to connect it directly to the motor to test it. Lastly, a checked its blade if it blocked the motor rotation.
5 Fixes For A Philips Trimmer Not Turning On or Working
- Bad Battery
One of the most common reasons for issues is the battery. These devices typically rely on a 3.7V rechargeable cell that can drop below the voltage it needs to function properly.
That can happen if the battery is very old or was stored away for long. The simplest way to check this is to remove the battery and measure its voltage with a multimeter.
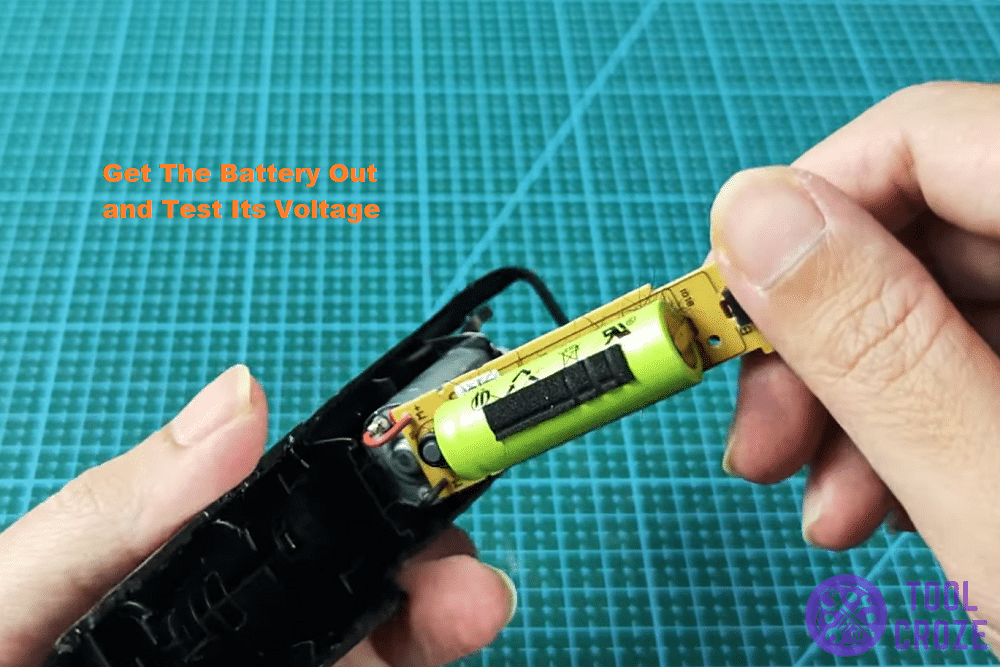
If you see a reading well below 3.7V, it’s a sign that the battery is dead and needs to be replaced. Even if it shows close to 3.7V, it could still be failing under load, so keep that in mind.
In my experience, a trimmer that won’t respond at all usually has a battery that’s either completely dead or close to it. Swapping it out often solves the problem.
- Faulty Power Button
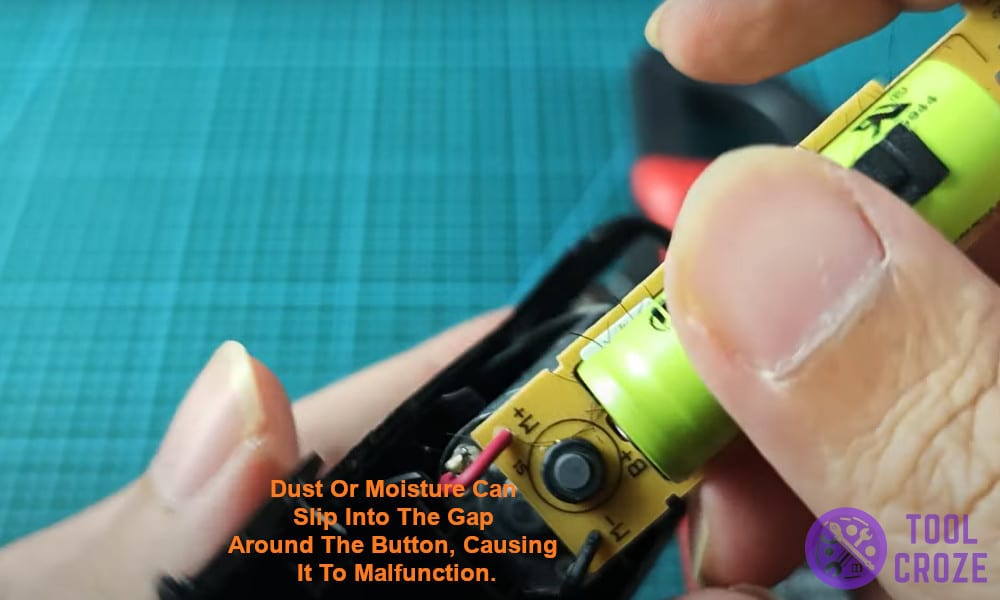
Some trimmers, however, won’t start even with a perfectly good battery. In those cases, the on/off button might be the culprit.
Over time, dust or moisture can slip into the gap around the button, causing it to malfunction. If you’re comfortable with it, try taking your trimmer apart.
Carefully remove the front section and look at the switch directly like I’m doing in this photo. Pressing it from the inside sometimes reveals if the mechanism has broken or come loose.

Occasionally, it’ll be obvious that the internal switch is cracked or corroded. If that’s the case, cleaning or replacing the button could restore the trimmer to working order.
Even if the button looks fine, it’s worth giving it a quick check before moving on to the other possibilities.
- Burned Components or Boards
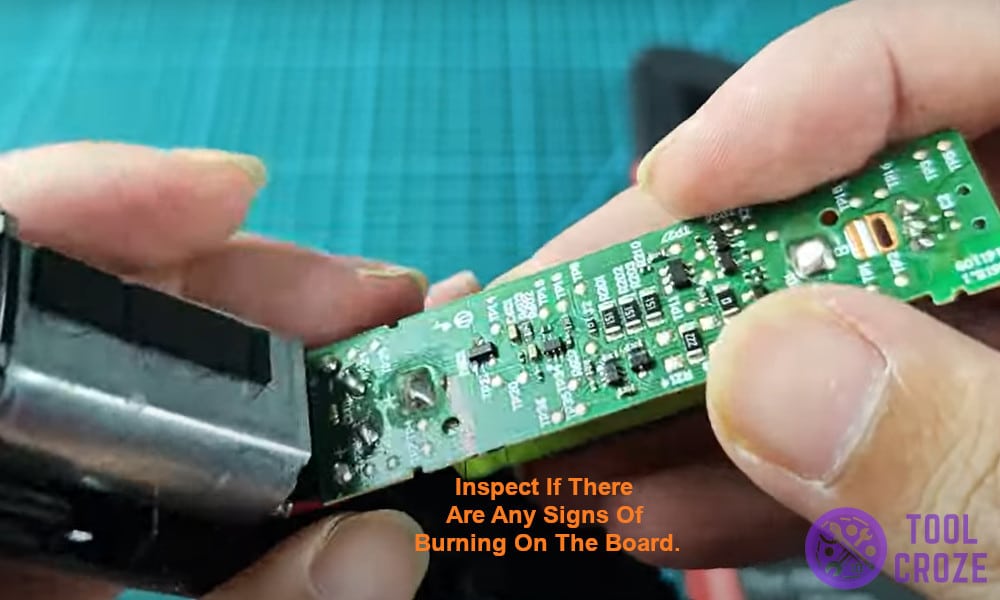
Another reason for this is burned or damaged components inside. That can happen if it’s been dropped or exposed to water, or if a tiny component has simply worn out over time.
I once came across a trimmer that looked perfect on the outside but had a small scorch mark on the circuit board under the plastic casing.
When you see that kind of damage, it’s rarely worth trying to replace individual components unless you have plenty of experience with electronics.

Sometimes, you won’t see any visible issues on the board but the trimmer still won’t start. That can mean an internal component failed in a way that isn’t obvious at first glance.
People who are handy with a soldering iron might attempt a deeper inspection. But for many users, it might be more practical to replace the entire trimmer if the board is at fault.
- Improper Blade Installation
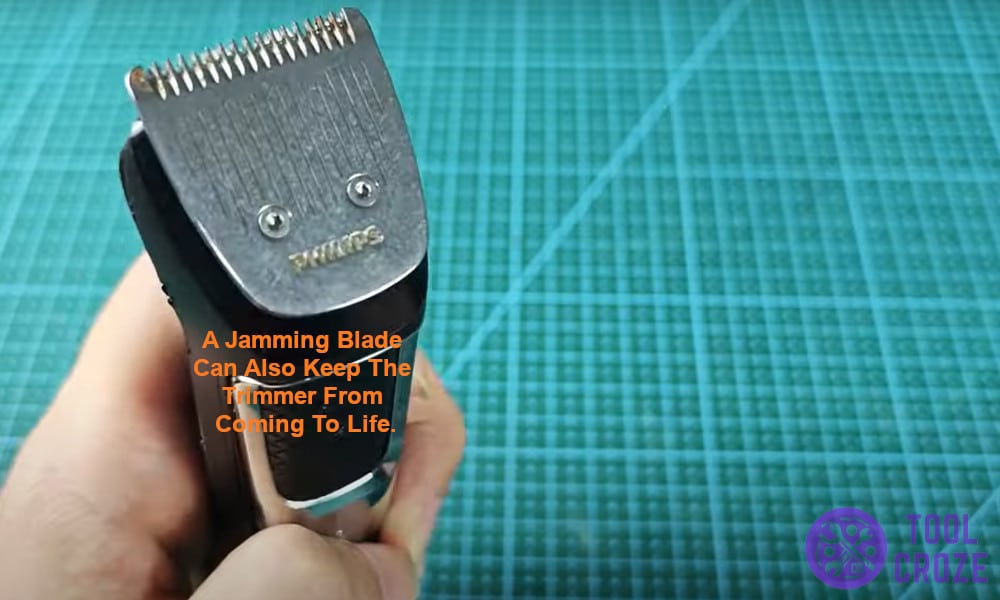
A jamming blade can also keep the trimmer from coming to life. After all, the motor inside needs to spin freely.
If hair or other debris has clogged up the blade assembly, the whole device can stay silent or struggle to move. That’s exactly what might be going on with your trimmer’s motor
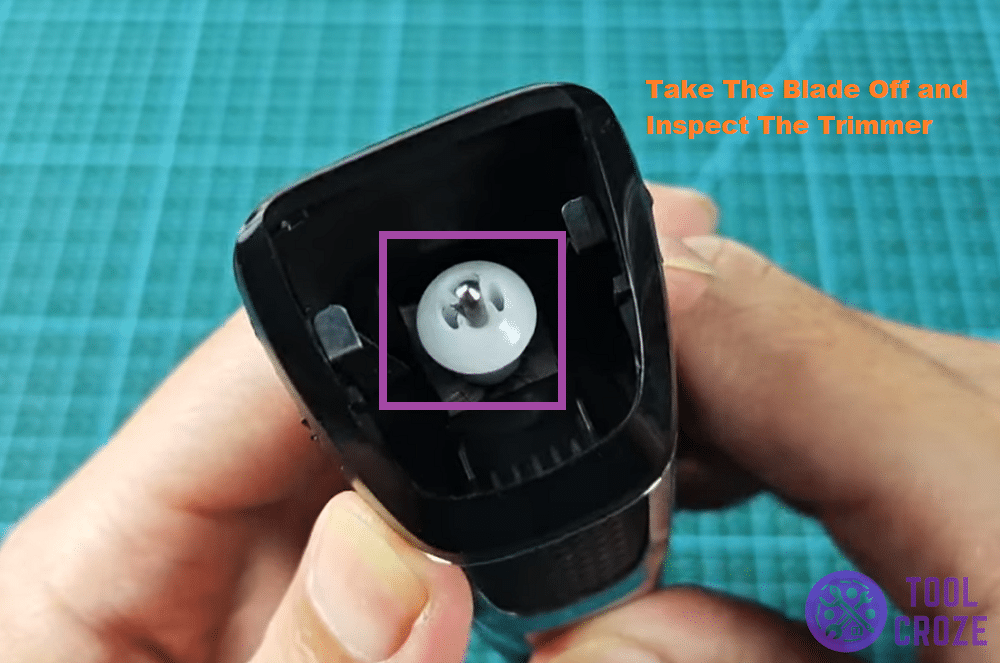
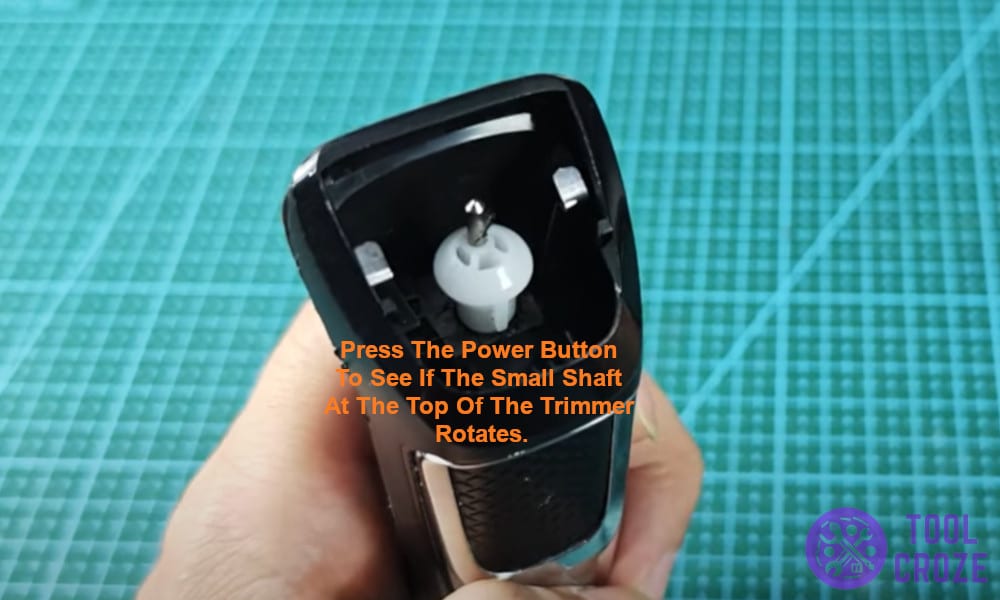
One simple test is to remove the blade head entirely like I’ve done above. Then, press the power button to see if the small shaft at the top of the trimmer rotates.
If it spins without the blade, that’s a sign the blade was preventing movement. Something like this mostly comes down to improper installation.
Cleaning the blade assembly and applying a bit of trimmer oil before carefully installing the blade can solve that problem.
- Test The Motor For Issues
To be absolutely sure if the motor is faulty or not, you can test it by providing it with about the same voltage it’s designed to run on. Three AAA batteries in series give roughly 4.5V.
While that isn’t 3.7V exactly, it’s close enough for a quick test. I tried it out myself, and you can see me performing the test in the picture under this.
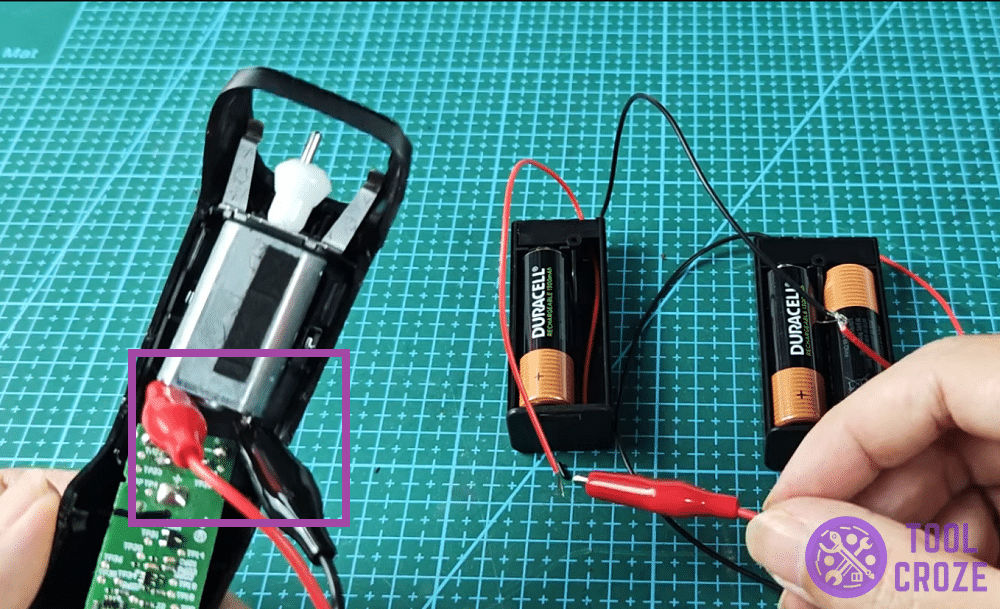
Disconnect the motor from the trimmer’s circuitry once you have the three AAA batteries, and then connect them to the motor leads.
If it spins, that means the motor is functional. The problem likely lies elsewhere, such as one of the other possibilities I’ve talked about so far.
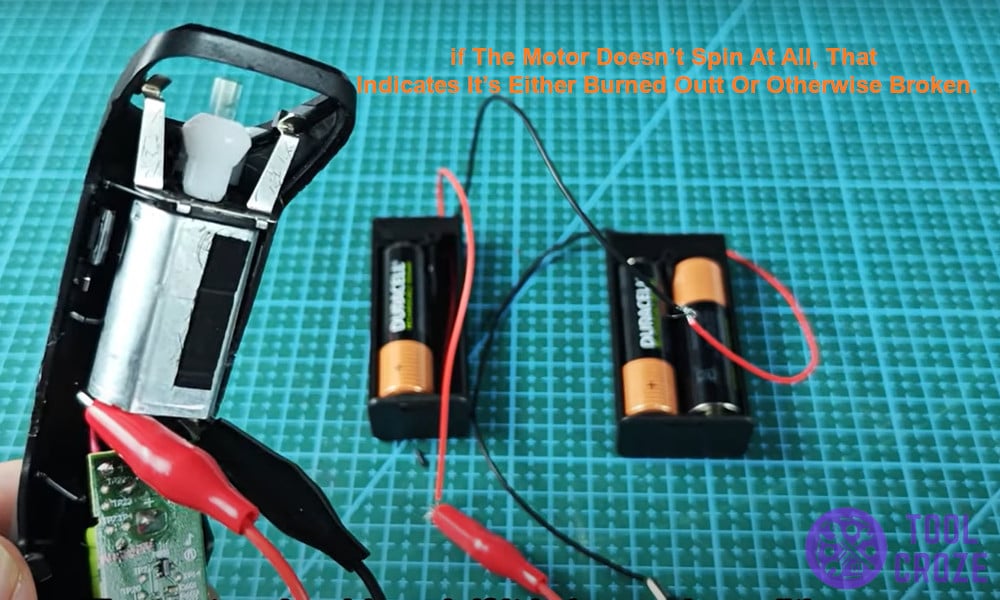
But if the motor doesn’t spin at all, that indicates it’s either burned out or otherwise broken. In that situation, replacing the motor may be an option.
Depending on the trimmer’s age and cost though, some might prefer buying a new trimmer. That’ll give you much less trouble than having to get specific parts and repairs.
