Battery issues are a matter of when, not if. That’s the case for any tool battery too, including HART ones. If you have one that’s giving you trouble, I know that feeling.
I recently had to deal with a HART battery that was just not charging. So, I tried to bring its cells back to life by upping their voltage, and it worked! Here’s what you have to do…
I also made a short video in which I demonstrated how I reset my 20V HART battery that won’t charge. You can watch the video below.
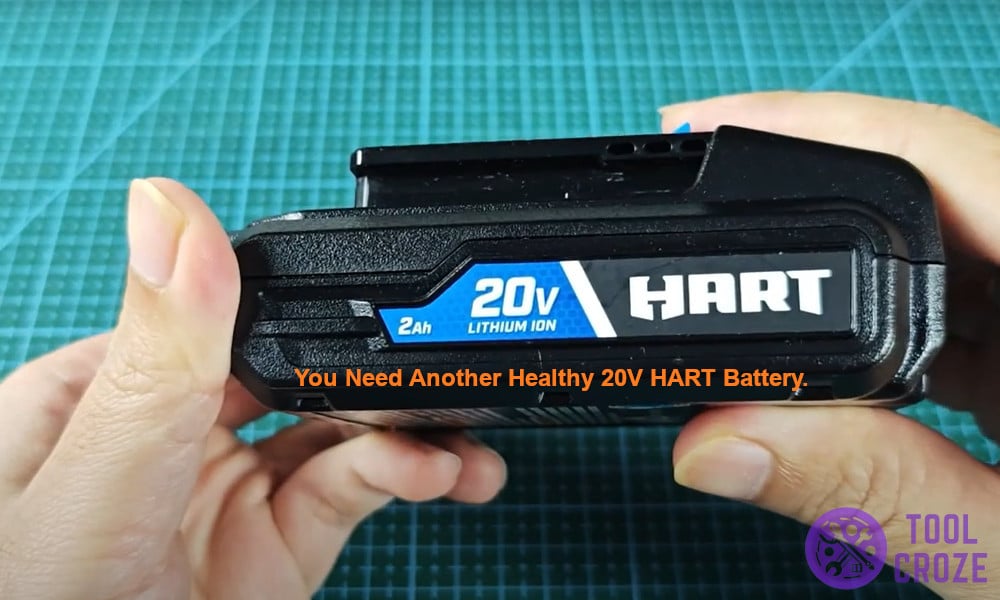
To do the reset, you need another similar healthy 20V HART battery. I connect their terminals for 15 seconds, then recharge the bad HART battery again. It should be charging fine now.
How To Revive A Hart Battery That’s Not Charging
If you’re seeing a red blinking light on your HART charger, it means the charger has flagged your battery as unhealthy—or “bad.” Simply put, the battery’s voltage is too low.
The charger can’t begin its normal charging cycle, so it throws up a warning instead. Usually, once a battery is detected as “bad,” the charger won’t even try to feed it power either.
Now, it’s important not to confuse what kind of flashing red light your HART charger is showing. After all, there are two types of them on this particular charger.
If the red light is flashing at a normal speed instead of slowing down and speeding up randomly, it’s not “bad”. It’s overheating or overcooling instead.

That’s an entirely different issue that you can deal with by getting the battery off the charger for starters. Then, store it away for some hours to let it come back to a normal temperature.
If your HART charger is flashing at a weird pace, then it’s probably a dead battery. But, it’s possible to revive even a dead battery with a simple jump-start.
It’s very important to know the different meanings of the indicator lights on a HART 20V battery charger. I also have a short video about this which you can watch below.
A blinking green light means it’s charging the battery. This will become a steady green light once the battery becomes fully charged.
A blinking red light means it’s testing the battery or the battery is hot or cold for charging. A solid red light means the battery is ready to be charged. Lastly, an irregular blinking red light pattern means a bad or unhealthy battery.
How Jump-Starting Works
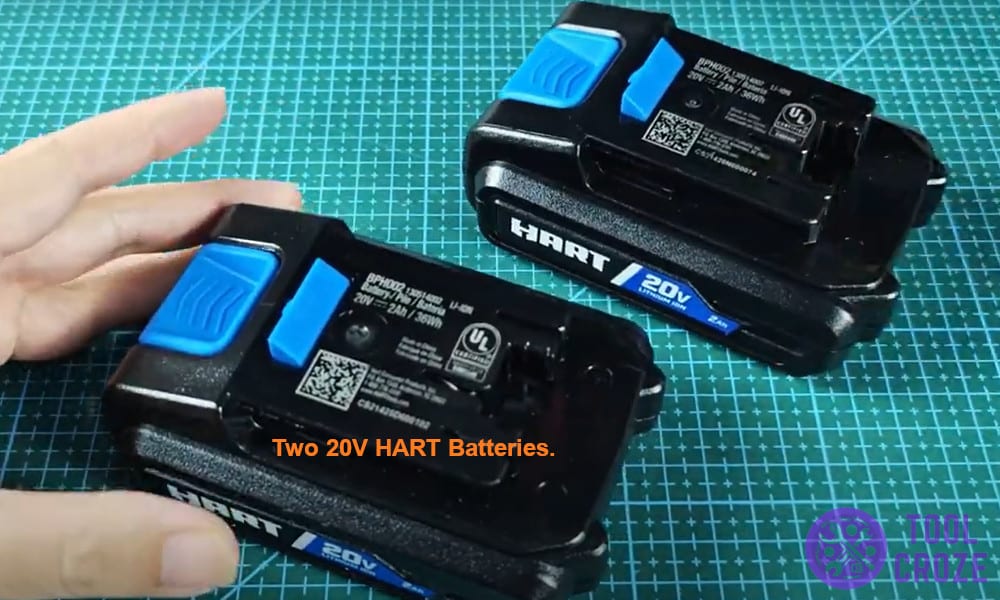
Jump-starting a battery involves connecting it to a healthy battery of the same voltage range—so in this case, another 20V HART battery.
Doing this briefly will let a small amount of current flow from the good battery to the bad one, boosting its voltage above the threshold the charger expects.
Once the battery’s voltage crosses that threshold, you can put it back on the charger, and it should (in most cases) start blinking green, which indicates a normal charge cycle.
Note: This fix won’t save every battery. If your battery is heavily damaged or old, jump-starting might not be enough to revive it. Still, it’s worth a try before you invest in a new battery.
What You’ll Need
A Fully Charged, Healthy 20V HART Battery: This battery will act as the “donor” to give your bad battery a needed boost.
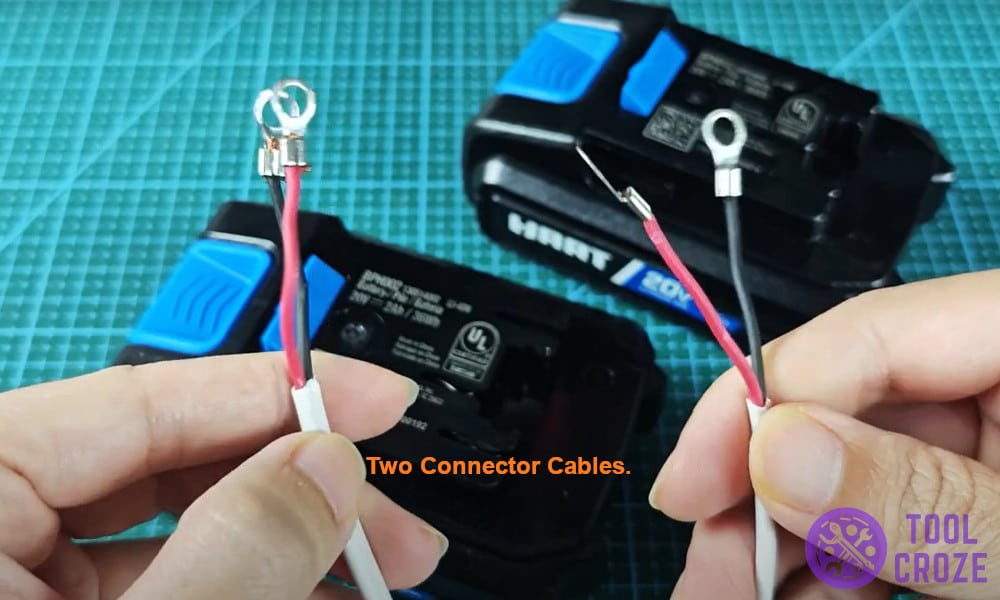
Two Connector Cables: Ideally, these should have insulated alligator clips to ensure safe and secure connections.
Protective Gear (Optional but Recommended): Gloves or eye protection can help keep you safe in case of small sparks or mishaps.
7 Steps To Revive A HART Battery That’s Not Charging
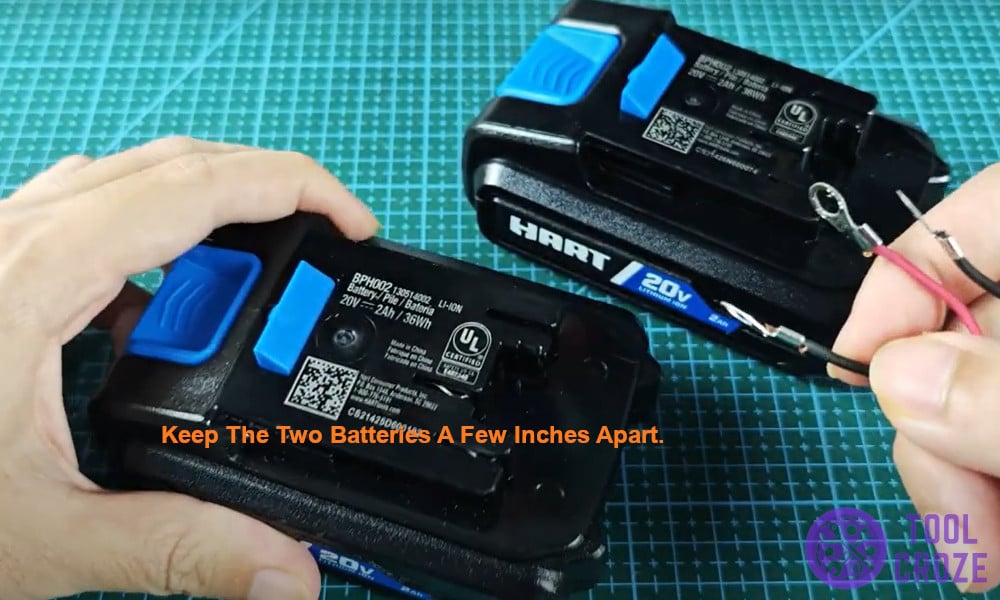
Step 1: Prepare Your Workspace
Find a flat, stable surface to work on. Ensure the area is clean and dry, and keep the two batteries a few inches apart so you can clearly see what you’re doing.
Step 2: Identify Battery Terminals
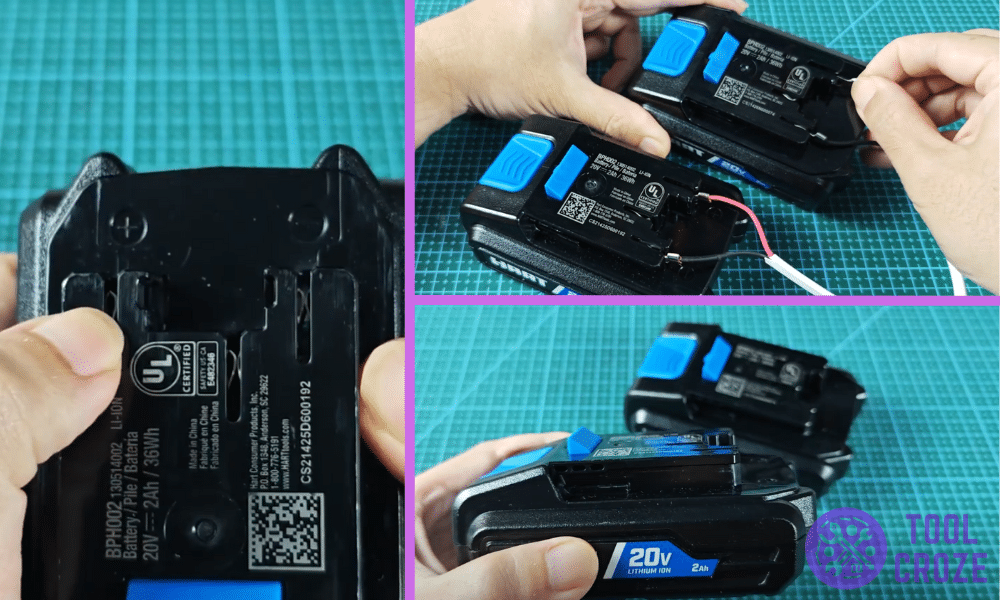
Locate the positive (+) and negative (–) terminals on both your healthy battery and the problematic one. They’re often labeled on the plastic casing or indicated by a small symbol.
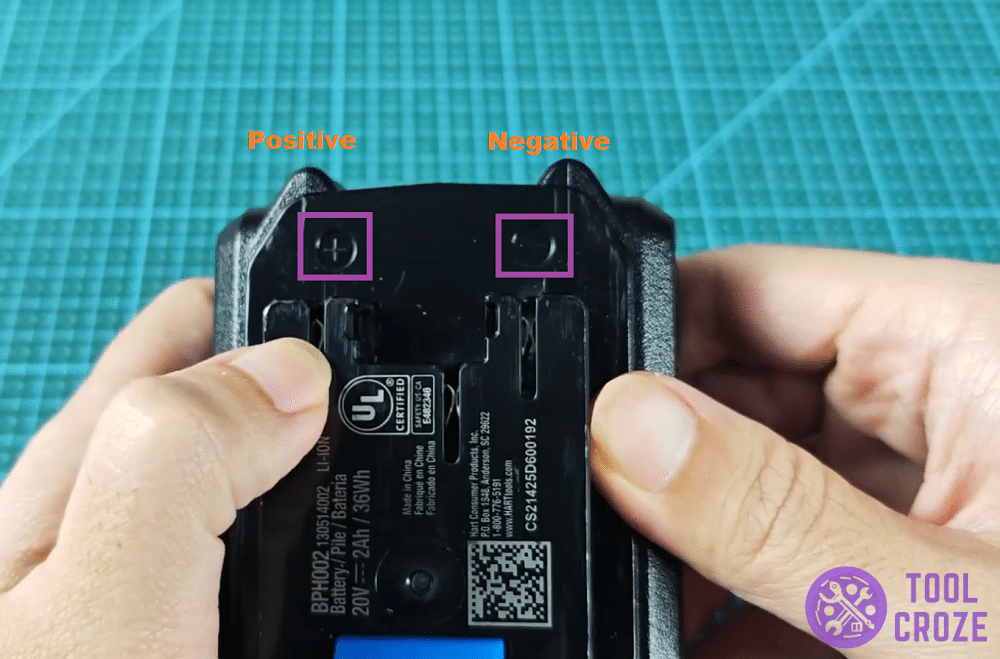
The picture above shows both terminals on a HART 20V battery. Take a look at it if you can’t find them on your own.
Related: Hart 20v Battery Pinout Wiring Diagram
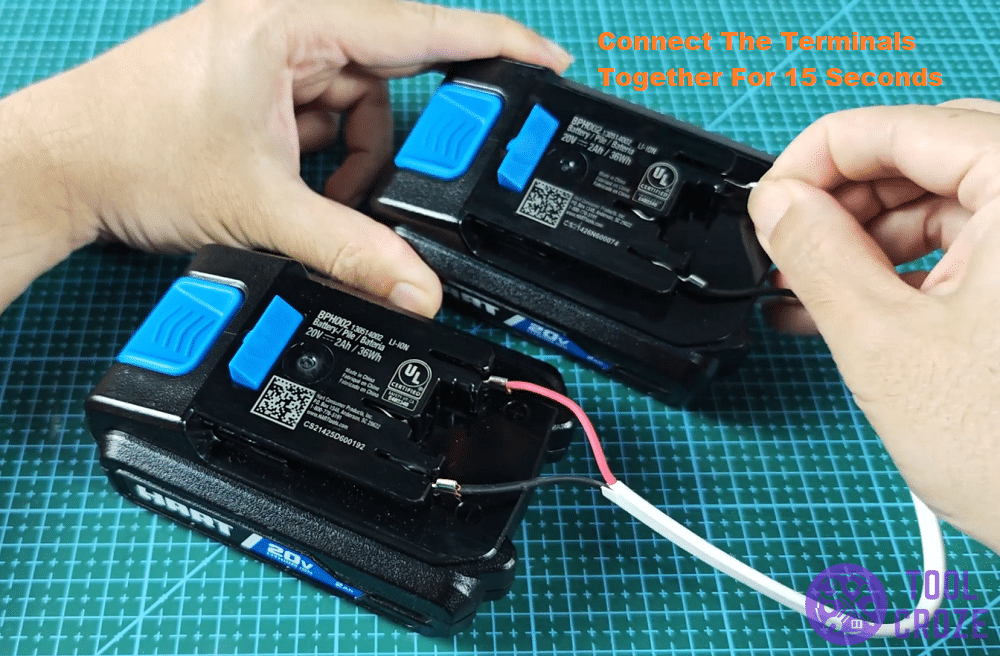
Step 3: Connect the Positives
Take one connector cable and attach it to the positive terminal of the functioning HART battery. Next, attach the other end of that same cable to the positive terminal of the bad battery.
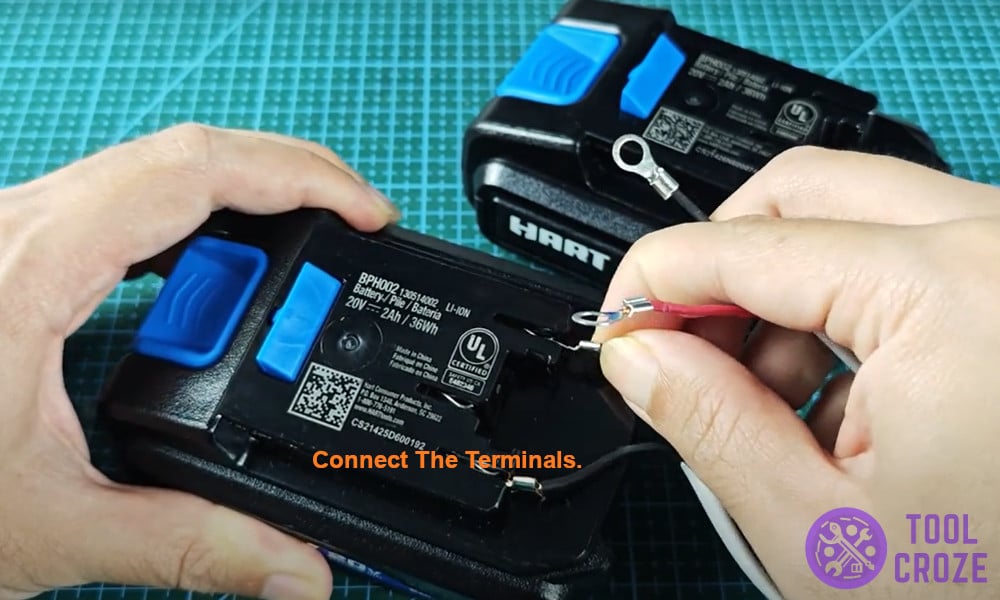
Double-check you haven’t accidentally touched a negative terminal; mixing them up can cause damage or even sparks.
Step 4: Connect the Negatives
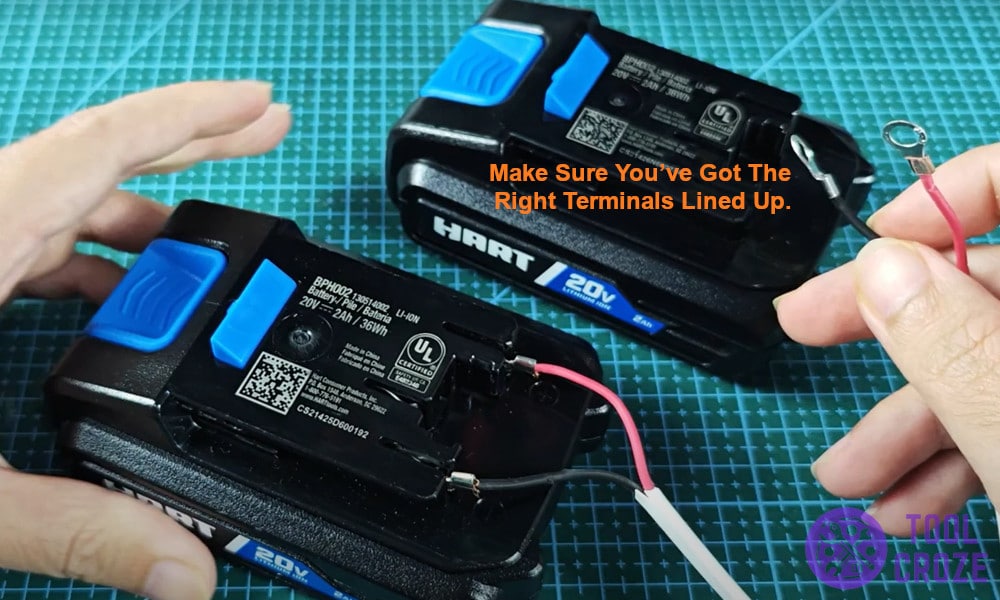
Use the second cable to connect the negative terminal of the healthy battery to the negative terminal of the problematic one.
Once again, make sure you’ve got the right terminals lined up. At this point, you’ve created a small circuit linking the two batteries, like in the image below.
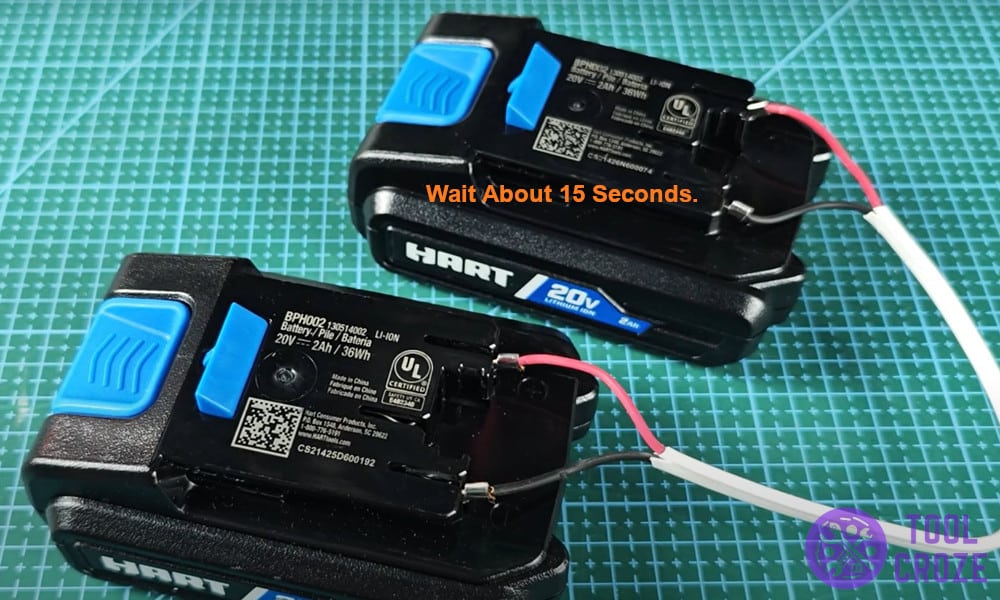
Step 5: Wait About 15 Seconds
Give the batteries about 15 seconds to balance out. A small amount of current will flow from the healthy battery to the bad one, boosting its voltage.
Avoid leaving them connected for much longer than this, as it can risk overcharging or unevenly distributing voltage.
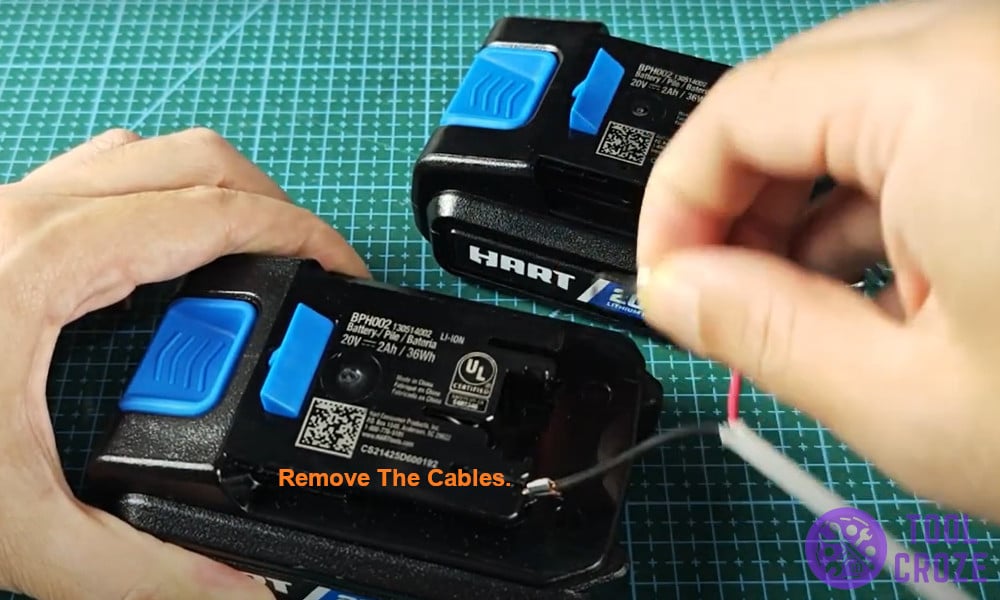
Step 6: Remove the Cables
Disconnect the cables—usually, it’s best to remove the negative one first and then the positive one, just to avoid any unintended short circuits.
Keep a firm hold on the cable ends, as they might spark if they accidentally touch each other.
Step 7: Place the “Bad” Battery on the Charger
Now that your battery has been jump-started, slide it back onto the HART charger. If all goes well, you should now see a green blinking light.
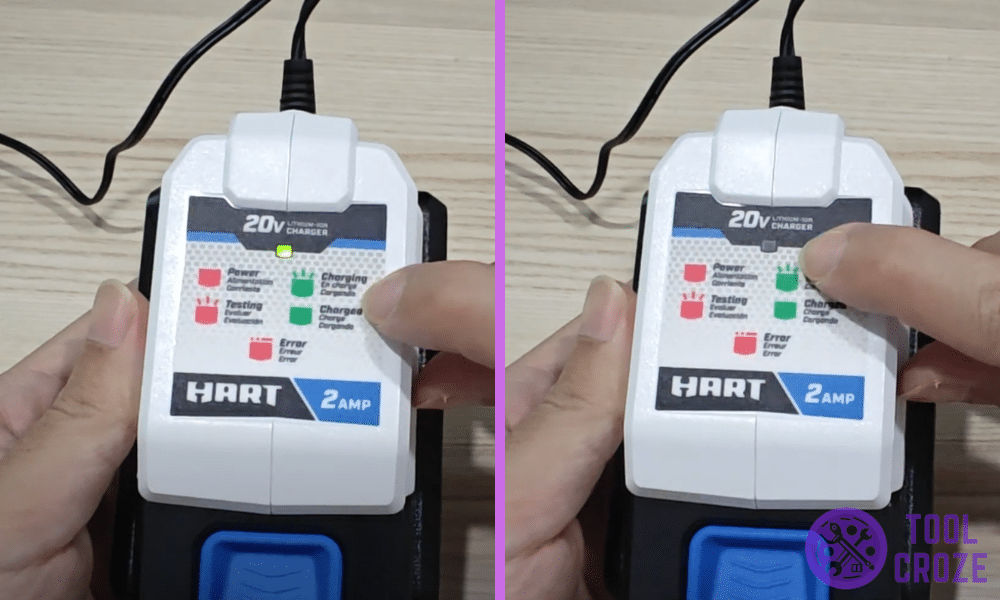
That blinking green light up there means the whole process was worth it! Your HART charger recognizes the battery and is charging it like normal.
