The cutting line is the main component for trimming on any string trimmer. So, obviously, your Black and Decker trimmer won’t be helpful for cleaning any surfaces if it won’t feed you the cutting line.
When something like this happens, I always have a few things that I look at first. They’re usually the reason why this happens, and today I want to share each of them with you!
Read: Common Black and Decker Charger Problems Troubleshooting
Why Won’t Black and Decker Trimmer Feed Line?
- Wrong Cutting Line
All string trimmers don’t actually use the same cutting line. Depending on the brand and model, they use different sizes of lines for specific kinds of trimming.
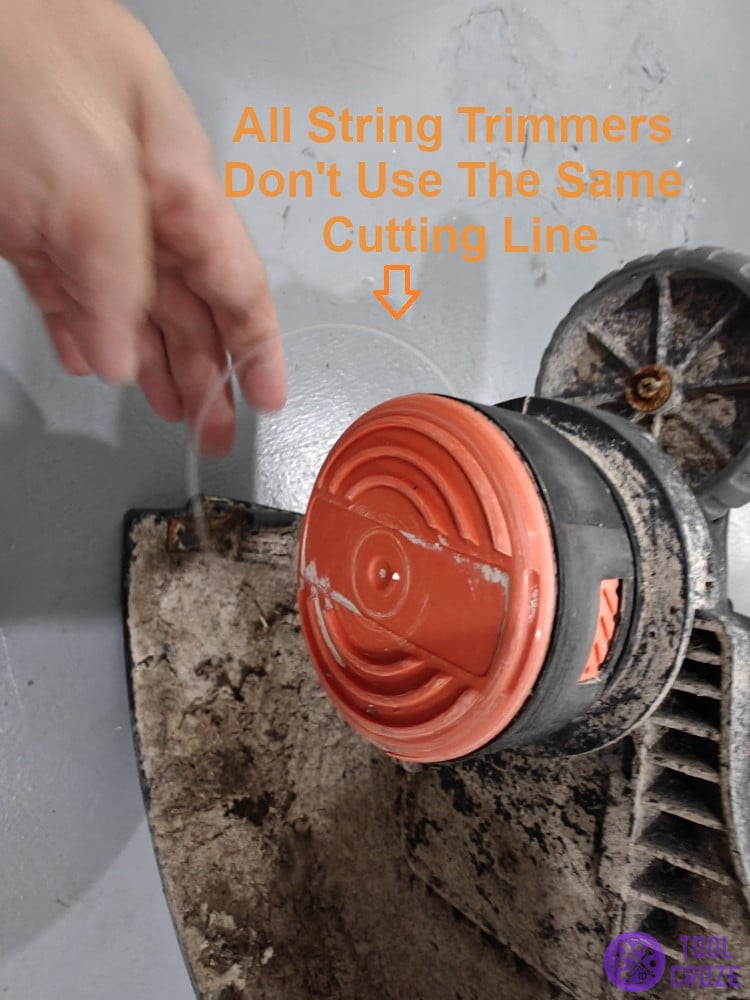
That’s something you have to watch out for when using your Black and Decker string trimmer. Using the wrong line type will lead to no feed coming from the device.
So, check your Black and Decker trimmer’s specifications, and see which line suits it best. Then make sure you’re using that specific line and not one of a different size.
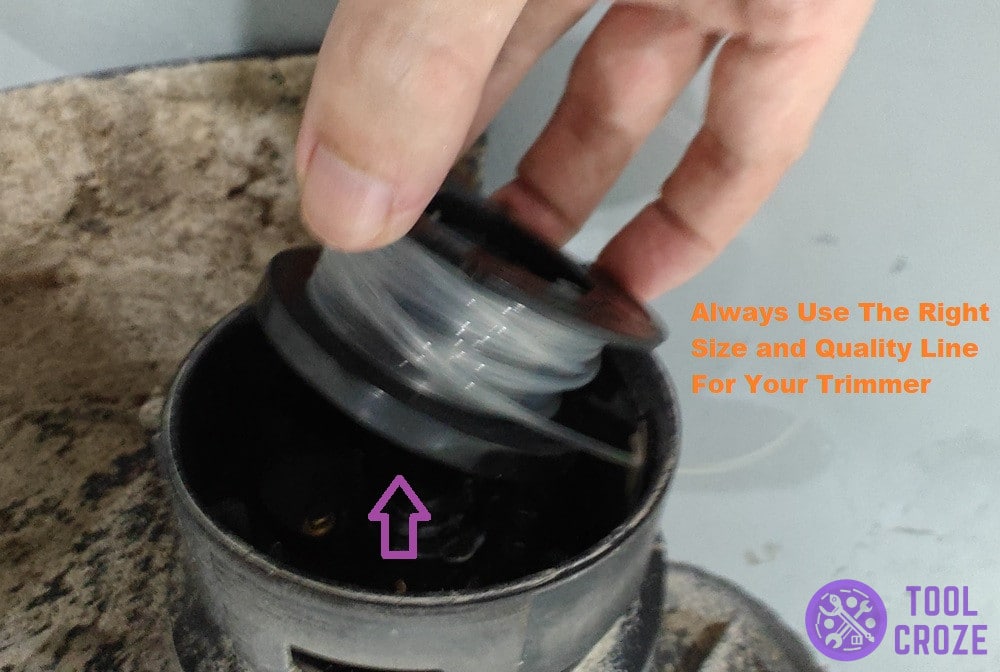
One more thing before I move on from this topic; always ensure the quality of your cutting line is good too. Cheap lines will break easily and aren’t very useful.
And in case Black and Decker trimmer line keeps coming out or feeds too much line, here are 2 easy solutions you can do to solve this problem. You can check it out on the video I’ve made below.
There, I showed how you can use a tape to fix the feeding component. Or you can just wind the string in the opposite direction to fix this problem.
- Spool Cap Needs Cleaned
The spool cap is where your cutting line is seated. Any problems or hindrances around this can stop the line from working as intended. One big problem specifically, is dirt.
Dirt can gather around the spool cap. This isn’t a big problem in most cases. But, in some situations, this dirt can block out the path your cutting line needs to be fed through.
If you aren’t sure what I’m talking about still, here’s a picture of me holding the spool cap. This is what you need to look for on your trimmer, near the motor.
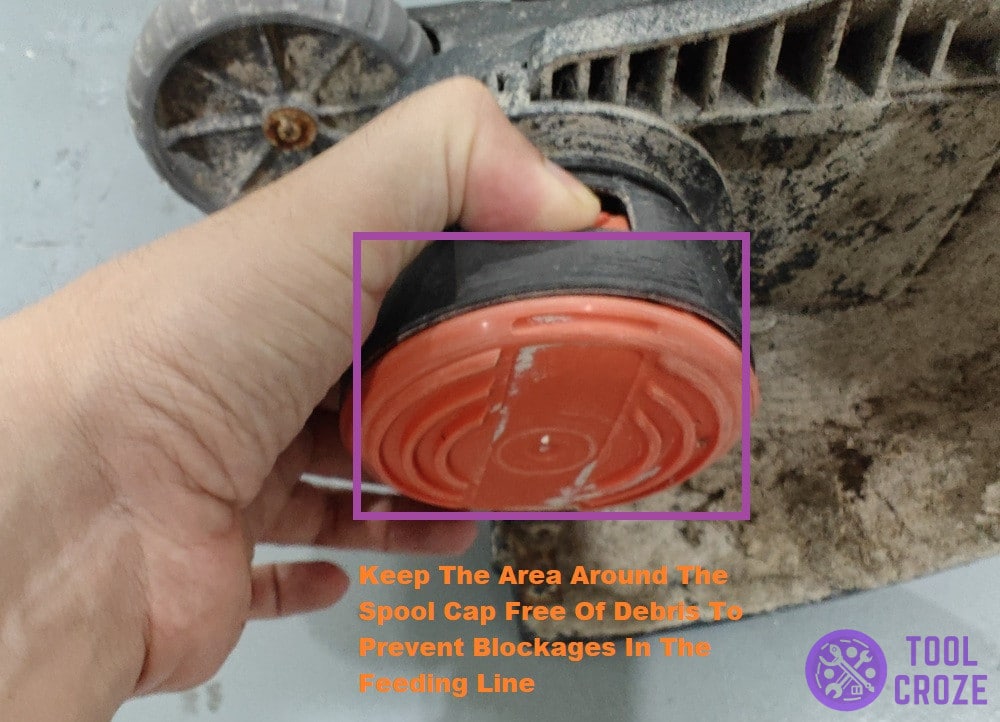
Once you find this component, do as I said in the photo and keep it clean. Use a cloth to free it from any dirt build-ups, and wipe it until it looks good as new.
If the spool cap is not being installed correctly, it might even block the motor from running. Or, in case your Black and Decker trimmer has motor stopped working and really needs to be replaced, I also have a video which shows how to do this. You can watch it below:
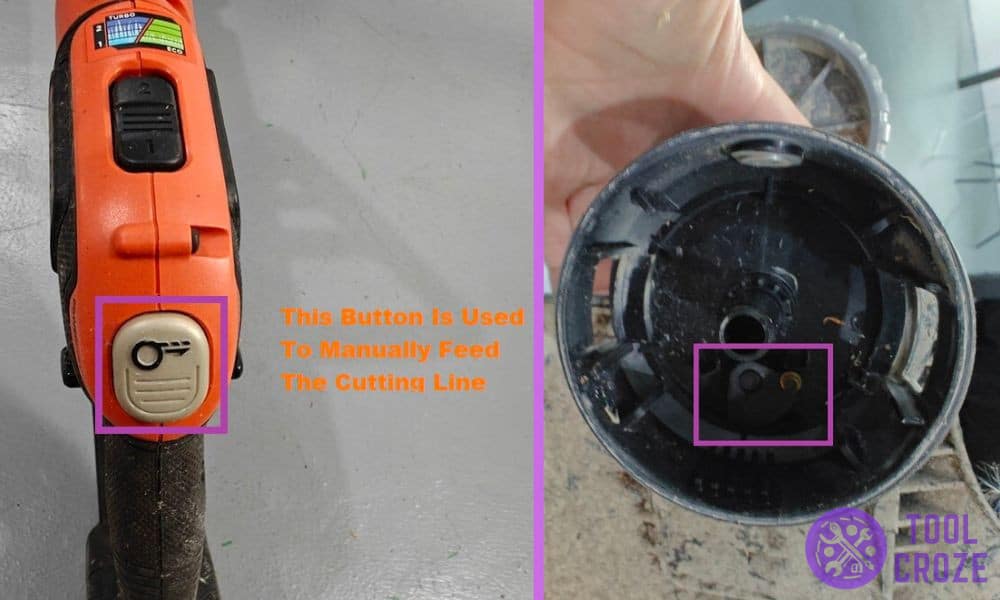
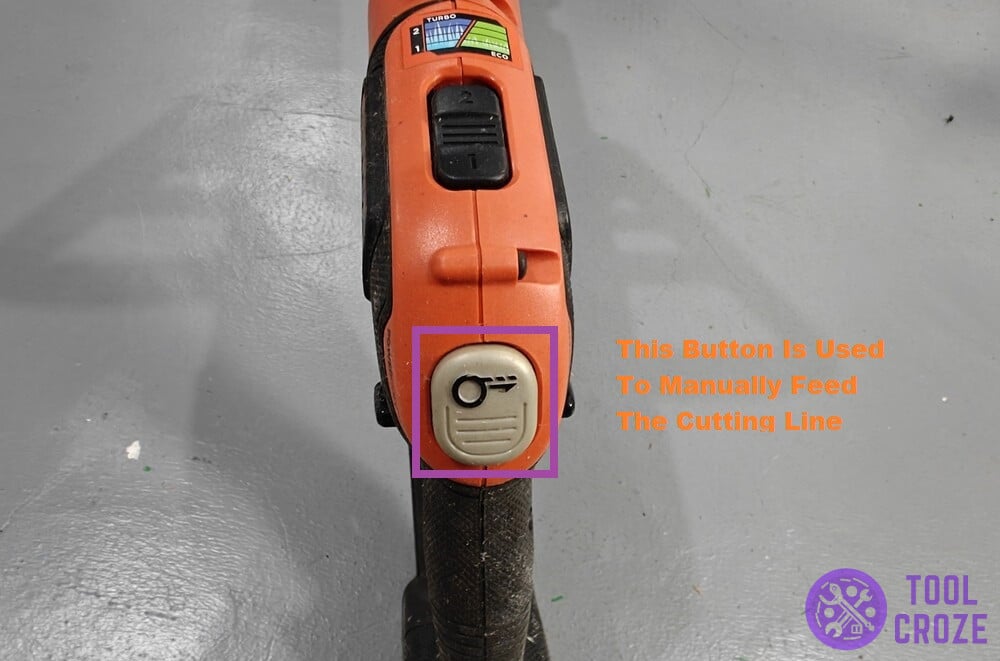
- Faulty Line Feed Button
Does your Black and Decker trimmer feed work fine when you have it set to auto, but won’t work when you switch to manual? I think the reason for this is a faulty line feed button.
This little button is what you press to let the machine know you need more cutting line to be released. But, if there’s a problem with the button, your trimmer won’t know when to let go of the line.
Related: Fixes for Black and Decker Drill Light on but Not Working
Here’s what this button looks like. It should be on the handle of your trimmer.
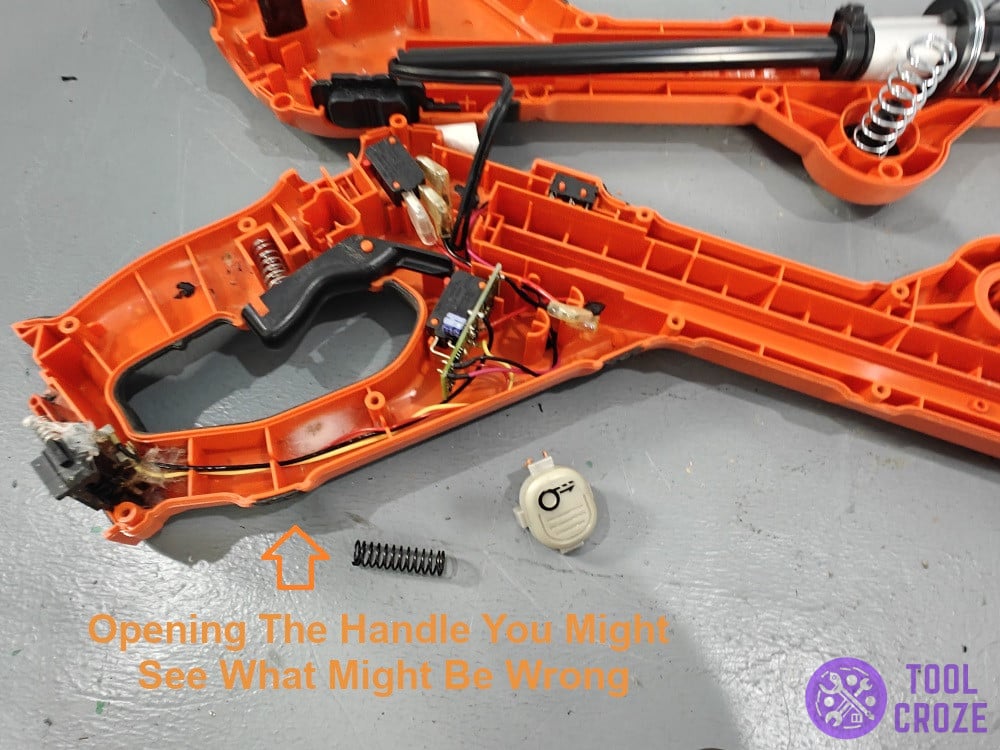
Now, the real struggle is figuring out what exactly is wrong with the button. There are usually three things to watch out for.
It could be debris blocking the button from pressing properly, a faulty spring on the button, or an issue with the input lever this button pushes on when you press it.
I recommend opening the handle to see what might be wrong. Use a screwdriver to take out the screws across the handle, and then inspect the area around the button.
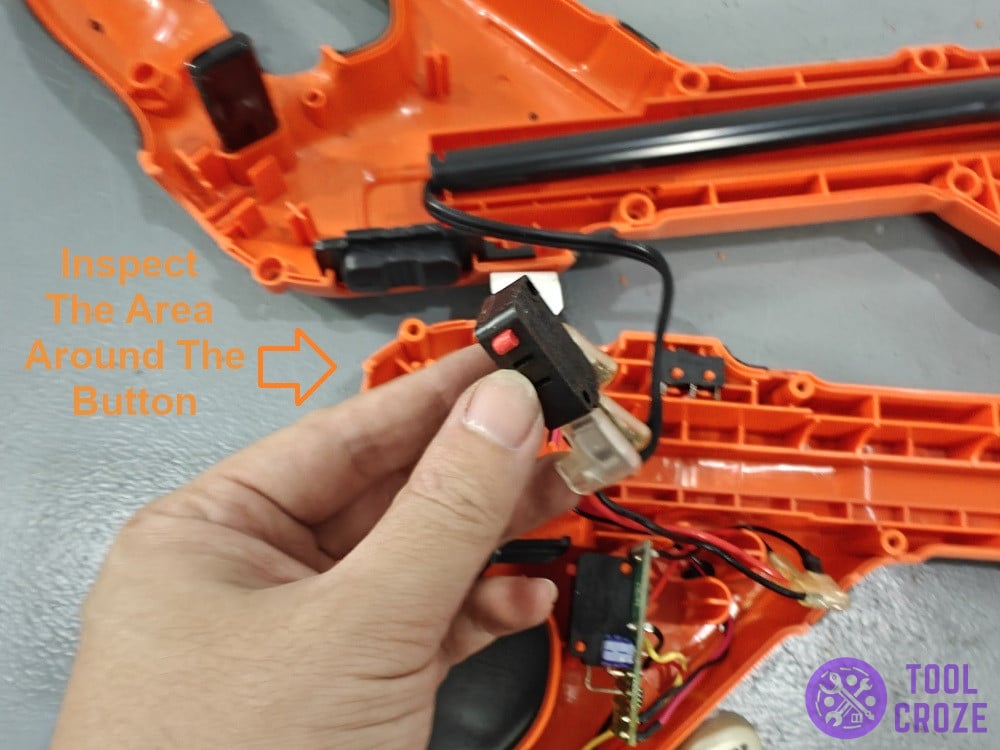
You can see in the image below the button and the components around it.
Here’s a video I made showing how you can easily disassemble the trimmer to fix the trigger button. You can see how easy it is do this.
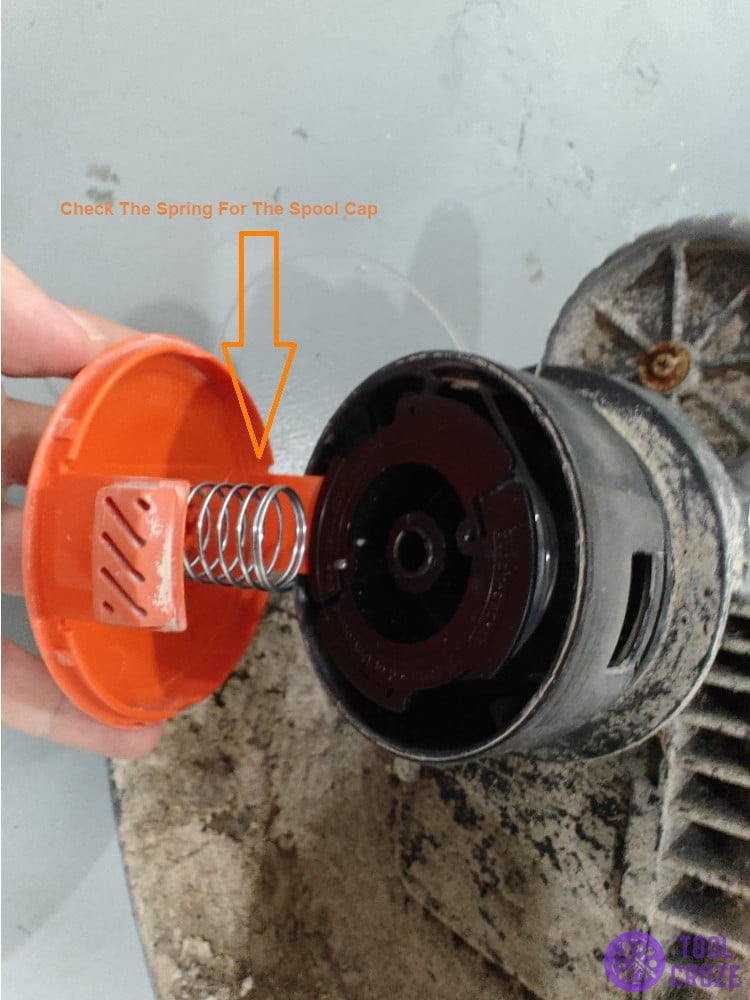
First, wipe off this area and make sure it’s fully clean. Secondly, also check the spring attached to the spool cap. If it is faulty, you will have to replace it with a new spring.
Here’s an image which shows the spring which is attached to the spool cap.
Lastly, the lever itself could have a fault in it. You can’t really replace this specific component, so I recommend getting a repairperson to look at it.
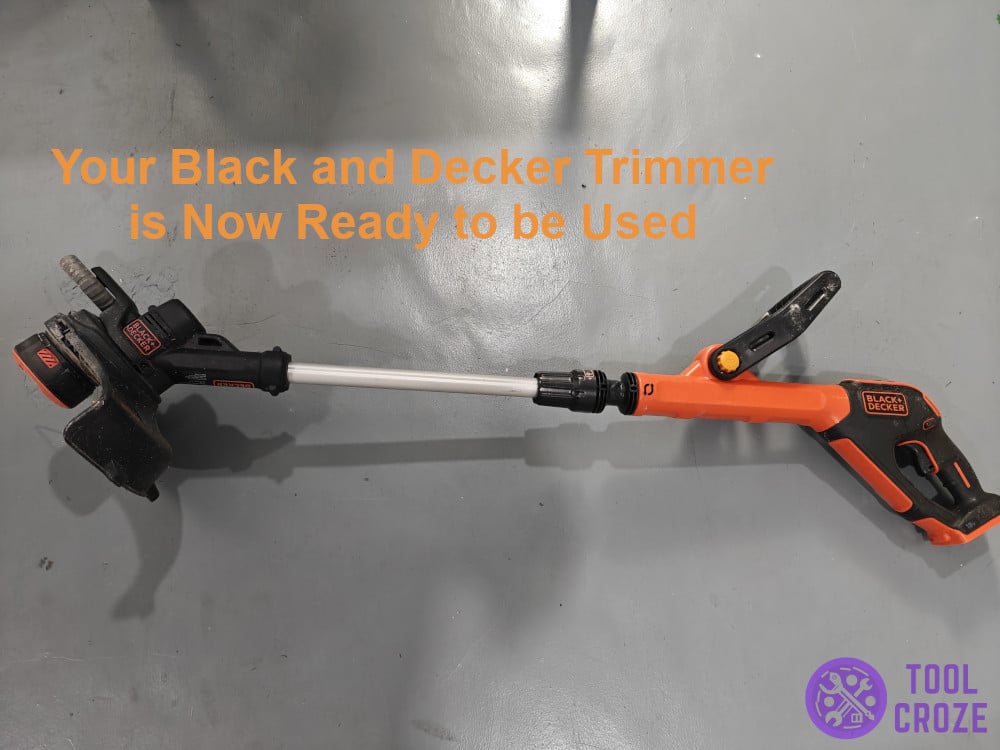
After making all the necessary fixes, your Black and Decker trimmer is now ready to be used again. Here’s a pic which shows the trimmer with all its parts assembled again.
They’ll be able to fix it as needed since it’s hard to do so without the right tools. Then, your trimmer should start feeding you the line just as you need it!
