Usually, drills will have problems with their drill bit, the motor, or some other component. These types of things are common. But, a stranger case is when the drill clearly has power but just won’t work.
An example of this that I recently ran into was a Black and Decker drill that had its light on but it still was not working. If that sounds like the mess you’re in, try these tips I’ll list today!
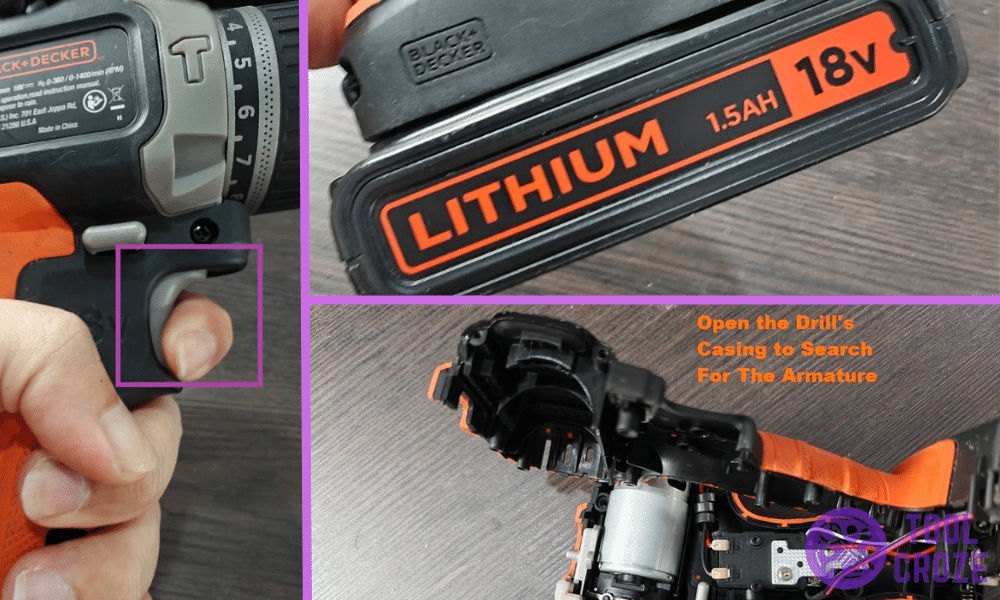
Light On Your Black and Decker Drill But Still Not Working?
- Inspect Trigger Area
Since the light is on, you know that there’s active power. But, active power isn’t useful if the trigger won’t work. That’s because the trigger is what tells the drill when it’s time to do its thing.
Without a working trigger, there’s no way for you to control the device. So, even though it’s otherwise functional, the drill doesn’t work.
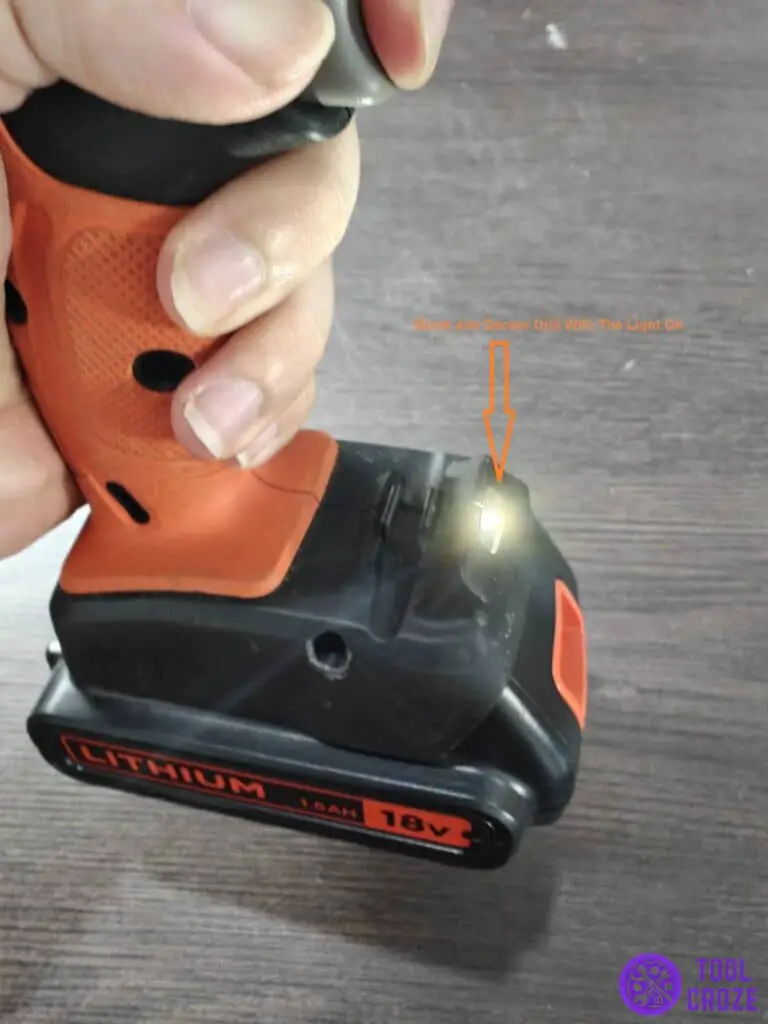
With all that out of the way, my first recommendation to you is to check the trigger. Do it by pressing it down the way I’m doing in this picture.
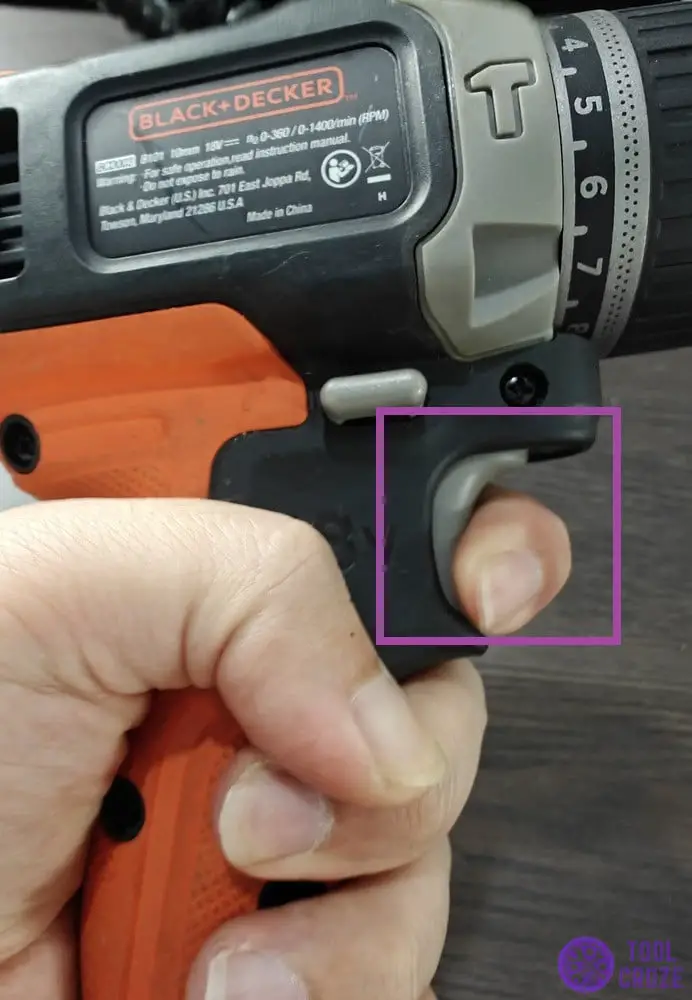
There should be no notable differences in its operation from when you usually press it down. The resistance should be the same, and you optimally shouldn’t hear any clicking sounds.
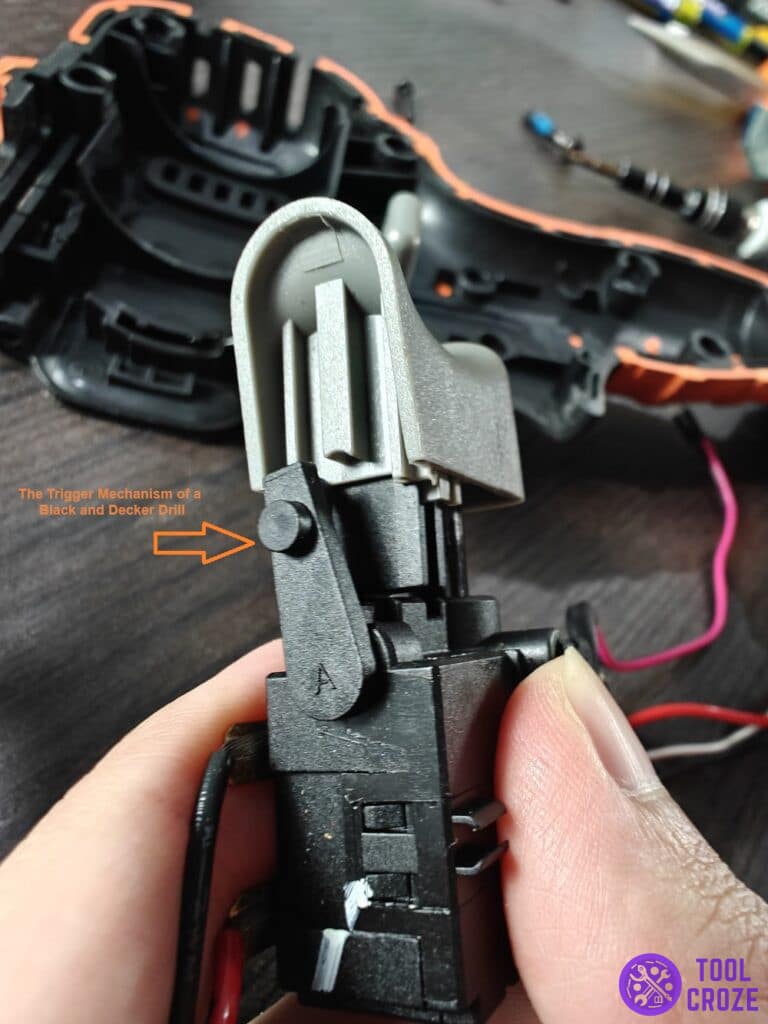
However, if you do find something to be different, that means there’s an issue with the trigger mechanism. It could just be that the mechanism needs a good cleaning after you remove the cover.
In worse cases though, there can be a faulty spring or the trigger itself has damage. The best way to handle these types of things is to replace the component entirely or have a repairperson look at it.
- Old/Weak Battery
As it gets older, a battery loses its maximum capacity more and more. You probably already know about this with your phone and its battery health, which you can usually check through the settings.
You might be wonder what are the relation between weak battery and drill settings?
Well, some drill settings (like setting 10, hammer mode) required higher power and weak battery might not be able to power these settings, hence you only see the light on but the drill won’t spin.
Try to change it to lower settings and see if the drill start to spin now.
I have a video about a quick explanation of what each setting means on a Black and Decker drill. You can watch it below.
A full torque setting is used for full impact. A hammer mode is used in concrete drilling with impact effect.
It also has settings 1 to 10 which produces different torque based on your need. Setting 1 has the lowest torque while setting 10 has high torque.
For drill speed, it has speeds 1 and 2. Speed 1 has lower speed while speed 2 has higher speed.
Lastly, it has the forward/reverse button to change the direction of the drill rotation.
Similarly, Black and Decker batteries have their own health. This health gets lower and lower as time goes on. Eventually, the battery reaches a point where it just can’t power your drill.
Your battery is probably at that point if it’s been in use for a couple of years now. Replacing it is inevitable and something that every cordless Black and Decker drill user has to do.
One of the obvious signs of this is when your Black and Decker battery is blinking red when you charge it.
A weak battery would also explain why the light is on but the rest of the drill isn’t working. It might have enough power for the light, but it can’t handle the rest of the drill’s operations.
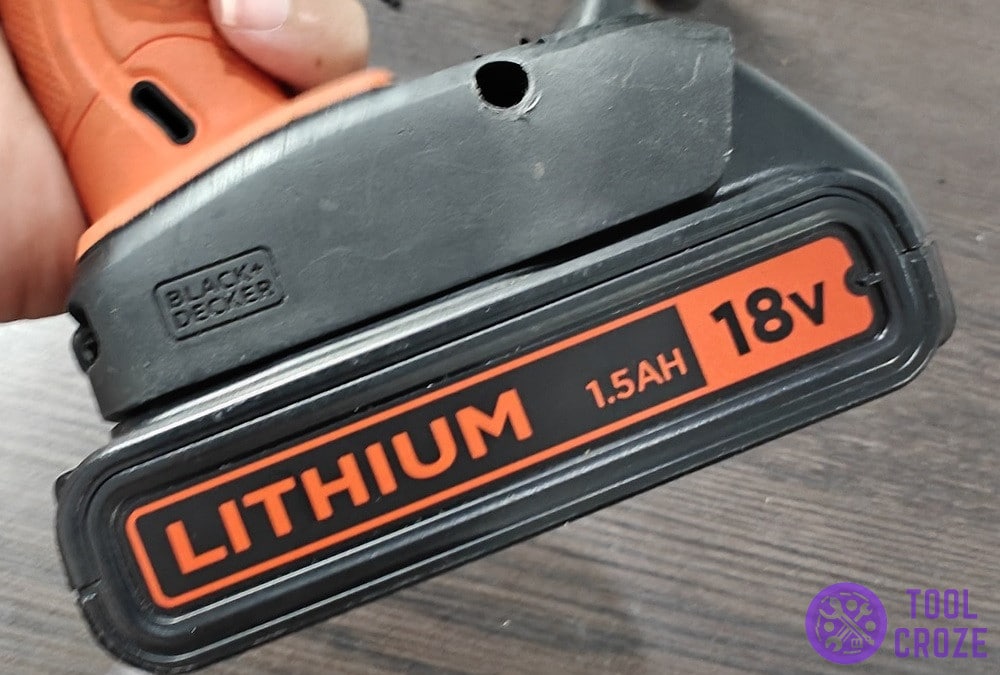
You can see my 18V Black and Decker lithium-ion battery in the photo above this. According to the company itself, this battery stays good for about 300 charging cycles.
It takes around 2 years for that many cycles to go by (more or less depending on how much you use the drill). So, if you have the same battery or something similar, it probably needs a replacement now.
Related: Common Black and Decker Charger Problems Troubleshooting
- Wiring Error
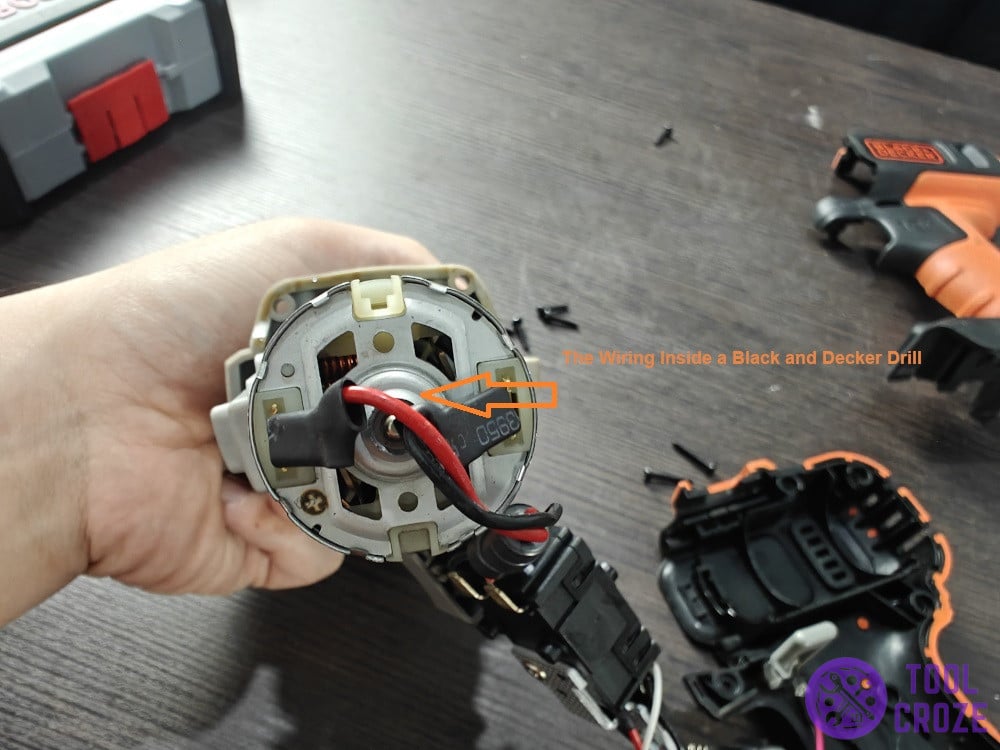
Errors with wiring are another reason why some parts of your Black and Decker drill are working but some aren’t. In this case, maybe there’s an issue with the motor’s wiring.
If any of the wires inside move or detach from the motor, it can’t supply the necessary power to the drill bit. There won’t be any torque produced and the drill won’t spin.
If you’re a beginner, I don’t recommend messing around with the wires yourself. They’re hard to keep track of. But, if you’re confident in your ability to, start taking the screws out like I’ve done here:
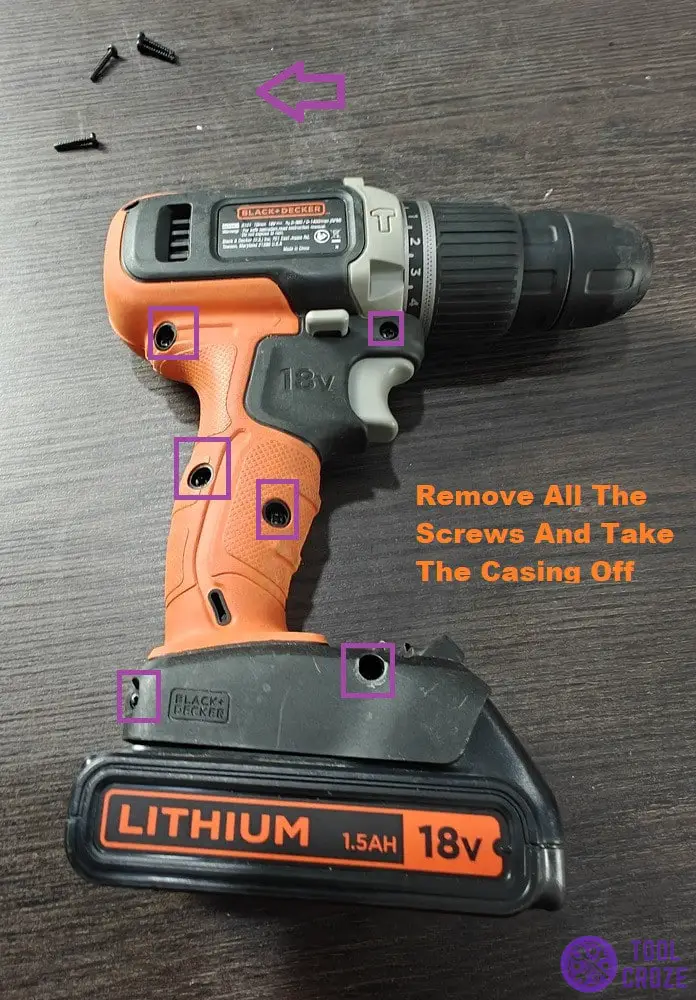
Once you find your way inside, take a good look at the motor. Check its edges and nodes to see if there are any detached wires nearby. You should be able to see them if there are and put them back in place.
But, if you don’t want to mess with the wiring yourself, any repairperson will be able to diagnose the wiring problem and deal with it for you pretty easily.
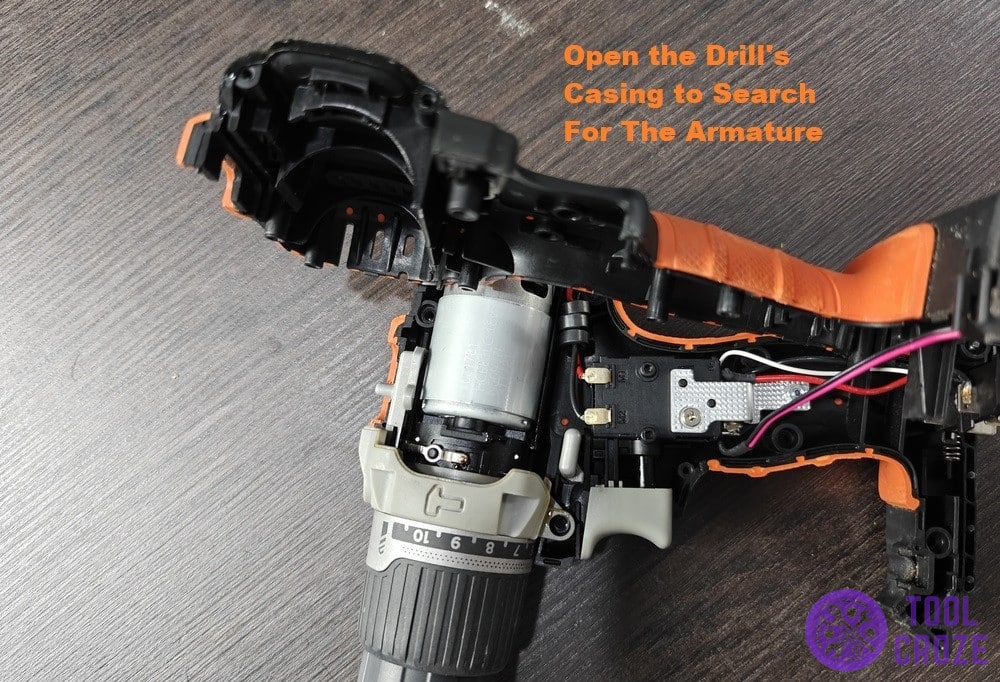
- Defective Armature
Like the motor, the armature is one of the components responsible for producing torque in the Black and Decker drill. But, if this component stops working, so does the drill bit.
And speaking of drill bits, I have made a video about how you can easily perform a Black and Decker drill bit change. You can watch it below.
I know 2 two ways how to do it and I showed them both on this video.
The first way is the safest way for me. First, I would remove the battery from the black and decker drill.
Then, I’ll use one of my hands to grab the upper part of the chuck, please take note not to grab the lower part of the chuck. Rotate the chuck in anti-clockwise direction, and the chuck is now loosen to release the drill bit.
Finally, get another drill you would like to use and rotate the chuck clockwise to tighten the chuck.
The second way is more convenient and the fastest way.
Put the battery back to the drill, grab the upper part of the chuck, set the drill to anti-clockwise and press the drill trigger.
The drill will now start to spin and the chuck would be loosen to remove the old drill bit. With same procedure, set the drill direction to forward and press the trigger slowly to tighten the new drill bit.
That is because it can’t produce the right momentum to function as needed even if the light is on. So, make sure that it’s not the thing that’s behind your worries.
If you don’t know where to look for the armature, it’s usually near the motor on Black and Decker drills.
If it turns out to be faulty, the only course of action is usually to repair it.
It might be burned out or have some other issue, and getting it repaired is usually a hassle compared to just repairing it. It usually ends up costing the same too, if the damage is too serious.
