
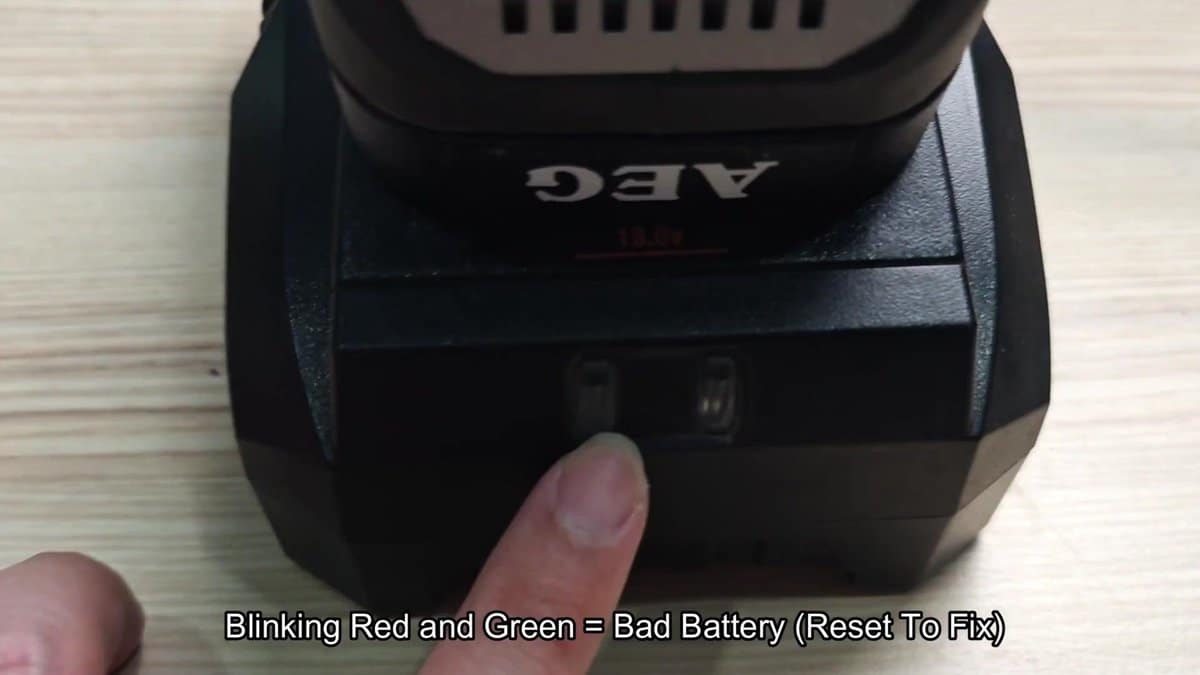
Problem with the charging of AEG-battery? Nothing is more annoying than when you plug in your AEG-battery and see the red and green lights blink. The charger show that blinking pattern as a sign of a fault in the battery, so it refuses to charge.
Testing it using the button I saw that it already had a bit of leftover charge, so I thought that maybe can revive it instead of simply toss it.
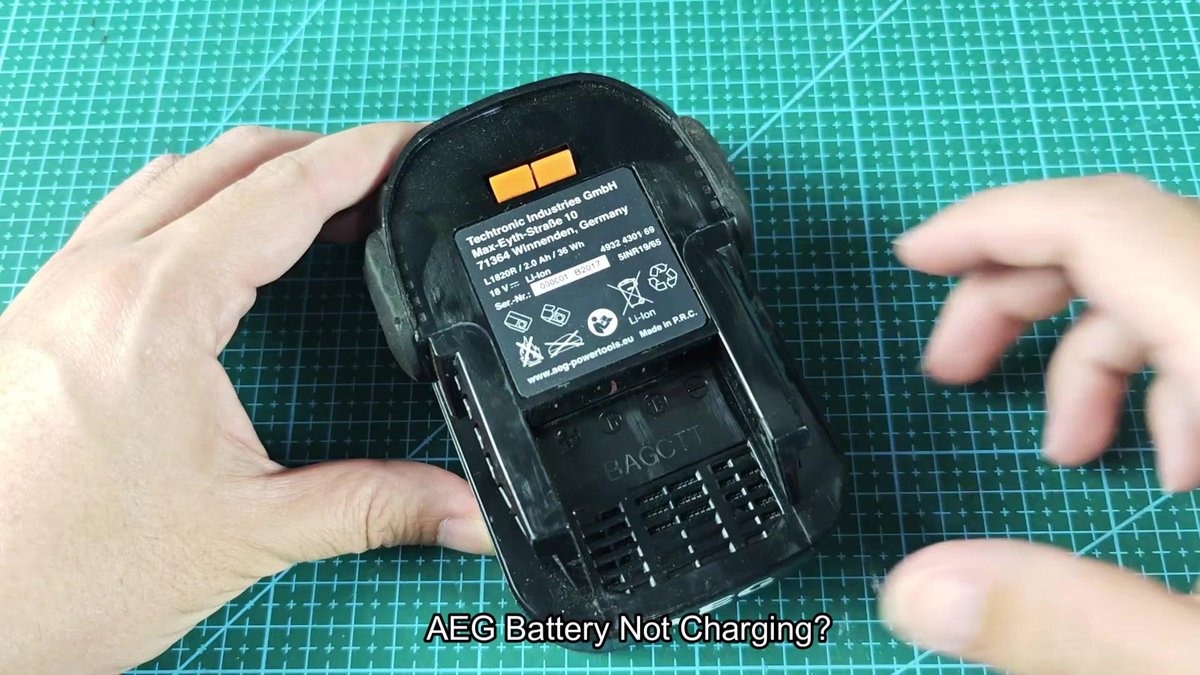
I first took out the dead battery to check it well. It was a professional lithium-ion AEG-battery with 18 volts and 2.0 amps. The label shows that it dated from 2017, so it was still not that old I think since I bought it new.
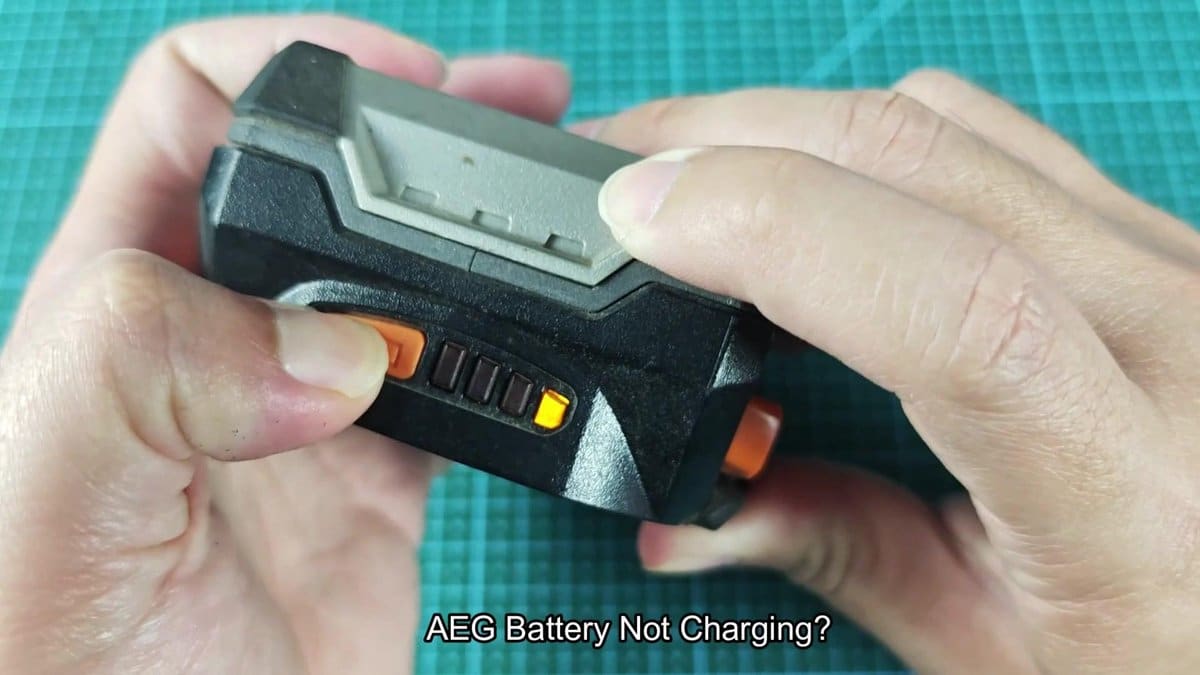
Pressing the orange test button on the side, one light bar flashed, which showed that some energy stayed in the cells. Some reason existed so that the charger stopped the process before full capacity.
Revive an AEG 18V Battery: Fix Flashing Red and Green Charger Lights
I double checked the battery a few times to make sure. Every time when I pressed the orange button, at least one LED segment lit up. Clearly the unit already had a bit of life, but it just needed the charger to recognize it again.
Then I tried the revival trick that basically gives a jumpstart to the internal battery management for normal mode.
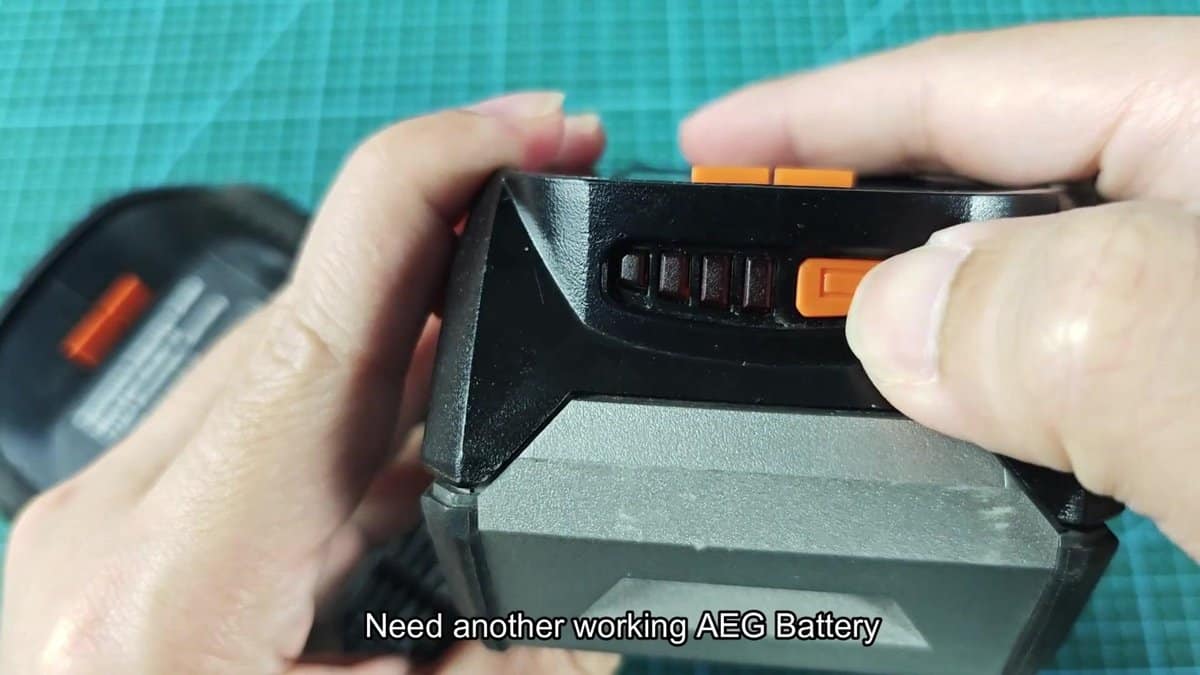
For that you need another AEG-battery from the same volt group that works well. I took my 4.0 Ah unit and checked whether it was fully charged by pressing the test button. The lights shined in order, all four of them.
Perfect.
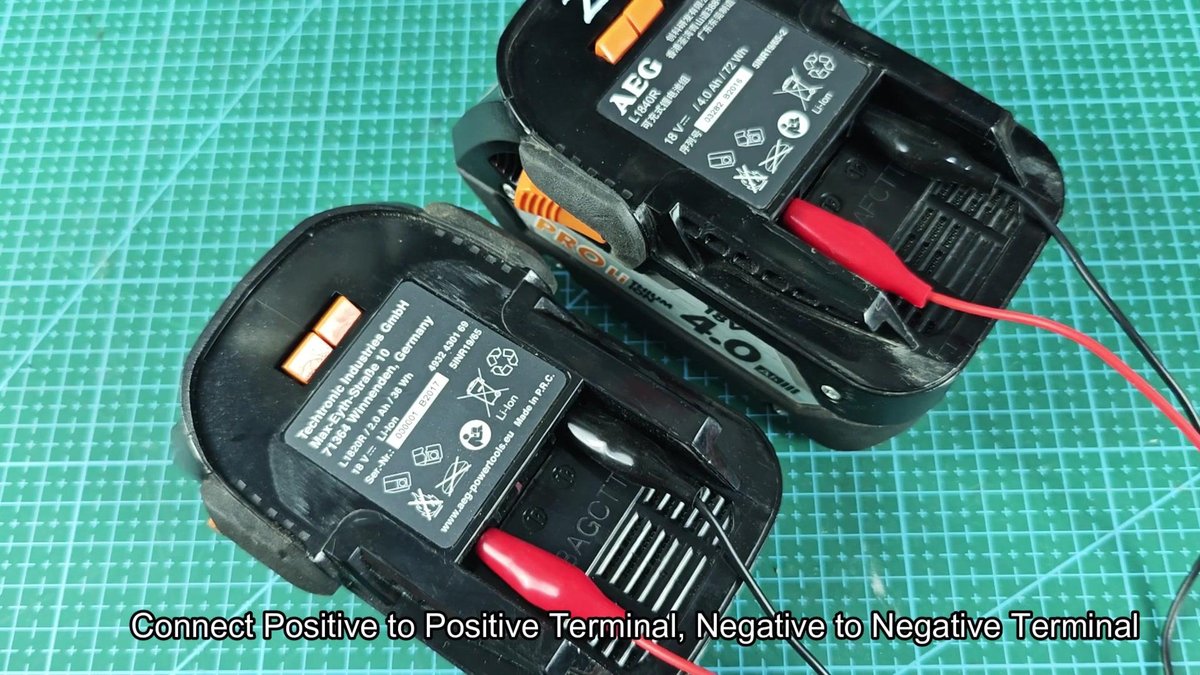
The next step was to find the positive and negative polls on both units. I flipped them to see the contacts where they connect to tools or chargers. Beside the positive terminal shows a little plus symbol pressed in the plastic.
It was easily found on both, together with the marks T1 and T2 for the other spots.
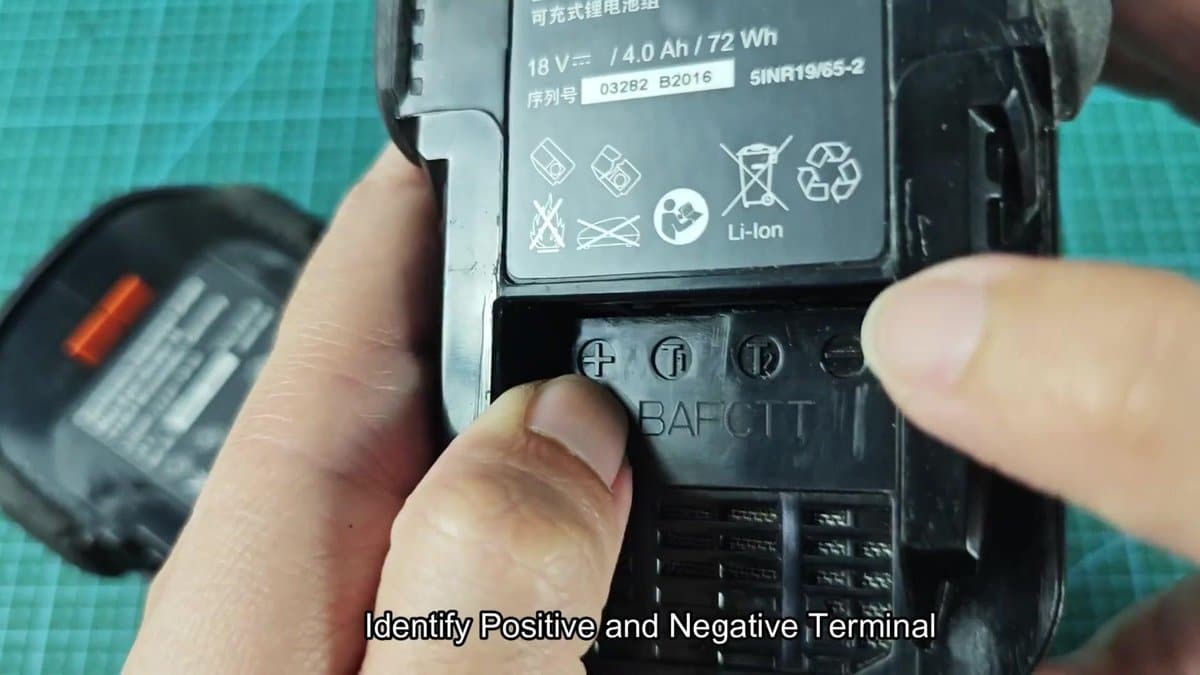
I set the batteries upside down on the workbench, ready for the links. Be careful here, because swapping the polarity is a common mistake. The poles are clearly labeled, if one knows what to search for, so double checking before connecting is wise.
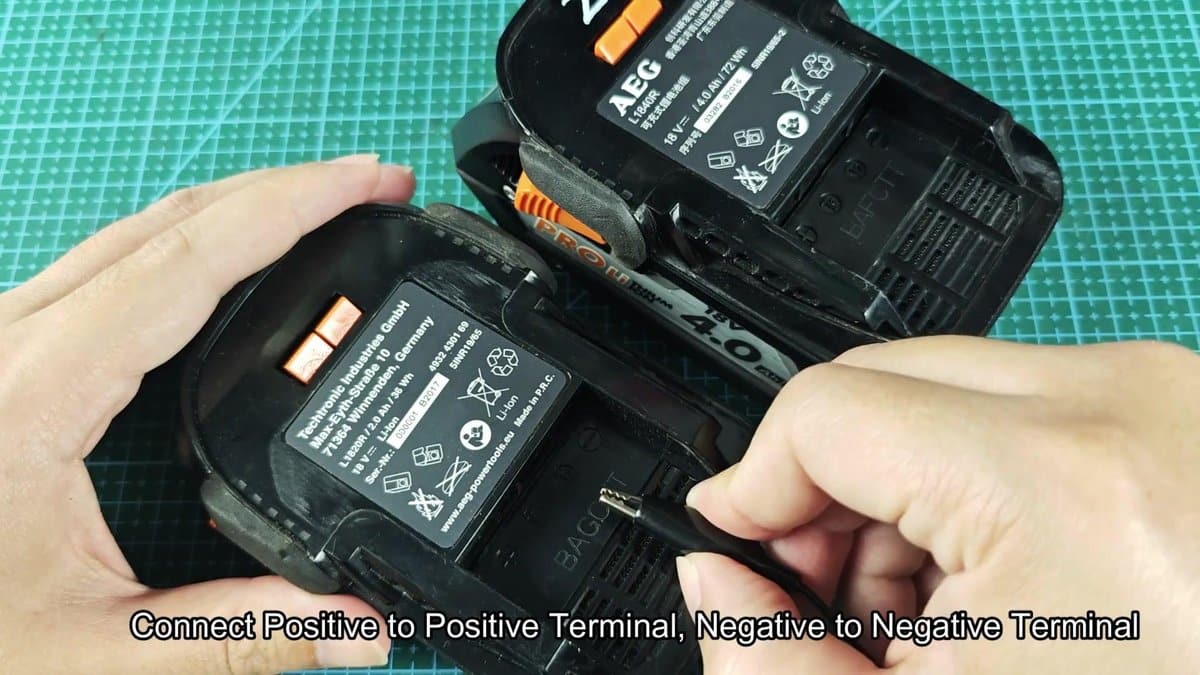
To bridge the two units, I used thin wires with crocodile clips. I connected the positive pole of the good to that of the dead, then the negative in the same way. Just make sure that the metal tips touch the battery poles well.
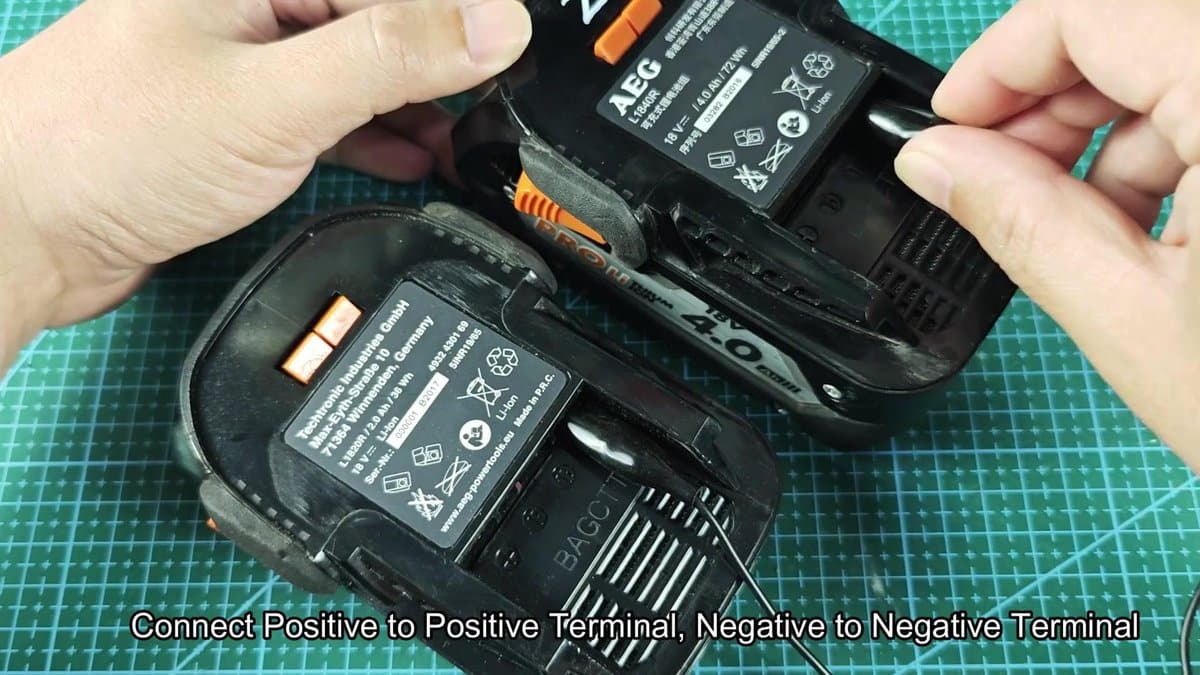
The setup with the two units wired looked like a makeshift jump-start cable. Really, because that exactly is what it is. The fully charged unit sends energy to the weak one through those direct links.
I pressed everything flat, so that the clips do not slip during the wait.
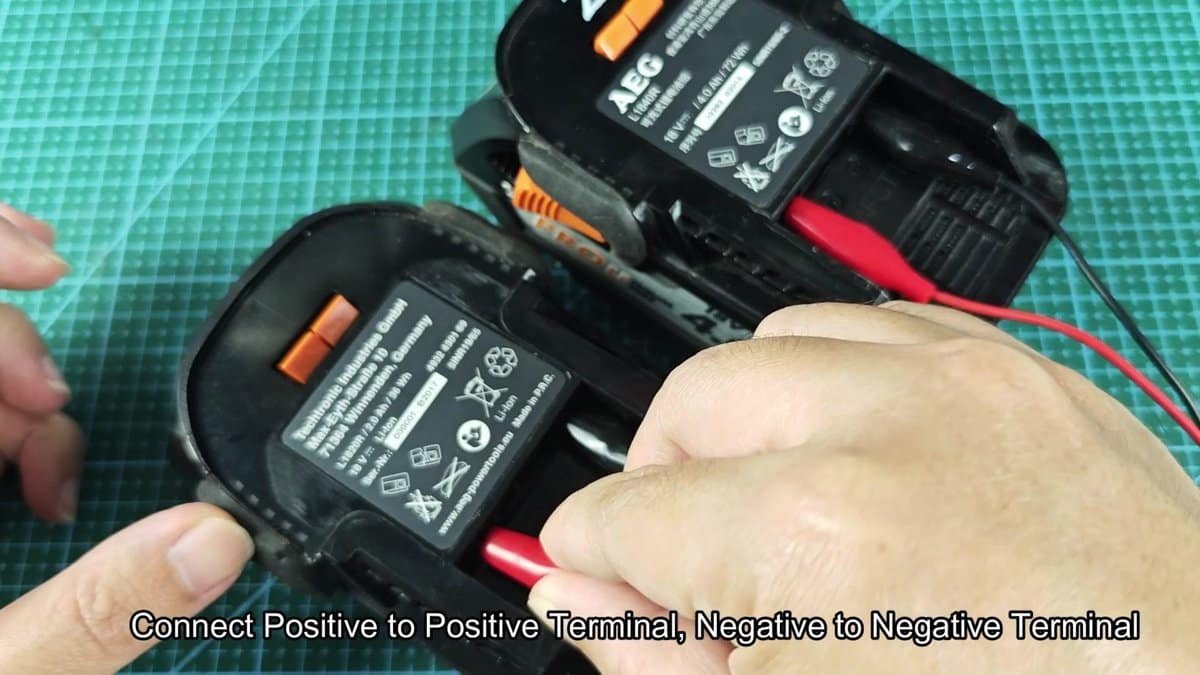
I left the two units connected for around fifteen seconds. The video warned to unclip right away if the wires start smoking or burning, which wood signal a big mistake. I watched everything, and nothing happened.
No flame, no heat, no bad smells. Simply two batteries connected and working almost normally.
Then I carefully removed the clips and separated the units. No visible difference in the dead one, it seemed the same as before. The only way to check was to put it in the real charger.
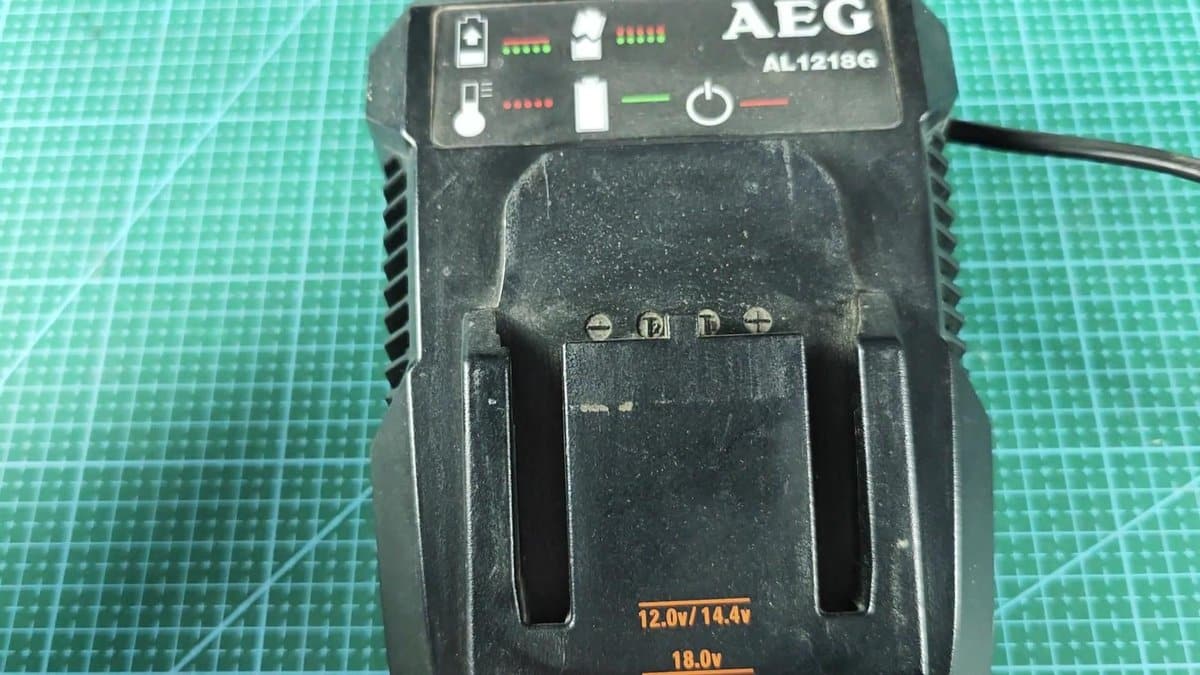
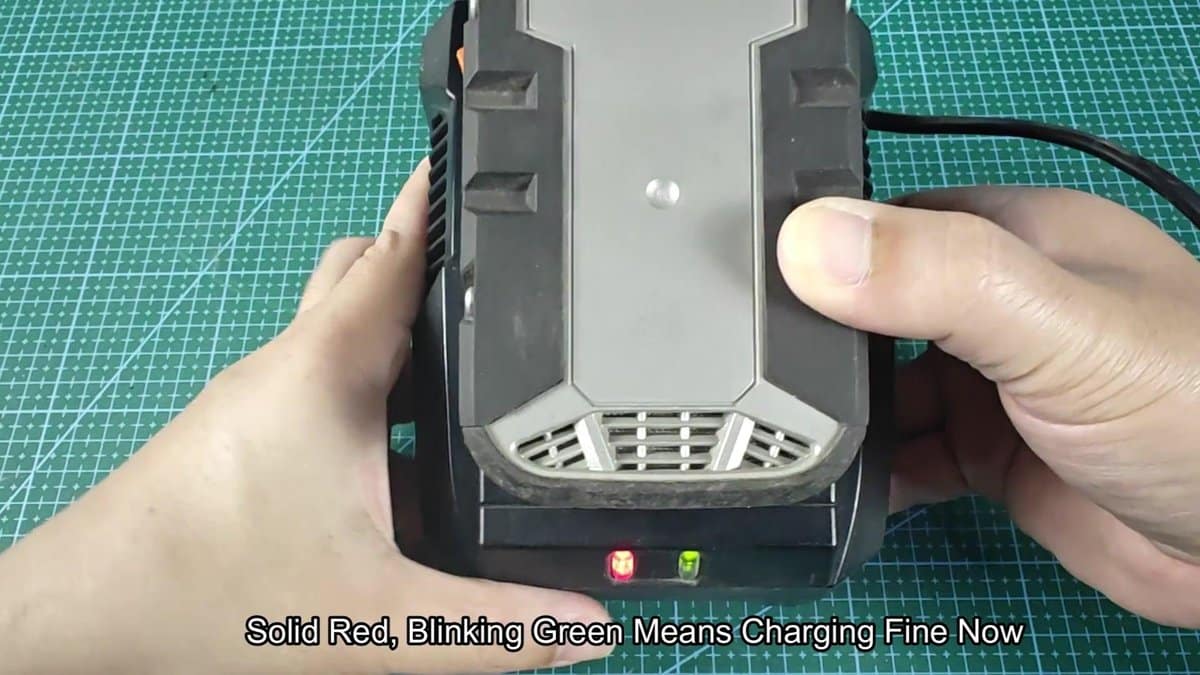
I put the battery in the AEG AL1218G, and I watched the lights. The device works for 12, 14.4 and 18 volt units, so it right away spotted it. Instead of the prior blinking red-green nonsense, the bottom LED shined steady red.
The normal charging sign is solid red light.
I moved my eye closer to the light pattern to confirm. When the bottom is steady red and the green blinks, the charge moves along normally. There it was.
Such blinking shows that the process works and everything goes well. So the revival trick succeeded and brought the battery back to life.

To reach full power, I left it on the charger for the whole cycle. The whole thing from start until finish took maybe five minutes of real work, not counting the actual charging. Much more quick than ordering new and waiting for delivery, especially because the unit was not damaged.
The battery that before refused to charge now works well in all my AEG tools. It holds energy just as if it was new from the box. The method gives a right good start.
