I use my Freebird shaver on a daily basis to groom my beard and to help me look clean and nice for my professional life, but a few days ago, I found myself in a problematic situation with my Freebird shaver.
No matter how hard I tried, my charger just wouldn’t charge, even after leaving it on charge for 2-3 hours, still there was no sound, no motor working whatsoever.
I figured something was wrong with my Freebird shaver and took the help of the internet to help me fix it. Here is how I managed to fix my Freebird shaver when it was not charging.
And to help you even more, I have also made a short video on YouTube where I showed how to fix this problem. You can watch it below.
On the video, the first thing I did was to check if there’s a problem with the Freebird shaver battery. If it’s fine, you can check the wires connecting the charging port and the PCB, make sure they are secured.
2 Ways to Fix a Freebird Shaver That’s Not Charging
Before we can fix the Freebird shaver, we need to open it to examine the problem. Follow the steps below to first open the shaver.
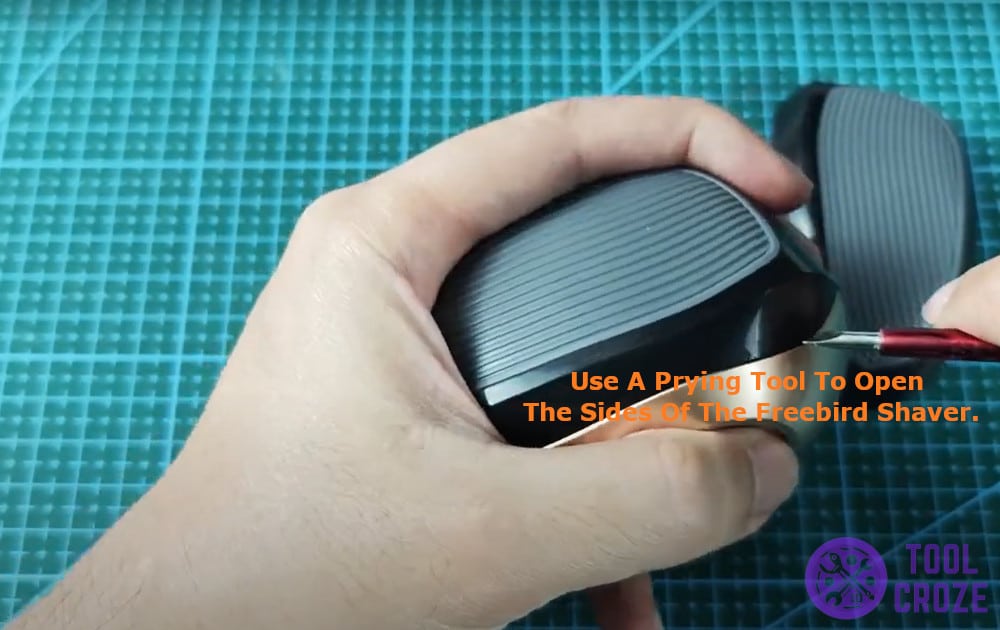
1. Use a prying tool to open the sides of the Freebird Shaver, which are stuck together with plastic hinges. These are really easy to remove and require little power.
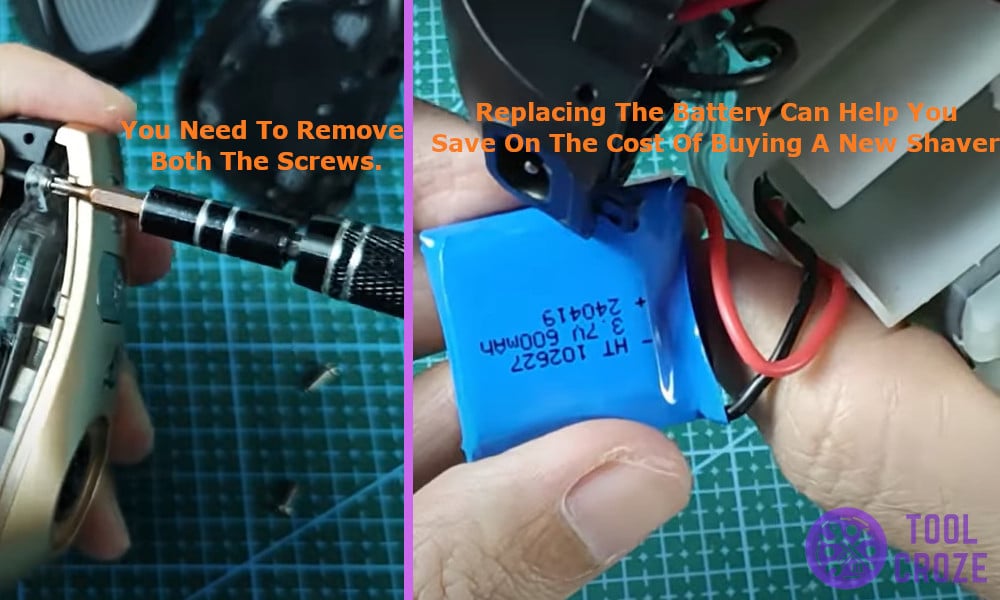
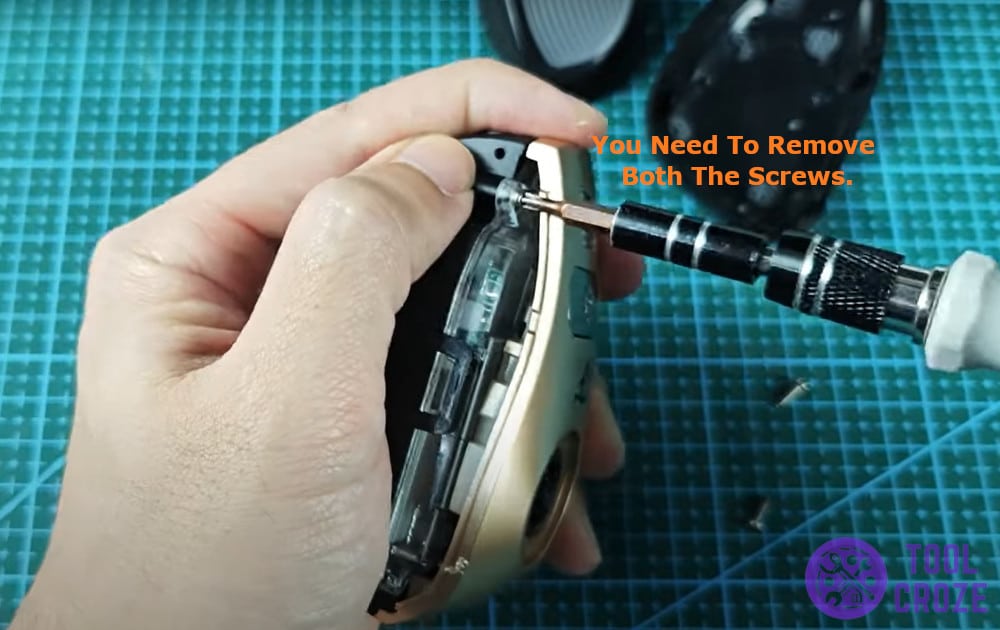
2. Now you will find two screws holding the top cover of the Freebird shaver in place, you need to remove both the screws before prying open the top cover of the shaver. Once removed, use very little force to remove the front cover.
3. At last, you will find a transparent plastic cover which holds every electrical component below it. Carefully pry it out using a sharp pry tool and remove the whole electrical unit from the body.
The Fix
Method 1 – Replace The Battery
If your Freebird shaver is not charging just like mine the problem might be with the battery or the charging unit. Follow the steps below to look for the problem and fix it.
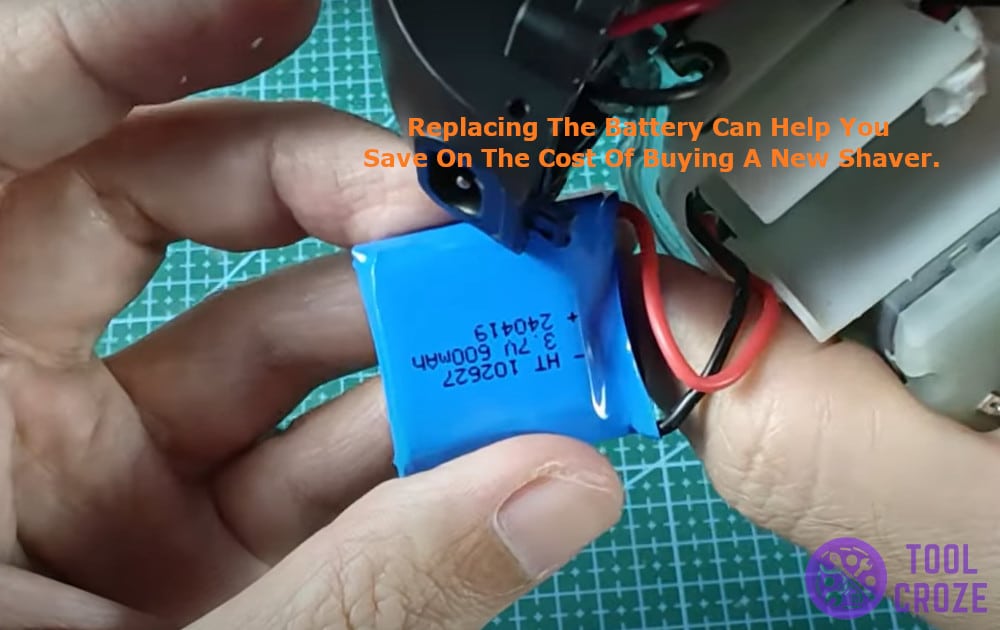
1. A very common issue if your Freebird shaver won’t charge can be because the battery might be dead, or it might not be receiving a charge at all.
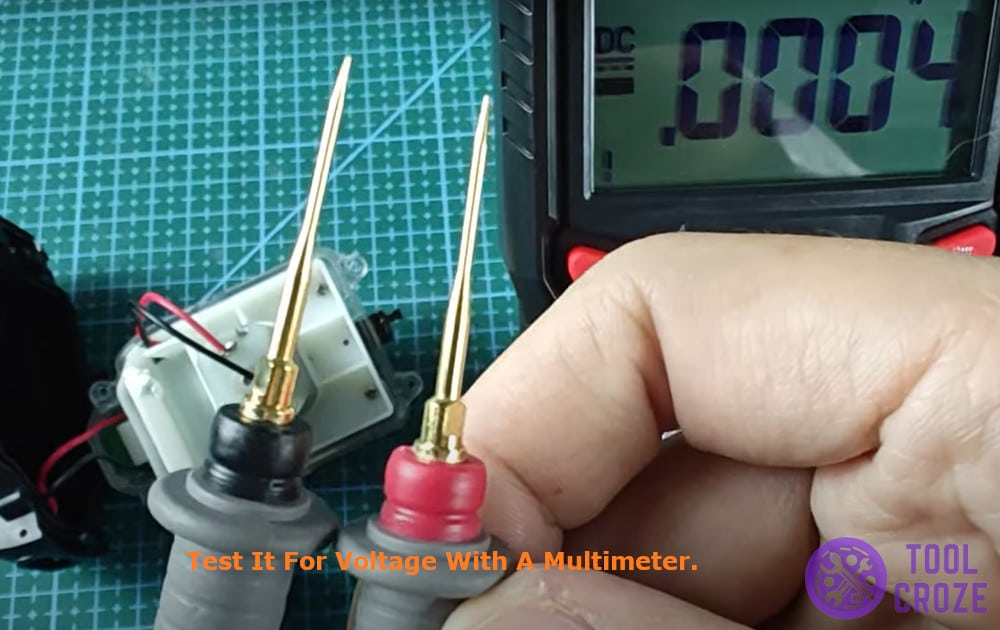
2. Remove the battery, which is located alongside the motor and test it for voltage with a multimeter. If the battery output is around 3.7V, the battery is fine, but if the voltage is below 3.7V, the battery is dead and needs a replacement.
3. Replacing the battery can help you save on the cost of buying a new shaver. Replace the dead battery with a 102627 3.7V battery only to achieve the optimal performance.
Method 2 – Check The Charging Unit
1. The battery is charged with the help of the charging unit, and make sure all the wires from the charging port to the electronic boards are properly soldered.
2. If you find a loose connection, solder it properly to the board or the port and try charging the Freebird shaver again. Use a 5V charger to charge the shaver and if a solid red light is displayed on the shaver it means the Freebird shaver is being charged again and the problem is now solved.
