Using a drill can be a really tricky task especially when the drill bill just decides to stay stuck in the chuck.
This was me yesterday when my drill bit decided to not move even a inch after being stuck in the chuck of my Worx drill while I was working on a really important project that needed to be completed as soon as possible.
I tried everything from reversing the drill to using force to remove the drill bit but nothing worked for me until I used the internet and it provided me with these 3 methods to remove the drill bit stuck in the chuck.
I also made a short video about this topic and you can watch it first before you continue reading this article. You can watch it down below.
On the video, I demonstrated how you can fix this problem by using an old hose, a locking plier or a pair of big pliers.
3 Ways to Fix Worx Drill Bit Stuck in the Chuck
Method 1: Use a Water Hose Sleeve & Reverse Drill
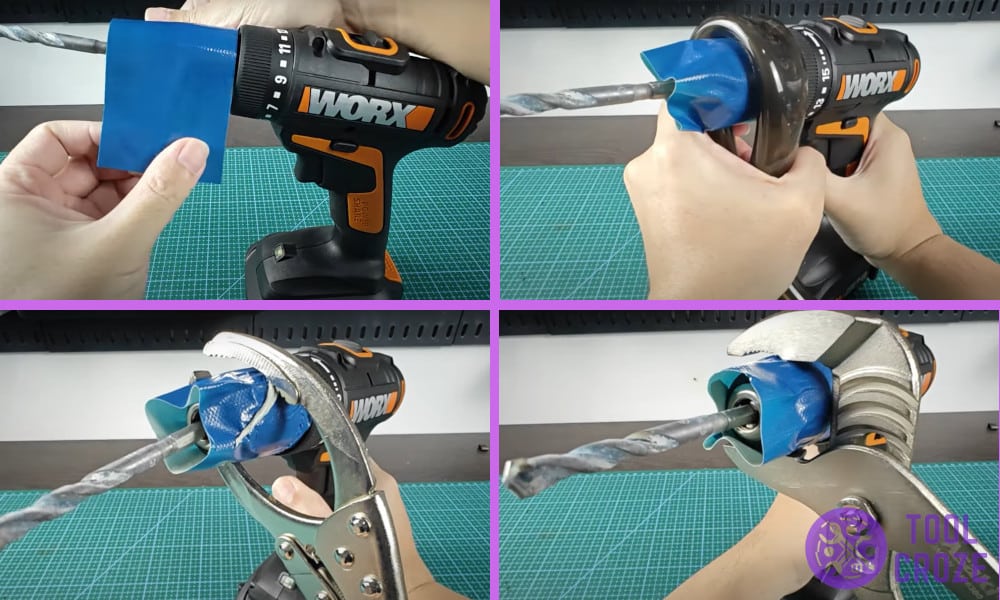
1. I started off by protecting the drill from any scratches and damages as I bought my Worx drill just recently. I loved this drill more than my other drills. I took a piece of tape and wrapped it around the chuck to secure it.

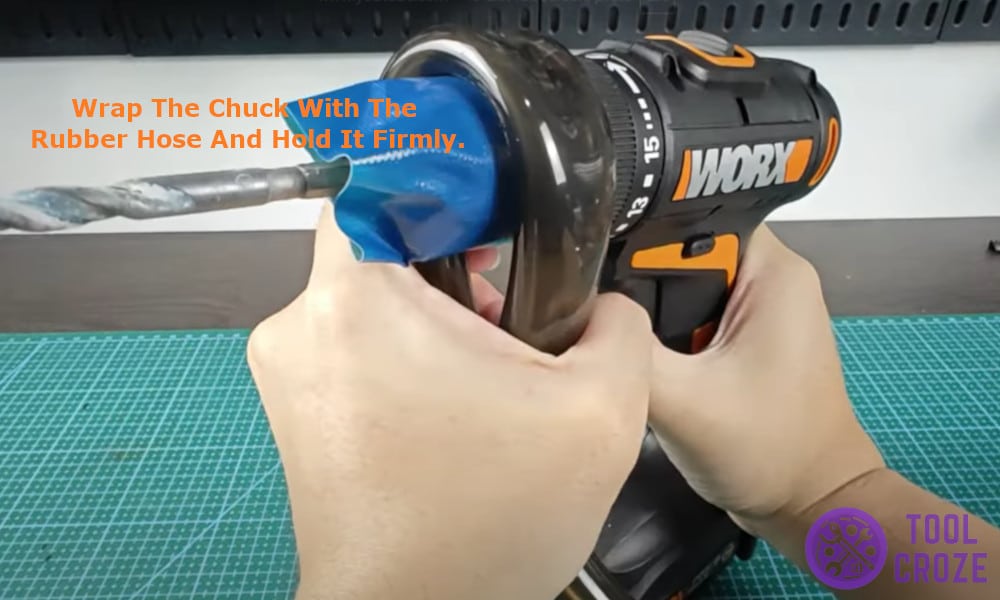
2. Now comes the part where you have to use a little bit of force, take a piece of old rubber hose. I found one laying around my house, you can use an old pipe and cut a piece of it. Then wrap the chuck with the rubber hose and hold it firmly.
3. Then I reversed my drill making sure I held the hose in place and the magic happened right in front of my eyes as the drill came right off. Make sure to hold it tightly and firmly in order to not hurt yourself.
Method 2: Try Locking Plier If Water Hose Doesn’t Work
1. Well if the hose trick didn’t work for you don’t worry I got another one that might just do. For this one I started with pulling out a locking plier from the pile of my tools.
The locking plier helped me get a tighter grip on the chuck to remove the drill bit.
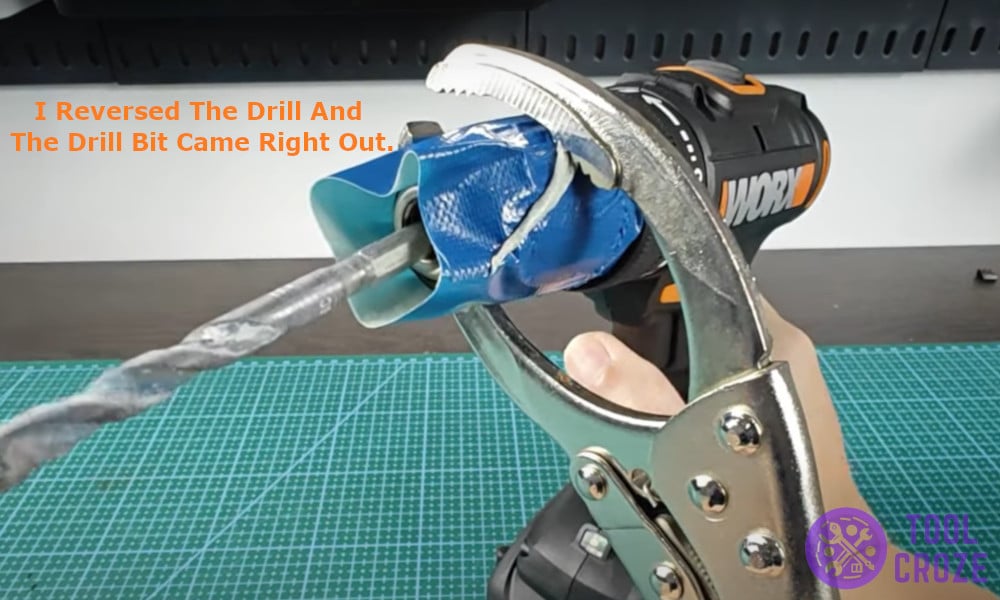
2. Start by applying a layer of tape as a protective layer on the chuck. When I made sure I had a firm grip on the pliers and tight hold of the chuck I reversed the drill and the drill bit came right out.
The drill was once again free to be used and get my things done in time.
Method 3: Big Pliers

1. Now if you don’t have special locking pliers don’t worry and just grab any kind of big plier that you can find in your tool box and put it to work.
I started by applying the protective tape around the chuck to avoid any damages or scratches.
2. Then I placed the Worx drill in reverse and with firm grip on the chuck with the pliers I reversed the drill. The drill bit came right out and my drill was ready to be used again normally.
