The Tineco Vacuum mop is one of the most helpful mops I have ever used for my cleaning tasks and making sure my tiles and floors are in the best possible conditions.
It has helped me get into the corners I couldn’t get into myself and places that take a lot of guts to clean, but a few days ago I ran into some problems. As soon as I turned the Tineco vacuum on it started giving me a weird error.
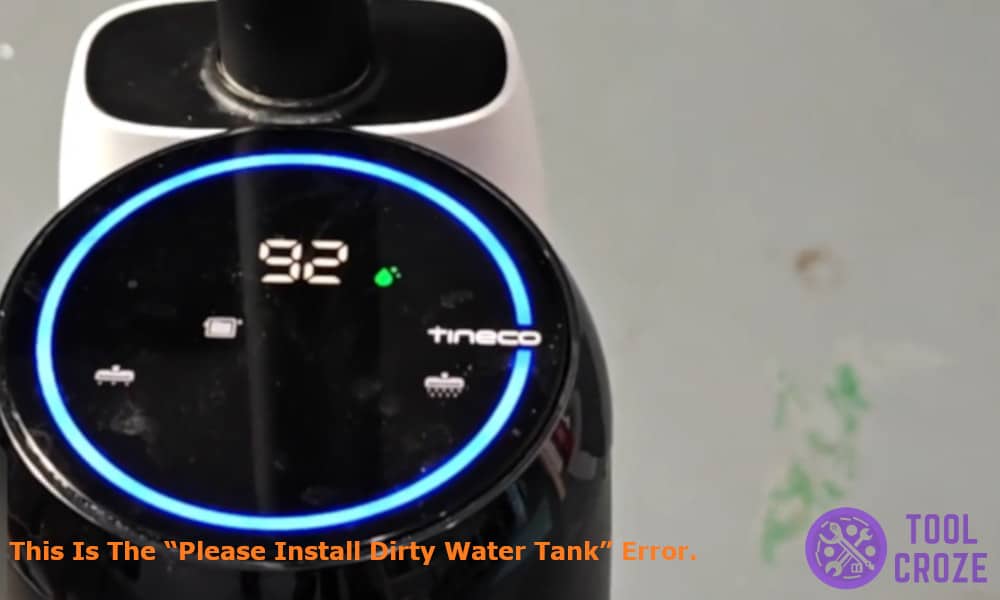
For some reason the vacuum kept saying “please install a dirty water tank” and the mop turned itself off again and again.
I tried putting it in charge thinking the battery was low but nothing worked and the mop kept turning itself off and showed me an error on the display.
I also have a short video about this topic and you can watch it below before you continue reading this article.
On the video, I showed the different ways you can solve this problem: re-installing the dirty water tank, fixing the dirty water tank, and connecting the 2 rightmost pins together.
3 Ways to Fix Tineco Vacuum Mop “Please Install Dirty Water Tank” Error
After hours and hours of researching on the internet I found some solutions to fix it and here is what you can also do if you are struggling with this error.
1. Re-install the Dirty Water Tank
The Dirty water tank is responsible for holding dirty water in a container which is collected by the mop itself during the cleaning process.
A fresh stream of water is sprayed on the floor which is then collected and vacuumed into the dirty water tank. Without the dirty water being attached the mop stops working as there is nowhere to send the water into.
I started by removing the tank and then reinstalling it in place to see if the error persisted or not. I tried removing and also emptying the dirty water tank before installing it back on the mop again.
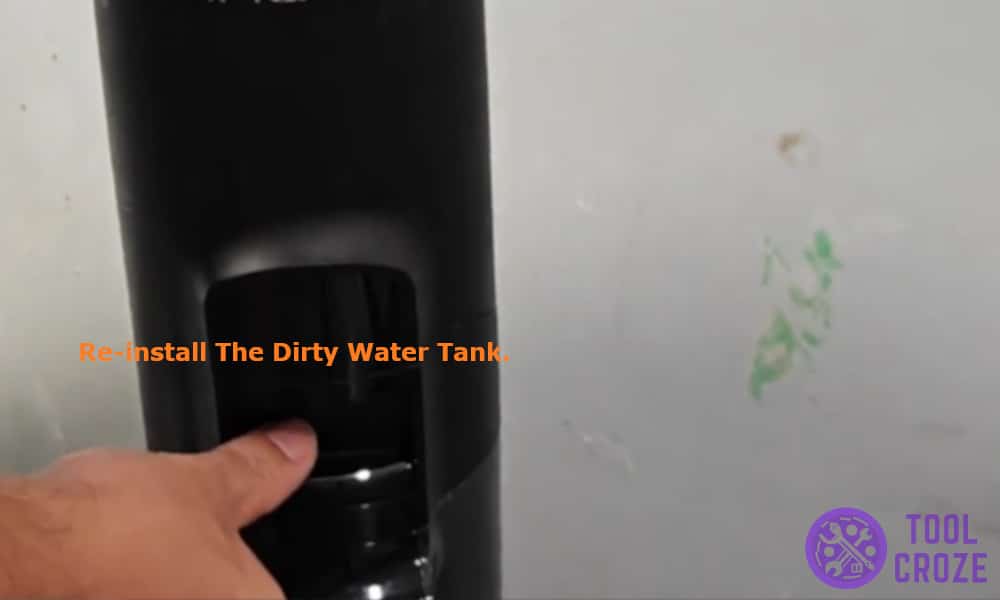
If the error goes away then congratulations my friend you are free to use your Tineco mop as you like again without any irritating errors.
2. Fix the Dirty Water Tank
If your errors were still not resolved well, don’t worry it might take a long time but these solutions might fix things for you.
While reinstalling the tank didn’t make any changes to my mop and I kept getting the same error I tried troubleshooting the Tineco mop.
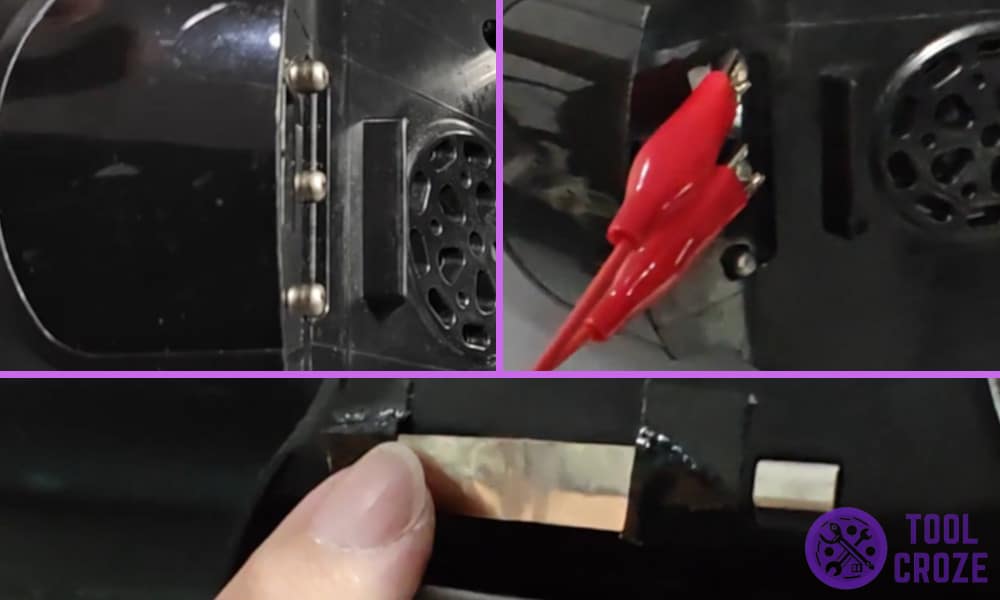
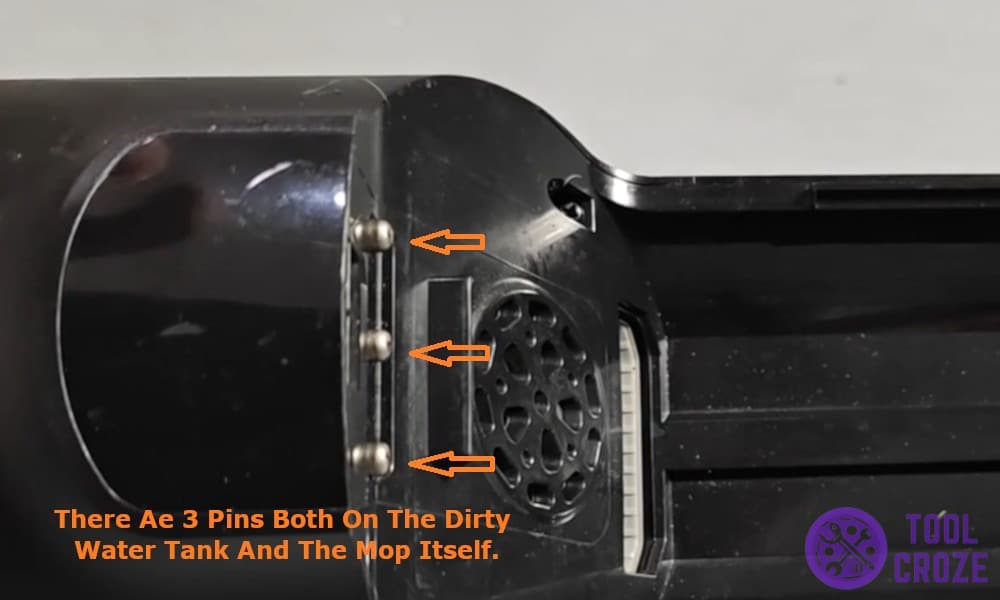
I noticed that there were 3 pins both on the dirty water tank and the mop itself which detects the presence of the tank on the mop.
While it was confusing at first but after trial and error I understood that the right most pins of the mops were responsible for detecting the dirty water tank.
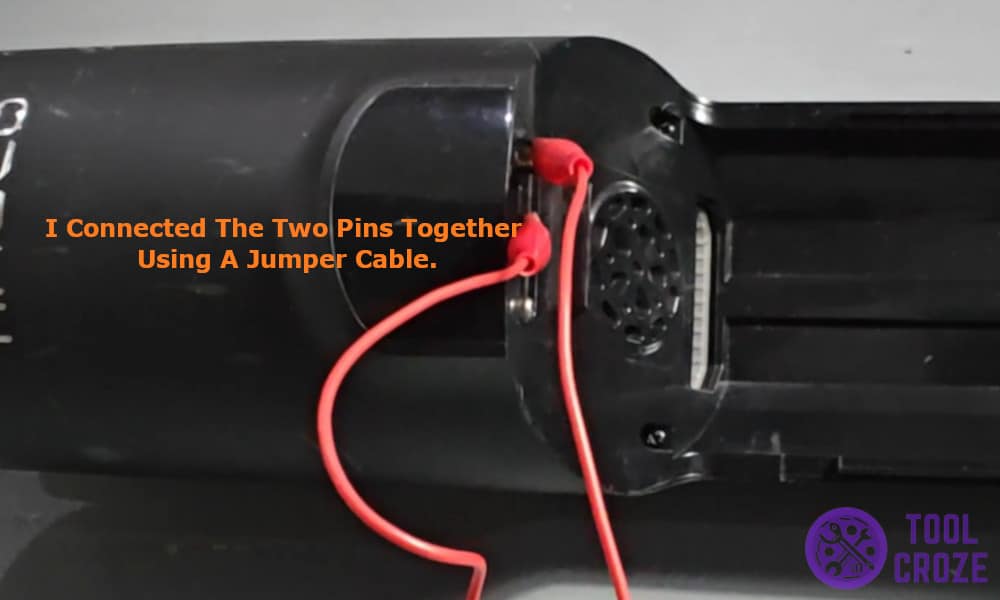
To prove this theory I opened the part of the tank where the pins are located and inspected it thoroughly and I found out that it was just detecting the presence of the tank by completing the circuit.
So, I tried checking this mechanism by connecting the two pins together using a jumper cables and connected the two rightmost pins of the mop together to see how it works, it turns out I was right and as soon as I connected the two the error went away and the mop thought the dirty water tank was connected to it.

The error went away and my Tineco vacuum kept running without showing any errors and problems. This only meant one thing: that the internal circuit of my mop tank was broken and needed to be fixed.
If you also face this problem try replacing the dirty water tank or get it repaired by a professional.
3. Connect the Rightmost Pins Together
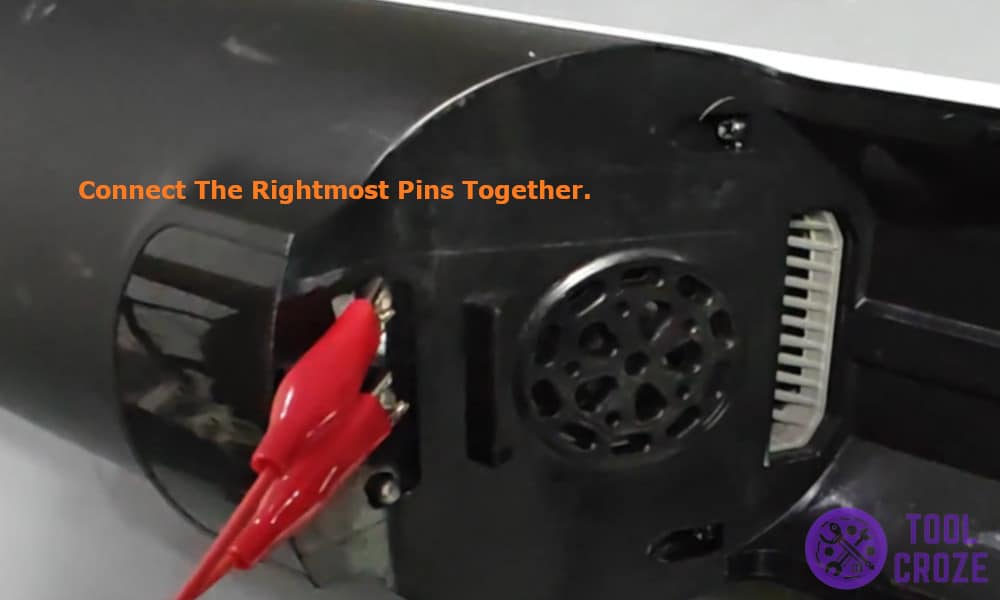
Now here was the solution that helped me save so much money on buying a new mop and helped me fix my Tineco vacuum mop.
Now that I knew how the pins worked with the mop and the dirty water tank I bypassed the connection by just joining the pins together.
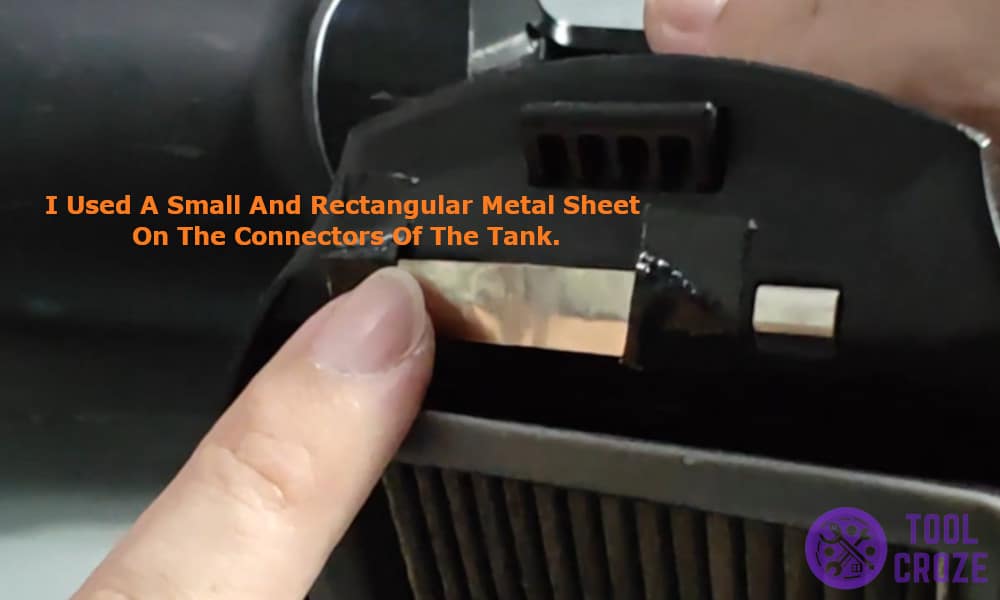
I used a small and rectangular metal sheet on the connectors of the tank to connect the pins together whenever the dirty water tank is attached to the mops. This fixed the error for me and my mop worked like it was new again.
If you are also going through the same problem as me just follow these steps to fix the mop and get rid of the errors.
