When a 20V PWRCORE SKIL battery starts flashing red on its PWRJUMP charger, it means the battery can’t charge like it should. This is usually a voltage issue.
I ran into this problem myself not too long ago. Eventually, I found a fix for my SKIL battery that was not charging and just kept flashing a red light. Let me share it with you.
But before you go on reading the rest of this article, you may also first watch my short video where I demonstrated how I reset my 20V PWRCORE SKIL battery. You can watch the video below.
I used another 20V SKIL battery to jump-start it. I connected the positive and negative terminals of the two batteries.
After 15 seconds, I disconnected the two batteries and put the bad SKIL battery back on the charger. It began to charge normally again.
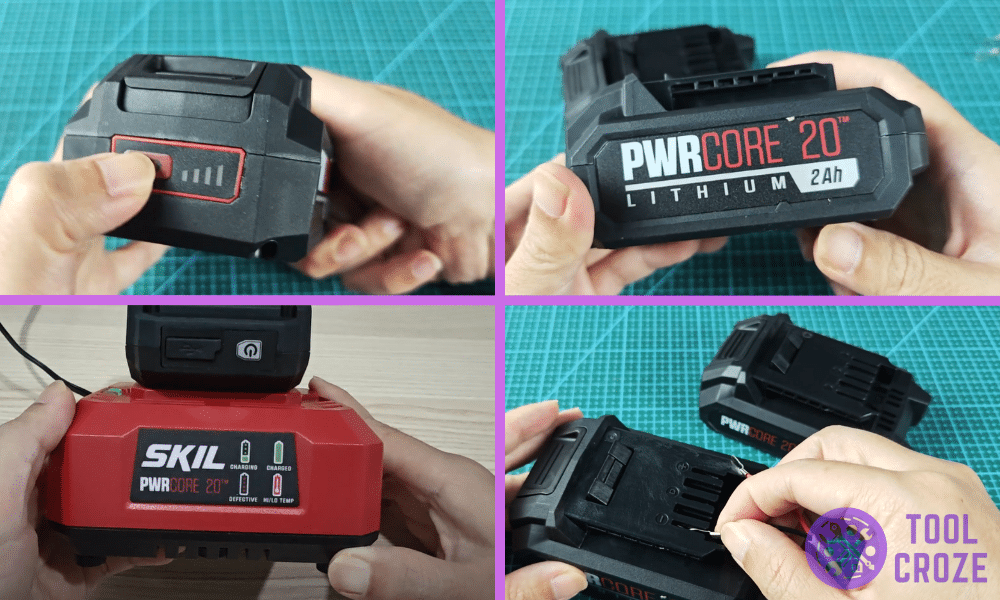
How To Fix A Skil Battery Not Charging – Flashing Red Light
A red flashing light means the charger is detecting the battery below a safe voltage level. In other words, the battery’s voltage is too low and it can’t hold charge anymore.
It’s very important to know the different meanings of the indicator lights on a SKIL battery charger. I’ve also made a short video about this topic and you can watch it below.
A blinking green on the charger means the battery is in charging mode. This will become a solid green once the battery becomes fully charged and ready.
A solid red indicates the battery is either too hot or too cold for charging. Lastly, a blinking red means the battery may be unhealthy.
That can happen if the battery has been in storage for a while, or if it was drained well below its recommended limit. You can sometimes solve this problem through jumpstarting.
Jumpstarting a SKIL battery nudges its voltage just enough so that the PWRJUMP charger sees it as healthy again. But, to do it, you need another similar battery to provide power.
In my case, I grabbed another 20V SKIL battery I had on hand, and used it to give the problematic one a short boost. That was enough to get rid of the flashing red light up there!
This isn’t a guarantee for every battery. In many cases though, it can make a difference and stop you from spending money on a replacement. I think that makes it worth a try, no?
The method itself doesn’t require complicated tools or advanced knowledge. The most important thing is to have another working tool battery of the same voltage.
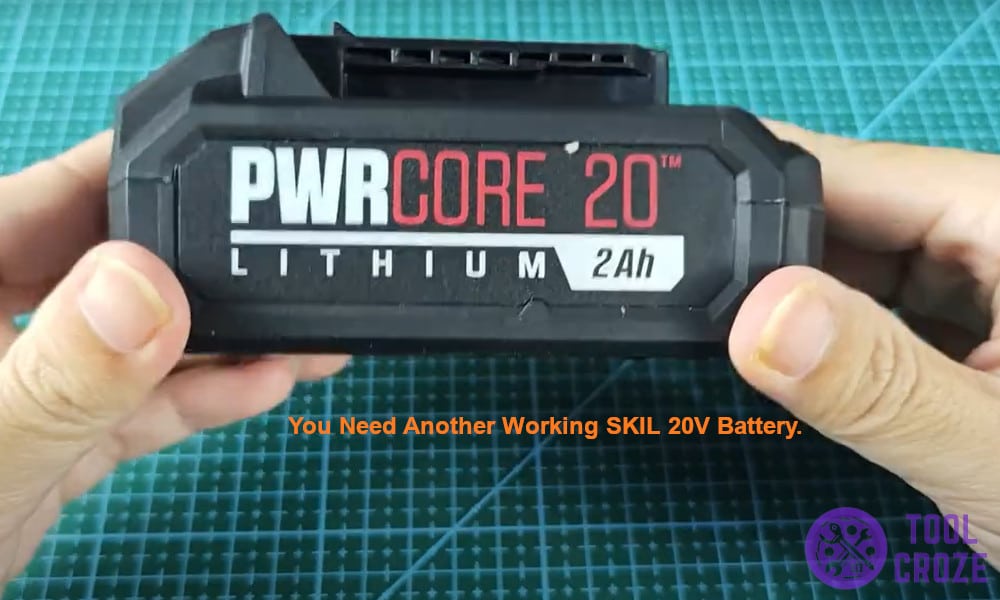
You don’t want to use a higher voltage one, or something that isn’t compatible. Matching voltages is key to avoid damaging the batteries or creating a safety hazard.
Other than the extra battery, all you need is a pair of wires to connect the two batteries and their terminals. Once you have those, you’re ready to jumpstart the problematic battery.
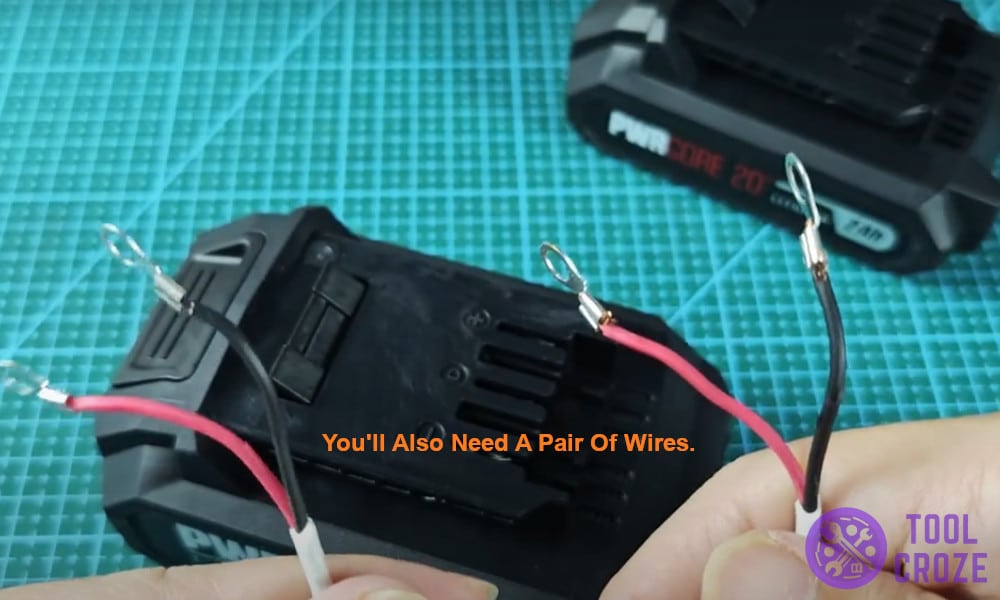
Whenever you want to start jumpstarting your dead SKIL battery, look for the positive and negative terminals on both batteries first. Matching them correctly is crucial.
The positive terminal on the healthy battery must go to the positive on the bad battery, and the negative to the negative. You can see me connecting my two SKIL batteries below.
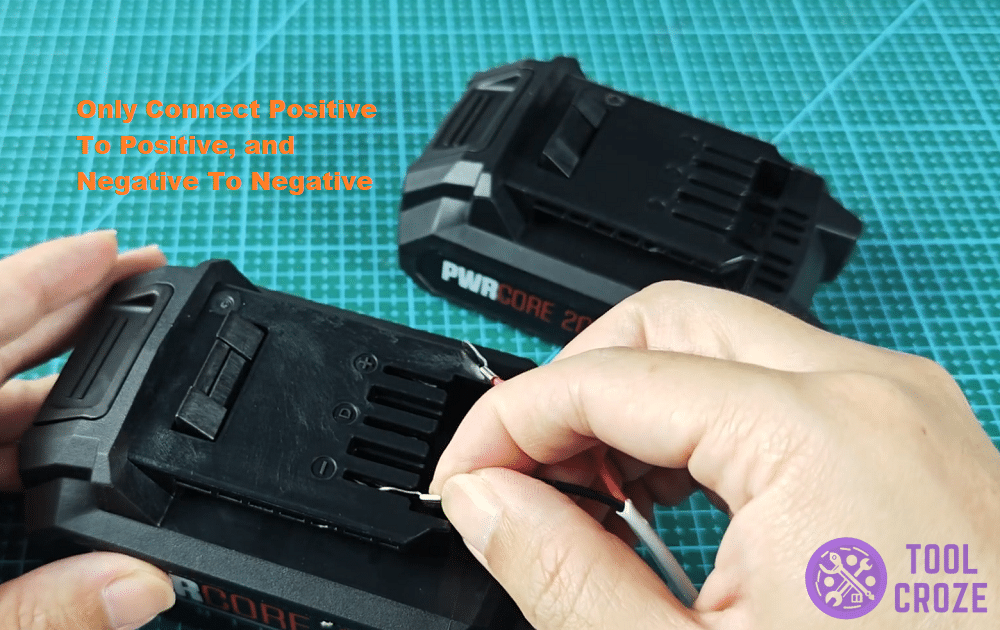
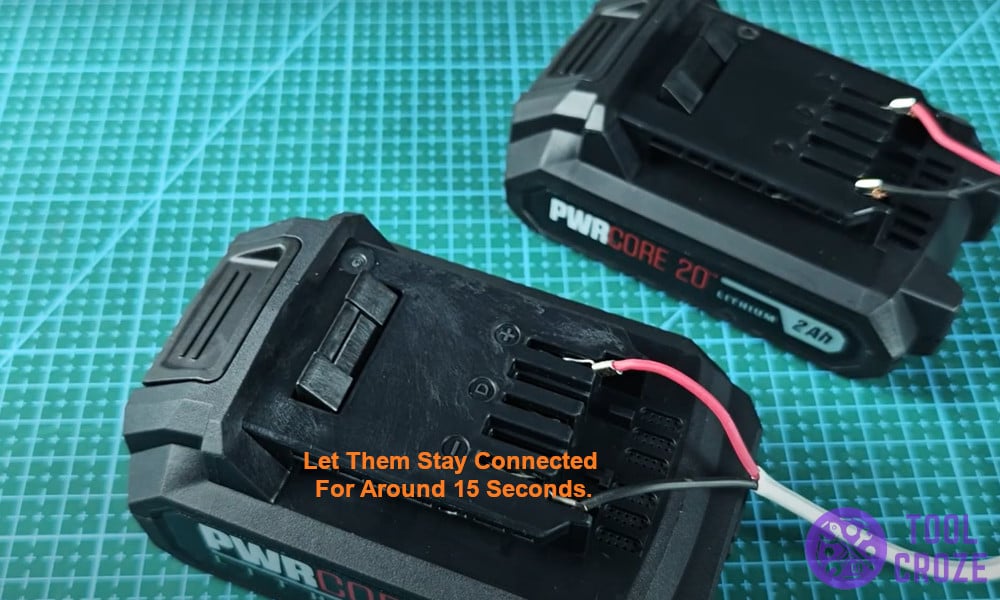
If you accidentally mix them, you could permanently damage both batteries, or risk getting shocked. Once they were lined up, I let them stay connected for about fifteen seconds.
That was enough time for a small charge to transfer into the dead battery. As soon as those seconds passed, I separated the batteries and put them apart.
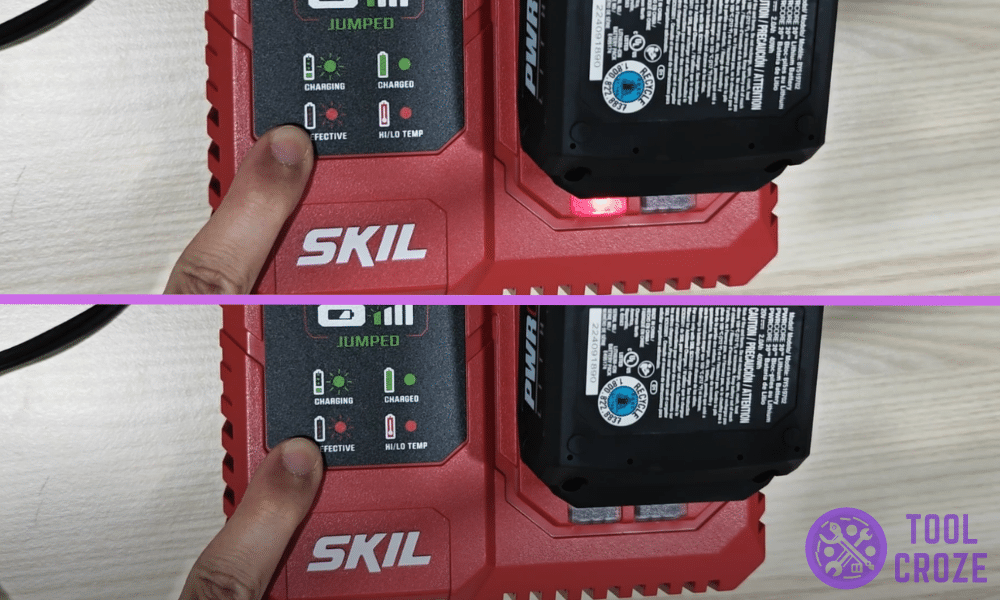
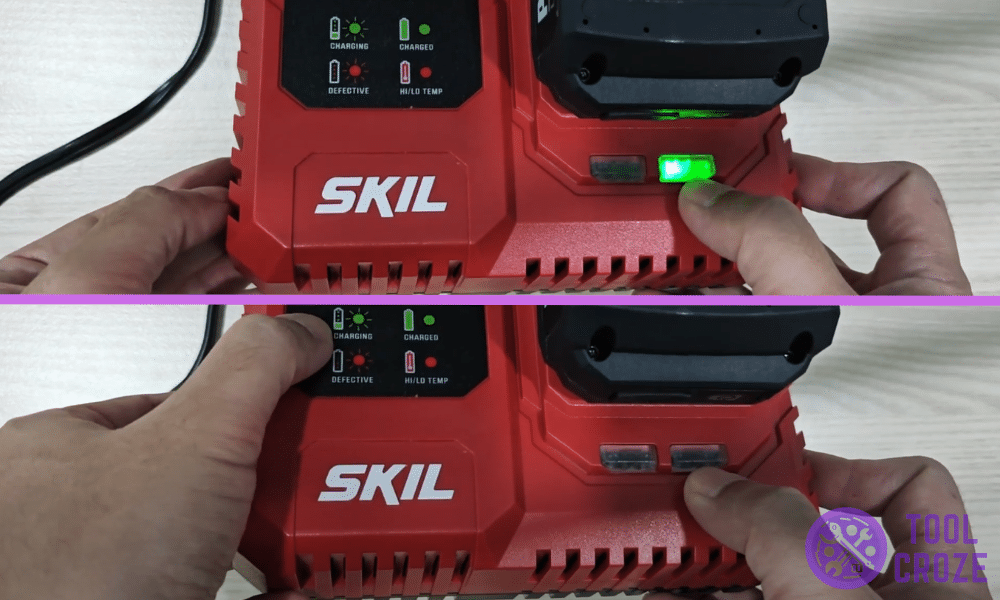
Now it was time for the moment of truth. I put the previously dead SKIL battery I had on its charger after trying all these steps to see what would happen.
I expected another red flash, but was pleasantly surprised to see the light was flashing green this time!
That flashing green light meant the charger was now actively charging the battery like any other healthy pack. I let it fully charge until the indicator showed it was done.
After that, I tested it on one of my SKIL tools. Everything worked perfectly, and the battery kept its charge just fine.

The biggest takeaway for me was that a flashing red light doesn’t necessarily mean a battery is ruined beyond repair. With the right steps, you can bring it back sometimes.
While it can indicate cell damage or other serious problems, a flashing red light could also be as simple as the battery’s voltage dipping below what the charger will accept.
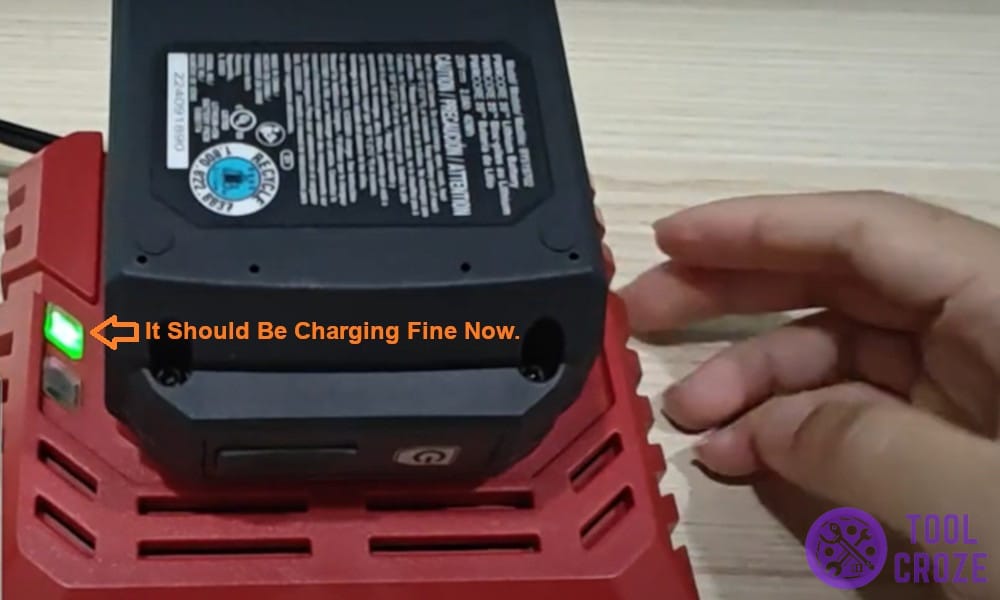
Jumpstarting is a quick fix for that that only takes a few moments. Just look at my battery in the photo above after trying it. It’s charging and working perfectly now!
I think it’s important to remember that jumpstarting won’t bring every battery back to normal. If the cells are completely worn out or there’s internal damage, boosting won’t help.
You might see it charge briefly, only to fall back to flashing red again the next time you put it on the charger. That’s a sign the battery is likely beyond saving.
Replacing the battery at that point may be the only reliable option. Still, it’s worth attempting the jumpstart solution, especially if you own another 20V SKIL battery.
Line up everything correctly, watch for sparks, and limit the connection to around fifteen seconds. If you do everything right and are lucky, the battery should work after all this!

my pwr charger was charging battery, before it was finished I pulled out the battery to use it , later I put it back in the charger and the charger doesn’t do anything no lights, nothing. Now my battery still has a good charge on it, but the charger should at least light up, right?