Got a Ryobi 18v battery and want to do some work on it? Whether it’s just maintenance, resetting, or you’re trying to replace parts, a wiring pinout diagram makes things easier.
Finding a pinout for the specific batte
ry you want can be tough, especially if it’s a tool battery. You’ve hit the jackpot here though, cause I’ve got a wiring diagram pinout for the Ryobi 18v battery below!
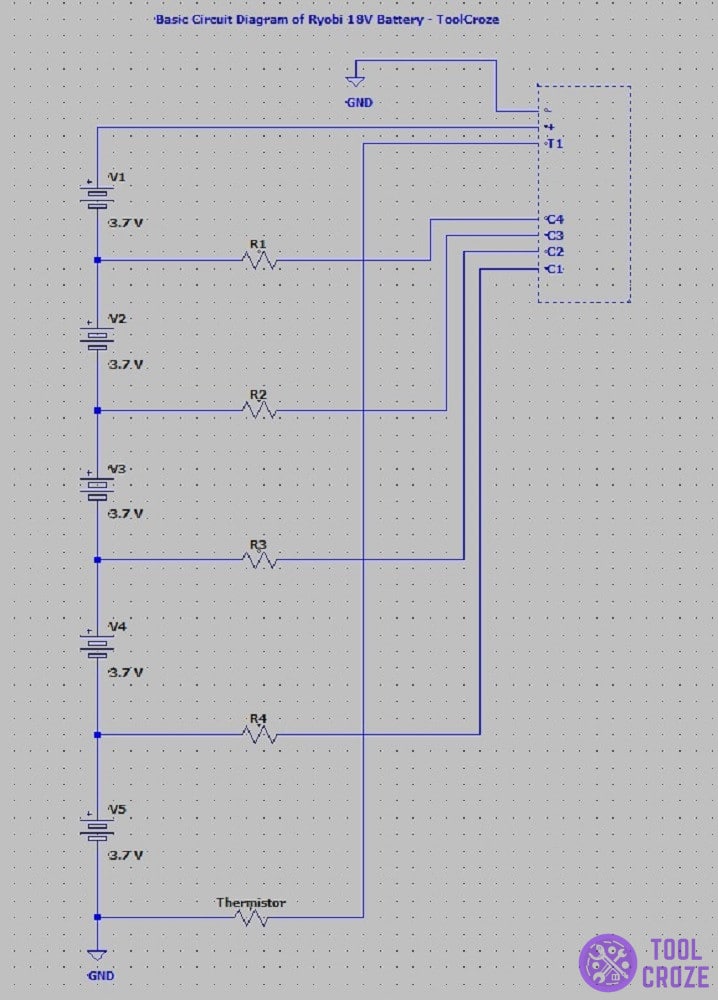
Ryobi 18V Battery Wiring Pinout Diagram
I know some of you might be wondering why this is a whole article instead of just a picture. Well, that’s mainly because a lot of people don’t know how to read these things.
Pinout diagrams for wiring on any battery can be hard to understand, especially what the symbols on it mean. Speaking of the diagram, here it is below.
Now, for the parts that I mentioned that might be hard for some users to understand. For anyone that doesn’t know what the acronyms and symbols above mean, here’s a briefing on them.
GND: The start point of the diagram, the “GND” logo on top stands for Ground. This is a zero-potential reference point on the battery that acts as the negative terminal.
This terminal allows the electrical current to return to the power source and is one of the most important parts of the battery’s wiring.
– and +: These two symbols are meant to represent the negative and positive terminals respectively. They are the catalysts for the functioning of the battery.
Power flows throughout the battery and its inner wiring thanks to these two terminals.
C#: The “C” in the diagram stands for capacitor. Capacitors are terminals used for battery balancing.
They work along with the positive and negative terminals to ensure proper power flow within the battery so that it works right.
R#: This part of the diagram symbolizes the resistors within the Ryobi 18v battery. Resistors provide specific voltages to the transistors to regulate the electrical current.
As there are multiple capacitors and resistors, each of them has a number to make it easier to mark out their locations. The number is represented by the #.
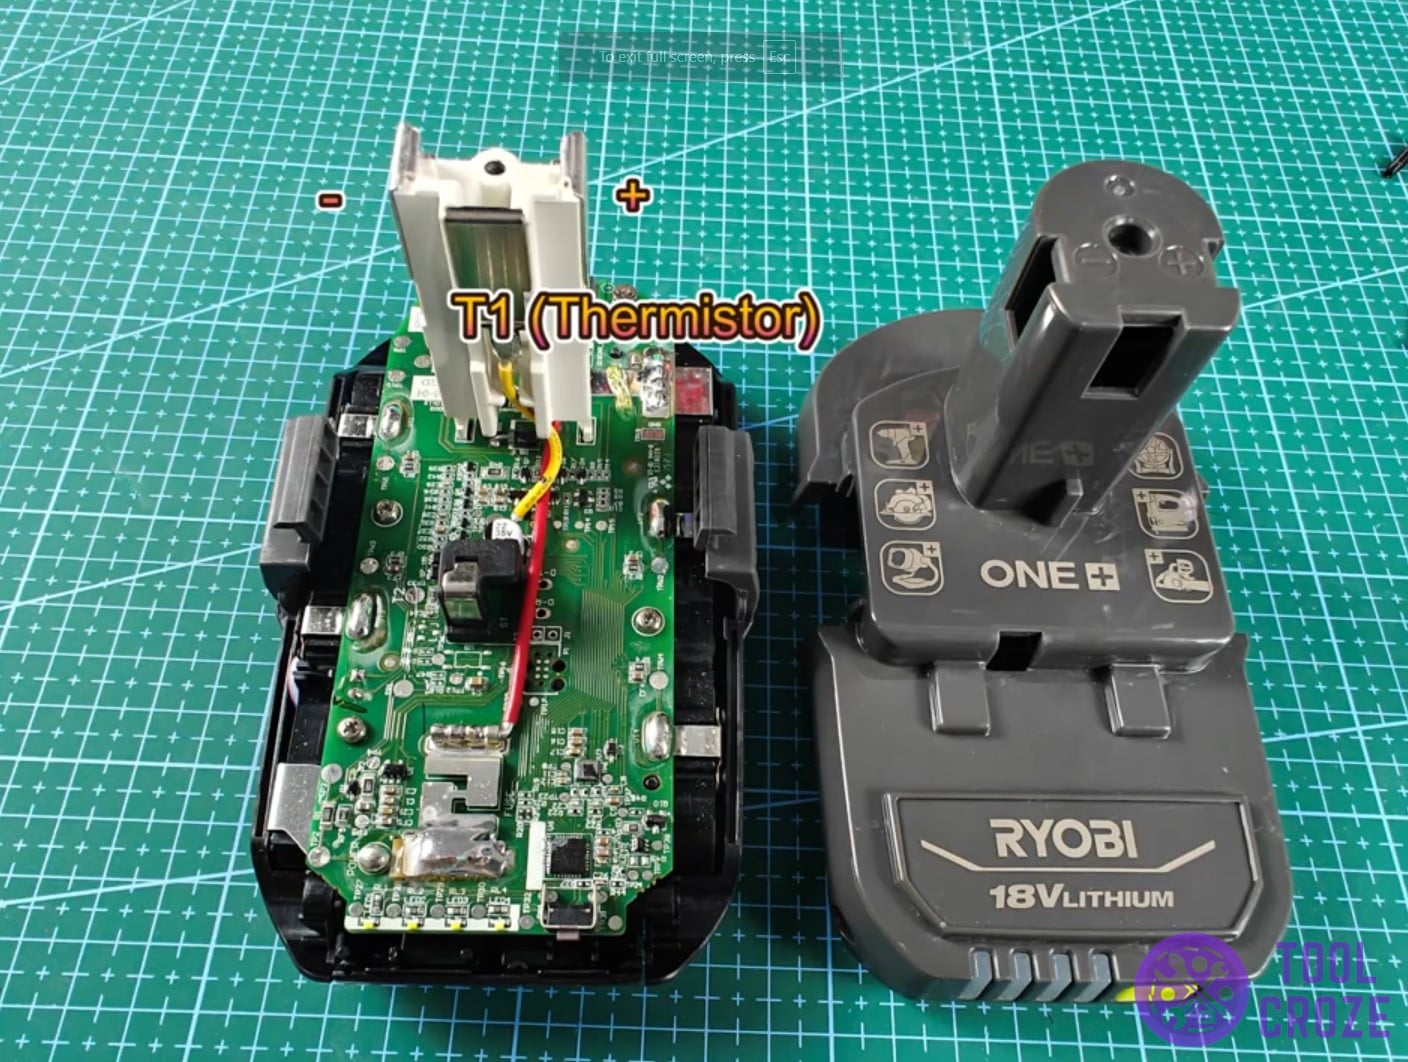
Thermistor: The thermistor is a type of resistor within the battery that changes the resistance against a current’s flow according to the temperature of the battery to prevent overheating.
It protects the battery from extreme temperatures and stops other components from burning out by cutting power to the battery if necessary.
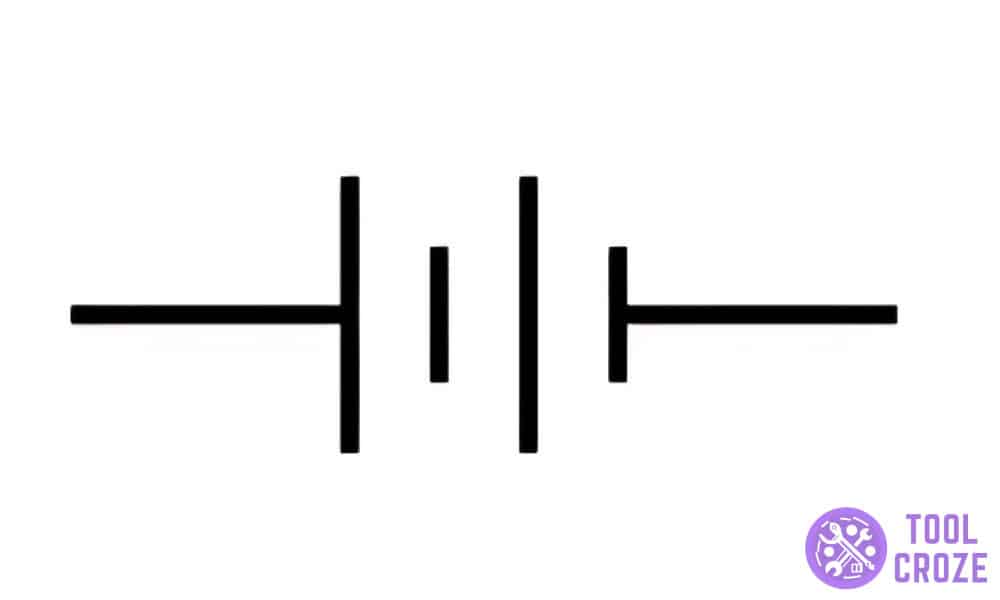
Double-Cell Batteries: Within the Ryobi 18v, there are multiple double-cell batteries. These are what hold power and allow it to power tools like the Ryobi PCL235 Impact Driver.
You can see the logo that represents these batteries in the picture down here:
I think that’s about it for any important parts of the diagram that beginners may not know about. But, there are other details I want to go over too…
Inside The Ryobi 18V Battery
All these different parts of the diagram, and obviously the inner mechanism of the Ryobi 18v battery, are on a PCB circuit board with a series of four resistors.
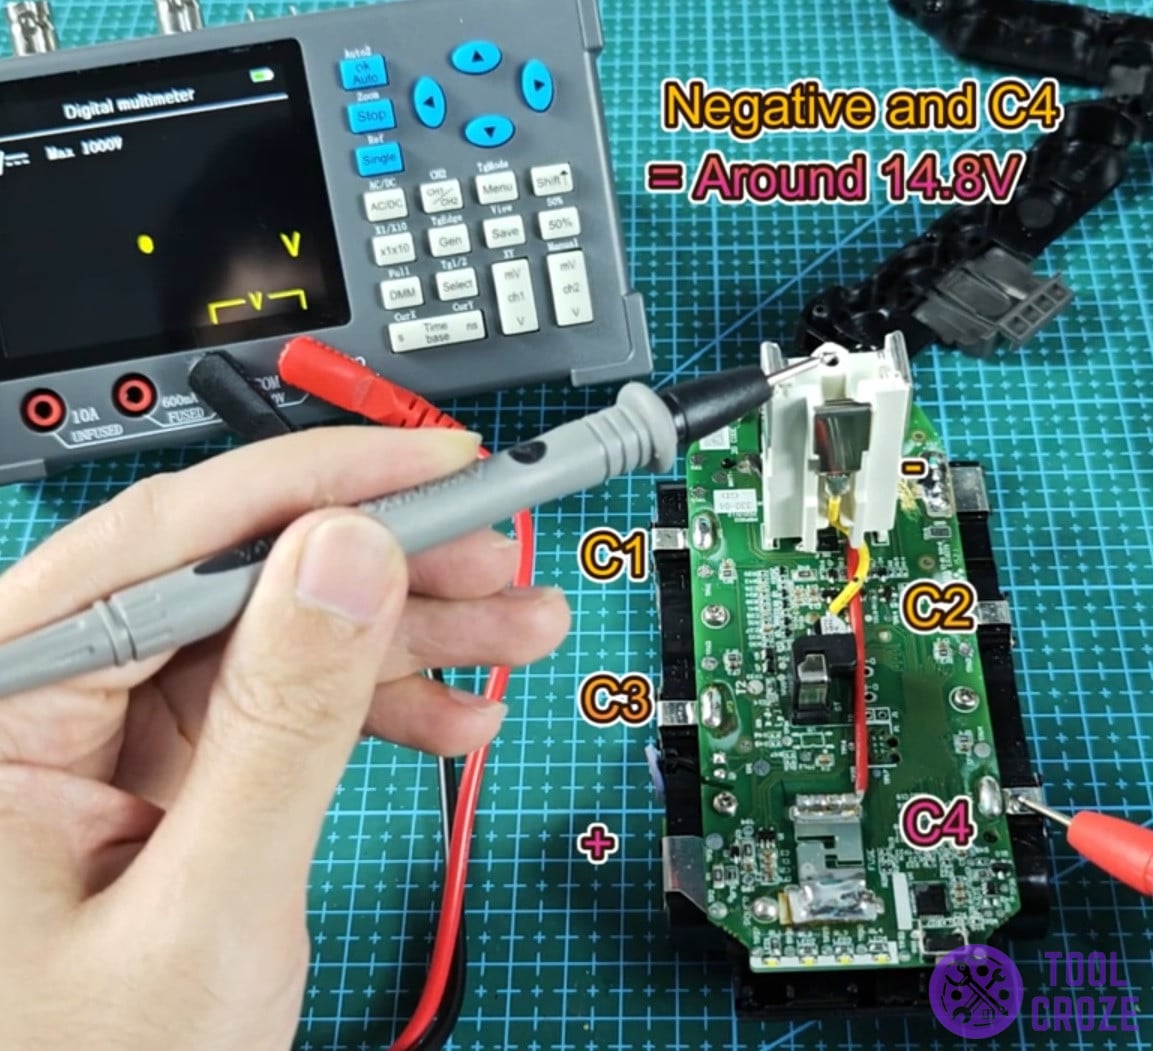
On this board, the thermistor is tied to the B+ and B- pins. The C4 pin is tied to R1, C3 to R2, C2 to R3, and C1 pin to R4. It’s what connects the whole thing together.
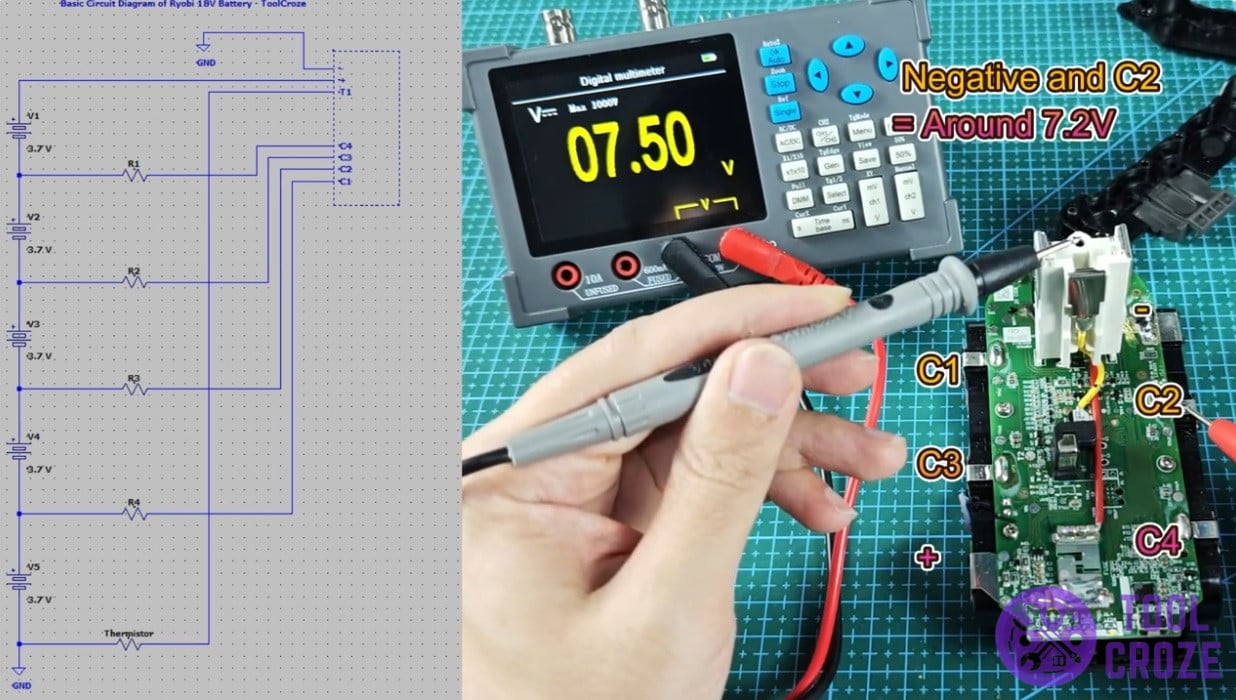
The circuit board’s voltages across different points are given below, so you have a better idea of what the readings should be like when you check:
- Positive and Negative: ~18V
- Negative and Thermistor:b
- Positive and Thermistor: ~18V
- Negative and C1:~3.7V
- Negative and C2: ~7.2V
- Negative and C3: ~11.1V
- Negative and C4: ~14.8V

Do you know about pin T2?