
Is your Anker power bank acting up? Not charging? Before you decide it’s time for a replacement, there’s a simple reset might save the day, so try that first.
Don’t know how to reset an Anker power bank? Keep reading because I’ll guide you through all the necessary steps and get the device working again.
I’ve also made a short video which shows a very simple way to reset an Anker power bank. You can watch it below.
The power bank must have 2 separate ports, either USB or USC Type-C. Use a USB cable to connect the two ports of the power bank to each other. When the reset is successful, all its blue lights will light up for a while.
How to Reset Your Anker Power Bank (Guide)
- Check Your Power Bank’s Ports
Here’s the deal: not every Anker power bank can be reset this way, so let’s figure out if yours qualifies before moving forward.
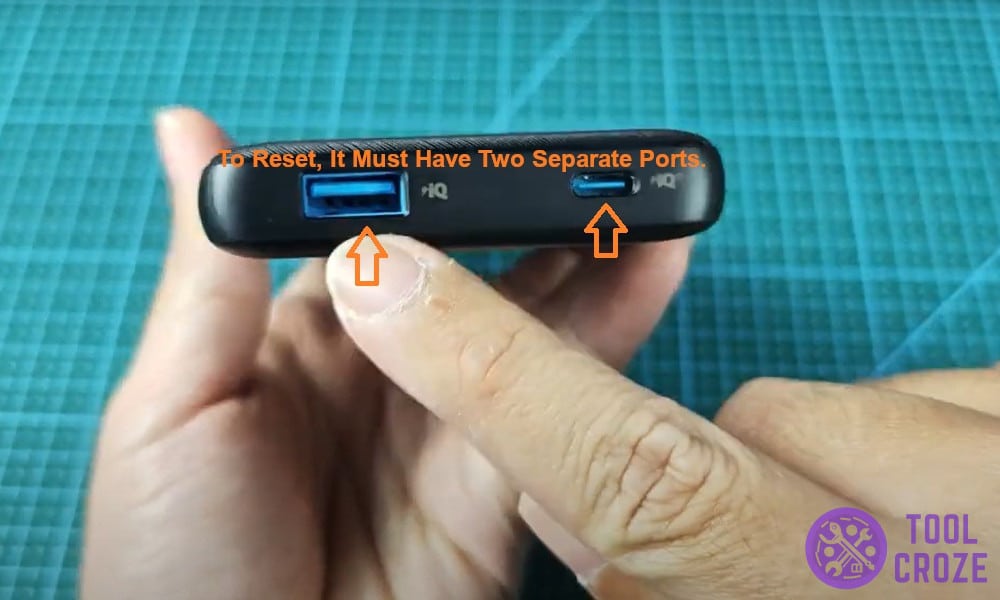
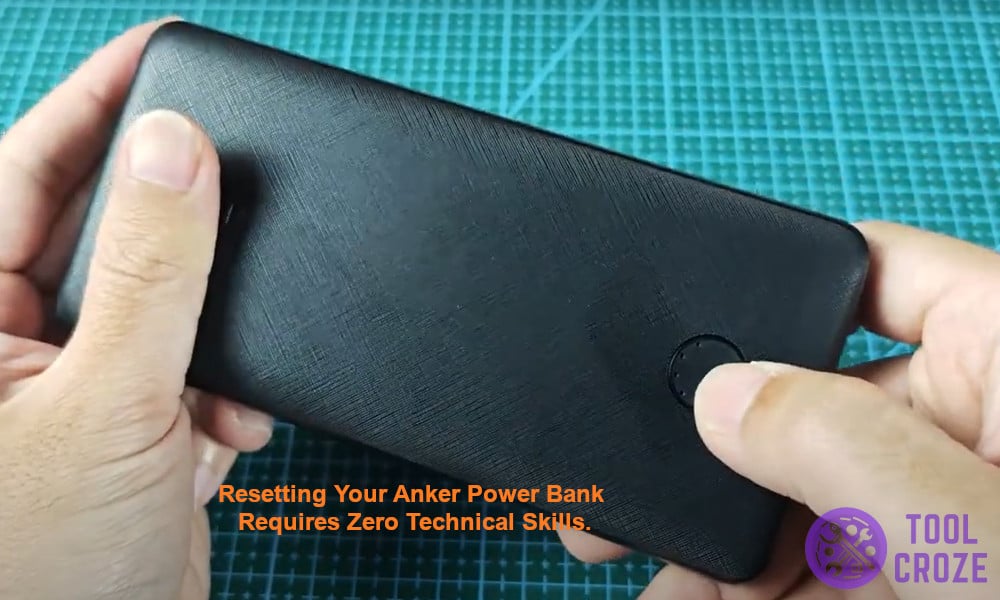
Check if yours has two separate ports. They should both be together on one side of the power bank, and are probably two different port types.
Here are the two on my own Anker power bank. One’s a USB port, and the other is a Type-C port, so I’ll use a cable with both of those ends for this method:
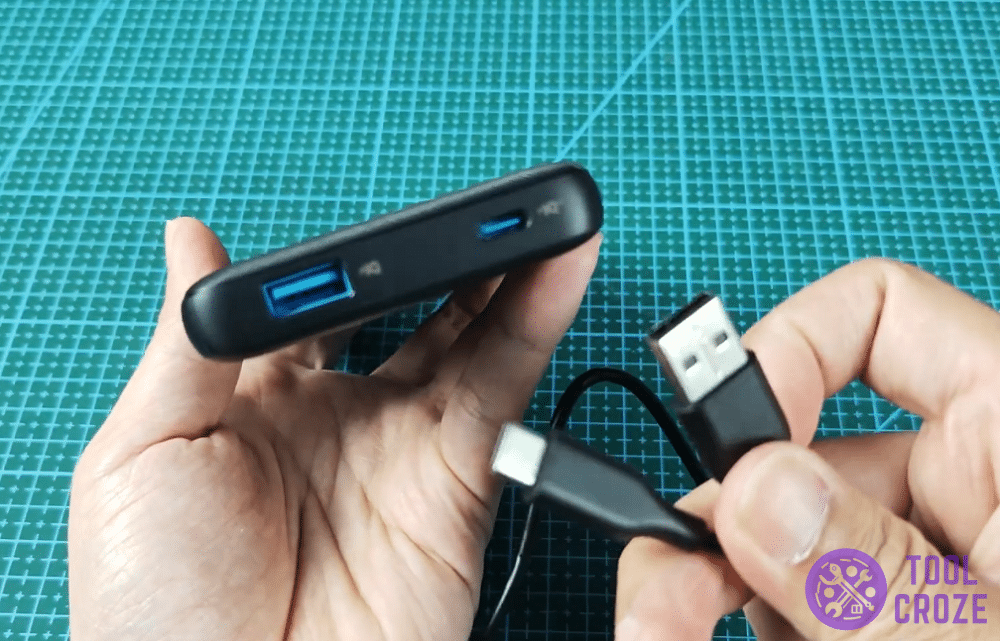
Most Anker power banks are designed with this dual-port setup, but it’s always good to double-check. Without two ports, this method won’t work.
- Grab A USB Cable
After checking the ports, grab a USB cable. Any old cable will do, as long as it lets you connect both of the ports on your Anker power bank together.
The goal here is to create a loop with the cables so that power flows between both of the ports. This is what causes a reset in these particular power banks.
- Connect The Ports
Take one end of your USB cable and plug it into one of your power bank’s ports. One end on each of the ports. It’s all you need to do to reset these things!
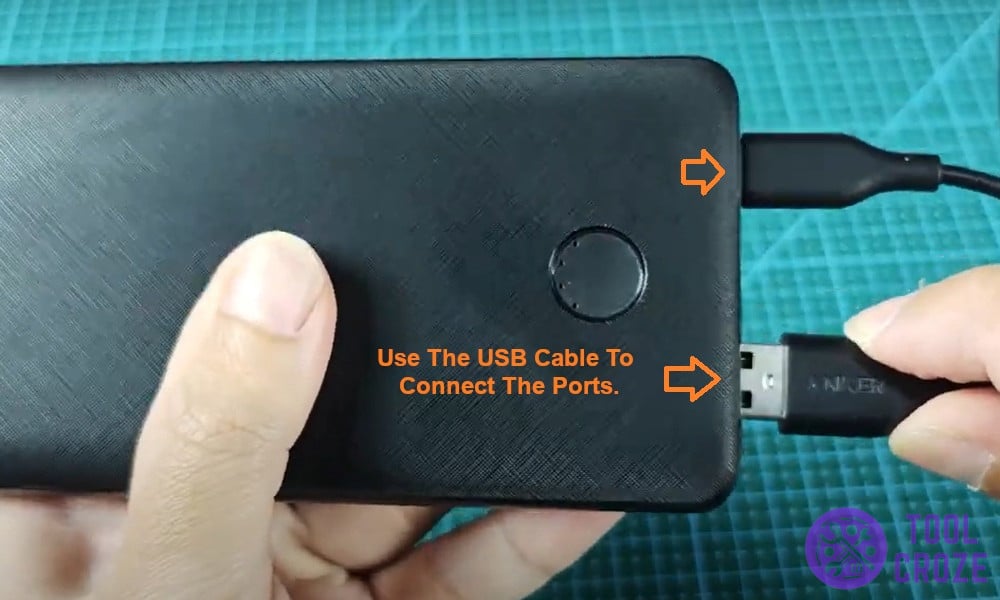
Basically, you’re connecting it to itself. It may sound a bit weird, but this step is like a reset button for your Anker power bank. And who doesn’t love a quick and easy fix?
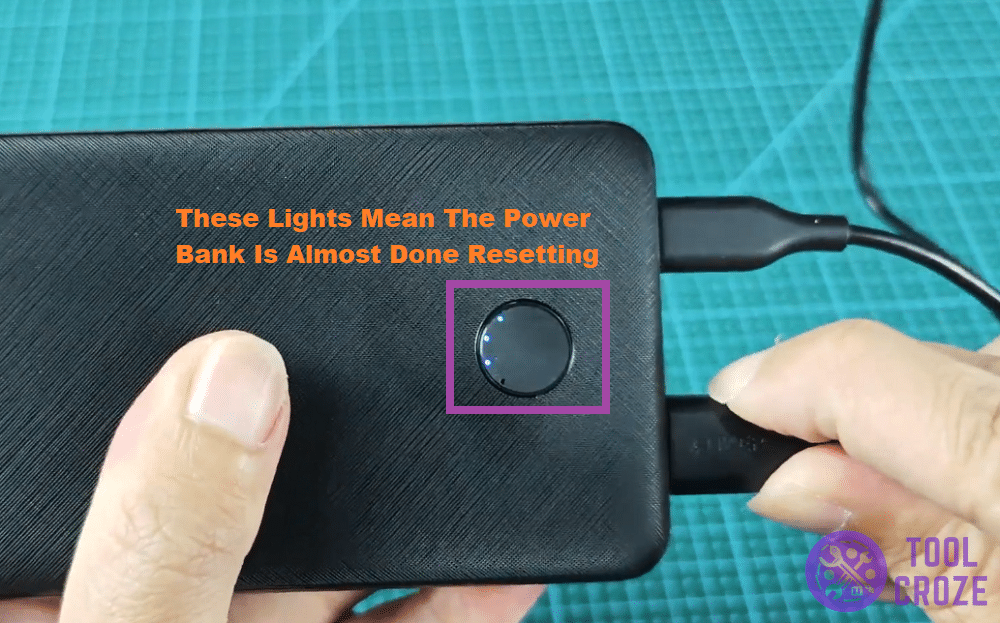
- Wait For The Blue Lights
Once the cable is connected, keep an eye on the blue LED lights on your power bank. They should all briefly light up, and that’s when you know the reset is complete.
For reference, take a look at the image below. These blue lights will show up on the Anker power bank for a bit, and then go away on their own.
- Test The Power Bank’s Charging
Now, unplug the USB cable and try charging your Anker power bank as usual. Plug it into an outlet or your device and check those LEDs again.
If everything goes smoothly, you’ll see the familiar blinking blue lights from the photo below. These blinking lights are a sign that the reset was successful!
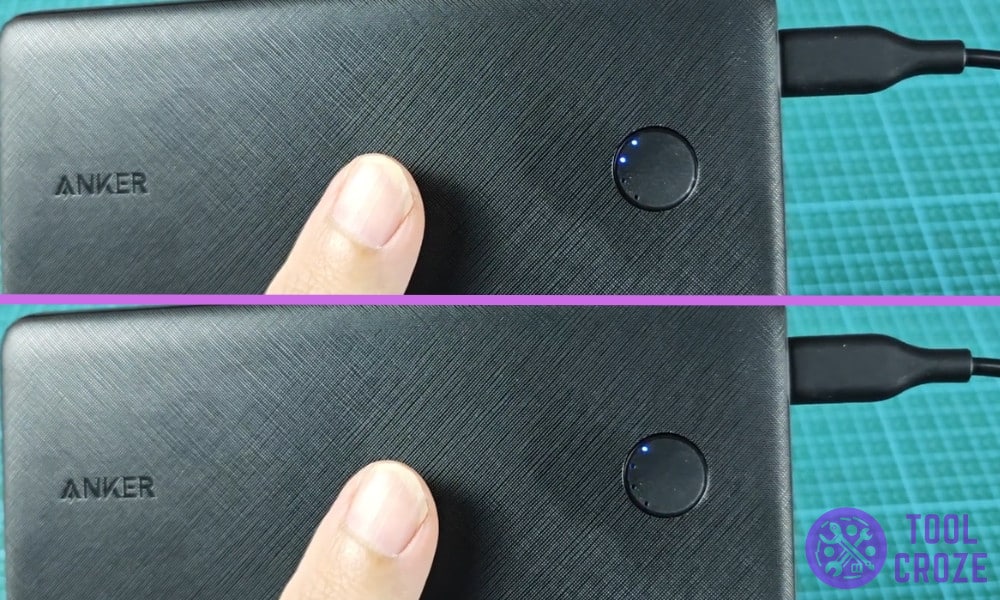
More importantly, it’s a sign that your Anker power bank is back working again! It should start charging your devices without hassle from here on out.
I’ve also made a short video about the blinking blue lights on your Anker power bank. You can watch it below.
When you press the main power button on an Anker power bank, it would start showing blue light. And when you start charging the power bank, the blue light will begin to blink.
Is this normal? Yes, it is normal as each LED indicates 25% of the charge. It would start to blink sequentially, one by one when the charge is increasing. When the Anker power bank is fully charged, all 4 LEDs would light up.
Related: Anker Power Bank Green Light Explanation
The Bottom Line
Sometimes, all your Anker power bank needs is a quick reset to sort itself out. This trick is simple, requires zero technical skills, and can save you the hassle of buying a new one.
So, give it a try next time your power bank acts up. If your Anker power bank still refuses to cooperate after all that, it might be time to call in the experts.
Check your warranty details or reach out to Anker’s customer support. Worst-case scenario, they’ll help you figure out if it’s time to look for a replacement option.
Hopefully, it doesn’t come to that though, and this method fixes your Ankwer power bank!

Thomas,
Thanks a million…was able to salvage mine with your walkthrough. Take care.