
Do you know how to install a hinge on your door jamb? Or is there a door hinge that needs replacing in your home? Then this article is for you!
My goal is to provide you a basic door hinge installation guide that is applicable to all types of hinges. After mastering this installation technique, you can easily fix hinges on your cabinets, closets, windows and furniture at home.
For this article, I will start from scratch with a brand new door jamb so you can follow me step by step as shown in the video below:
How To Install Hinges On A New Door Jamb
Article key points:
- Outline the width, length and depth of door hinge with pen knife and precision ruler.
- Cut the work area with hand chisel and hammer.
- Install door hinge into position with an electric drill and screws.
- Outline the width, length and depth of the door hinge with a pen knife and precision ruler.
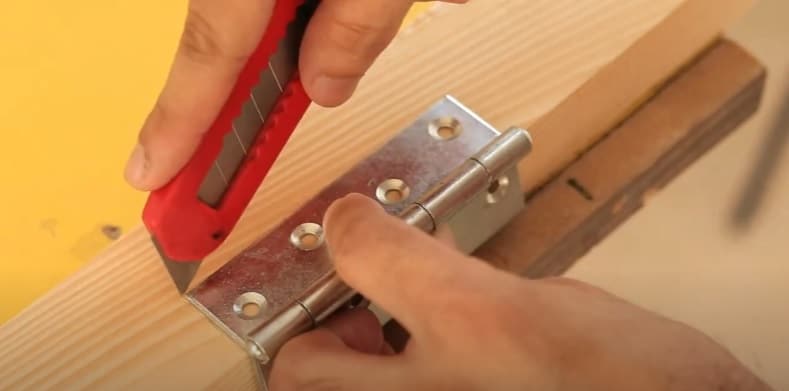
Firstly, lay the door jamb on a stable work surface and outline the desired position of the door hinge with a pen knife.
Specifically, outline the width and length of the door hinge by tracing around it.
As for its depth, I prefer to use a straight precision woodworking ruler to measure then mark it on the door jamb as shown in the image below:
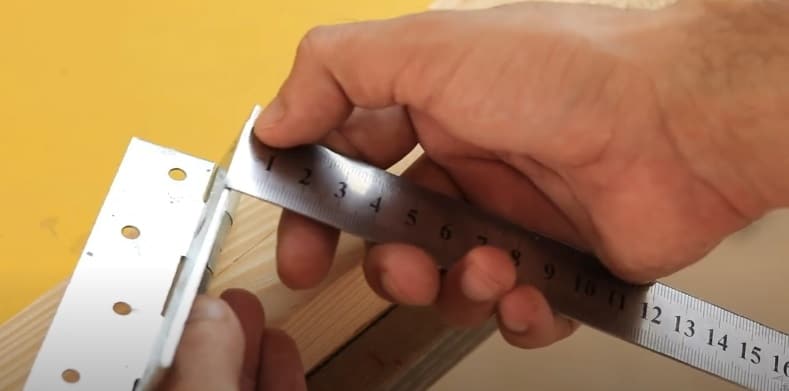
I chose to do it this way so that I can prevent myself from cutting out too much wood from the door jamb which may affect the functionality of the door hinge.
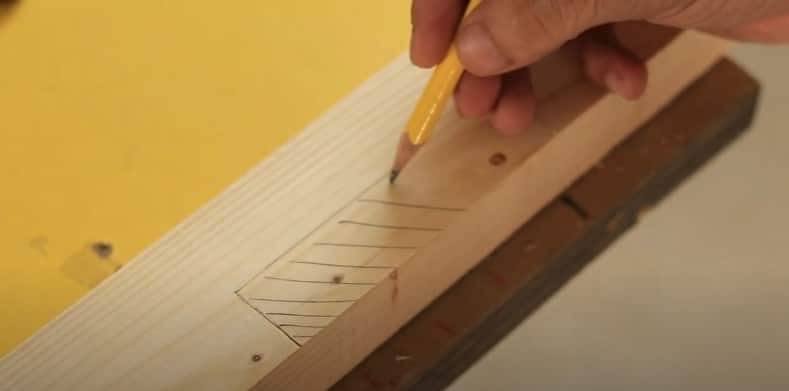
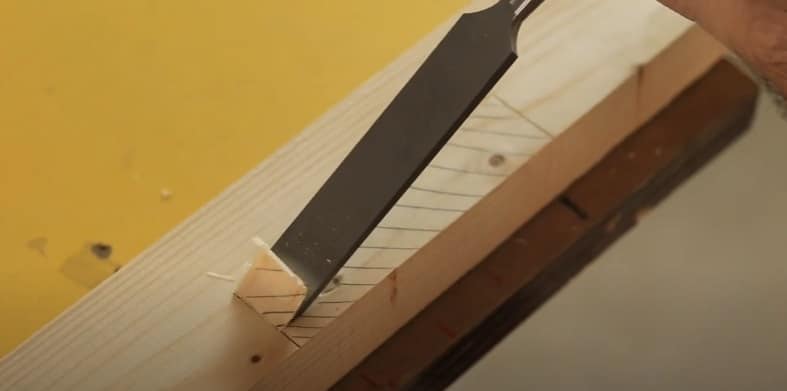
- Cut the work area with a hand chisel and hammer
Secondly, shade in the work area with a pencil to provide better visibility. After that, use a hand chisel that is a size smaller than the work area and cut it out with a hammer.
I recommend using a smaller chisel because it is easier to control the direction and force on the chisel. Plus, it gives a precise cut and room of adjustment compared to the bulky ones.
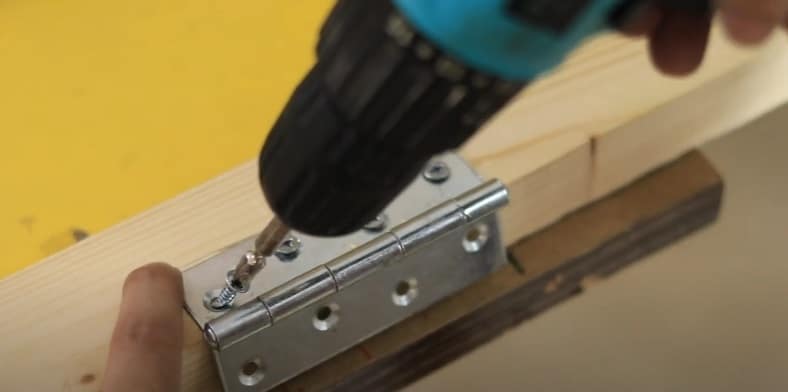
- Install door hinge into position with an electric drill and screws
Lastly, place the door hinge onto the newly cut area and check for accuracy. Make the necessary adjustment on the cut area if required.
Once the hinge and door jamb is finalized, secure its position on the door jamb with an electric drill and screws.
Congratulations! You have now successfully installed hinges on a new door jamb!
In conclusion, I hope my basic door hinge installation guide has been helpful for you in your projects at home or at work. See you again in the next article, my dear readers.
What do you think of my article? Your feedback is greatly appreciated! I enjoy reading comments and learning from you so I can improve my skills and creativity in my work.
