The other day I ran into a frustrating problem where my Hercules 20V battery was not being charged.
I tried numerous times connecting and disconnecting the battery but the Hercules battery charger would only show a red flashing code, which was not normal as whenever I charged my battery, it showed the normal green flashing code, meaning that it was charging properly.
The red flashing code on the Hercules battery charger means that the battery is dead and is not being charged.
I knew something was not normal, either it was the charger that was not working correctly, or it was the battery itself that had an issue.
So I decided to look it up on the internet and found a very helpful video, which helped me fix this problem in an instant. Follow my steps and I’ll help you fix this problem.
I’ve also made my own short video about this topic and you can watch it below.
I used another 20V Hercules battery to jump-start the problematic battery. I connect the positive and negative terminals of both batteries, wait 15 seconds, and then charge the bad Hercules battery again.
Read: Hercules 20v Battery Pinout Wiring Diagram
How to Fix a Hercules Battery Not Charging – Flashing Red
1. To fix your 20V Hercules battery you would require another healthy 20V Hercules battery ideally a fully charged battery, this healthy battery will help to transfer some voltage to the dead battery.
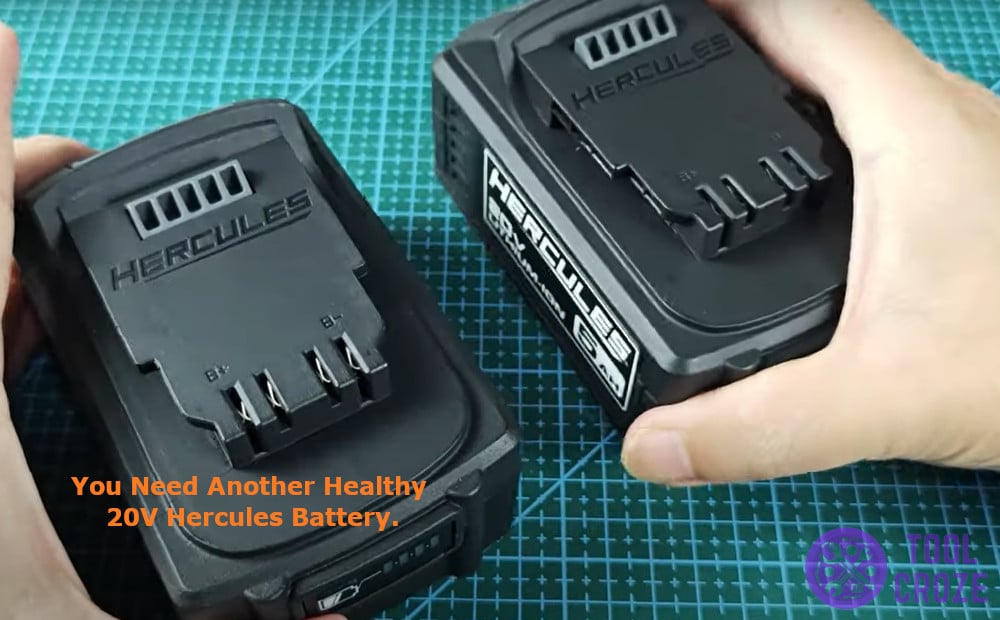
You would also require using a male-to-male jumper wires with crimped terminal pins.
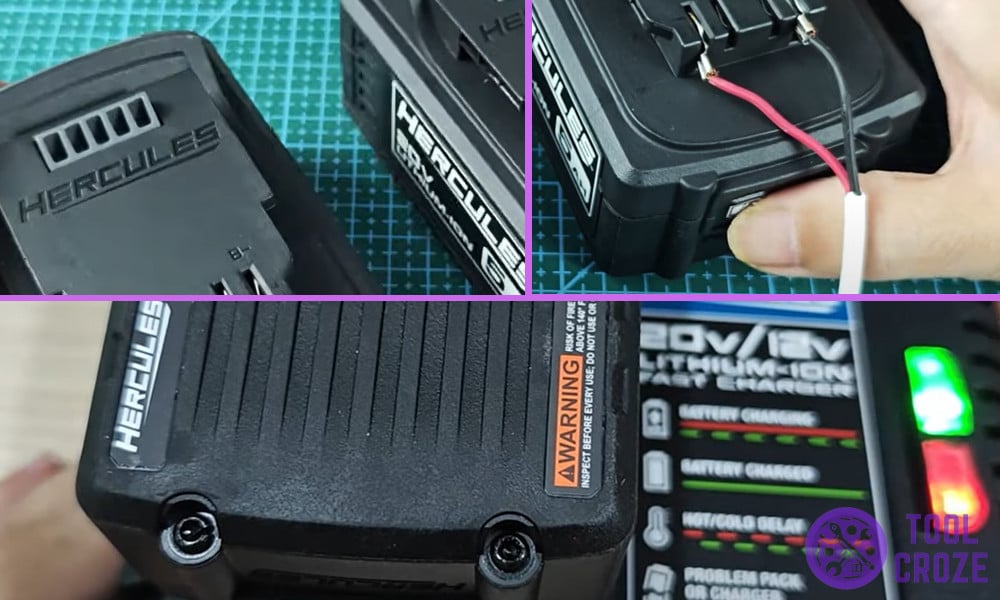
2. On top of the battery, there are markings that shows both the B+ and B- terminals, find these terminal and connect the B+ terminal to the B+ terminal of the healthy battery and B- terminal to the B- terminal of the healthy battery using the jumper wires.
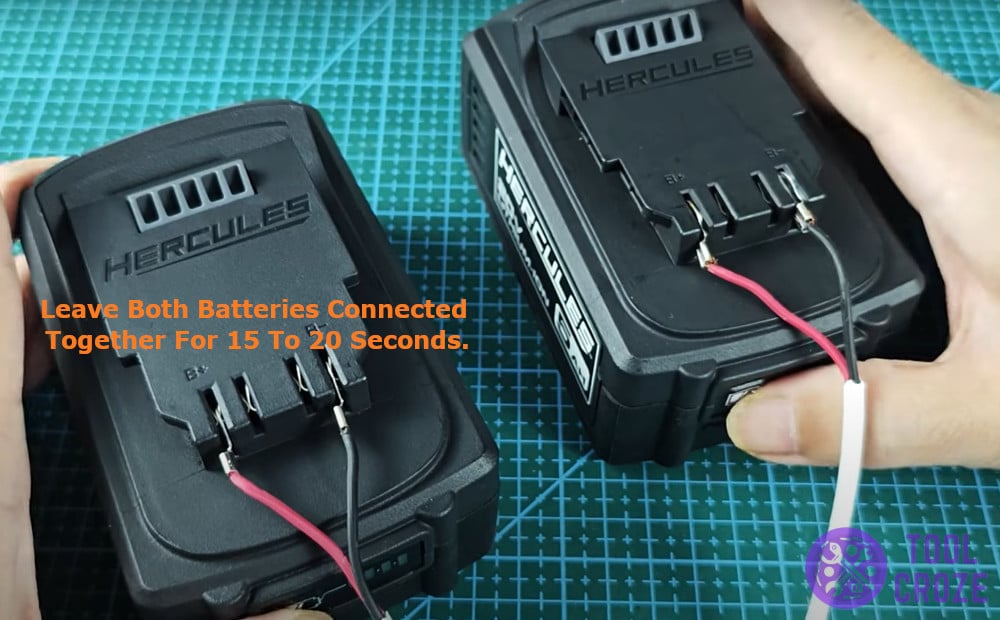
3. Leave both the terminals connected together for 15 to 20 seconds and then disconnect the connection from both of the battery. By this time there will be enough voltage in the old battery which will help it charge back up again.
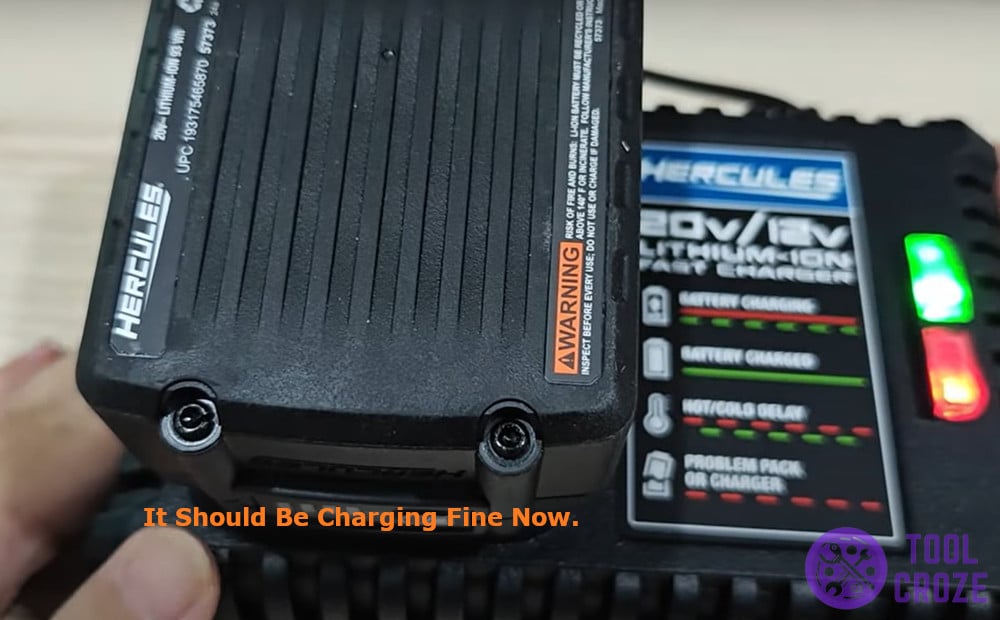
4. Take the problematic battery and try charging it again with the Hercules battery, and the problem should be resolved and the battery should now show green flashing light.
It turns out that the battery was not completely dead; rather, it was out of voltage or too drained, which was making it undetectable by the Hercules charger, and hence it was giving the red flashing light.
It’s very important that you know the different meanings of the indicator lights on your Hercules battery charger. I also have a short video about this and you can watch it below.
A solid red means it’s ready to charge the battery. A flashing green plus a solid red means it’s charging the battery. A solid green means the battery is now fully charged. A flashing red and green indicates a hot or cold delay, and a flashing red means it detected an unhealthy battery.
Connecting it to a healthy Hercules 20v battery for a few seconds helped it regain some voltage, and it was detected by the Hercules charger again.
If your 20v Hercules battery also stops charging and starts to give the red flashing code on the charger, don’t panic; instead, try this trick, which might save your battery just like it did for me.
