Here are the most common problems of Greenworks Trimmer to help you out with troubleshooting and help you fix it.
But before you continue reading this article, you may first watch the short YouTube video I made about this topic. You can also watch it below.
On the video, I showed how you can fix different common problems with your Greenworks trimmer like battery issues, auto-feed issues, power issues, faulty motor, and when the trimmer suddenly stops.
Is Your Greenworks Trimmer Not Working? Troubleshooting 5 Common Problems
1. Battery not charged
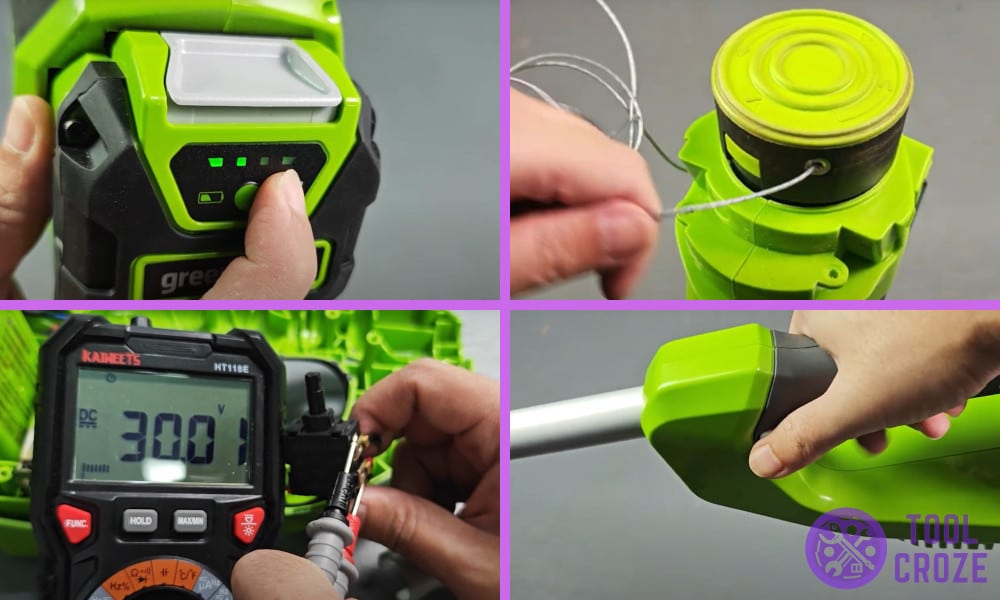
This is one of the most common problems with the Greenworks Trimmer that it just doesn’t give any response when the trigger is pressed.

I have faced this issue a few times and sometimes, an uncharged battery can make the trimmer not turn on at all, try charging the battery.
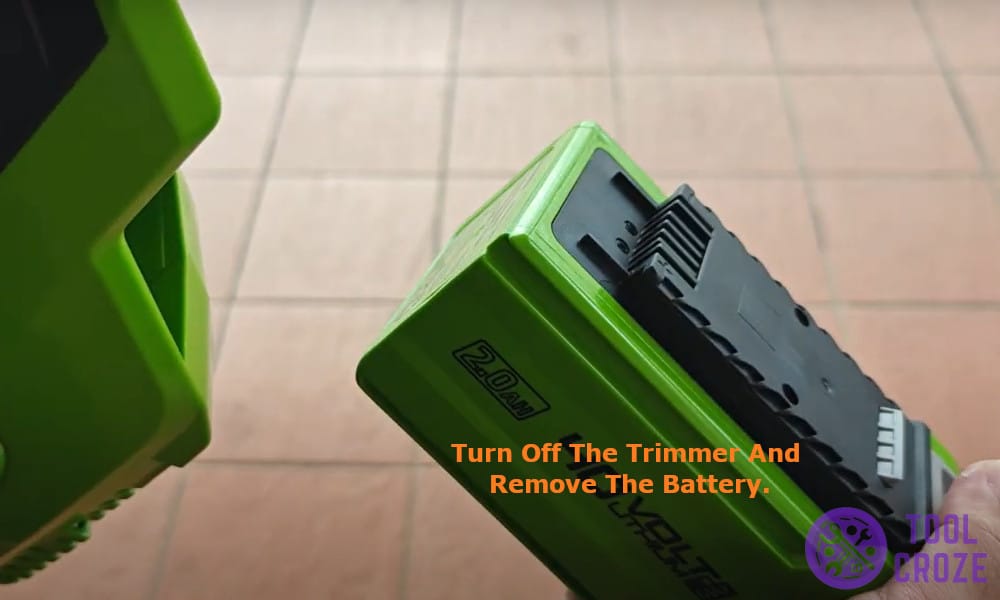
To do that, gently push down on the release button to take it out and use the Greenworks 40V charger to charge it before plugging it back into the trimmer.
If charging does not work, there is a chance that the battery might be dead, try checking the battery using a multimeter and if it doesn’t show any charge, it might be time for a battery replacement.
2. Trimmer starts and then stops
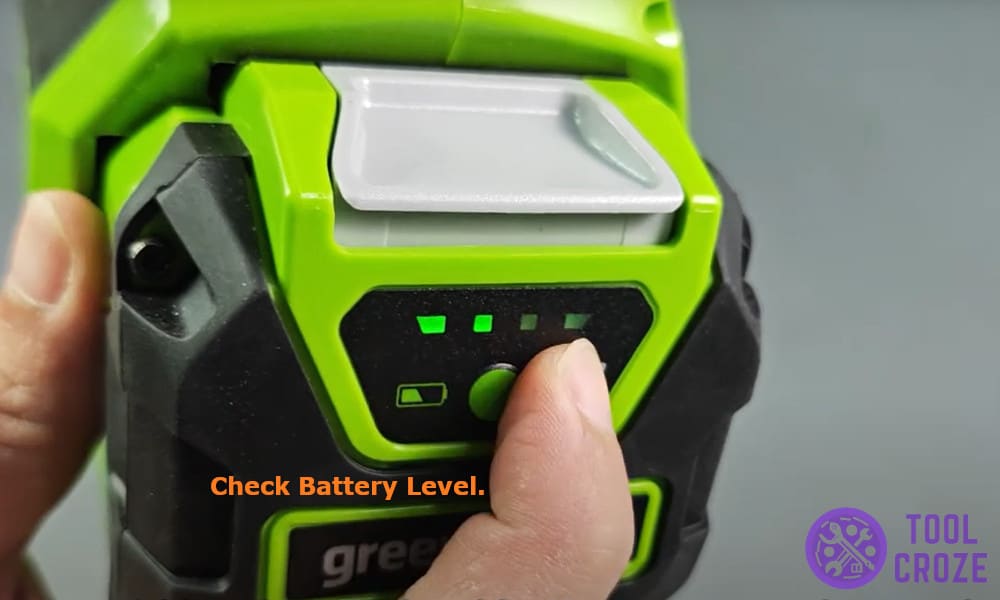
Sometimes my Greenwork Trimmer turns on and the line spins for a couple of seconds before turning off again, no matter how much I press the trigger it just keeps turning off. This can happen if the trimmer line is too long.
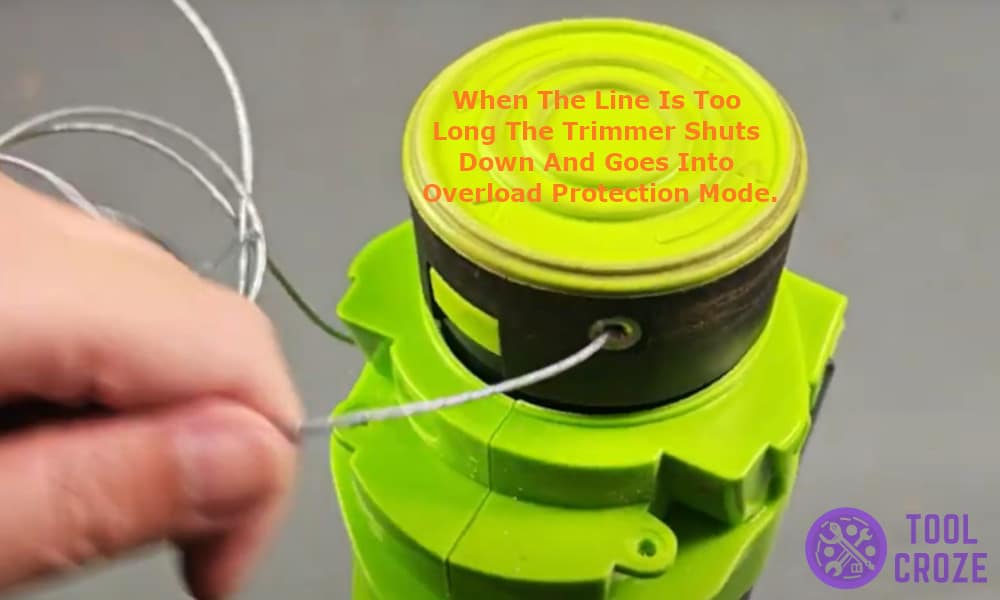
From what I found online, the motor gives the power to spin the cutting line but when the line is too long the trimmer shuts down and goes into overload protection mode to avoid damaging the motor or the battery.
But don’t worry, it has a simple fix, just manually trim the cutting line to about 4-5 inches and that should fix the issue.
Another way you can do this is by rolling out the string a little longer and putting the green cover back on and giving it a quick spin. That’s what I do and the cutter on the cover trims the wire at a perfect length to handle my overgrown yard.
I also made a short YouTube video which shows how I solved this issue and you can watch it down below.
3. No power when the trigger is pulled
Another reason why the trimmer is not working when the trigger is pulled could be an issue with the trigger.
This is what I did to check if the trigger is working properly, I started by removing the cover by unscrewing the screws on the body and gently pulling the trigger mechanism out of its slot.
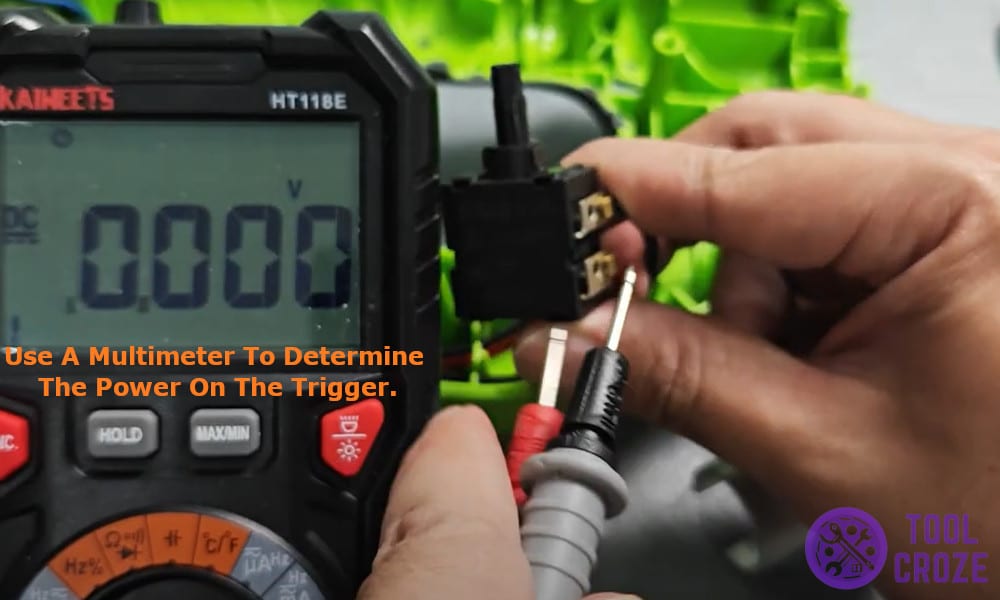
Next, I took my multimeter and put the pins on the positive and negative terminal of the trigger and held them securely.
For my trimmer the voltage displayed around 30V when the trigger is not pressed and no voltage when the trigger is pressed, this is how a working trigger behaves.
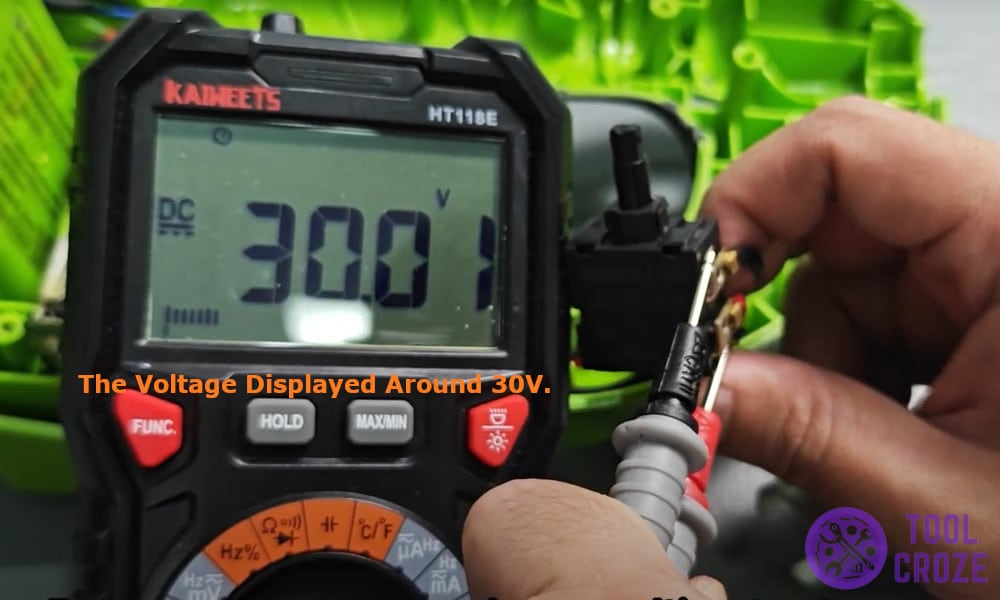
If it doesn’t show the same voltage for you, it could be a loose connection, tighten the screw on the terminals of the trigger and check that the wires are properly seated in their slots before testing again, if it still doesn’t work, replace the trigger and that should fix the issue.
4. Faulty motor
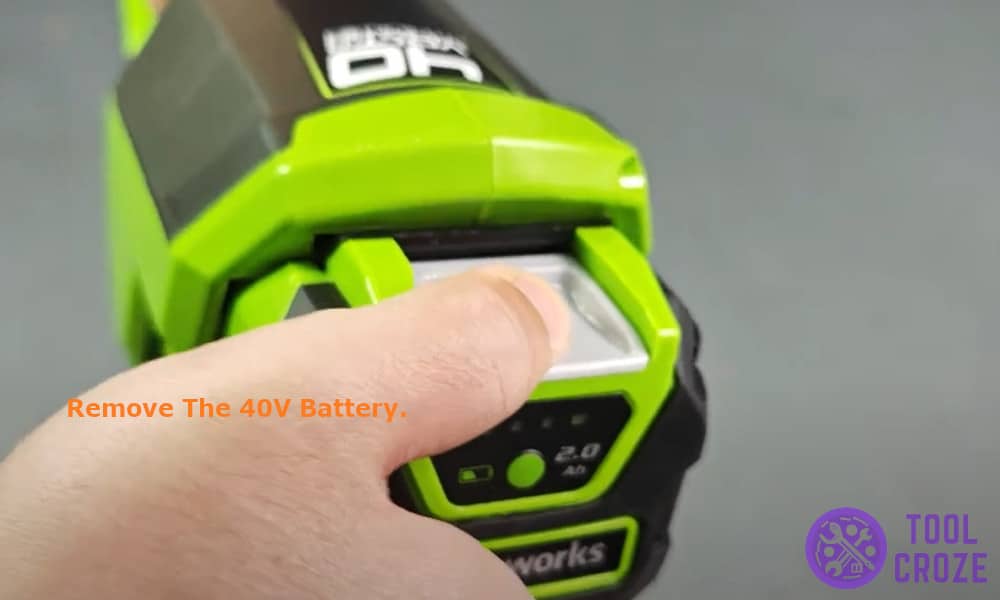
Sometimes the trimmer just does not turn on even with a full battery and perfect trigger, this could be a motor issue, this is how I checked my motor.
First things first, I removed the battery for safety and to prevent accidentally pushing the trigger and nicking myself.
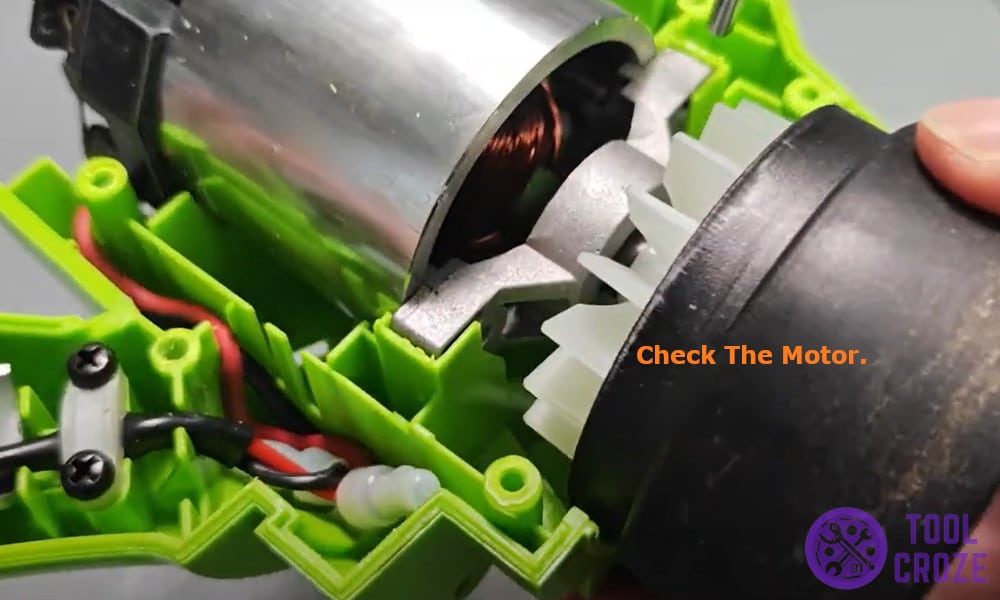
Next, I removed the screws on the trimmer head and rest of the casing to reveal the motor, it is pretty easy, just keep count of the screws.
Once the motor is out, I checked the battery voltage using a multimeter, it was 38V, which was well between the normal 37-40V range, then I connected the motor directly to the battery using jumper wires negative and positive terminals together.
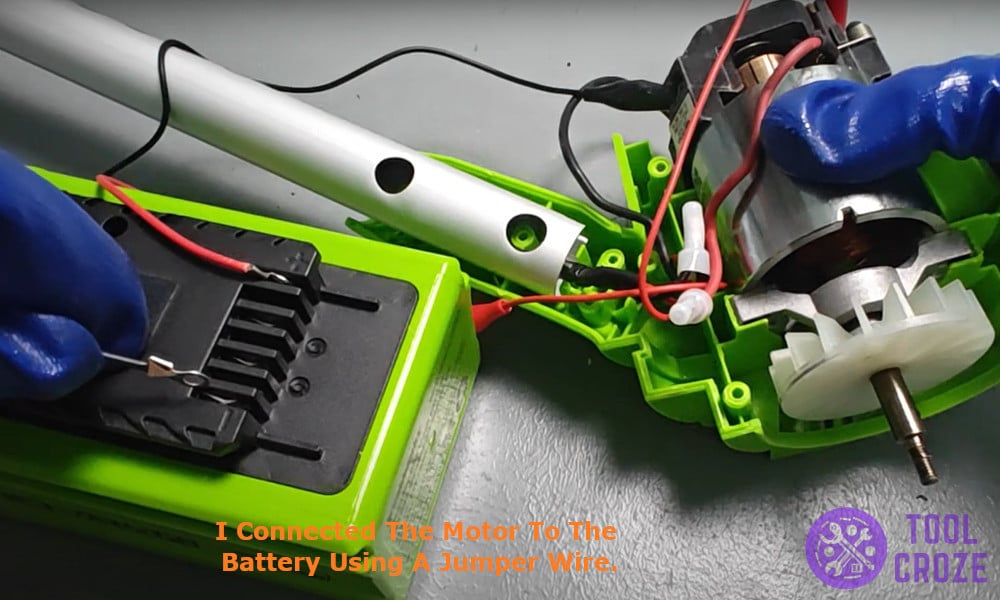
Doing that made the motor spin for me, but if that isn’t the case for you, the motor must be at fault and you should look at the back for the label and replace the motor.
And before I forget, I also have a short video about this topic which you can watch below.
5. Auto-feed not working
This is another common problem that occurs often with the Greenwork trimmer that the automatic mechanism of the cutting line does not work. This is what I did to fix mine:
First and foremost I removed the battery for safety and checked the spool cap to see if any dirt or debris was stuck in it which could jam the auto-feed mechanism.
Next I cleaned the cap using a wet wipe and moved onto checking the cutting line. Sometimes, the line gets stuck or the release mechanism doesn’t work; that’s what I thought the issue was, so I manually pressed down the release button and tried pulling the wire out.
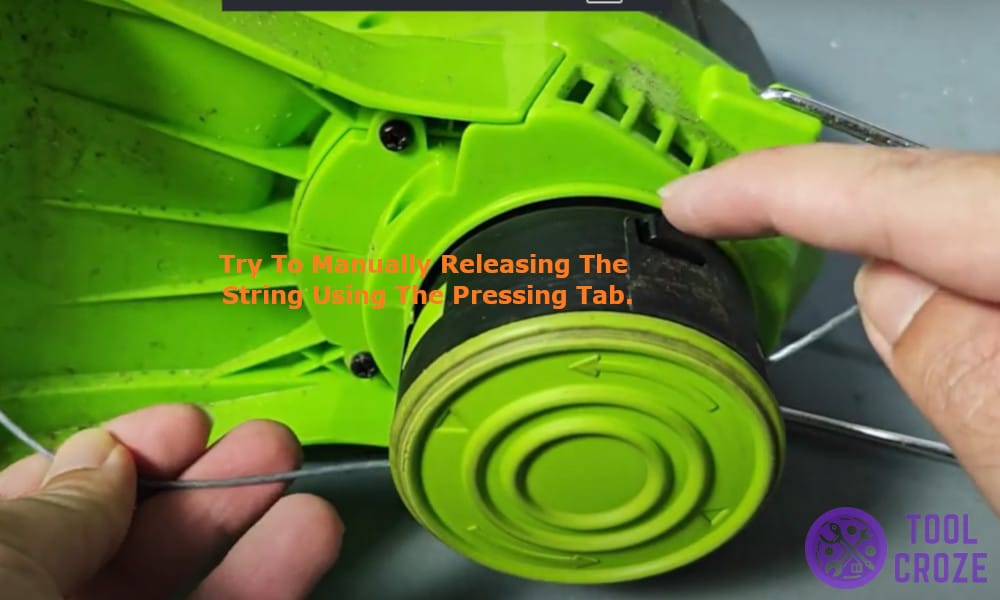
When that didn’t work I pulled out the reel and that’s where the issue was, the line had tangled inside the reel and that’s why the line wasn’t dispensing, I pulled on it till it got free and fed that back into the auto-feed to check it.
This fixed the issue for me, sometimes just pulling the reel out and putting it back fixes the auto-feed problem.
Lastly, I also have a short video about this topic on my YouTube channel but you can also watch it below.
