I like to keep the grass around my backyard and the driveway clean and maintained. As a guy who loves plants and keeping everything perfect, the Greenworks Trimmer is one of the most handy tools I have ever laid my hands on, but the other day I ran into big problems.
While I was trimming the grass I noticed that the Trimmer’s auto feed was not working and there was no line to cut the grass.
I tried turning it off and on again but there were no results, until I decided to take things in my own hands and troubleshoot the problem.
But before you go on reading this article, you can first watch the short video I made about this topic. You can watch it below.
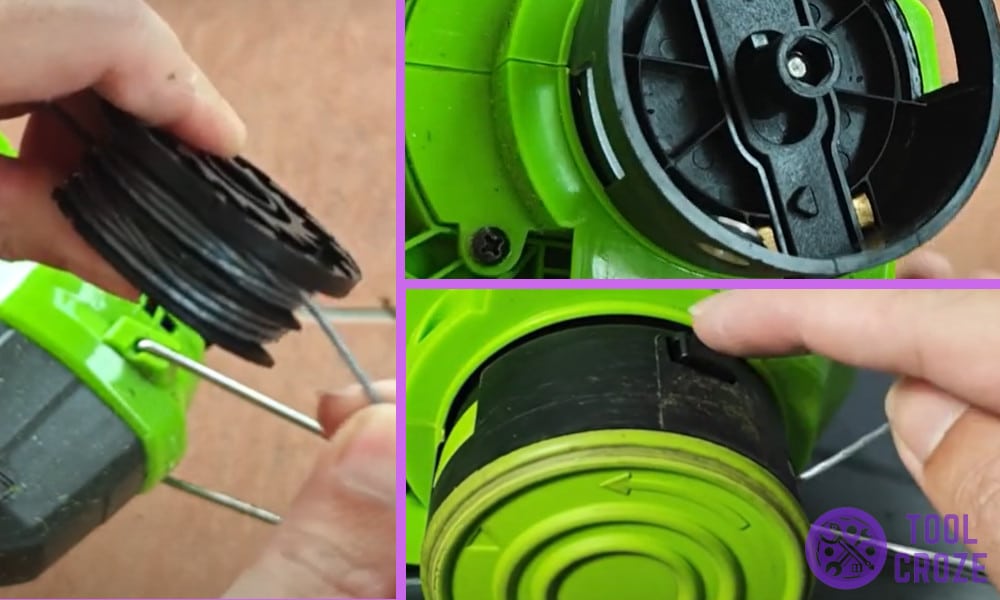
On my video, I check the spool and cap, the string line, and the auto feed mechanism. Then I manually release the string by pressing the tab.
How to Troubleshoot Greenworks Trimmer Auto Feed Not Working
Here are 6 steps to fix your Greenworks Trimmer auto feed not working.
Step 1 – Turn Off the Trimmer and Remove the Battery
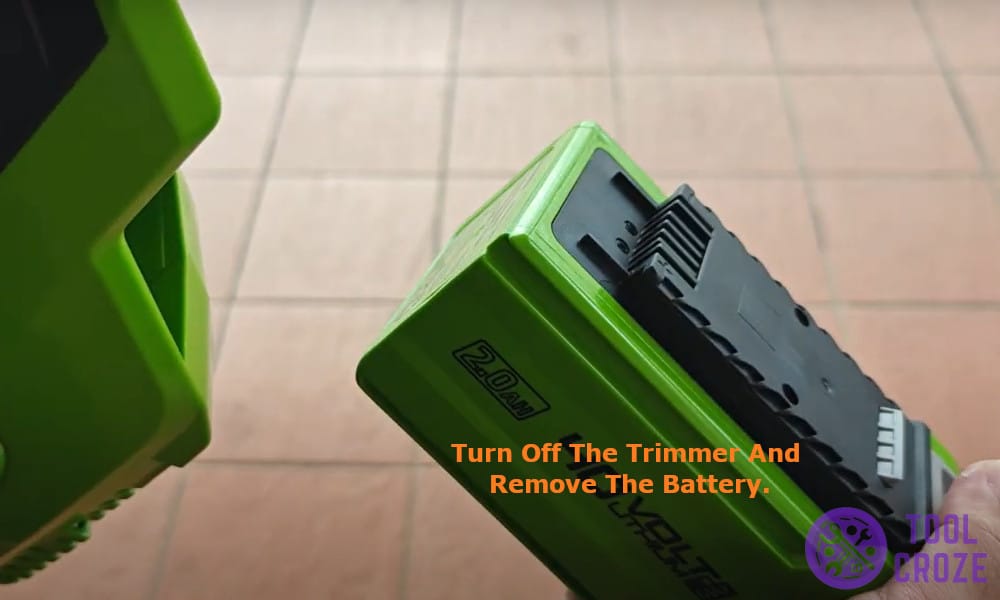
The spinner at the bottom of the trimmer can spin at a really high speed and can hurt you. As a precautionary step I started with turning off the trimmer and removing the battery from the top.
This will keep me safe from any electric current or even if I mistakenly press any button. Safety should always be your first priority.
Step 2 – Check the Spool Cap
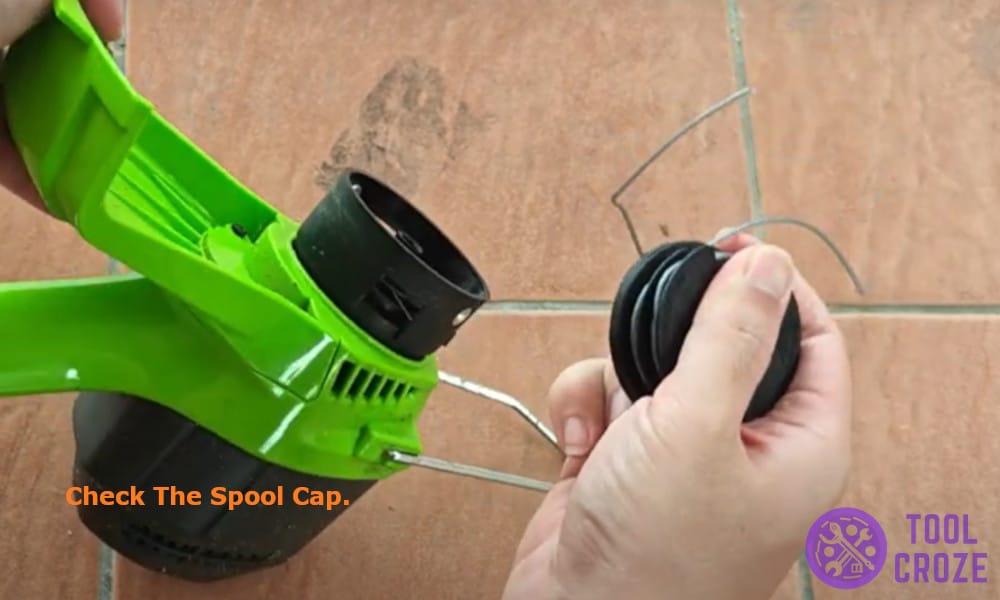
The spool cap is the first plastic removable object that comes in the way. I started by removing it from the bottom of the trimmer and inspecting it for any dirt or debris.
Grass buildup, dirt and other debris can cause the auto feed mechanism to jam. If you see any building of dirt clean it using fresh water to fix any issues.
Step 3 – Check the String Line
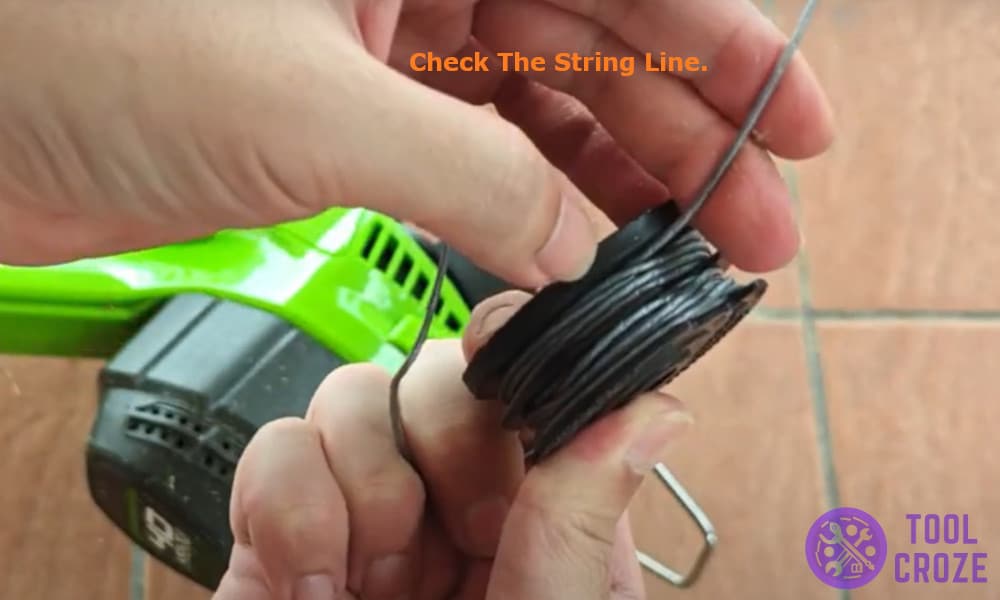
After removing the spool cap I could easily access the line wrapped in the feeder, I removed the feeder and checked the line for any tangled line or if the line was correctly wounded or not in the feeder.
If you see that the line is tangled or not wounded correctly remove it from the feeder and feed it again in the trimmer.
You might also face this problem if you are not using a trimming line of the right size, each trimmer has its own recommended thickness of line and size.
Related: What I Did When My Greenworks Trimmer Starts Then Stops: 3 Tips

Step 4 – Check the Auto Feed Mechanism
The auto feed mechanism is the most important feature of the Greenworks trimmer, it ensures if the line is released or not.
I decided to check the most important feature to make sure if it’s working correctly or not, the auto feeding mechanism uses a spring loader which should push back and release after pressing.
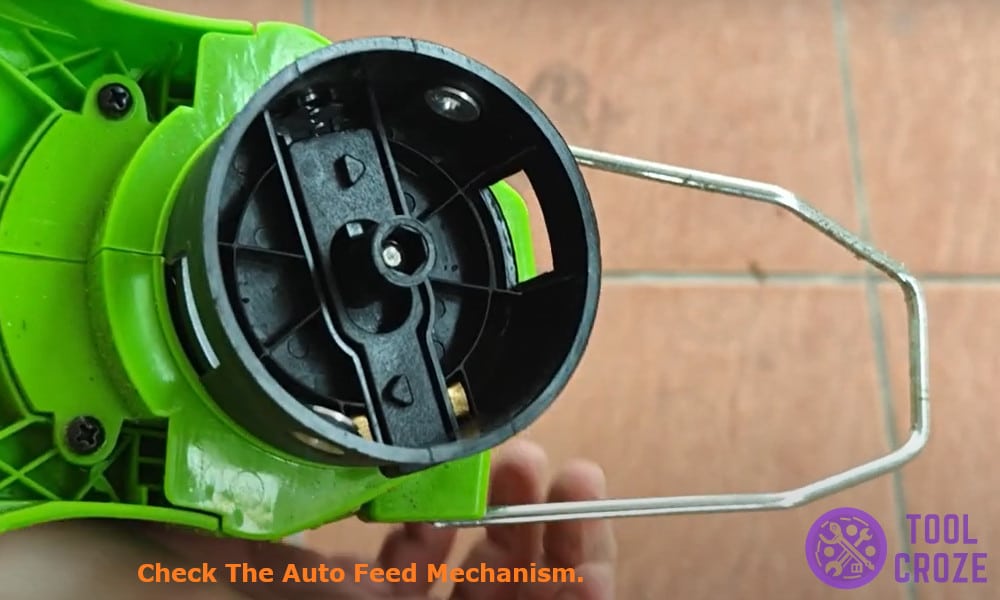
If the auto mechanism is not working properly, it is damaged and needs to be replaced to ensure proper feeding of the line automatically.
Step 5 – Try to Manually Releasing the String Using the Pressing Tab
You can also manually release the line using the auto feed tab available on the outside of the spool. I tried pulling out 1 to 2 inches of line manually by pressing the tab and to check if it’s coming out properly or not.
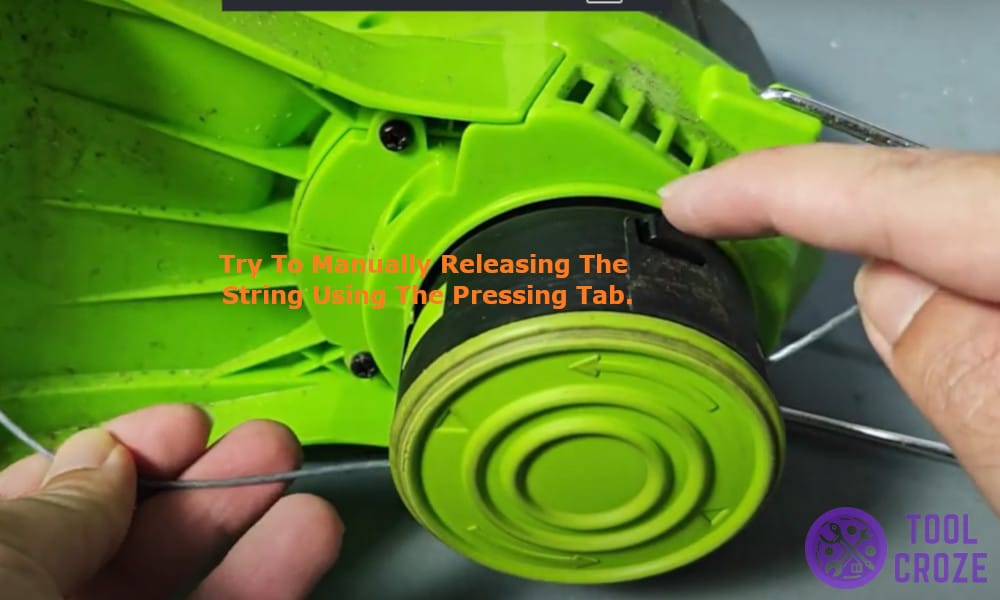
This helped me test if the feeding function is working properly or not. Try this method to check for your greenworks trimmer too.
Step 6 – Test the Auto Feed Again
After successfully testing all these steps I decided to give things another try.
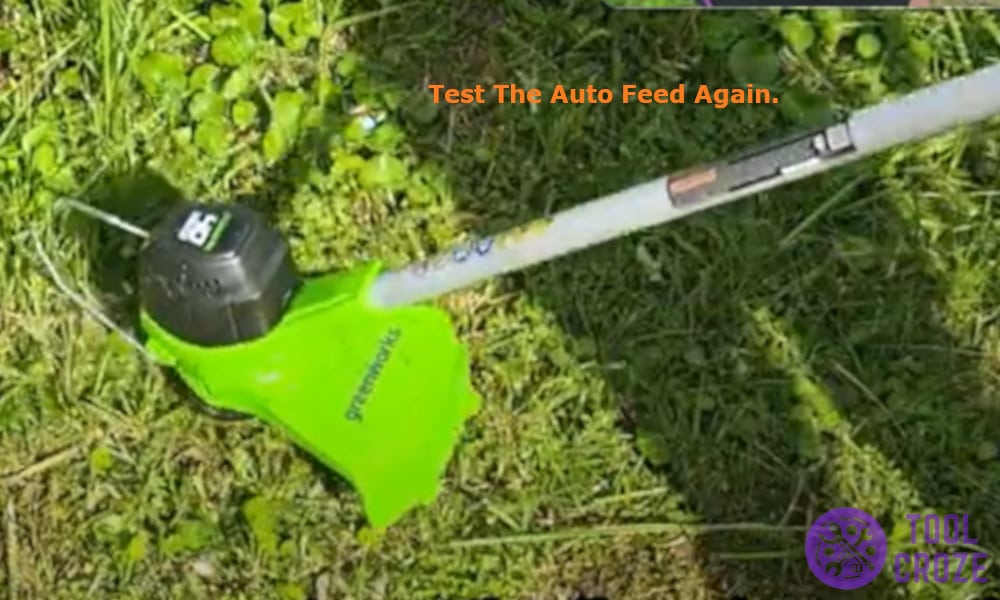
I started by inserting the battery back into the trimmer and turned it on, as I tried cutting the grass with it again it worked perfectly and the line was coming out once again.
Sometimes just restarting the trimmer can also restart the feeding mechanism and release the line automatically to fix the problem.
