When someone puts a battery on their Greenworks charger, it’ll start showing a solid or flashing green light. On bad days, that light may turn into a red one instead.
It’ll keep flashing red until users unplug the charger or take the battery out. To get rid of the blinking red light and fix a Greenworks battery that’s not charging, try the method below.
But before you continue reading this article, you can first watch the short video I’ve made about this topic. You can watch it down below.
On the video, you can see my 24V Greenworks battery is flashing red on the charger, it means the battery is unhealthy and it is not able to charge normally.
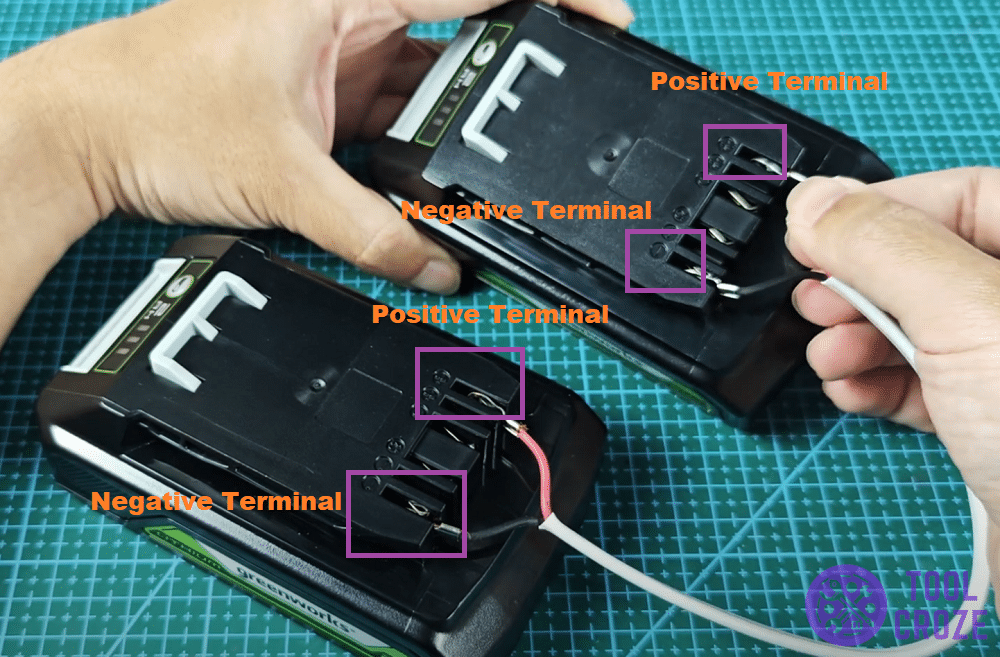
To solve this, I used another healthy 24V Greenworks battery to jump start the bad Greenworks battery. I connected the positive and negative terminals of the two Greenworks battery.
After 15 seconds, I disconnected the two batteries. Then, I put the problematic Greenworks battery back to the charger. It’s now charging normally.
How to Fix A Greenworks Battery Not Charging and Blinking Red
In case you don’t already, it’s important to know what that blinking red light means in the first place. After all, it’s not a color people usually see on the Greenworks charger.
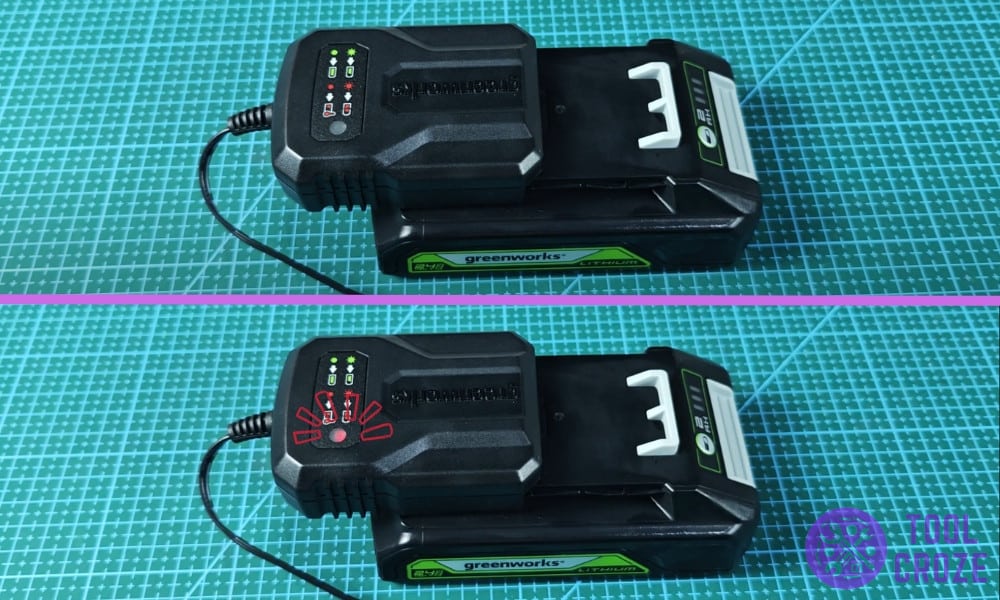
Green lights signal regular performance. When the Greenworks charger blinks green, that means it’s still charging your battery. A solid green light means the battery is at 100%.
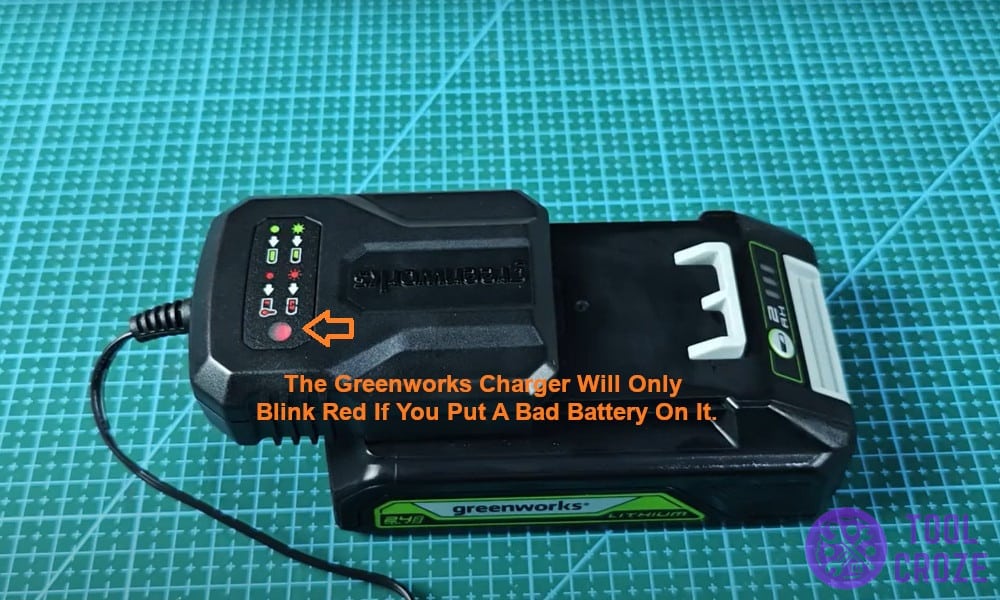
Red lights, on the other hand, are a bad sign when it comes to these chargers. That’s because it will only blink red if users put a bad battery on it.
I also have a short video about the meaning of Greenworks charger indicator and you can watch it below if you want.
In addition to those I already mentioned, you could also see a solid red on your Greenworks battery charger. This implies a hot cold delay which means the battery on the charger is either too hot or too cold to charge.
So, you’re probably seeing this light because your Greenworks battery isn’t functioning right anymore. It probably has faulty cells inside that are stopping it from charging.
Even a single cell losing its capacity or voltage can ruin the entire battery. It won’t charge anymore and obviously won’t be able to power any tools if its cells are weak.
Was your battery working fine until recently but now shows a red light like in the image below? That means you likely have a bad cell or few inside your Greenworks battery too.
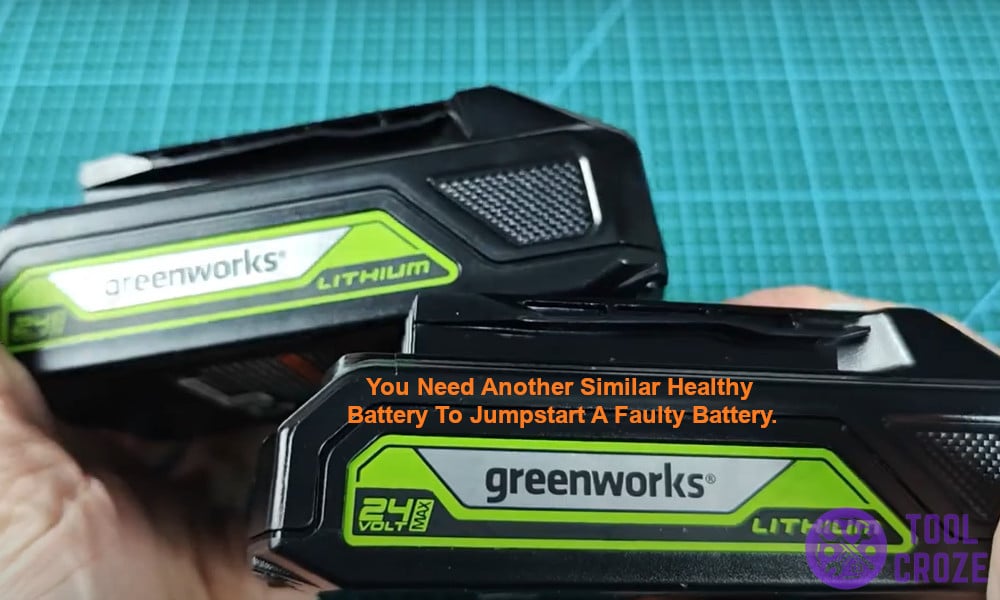
None of this necessarily means you need a new battery, though. There’s still a way to fix it. For that, you need to simply “jumpstart” the faulty Greenworks battery!
Jumpstarting will help reset the voltage of the cells inside your Greenworks battery. That way, their capacity will come back to normal and they’ll accept charge again.
All you need to jumpstart a faulty battery is a functioning one. In this particular case, users will want another tool battery that matches your Greenworks’ voltage.
I always buy my batteries in pairs so I have a spare lying around for situations like these. I fortunately have another 24V Greenworks battery identical to my faulty one because of that.
That doesn’t mean you need one too, though. Any other tool battery with a voltage of 24V will do the trick too. If you’ve got one somewhere, now’s the time to get it out.
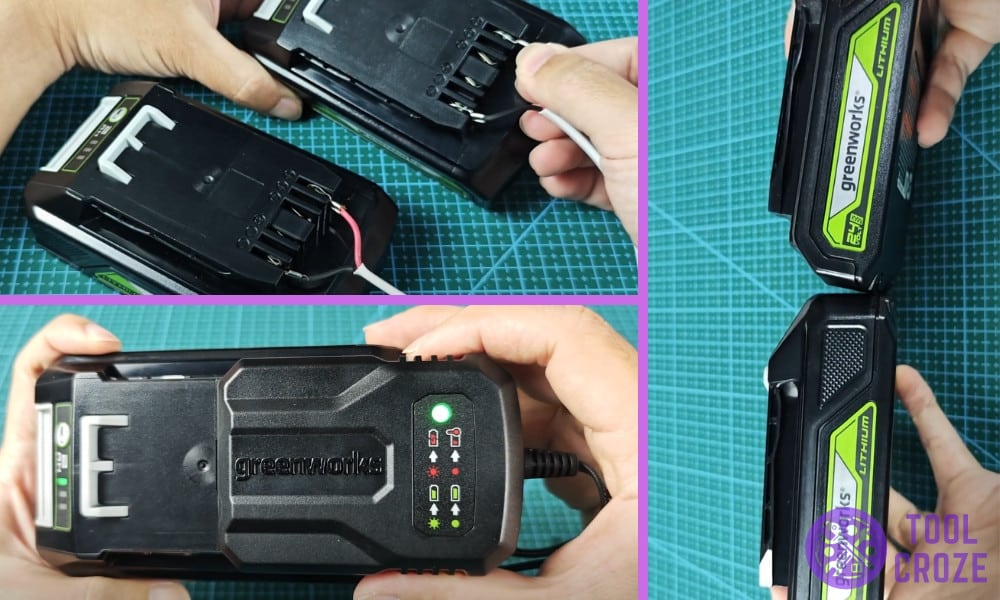
Place both of the batteries together on a table after identifying their positive and negative terminals. Next, get battery connector cables to connect these terminals together.
This is a safe process, but only if you do it the right way. Don’t mix two terminals together no matter what. That’ll lead to a mismatch and ruin both batteries.
Only connect two terminals of the same type. Positive goes with positive, and negative with negative. Here’s a picture of my two Greenworks batteries connected to make things clearer.
After putting both the cables inside the proper terminals, connect the two batteries for 15 seconds. Not much more or much less than that.
Less time than that won’t be enough to bring the voltage back to where it needs to be. More time will lead to overcharging, and potentially destroy the battery entirely.
15 seconds will be enough to restore the voltage of any bad cells inside the Greenworks battery. That means they’ll be back to working like before, without any charging problems!
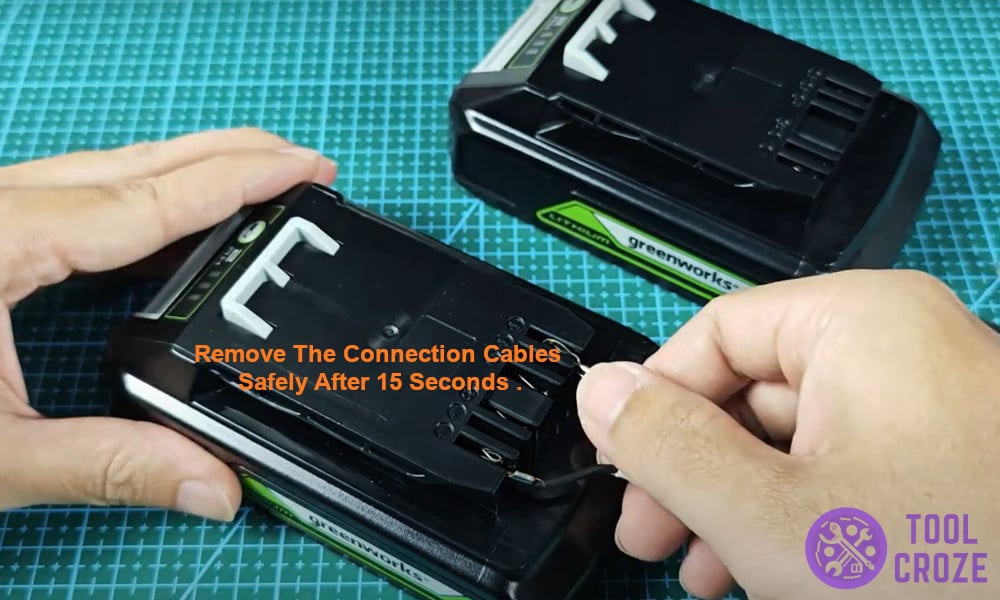
Remove the connection cables safely after those seconds pass. Now grab the problematic battery and put it on the Greenworks charger again to see if it works.
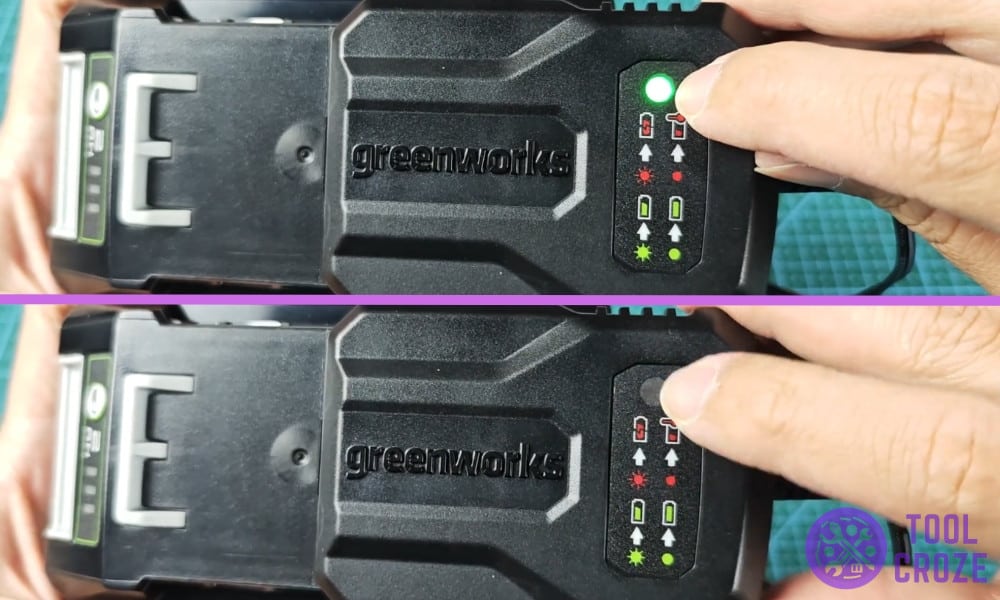
Ideally, the blinking red light should go away after you follow this entire process. Users should see the blinking green light instead, meaning their battery is charging like it should.
I was recently able to get a faulty Greenworks 24V battery of mine working again by following these exact steps. You can see in the image below that it charges just fine now!
While this method does work for a lot of batteries, that doesn’t mean it’ll work for every single one. Yours might be one of them if the blinking red light is still there.
Some batteries can’t have their voltage restored by any means. That’s because the cells inside them aren’t just bad, they’re completely dead and won’t work anymore.

If your Greenworks battery is a few years old now, it’s likely this method might not work. After all, these things only work for so long before its time to replace them.
It may be that time for you too if the steps in this guide weren’t helpful. But, hopefully, it doesn’t come to that and this method fixes your issue!
