I’ve been using my Milwaukee M12 impact wrench for a long time now. While it’s usually been a pretty handy tool, there’s no denying it has certain issues here and there.
Are you facing one? Go through some common Milwaukee M12 impact wrench problems with me, and their troubleshooting. I’ll talk about a bunch of them, and your specific issue should be there too!
I have also made a short video about how you can fix some common problems you can encounter with your Milwaukee M12 impact wrench. You can watch it below.
This video shows you how to fix problems with the battery, forward/reverse switch, trigger, LED light, motor and anvil and gear.
Troubleshooting 4 Common Milwaukee M12 Impact Wrench Problems
- Speed Selector Lever Broken/Bent
Users can control speed select through the little knob on top of the tool. When you move it, there’s a lever below it that shifts accordingly and lets the wrench know when to change pace.
The feature can’t work if that lever breaks though. With a dysfunctional lever, nothing will change even if you move the speed selector around, as the lever won’t move.
If the feature doesn’t work for you, that may be why. To confirm if that’s the case, open your Milwaukee M12 like I have in the image below, and check underneath the selector.
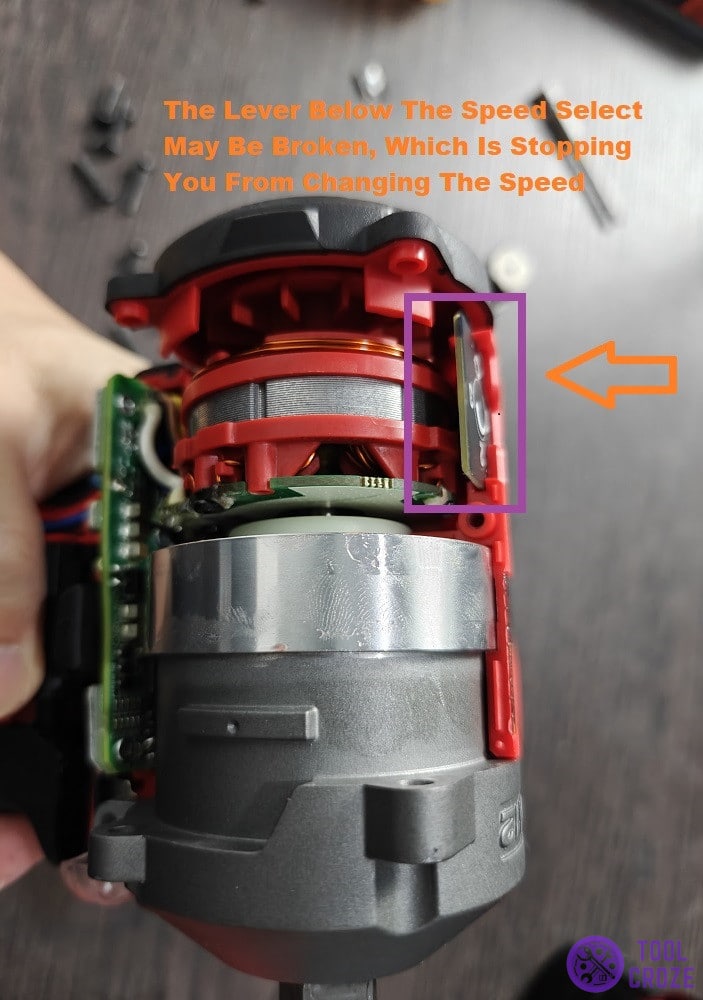
Levers that have damage are really easy to notice underneath this area. If users end up seeing bending or damage of any kind on the lever underneath your speed selector, it will need repairs.
You have to take it to a repairperson for that, so they can fit a proper lever inside that will get the feature working again.
- Nothing Happens When Pressing Trigger
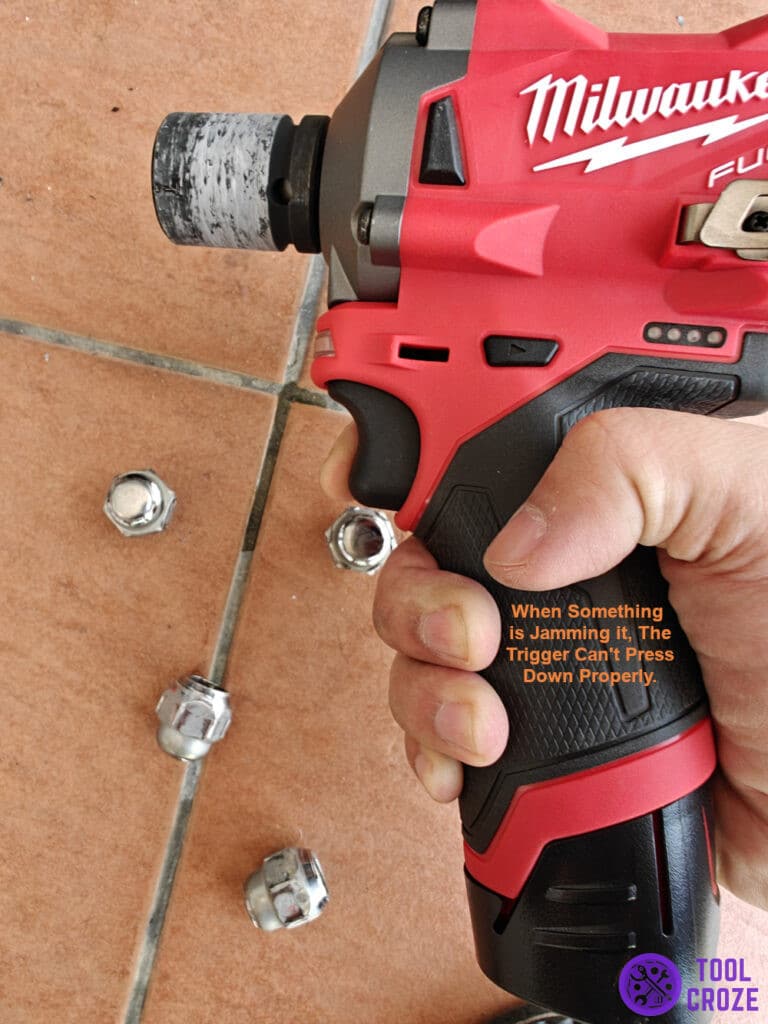
When something is jamming it, the trigger can’t press down properly. Even if you can click it all the way, there may be debris that’s stopping it from pressing all the way.
This stops the impact wrench from knowing when it’s time to start working. As such, nothing happens when you press the trigger. So, that means we just need to clean it.
To do that, you’ll have to open the Milwaukee M12 around the area I’ve highlighted in the image below. Then, clean thoroughly around the area surrounding the trigger.
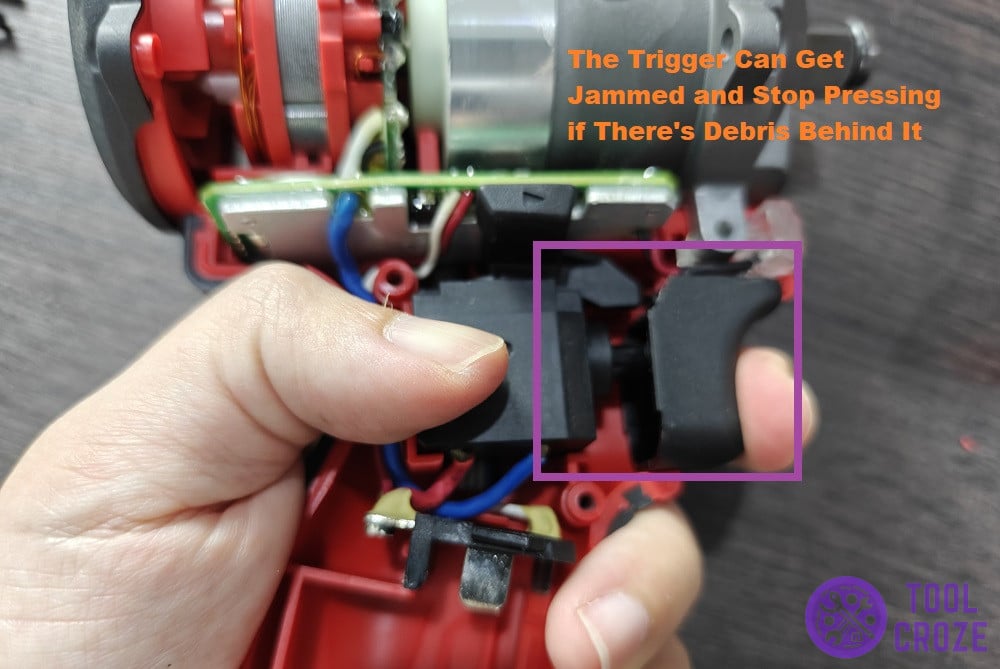
If it doesn’t work even after you get rid of debris, check the area right behind the trigger. The spring may be broken, which is stopping it from going in fully and starting the too.
Broken trigger mechanisms aren’t uncommon, and are often a result of wear and tear. You need replacement components to get it working again.
I have made a video which shows what should happen if the trigger is working properly. You can watch this down below.
This video also shows how you can use the Milwaukee M12 impact wrench on your tyre nuts.
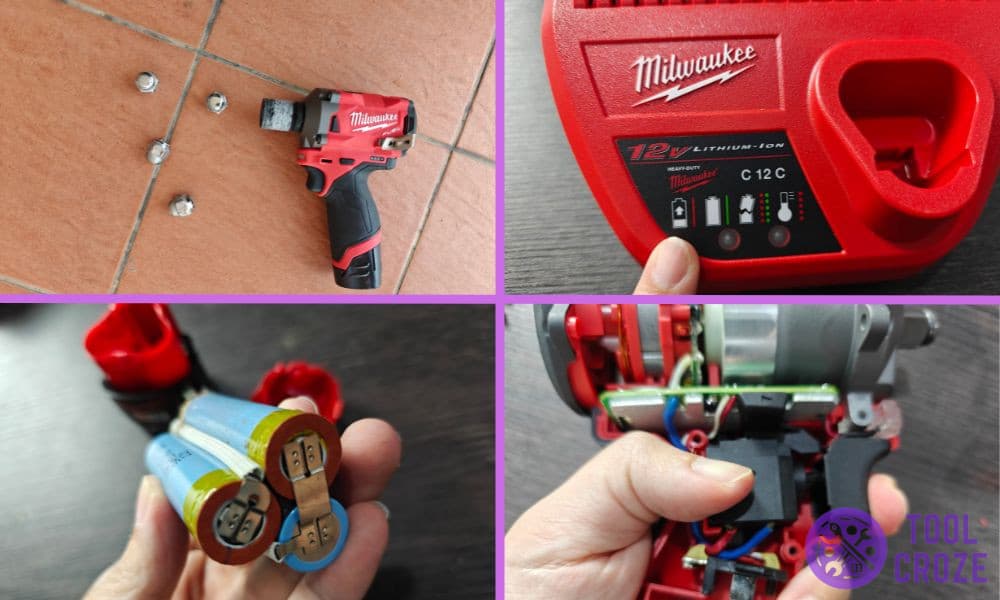
- Battery Issues
Battery problems are a common issue for any wireless tool, and the Milwaukee M12 is no exception. Usually, it’s just old age and regular use that has drained the battery too much.
After a certain time, they stop working. They won’t turn on, hold charge, supply power to the tools, or be good for much. This happens to all Milwaukee M12 batteries after a few years.
This means your Milwaukee M12 battery isn’t healthy anymore. I have a video about how you can solve this problem and you can watch it below.
You’ll know if your Milwaukee battery has a charging issue if you see a flashing red and green light when you charge it. To fix this issue, first you would need another similar healthy battery.
Using two wires, connect the positive and negative terminals of the two batteries. Leave it for around 15 seconds and then disconnect the two batteries.
The unhealthy battery should be reset by now. Try to recharge it on the Milwaukee charger and it should be charging properly.
It’s very important to know the different meanings of the indicator lights on the Milwaukee M12 battery so I’ve also made a video about it. You can watch it below.
If you a see a solid red, this means the battery is charging normally. This will turn into a solid green when it’s fully charged.
Related: How I Solved My Milwaukee M12 Battery Shows Green but Not Charging to Full Problem
As mentioned earlier, a flashing red and green indicates a bad battery. And if it’s only a flashing red, it means a hot/cold relay.
But, if yours isn’t that old, it may be the cells inside that are acting up. All these batteries have packs of smaller batteries inside. I’m holding the ones inside my own Milwaukee M12 in the photo below.
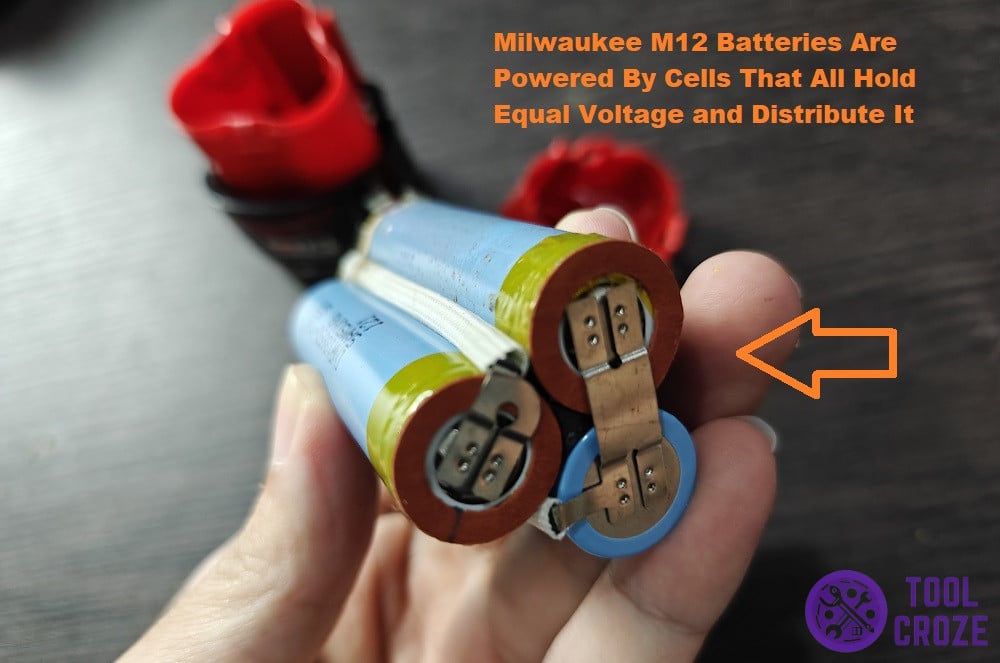
If even one of these cells becomes faulty, it leads to the entire battery failing. You have to open the battery’s covering and inspect each cell with a multimeter to diagnose this issue.
It may be tedious, but after you confirm the problem, you can fix it by getting a cell of equal specifications and replacing the faulty one with it to get the battery working again.
- Milwaukee M12 Charger Indicator LED Not Working
The indicator LEDs on Milwaukee M12 chargers let you know when something is wrong, or what the condition of the battery is while charging.
But, you can’t know about any of that if those indicators don’t work. If none of the lights on your charger seem to be turning on even though the rest of it is fine, they burned out.
Below, you can see a Milwaukee M12 charger that doesn’t have any indicators on. If yours looks like this even with a battery attached to it, the lights inside are probably burnt out.

The lights may burn out because of high temperatures, or because of too much pressure acting on them. Open the covers and look at the lights directly to see if they’re blown.
Regardless of the cause, it’s not possible to salvage those lights once they burn out. To get the LEDs on the charge charger working, you’ll have to replace them with new ones that work fine.
