Hand vacuums are so convenient for getting into tight spots and cleaning areas that regular vacuums would have a hard time getting to. Though, they aren’t without their fair share of trouble.
An example of this that I’m going to be focusing on today is the Black and Decker hand vacuum, and specifically troubleshooting its most common problems. Follow the tips in the list below to learn more.
Troubleshooting 4 Common Black and Decker Hand Vacuum Problems
- Black and Decker Hand Vacuum Not Charging
Battery problems are probably the most common thing with any tool. They’re especially common with hand vacuums, like the Black and Decker dustbuster, due to their internal batteries.
Internal batteries are a lot harder to deal with when something goes wrong. One such case is a hand vacuum that’s not charging, since it’s difficult to troubleshoot without looking at the battery.
External batteries are convenient since it’s pretty easy to tell if the charger or battery is to blame. But, with internal ones, you can’t tell if the battery is truly to blame without digging it out and testing it.
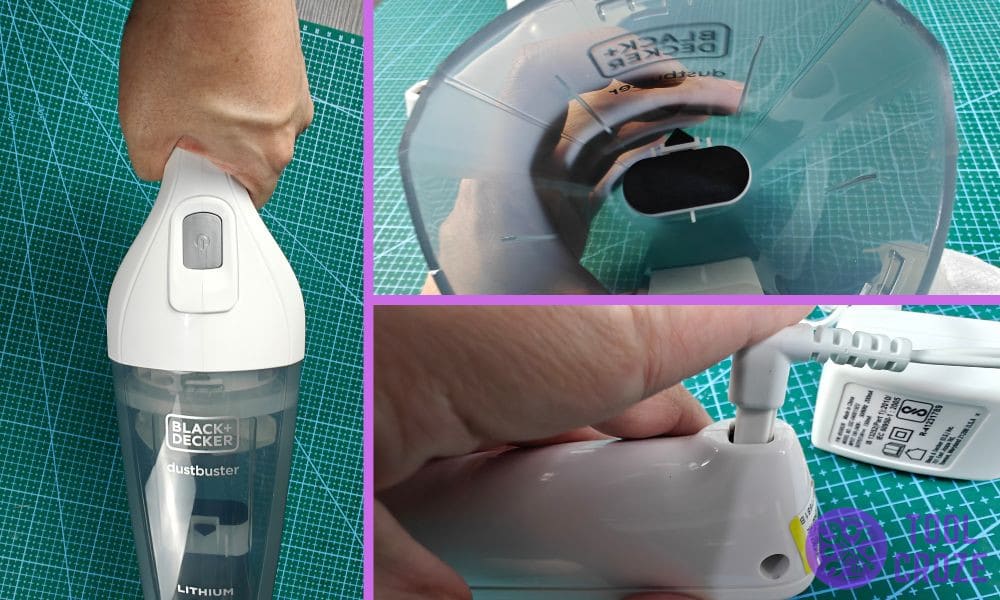
First, though, let’s start by ruling out whether the charger is to blame. Usually, a spare charger is perfect for this. If even the spare can’t charge the hand vacuum, the tool is faulty.

The picture above has my charger and Black and Decker Dustbuster. For now, both my battery and the hand vacuum itself work perfectly fine. But, if either of yours don’t function right, get a replacement.
If the battery is what has issues, buy a battery pack and follow a replacement guide for your particular model to resolve this. In the charger’s case, just buying a new one and using that is enough.
- Bad Suction Seals
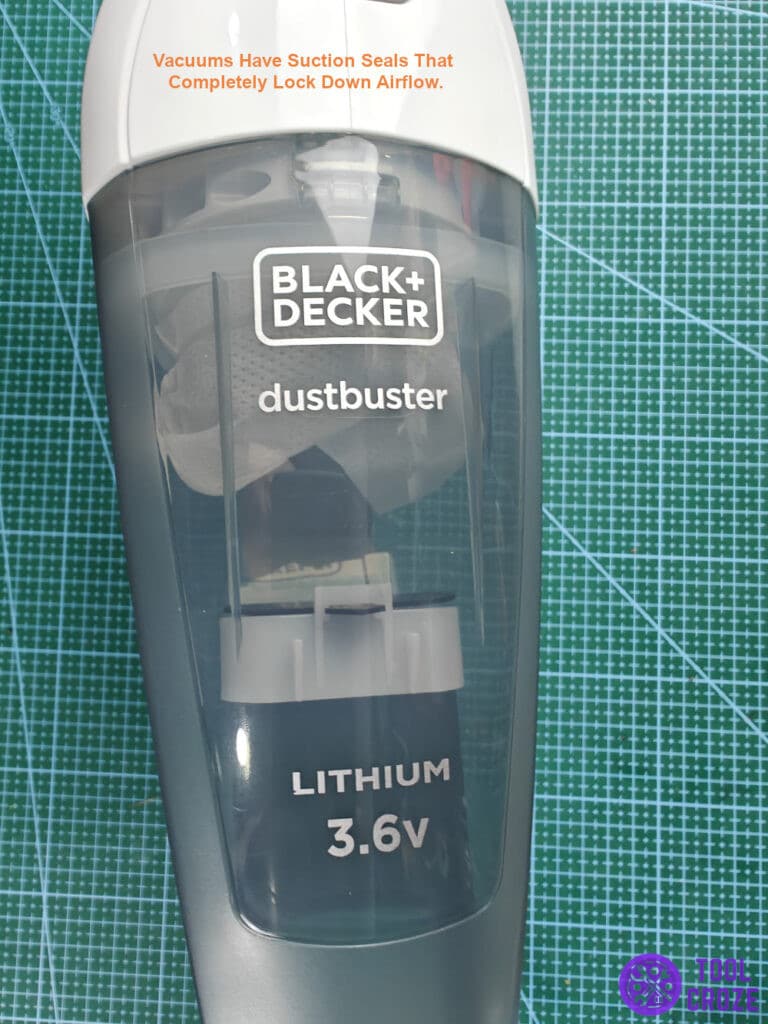
Vacuums have suction seals that completely lock down airflow. These make stronger suction possible since less air escapes the tool, resulting in a better pull. But, the seals can go bad.
They lose their hold on the tool with time, eventually getting looser. This starts to affect suction once the seal is completely loose and no longer prevent air from leaking out.

It’s a common issue with all vacuums, and handheld ones aren’t an exception. You’ll have to replace it sooner or later, but to do that you’ll need the necessary seal first.
Finding the exact type of seal your Black and Decker hand vacuum needs is easy if you still have the manual, like I do in the picture below. It’ll tell you more about the parts and their number.

Once users find out what the part number for the seal they need is, they can buy one and just put it on in place of the old one. Replacing the seal isn’t that hard once the spare is available.
All that’s necessary is to take the old seal off and clean the area around where it was. After that, carefully apply the new suction seal and lock it down into place so that it can control airflow.
- Filter Issues
Filter issues are another common thing with any vacuum. It’s especially easy to have trouble with the filters on some hand vacuums, because these ones are tinier.

Smaller sizes play a role because it’s easier for the filters to clog up when they’re tiny. That’s why it’s best to regularly clean out the ones on your Black and Decker hand vacuum.
Ideally, you should clean the filters after every 2-3 uses, at the most. That’ll leave no chance for gunk to build up, and will ensure that nothing gets dirty enough to impact performance.
I think it goes without saying, but you shouldn’t let the bin get too dirty either. Once it fills up to a certain point, the vacuum might stop turning on.

A toothbrush is good enough to clean the filters on most of these vacuums. Just run it across the surface, along with some clean water. That’ll get anything stuck out.
One big mistake some users make is to put the filter back in after washing it without waiting for it to dry up. Don’t do that! It’ll completely short the vacuum, and it won’t ever work again.

Wait for it to dry entirely over 24 hours before putting it back inside. And speaking of mistakes, don’t forget to properly set the filter in place while inserting it into its place.
Skewing the filter or misaligning it will affect the tool’s suction. It won’t pick up as well as it should anymore until users set it the way it should be.
- B&D Hand Vacuum Not Picking Up
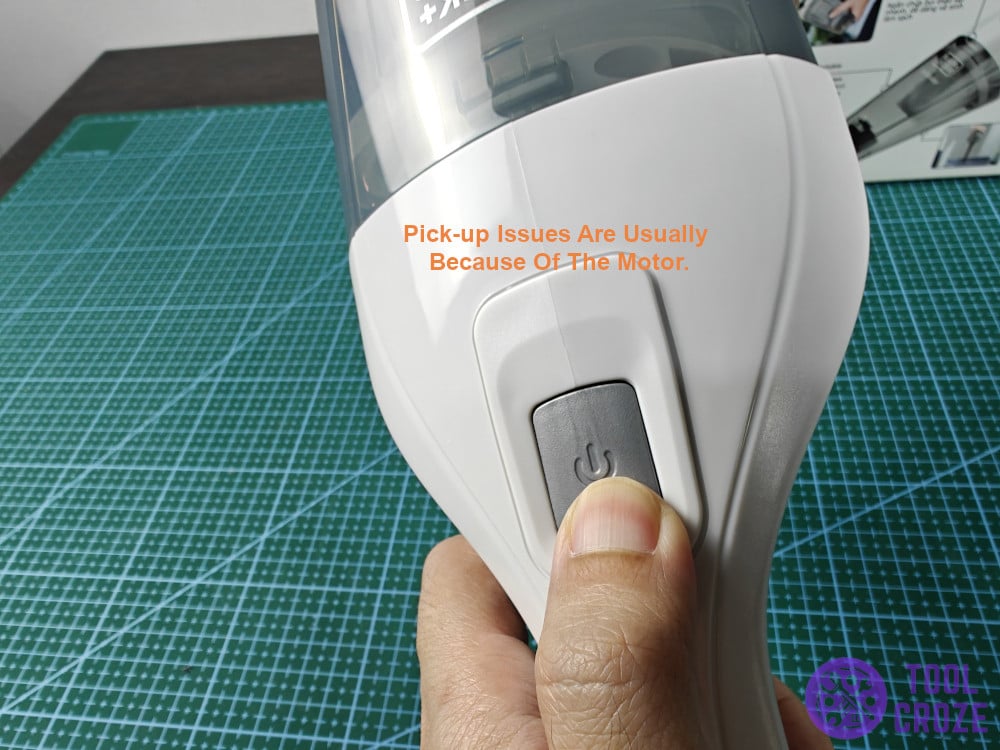
Pick-up issues are usually because of the motor. The motor is responsible for producing enough force and suction that the vacuum can do its job. But, a dirty motor won’t do that.
Despite the filter, dirt can still seep through to the motor inside sometimes. It’s common after a year or so of regular use. There’s only so much the filter can keep out after all.
At a certain point, that dirt will be too much for the motor to handle. It’ll start slowing down. To fix that, you’ll have to either replace the tool, or go through with the trouble of cleaning its motor.
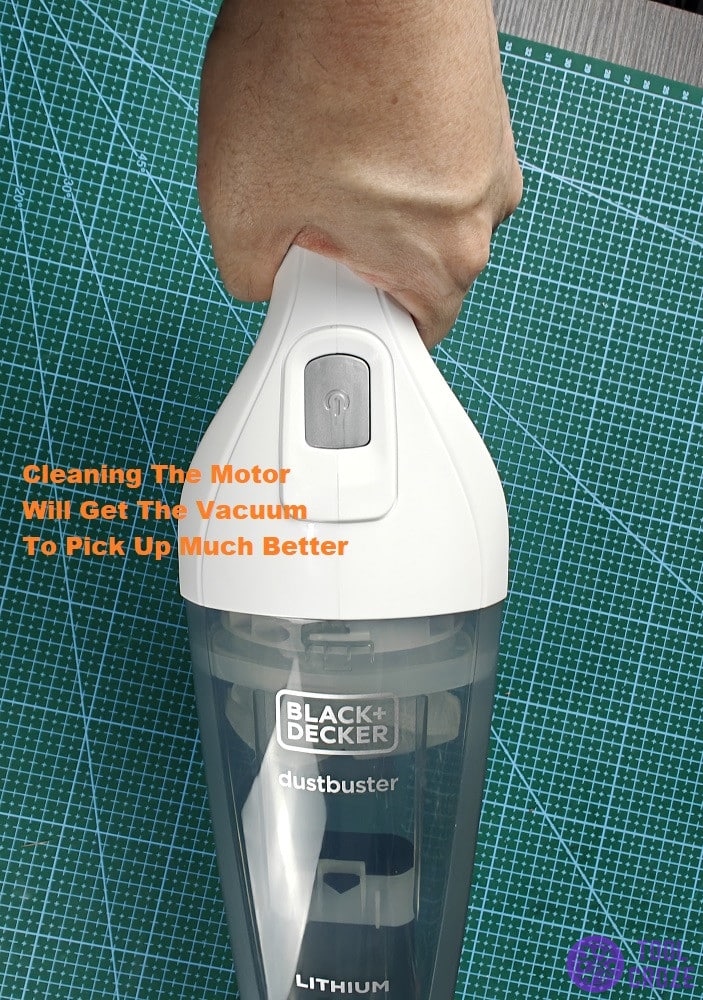
While that sounds like an easy choice, it’s not always. After all, it’s much harder to reach internal components in some Black and Decker hand vacuums, like the Dustbuster series.
These are the kind of vacuums that aren’t meant for long-term use. But, if you’re smart about it, it’s possible to replace their batteries and clean their motors.
If you have a vacuum with an easy-to-access motor, the manual will show you how. However, Dustbuster users will have to take matters into their own hands.
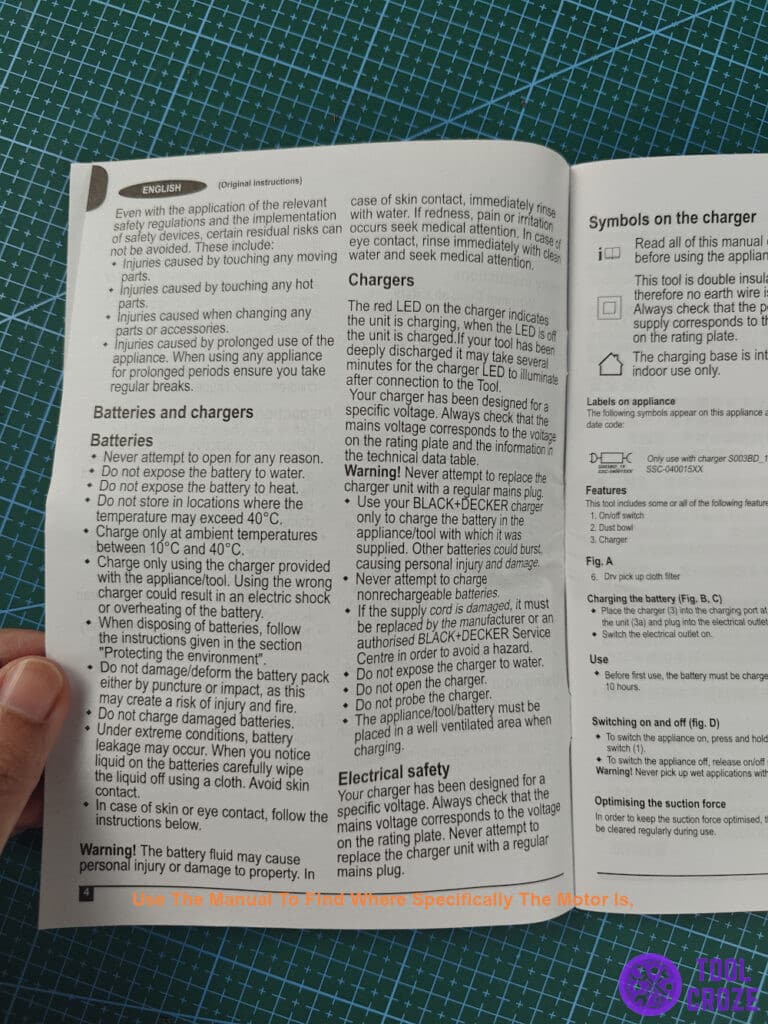
Start by taking off the screws and removing the casing from your hand vacuum. Use the manual to find where specifically the motor is, and then keep removing components until you reach it.
I’d be more specific, but the process is pretty different depending on the model. After reaching the motor, clean it (with Q-tips) and then try to see if the vacuum picks up better.
