The Ryobi 40V battery is one of the most powerful batteries that I have ever laid my hands on, but it not only delivers on power it also provides a long backup and while using it as a battery backup during camping trips it never disappoints me.
Not long ago the battery suddenly gave up on me while I was trying to charge it, no matter how long I plugged it in for charging the battery just wouldn’t come back to life.
It left me confused as I didn’t know how to fix this issue and after trying again and again I decided to give it a reset and with the help of the internet here is how I reset my Ryobi 40V battery and made it work for me again.
But before you continue reading this article, you may first watch the short video I’ve made about this topic. You can watch the video below.
On the video, I showed how you can open the cover and locate the RST pin. Then use a wire to connect the RST pin with the pin beside it. Finally, press the power button on the battery at the same time to reset.
Related: How I Troubleshooted Ryobi 40V Charger Itself Not Working?
How to Reset Ryobi 40V Battery OP40401
After I pulled out the manual for the OP40401 Ryobi 40V battery it was easy to do a complete reset of the battery. I started by removing all the screws that held the plastic cover of the battery and contained all the electrical components inside.
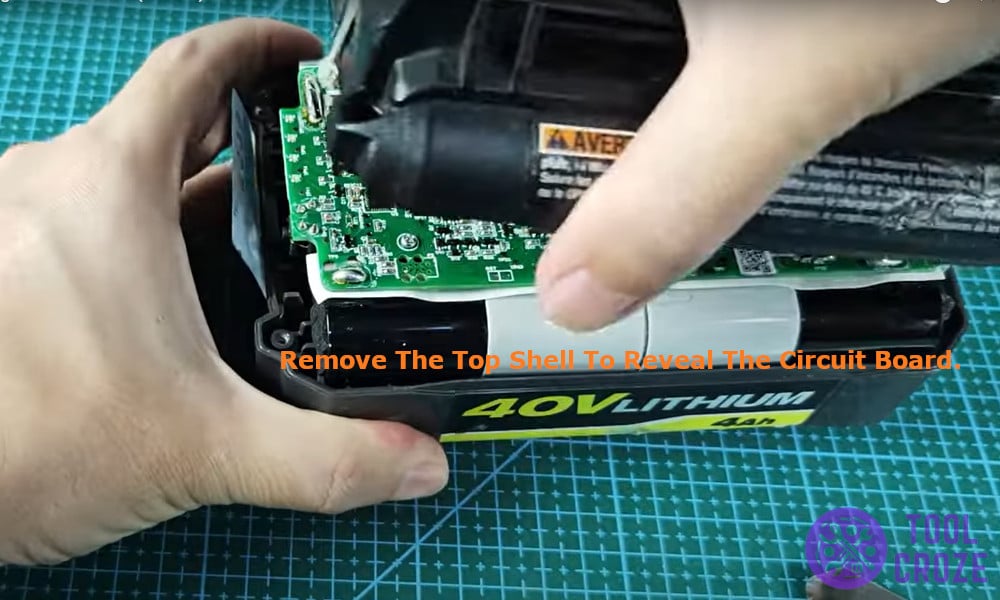
You can easily remove them using a screwdriver just make sure that you are using the right one. Once these screws were removed the only thing left to do was to pry out the sticker where the buttons are situated.
It can be hard to pry out but using a heat gun or proper tools can help remove it easily.
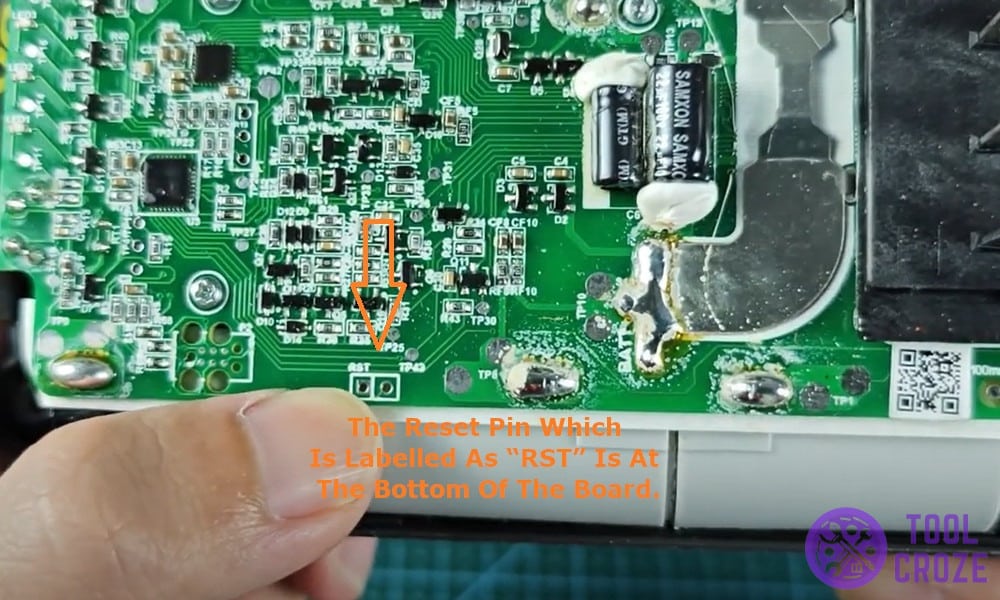
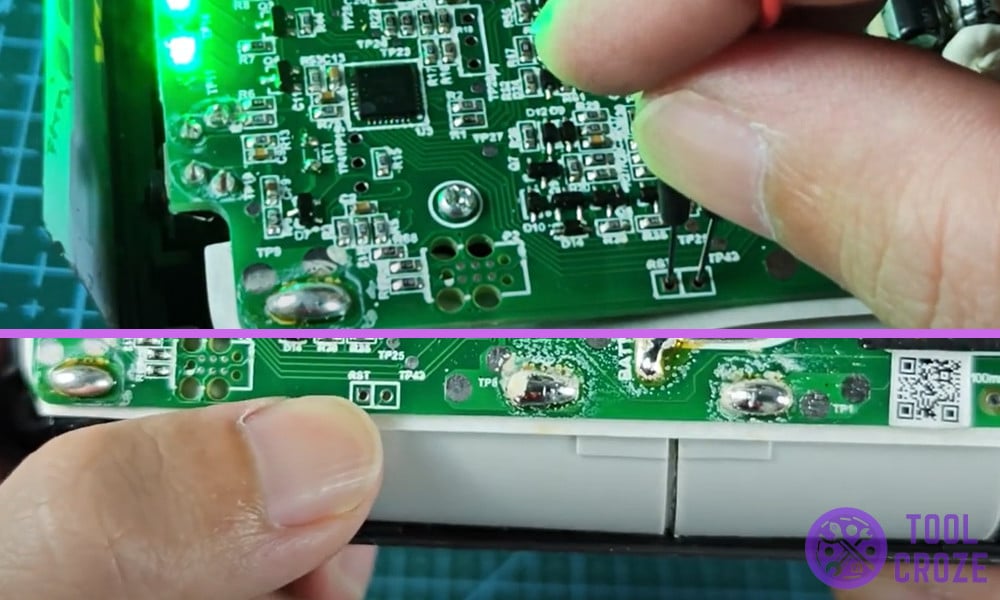
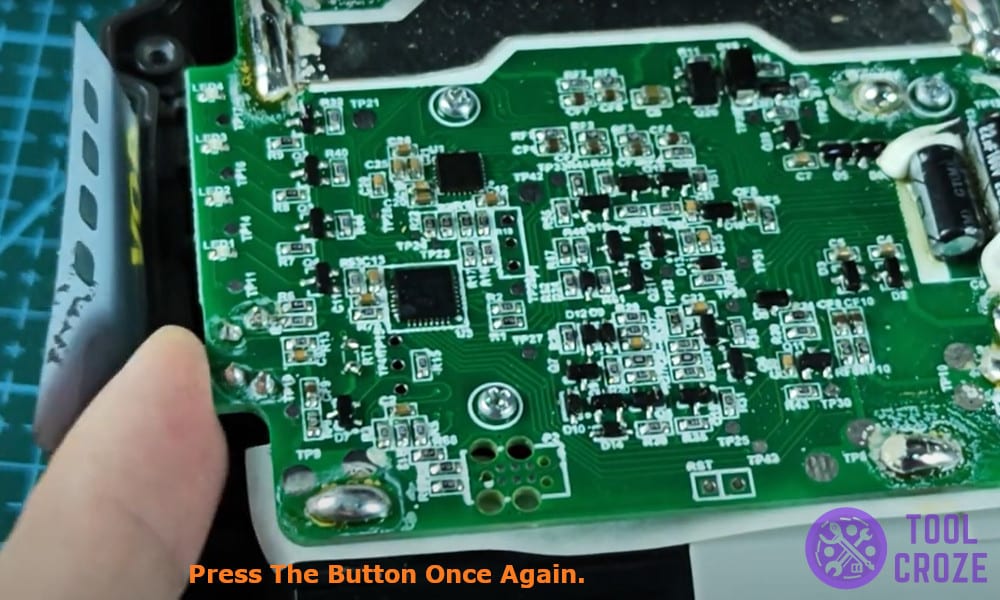
As soon as I got access to the board of the Ryobi 40V battery I looked for the Reset pin which is labelled as “RST” at the bottom of the board.
This pin is used to reset the battery and I did the same by connecting it with the pin beside it using a piece of wire. Make sure to connect these two pins together and then press the power button.
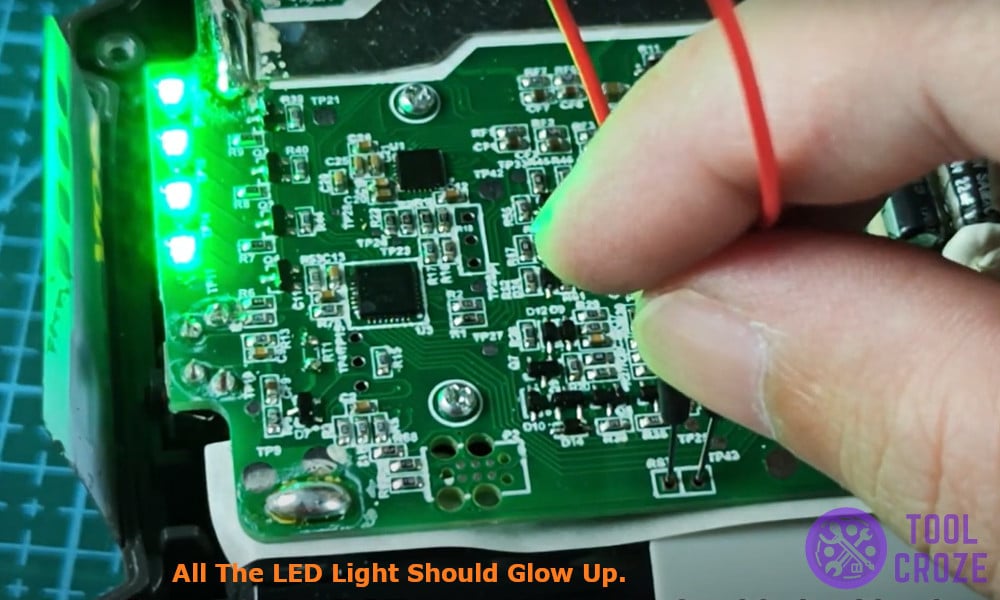
It’s like shorting two points together but in this it just resets the Ryobi 40V battery. All the LED light should glow up to indicate that the battery has been reset and then you can remove the wire.
Pressing the button once again made the lights blink which confirmed the reset. I packed the battery back again and put all the screws in place and then I tried charging it once again it charged normally.
If you are also facing similar issues with your Ryobi 40V battery just follow these steps to fix it and make it work like new again.
And before I end this article, I would like to share with you another short video I’ve made which shows the 3 different ways you can do to fix a Ryobi 40V battery that’s not charging. You can watch the video below.
