Tile Mortar Coverage Calculator
Estimate thinset mortar coverage, bag count, trowel notch volume, back butter allowance, and waste for floor, wall, shower, and large format tile work.
📌Project Presets
🧱Mortar Inputs
Mortar Estimate
📊Current Material Grid
📘Trowel Notch Reference
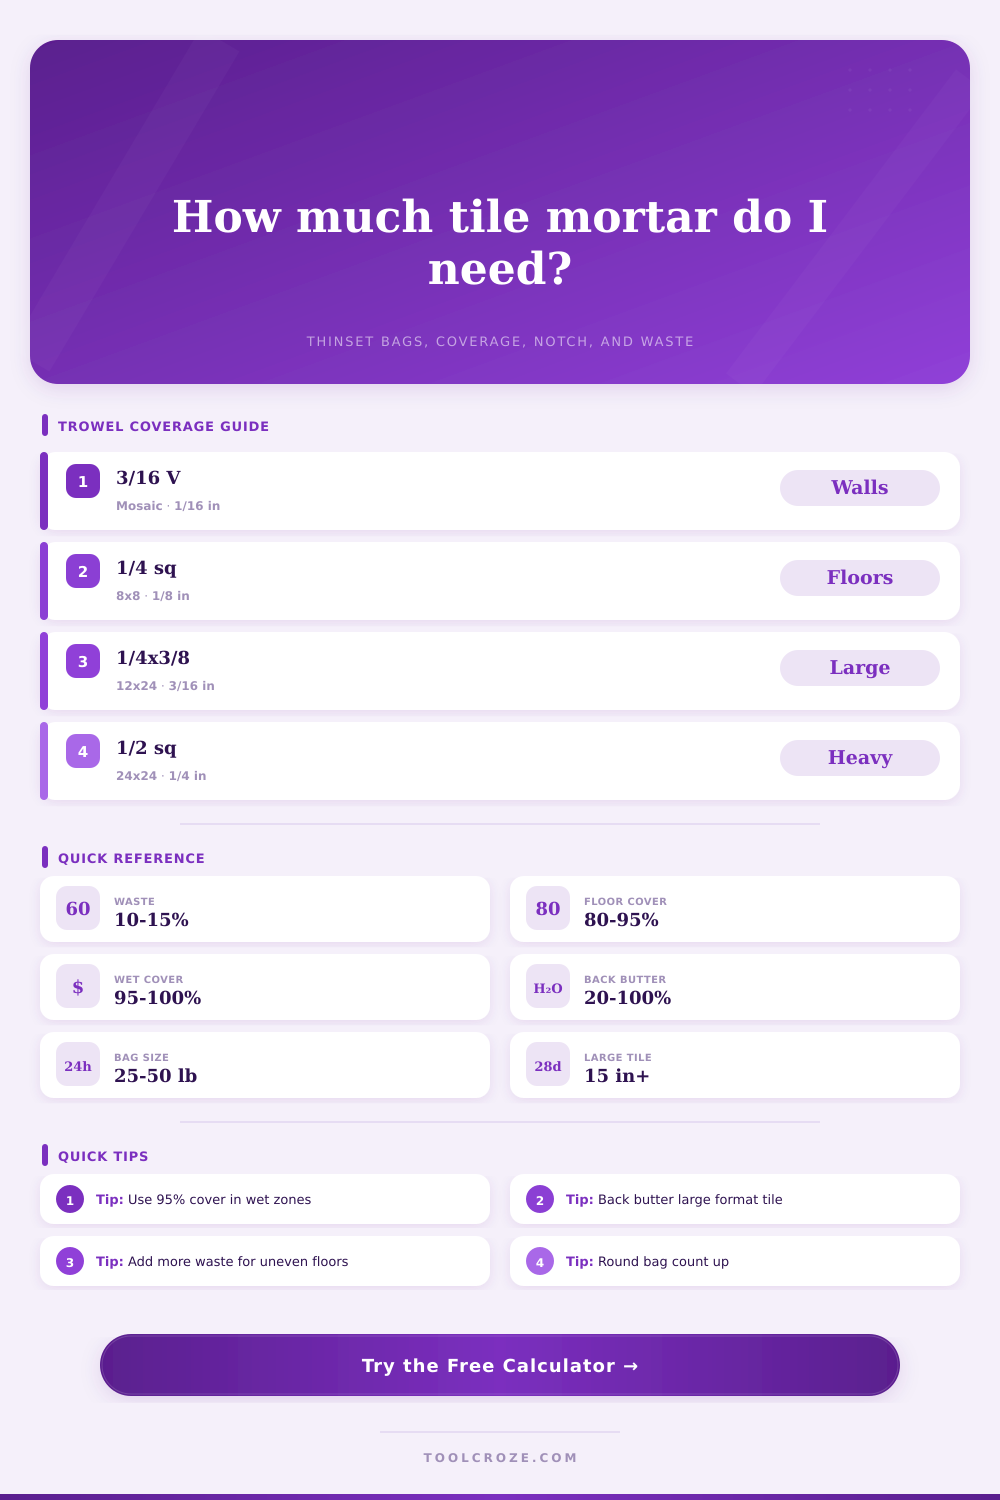
| Trowel notch | Typical tile size | Estimated bed | Common use |
|---|---|---|---|
| 3/16 x 5/32 V-notch | Mosaic to 4 x 4 in | 1/16 in | Backsplash sheets and light wall tile |
| 1/4 x 1/4 square notch | 4 x 4 to 8 x 8 in | 1/8 in | Small ceramic wall or floor tile |
| 1/4 x 3/8 square notch | 12 x 12 to 12 x 24 in | 3/16 in | Porcelain floor tile and many walls |
| 1/2 x 3/8 U-notch | 12 x 24 to 18 x 36 in | 7/32 in | Large format tile with good substrate flatness |
| 1/2 x 1/2 square notch | 16 x 16 to 24 x 24 in | 1/4 in | Large format porcelain and stone |
| 3/4 x 9/16 U-notch | 24 x 48 in and larger | 5/16 in | Heavy tile, stone, or very large panels |
📏Tile Size Coverage Table
| Tile format | Piece area | Suggested notch | Back butter range |
|---|---|---|---|
| 2 x 2 mosaic sheet | 1.0 sq ft sheet | 3/16 V-notch | 0 to 10% |
| 3 x 6 subway | 0.125 sq ft | 3/16 V or 1/4 sq | 0 to 20% |
| 8 x 8 ceramic | 0.44 sq ft | 1/4 sq | 10 to 30% |
| 12 x 24 porcelain | 2.0 sq ft | 1/4 x 3/8 sq | 30 to 70% |
| 24 x 24 porcelain | 4.0 sq ft | 1/2 sq | 60 to 100% |
| 24 x 48 panel | 8.0 sq ft | 3/4 U-notch | 80 to 100% |
🛠Bag Yield Reference
| Bag option | Volume used | Light bed coverage | Heavy bed coverage |
|---|---|---|---|
| 25 lb repair bag | 0.23 cu ft | 35 to 45 sq ft | 10 to 16 sq ft |
| 40 lb rapid-set mortar | 0.36 cu ft | 55 to 70 sq ft | 17 to 25 sq ft |
| 50 lb standard thinset | 0.45 cu ft | 70 to 85 sq ft | 22 to 32 sq ft |
| 50 lb large-format mortar | 0.50 cu ft | 78 to 95 sq ft | 24 to 36 sq ft |
✅Coverage Target Table
| Installation | Target transfer | Volume factor | Planning note |
|---|---|---|---|
| Dry interior floor | 80% minimum | 1.00 | Raise to 95% for large format tile |
| Dry wall or backsplash | 85% to 95% | 1.04 | Check transfer after setting a few tiles |
| Wet wall or shower | 95% minimum | 1.08 | Avoid voids behind tile in wet areas |
| Exterior or stone | 95% to 100% | 1.12 | Plan extra mortar for full support |
💡Mortar Planning Tips
Most failed tiles aren’t bad tiles. They’re tiles with something wrong behind them. Most often, it’s some unseen void that traps moisture and allows water to pool underneath. As it freeze, it pries the tile away from wall. The process is not an explosion. It’s more like a slow peeling apart. First the tile is loose here and there; then grout comes out; finally, a crack appear in slab.
To avoid this problem, all you have to do is know how much mortar you need, and that knowledge begins with knowing mortar coverage. It’s not just dumping a bunch of paste on the ground. It’s getting a certain percentage across tile. Once you enter the tile size, enter the area and let the calculator do the math for you (no need to guess at bag quantities). But first, you need to know what to plug into that calculator.
How to Choose the Right Mortar Amount
Trowel notch, The notch size is the most critical variable you can control. Notch size determine how much ridge of mortar collapses downward onto a bed when the weight of your tile push down on it. For example, a tiny notch is required with small mosaics; the thin tile is too fragile for a thicker bed, which will simply break it. In contrast, large format porcelain requires a deep notch to produce a bed thick enough to span slight irregularities in the surface. Using a small notch for big tiles will result in a thin glueline, which looks good but is not very strong. The charts on this page correlate notch size to tile size. Easy correlation, but a frequent error.
The second is back buttering (applying a skim coat of mortar on the backside of each tile). For smallish tiles, this isn’t necessary. But with large ones you don’t want to skip it. Because of the way they have to make them in factories, there’s usually a slight bow to a large tile that results in a high point and a low point. If the tile bows out from the wall, then the trowled mortar bed will not bridge the space at the high point. That’s what the back butter does, it fills the voids. This is adjustable via the tool, some guys use it to butter the backs of all their tiles; some just spot butter at the edges. It makes a huge difference to the number of bags. You need to be honest about how you’re going to do it.
Waste is hugely affected by the condition of your substrate. An old wood subfloor that’s uneven or has some slight flex will eat up significantly more mortar as you try to make things level; whereas a nice smooth slab will use very little (and the calculator has a surface condition selector so if your floor is wavy, select uneven). Don’t cheat on it. If your floor’s wavy, pick uneven. The extra bags it recommends will keep it from sounding hollow and cracking later. Better to have a little bit too thick of a bed than a hollow one.
It’s also simple to underestimate your waste factors. If you trowel slowly, mortar will squeeze out the sides, collect in the ridges of the trowel and harden inside the bucket. Ten to fifteen percent extra for waste is being realistic, rather than pessimistic. On shower type jobs where water traps behind the tile, you’ll want 95 percent coverage or better. Less on dry areas, but it’s always better to have more, assuming that the bed is consistant. It is good that the tool rounds up the bag count since you can return any unused bags, but once they are installed, you cannot return them.
Think of the mortar like a structural shim, not glue. It’s there to spread the load out evenly over the whole face of the tile. Missing a spot is a stress concentration point. Too much is a soft spot where the mortar will compress at a different rate then the surrounding areas. Consistency is the name of the game. Use a calculator to get your materials list correct. Once on site, rely on your hands and eyes to make sure the install matches the target. After setting a sample tile, pull it up and inspect the mortar coverage. If you have 90% or better coverage on the back of the tile, you’re good to go. Anything less and tweak your troweling technique (or back butter).
Running short on mortar kills a project. Stopping mid-room to mix a fresh batch can cause a different color and open time. It also causes a stoppage in action that results in a cold joint and weakened bond. Or you’ll scramble for more and have skinned-over thinset. It is always better to have an extra bag waiting in the corner.
How much? The math is simple; applying it is the trick. Measure twice, cut once (or at least that’s how my grandmother used to say). Get the right notch. Verify. You’ll be fine. Tile stays put.