
So there you are standing with a circular saw in hand and realizing your miter gauge has slipped three degrees. The cut appears perfect, so you assemble the parts. Now what? Nothing match up! Well this is where speed square comes in. No longer will you be wondering if you were off by a degree (that’s always a problem isn’t it?)
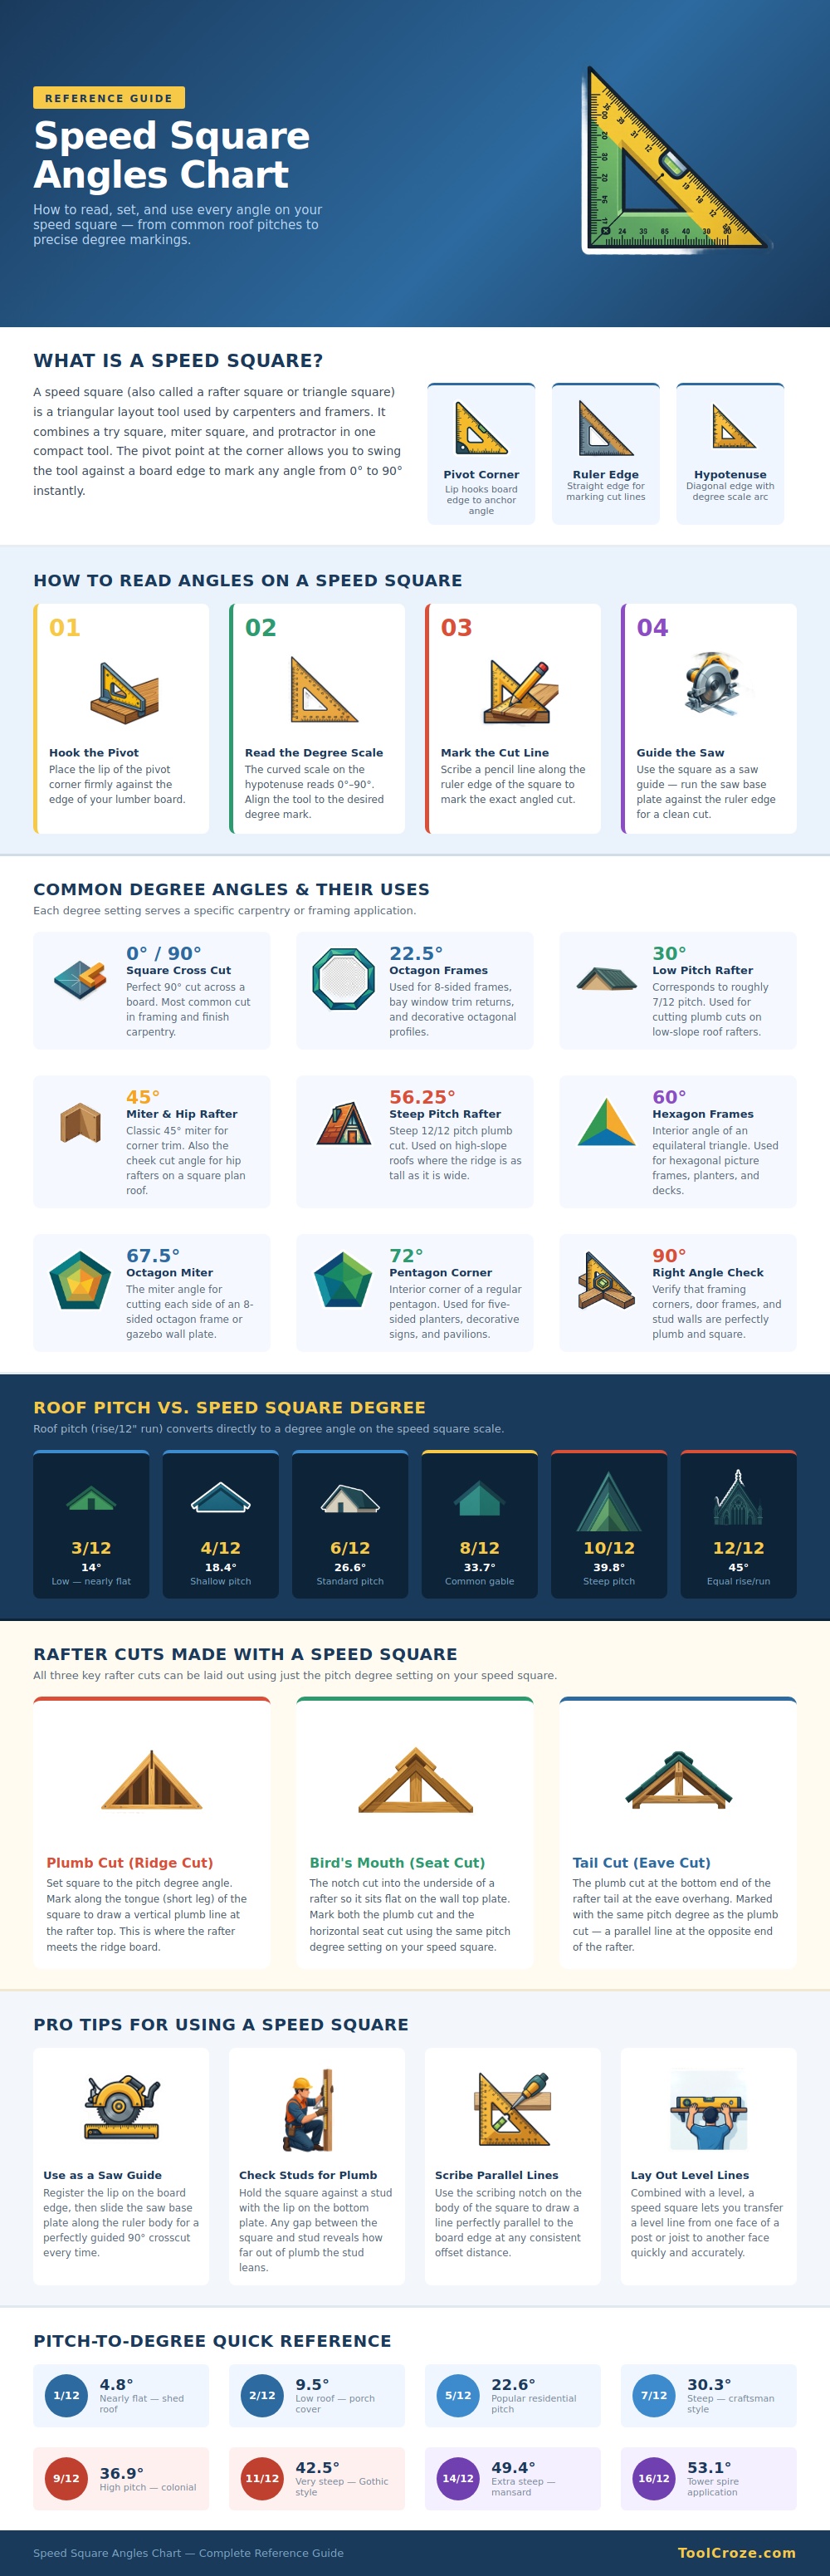
The speed square is more than another chunk of metal taking up space in your tool belt. This small little triangle can go in your back pocket and combines a rafter layout device, protractor and try square all in one. The beauty are knowing how to read that degree scale down the hypotenuse. That’s why they made this diagram (the infographic is up top). They wanted to show you the anatomy of the tool: the curved degree markings, the ruler edge, the pivot corner.
How to Use a Speed Square Correctly
And then explain the trick which is largely psychological, trust the geometry not your eye. That little lip hooks into the edge of your lumber to create a fixed axis. Then you swing the body around until the zero mark lines up with whatever angle you’re trying for. Seems easy, right? But when you’re out framing, you’re doing it over and over again, hundreds of time. So if your first rafter is off by even a fraction, everything beyond it picks up that error.
Look at the chart to see how the scale goes from zero to ninety degrees, so you can set any pitch you want without doing all the complicated math in your head. Where DIYers tend to become confused is understanding how roof pitch relates to degree angle. Six over twelve is builder-speak meaning “six inches of rise over twelve inches of run” but the speed square speaks to them based off degree angle. The illustration makes the conversion easy to see. So if we have a normal home roofing slope (pitch) of six over twelve, then that works out to be approximately twenty-six point six degrees.
Simply put that number on the tool, make your plumb cut mark at the ridgeline, and then work back down to mark your bird’s mouth notch (where the rafter rests on the wall plate). Because it physically aligns the tool and does all the trigonometry for you, there’s no need to carry bulky framing squares around or to do any additional math. You should of used this sooner.
This goes beyond roof work: The angle chart proves essential in decorative work and finish carpentry too. Constructing a hexagonal planter or octagonal gazebo? Internal angles is particular and exacting. The graphic notes that the hex’s rule is sixty degrees and the octagon’s is twenty-two point five. Mistakes here, and your joints won’t meet; instead, there’ll be space large enough to insert a coin. It is a little thing, yet it makes all the difference when the product is finished.
Want to know if your studs are plumb? Hold the square up against the face of the stud, lip down on the bottom plate. The gap between where the tool meets the wood shows exactly how much the frame is out of true. I’d be careless not to mention another little-used aspect: scribing parallel lines with the notch in the body of the square (useful for laying out shelves or a regular offset from edge). The chart that accompanies the article includes some rarer pitches, including fourteen over twelve for steeper mansard roofs; it’s clear the tool has many uses in various architectural styles.
You don’t have to memorize all the conversion factors; get comfortabley with setting the tool and checking your angle before making the cut. The angles on the speed square chart become a trustworthy method of getting things done right once you know how to use them. Less waste, tighter joints, cleaner lines; they’re just as important when trimming out a picture frame as they are when framing out a roof. So practice making simple 90° cuts until you gain some comfort then start experimenting with larger polygons and steeper pitches. It’s a little triangle that solves big problems so get to know its markings like reading a book. Eventually it’ll be something you reach for more times than not.
