🔧 Self Screwping Screw Torque Calculator | Drive Guide
Estimate drive torque, pilot hole size, and clamp load for wood, metal, and plastic fastening jobs
| Material | Base | Lube | Note |
|---|
| Screw style | Factor | Grip | Use |
|---|
| Condition | Factor | Effect | Use |
|---|
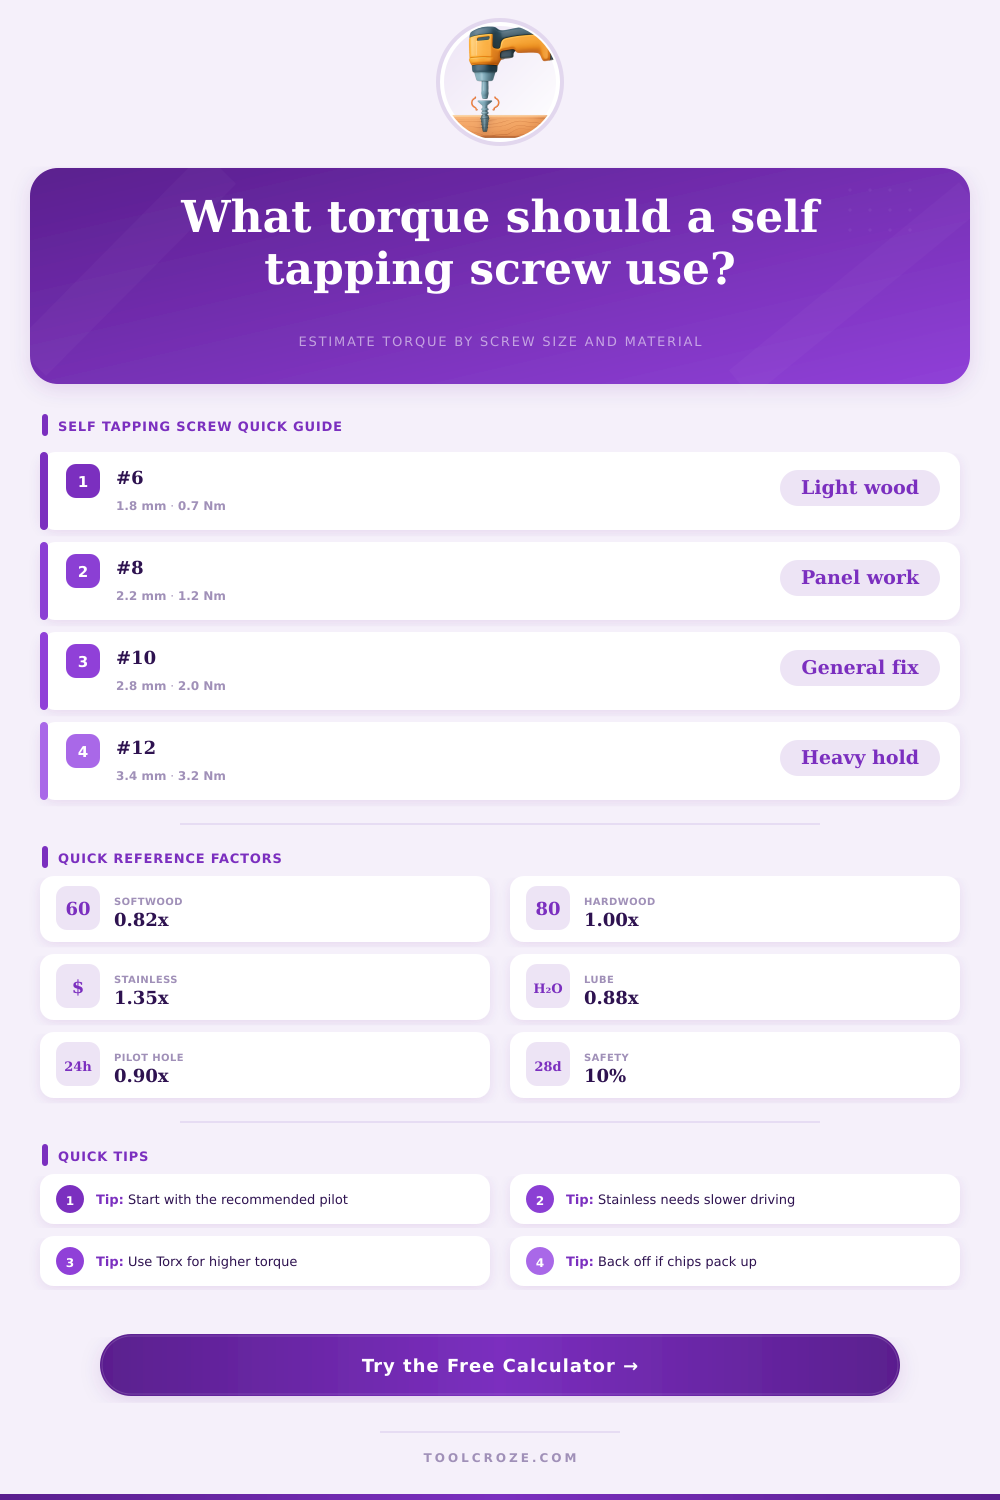
| Size | Diameter | Pitch/TPI | Use |
|---|
Self-tapping screw are used to fasten material together, but self-tapping screws can fail if you apply too much torque when driving them into the material. If you apply too much torque to an self-tapping screw, the threads of the screw will strip. Once the threads of a self-tapping screw strip, it will no longer be able to hold the material together.
In order to prevent self-tapping screws from stripping, you need to understand the relationship between the torque you apply to the screw and the material you are using. The size of the pilot hole for a self-tapping screw determine the amount of torque that is required to install the screw. If the pilot hole that you use is too large for the self-tapping screw, the threads of the screw will not be able to find enough material to grip onto the material, causing the screw to spin without any success.
How to Stop Self-Tapping Screws from Stripping
If, on the other hand, the pilot hole that you use is too small, the torque that is required to install the self-tapping screw will significant increase. Using a small pilot hole can cause the self-tapping screw to break or the screwdriver bit to slip on the screw. When using a #8 screw in hardwood, the pilot hole should be approximately 80% of the diameter of the screw.
However, if you want to increase the thread engagement between the screw and the wood to 100%, you will require more torque to install the screw. The material that you are using the self-tapping screw on will impact the amount of torque that you must use to install the screw. Different materials will react differently when using self-tapping screws.
For instance, wood will allow the fiber of the wood to be crushed when the screw is installed, and the fibers will often rebound when the screw is installed into the wood. Metals like aluminum and stainless steel will react different. For stainless steel, using lubrication on the screw will significantly reduce the drag on the screw.
Using lubrication can reduce the drag of a self-tapping screw on stainless steel by as much as 18%. If you dont use lubrication on stainless steel, the drag will significantly increase, which can cause the screw to fail during installation. The type of drive bit that you use will also impact the amount of torque that can be transferred to the self-tapping screw.
If you use a Phillips head screwdriver bit, the bit is more likely to experience cam-out. Cam-out is the slipping of the screwdriver bit out of the screw head. Cam-out will waste 10% to 15% of the torque that is applied to the screw.
Using a Torx bit or a square drive bit will allow the screwdriver to transfer more torque to the screw than a Phillips head bit. Additionally, self-drilling point can be used to eliminate the need for a pilot hole. However, self-drilling points will require more initial torque to start driving the screw in the material.
The depth to which the self-tapping screw should be embedded into the material also plays a significant role in the amount of torque that you should use when installing the screw. The embedment of the screw into the material is the portion of the screw that is buried into the host material. Using a deeper embedment will allow the screw to provide more resistance and better clamp onto the materials together.
However, using a deeper embedment will also require more torque to install the screw. For most job, embedding the screw 1.5 times its diameter into the material is an effective amount of embedment. Additionally, you should use some safety margin for the torque.
A 15% margin in the torque is often used, as some variable may require an increase in the torque required to install the screw. Finally, during installation, you must ensure that the self-tapping screw is performing correct. Ensuring that the chip are ejected cleanly from the screw indicates that the pilot hole is of the correct size and the screw bit is sharp.
If the chips are not cleanly ejected from the screw, this may mean the pilot hole is of the wrong size for the screw or the screw bit is dull. Additionally, you should clamp the workpieces as tightly as possible to the worktable. If the workpieces are not clamped securely, the torque that is applied to the screw will be wasted in flexing the workpieces.
By following these guideline for installing a self-tapping screw, you can ensure that the screw maintains its grip on the material it is installed in.