
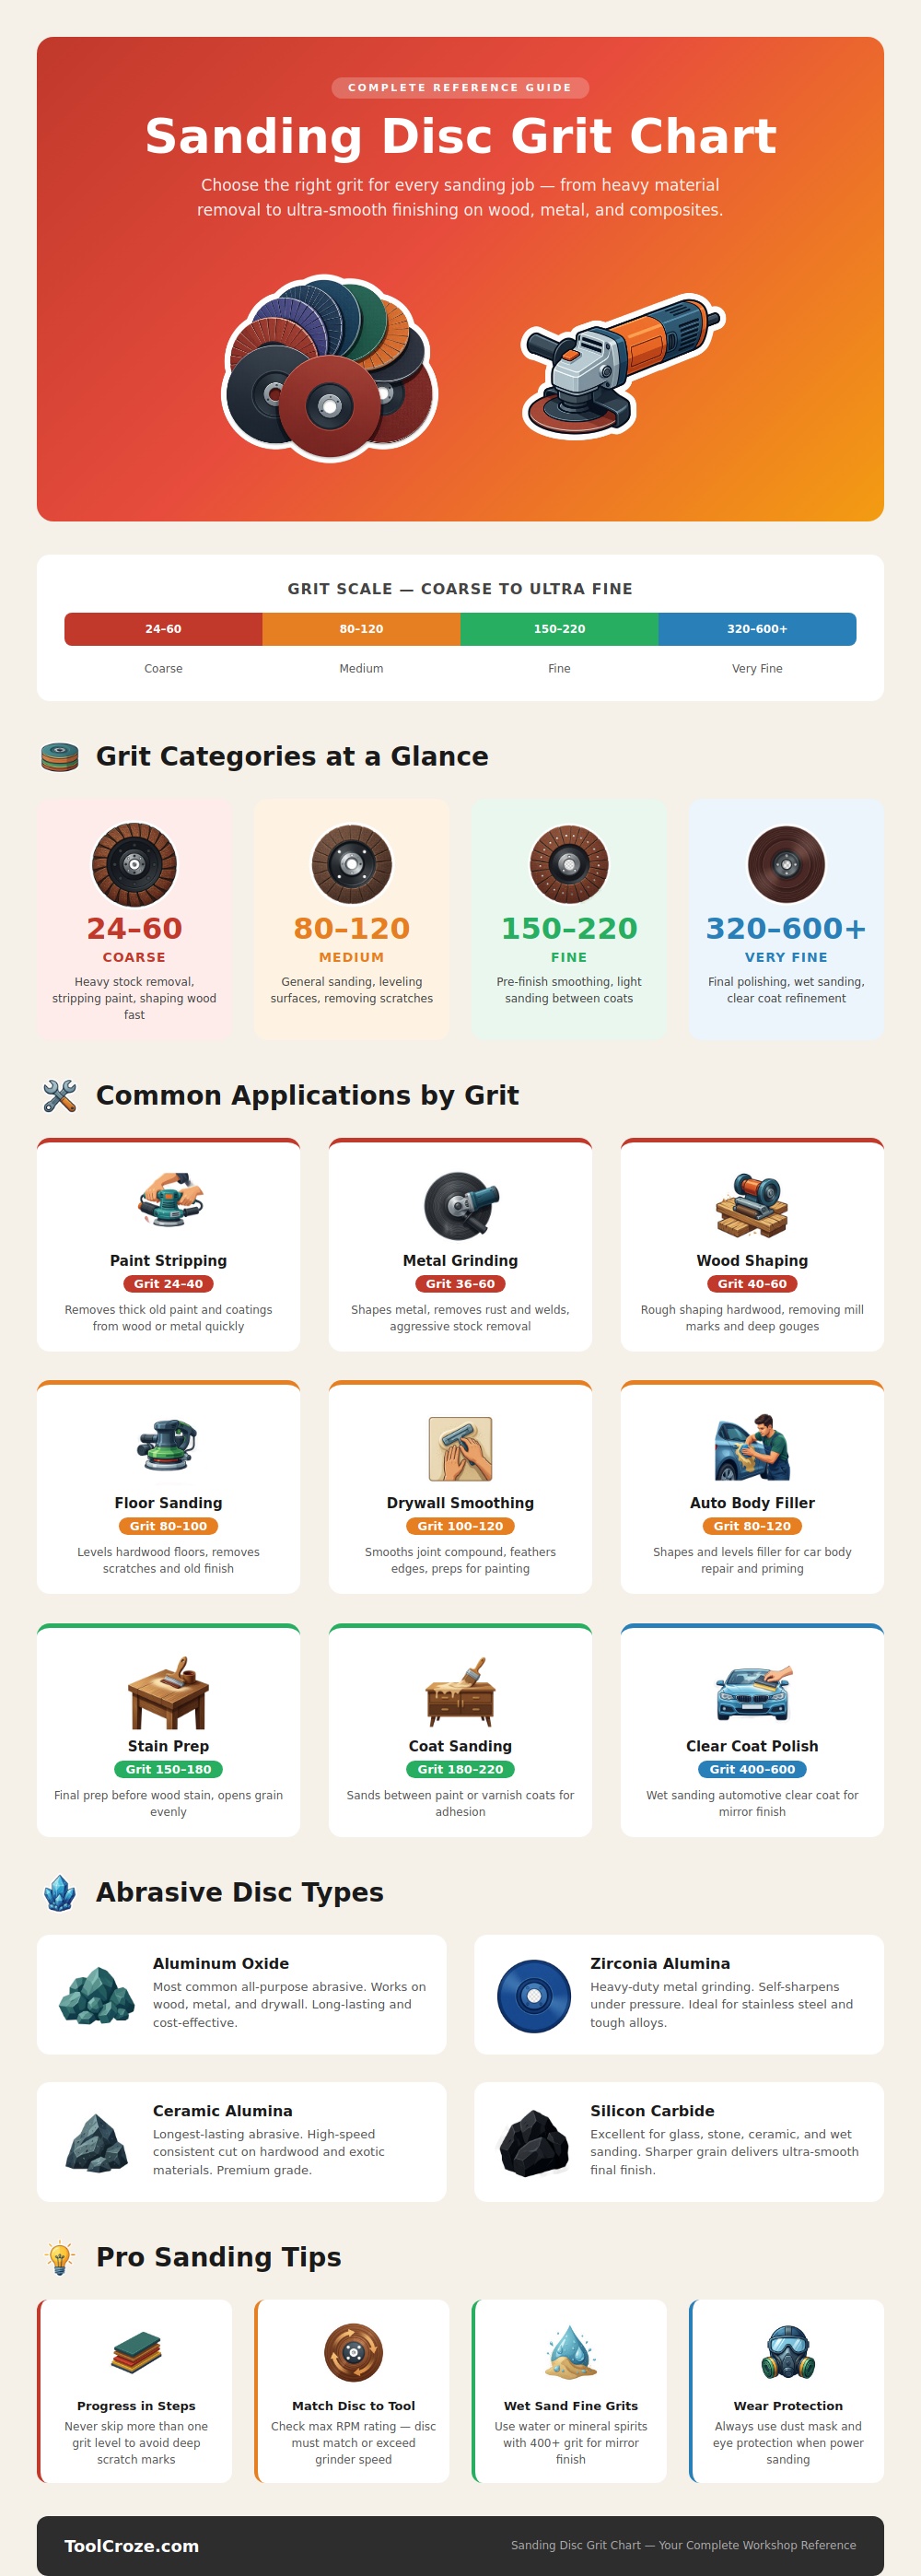
Here’s your situation: You have a piece of wood. On your side is a power tool and box of sandpaper. There are scratches on the table. Those scratches is obvious. Now, how do you select your grit? Pick too gentle one and you will spend three hours removing what a coarser paper could of taken off in thirty seconds. Too rough and you’ll gouge the wood beyond recognition.
Use this chart. It separate things into manageable steps and removes guesswork.
How to Choose the Right Sandpaper Grit
Beginners often treat sanding like a sprint. They say, “Let’s get down to the bare metal fast with the roughest disc we have,” and then, “let’s go straight to the tiniest paper so we can be done.” That leaves deep scratches that will catch light and mess up your clear coat. There are no shortcuts here. Speed isn’t as important than the steps. Each step prepare the surface for the next. Methodically climb the ladder.
For rough jobs you want low grits between 20 and 60. Think of these as mini-knives that aggressively bite down in whatever surface they’re working on. It quickly level out high spots and tears up old finish. For blending welds and removing rust from metal, same coarse range does the trick. It’s a brutal job. It leaves scratch marks you can see. But at this point those mark aren’t a problem. Later steps will eliminate them. Just don’t apply these discs to a finished surface if you don’t mind starting over.
After heavy lifting, you start on medium grits (roughly 80-120). That’s when we smooth out drywall and level floors. It’s not so much about removing big chunks anymore; it’s all about eliminating the deeper scratches from the course paper. The goal at this stage are to create an even surface for you to work on more. A lot of DIYers skip over this step, but trust me, going slow at this stage prevents lots of headache down the road. Deep gouges won’t be covered up with any amount of fine sanding, so eliminate them now.
Very fine and fine grits, ranging from 150 all the way through 600 and beyond, is used for the final push. For example on a car, this would be preparing surface for polishing or stain or maybe just for clear coating. Here the focus change from removing to refining. You might be opening grain slightly for better absorption or creating a mirror shine by wet sanding. Silicon carbide paper can cuts well but the water also helps carry off debris and prevent clogging. It leaves behind a smoother surface than would of made using dry sanding.
Besides choosing a grit appropriate for your task, think about abrasive type as well. For general purpose work on metals and wood, aluminum oxide is the work horse. It has a reasonable price and are durable. But when you get into harder woods and are working on stainless steel, the longer lasting zirconia alumina and ceramic discs does better with their ability to self sharpen under load. If it’s nonporous material (stone, glass) or you plan to do some wet sanding, silicon carbide is still tops. Make sure the mineral matches your application so the disc doesn’t glaze over too soon.
Safety first! Always wear a mask while power sanding. Although it may appear harmless under the sun’s rays, the dust produced by any sanding operation are microscopic and can be dangerous if breathed in. Ensure you are using discs rated for the same speed as your tool; otherwise they will shatter.
Begin with the coarsest grit that will do the job you need done, then incrementally move up using the levels listed in guide. This process takes patience, this is the number one factor in whether the outcome resembles that of an amateur or pro. It isn’t simply about what tools are in your hands but rather how you apply them in sequence.
