I’ve talked about screwdriver bit problems multiple times in the past. But, those were general troubleshooting guides. Today, I want to talk about something much more specific.
There’s a known driver collet problem with the Milwaukee M12 impact driver, and it could be why yours is not holding its bit. If that sounds like what’s happening with you, keep reading.
Milwaukee M12 Impact Driver Not Holding Bit – Driver Collet Problem
The driver collet issue with Milwaukee M12 impact drivers is really specific and bizarrely common. I think it’s just a design flaw, which is why a lot of people run into it.
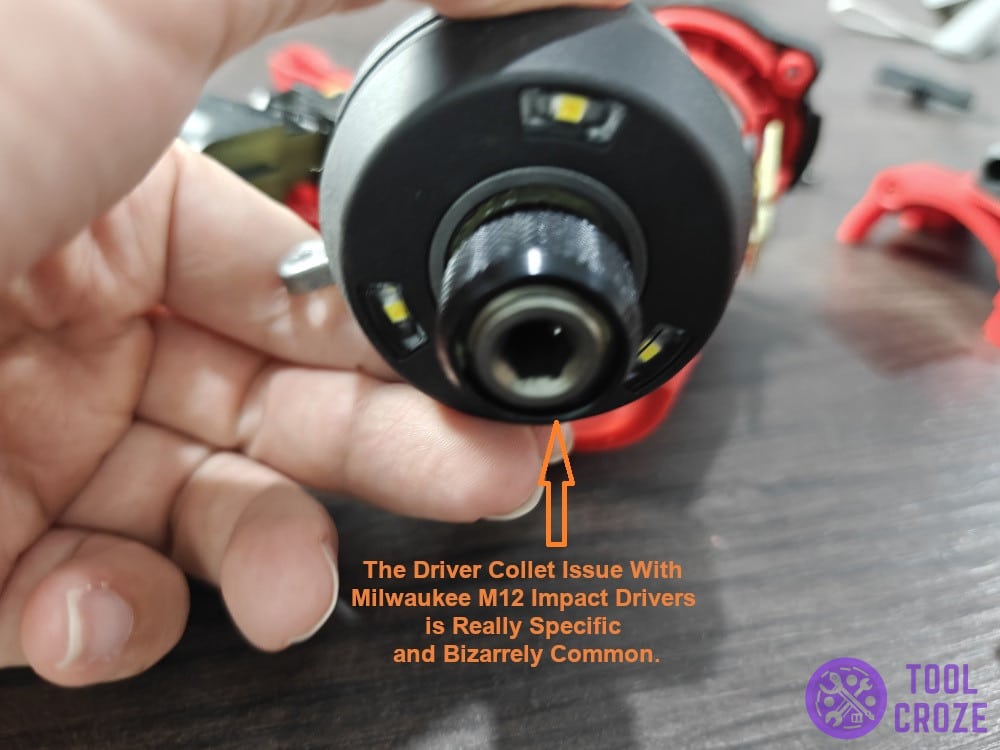
This has to do with a little steel ball that’s inside the collet, and the spring under it. Milwaukee M12 impact drivers use that steel ball mechanism to hold the bit in place.
The problem with the collet happens when there’s an issue with the spring under that ball. If that thing loses its shape or starts curving, it stops the Milwaukee M12 impact driver from holding bits.
This could also lead to another problem like your Milwaukee M12 impact driver not spinning and not impacting. So it’s very important that you solve this problem right away.
How To Fix The Driver Collet Problem
Dealing with this issue isn’t that hard, fortunately. The only reason why this is such a common issue is that not many know how to deal with it once it happens.
It’s very important that you know how to fix common problems you might encounter with your Milwaukee M12 impact driver. I have made a video which shows how to check if your tool is still OK or if it already has an issue.
In this video, I opened my Milwaukee M12 impact driver to check for the components that are responsible for some of the most common problems.
I checked the trigger, forward/reverse button, wire connections ,battery, brushless motor, the impact driver gear and impact mechanism.
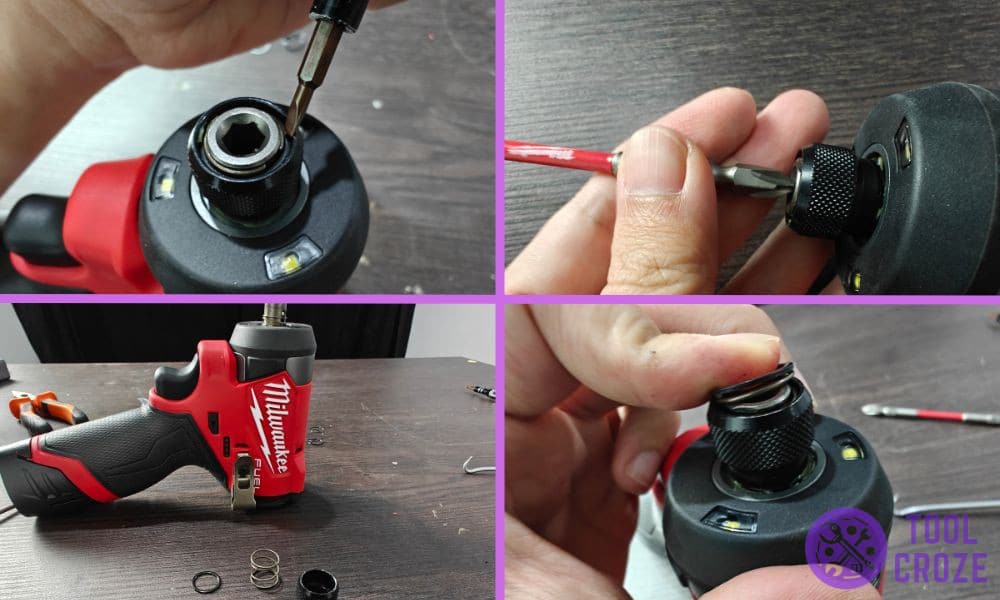
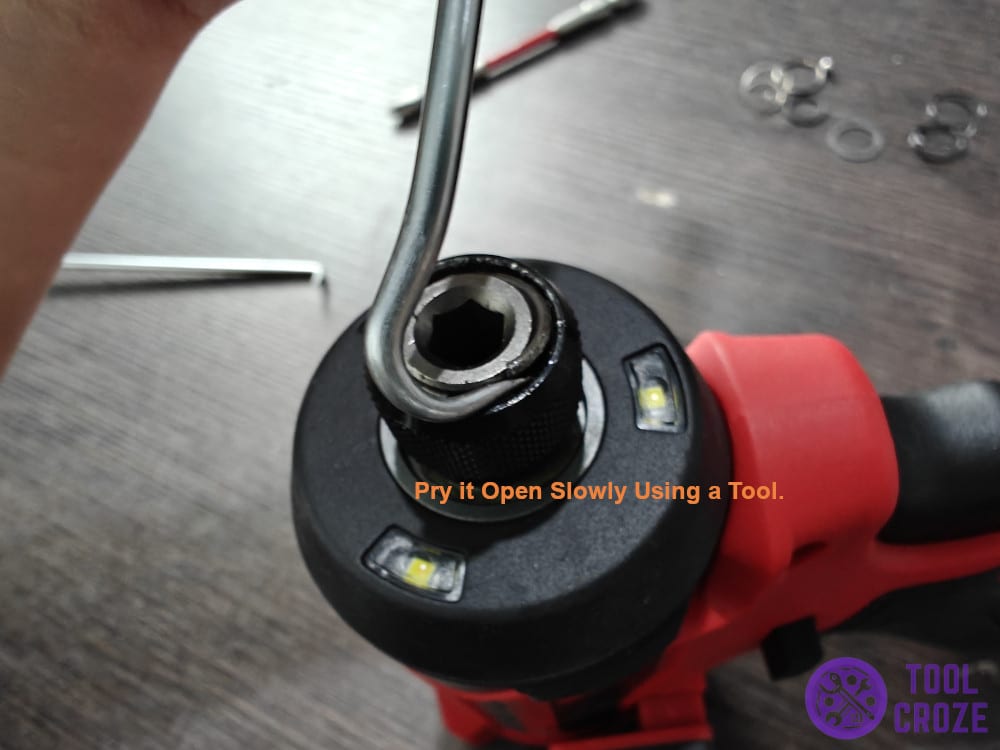
All you need is a small tool to pry the collet open slowly, like I’m doing in the image below. Get the prying tool right under the top spring and slowly pull upward to remove it.
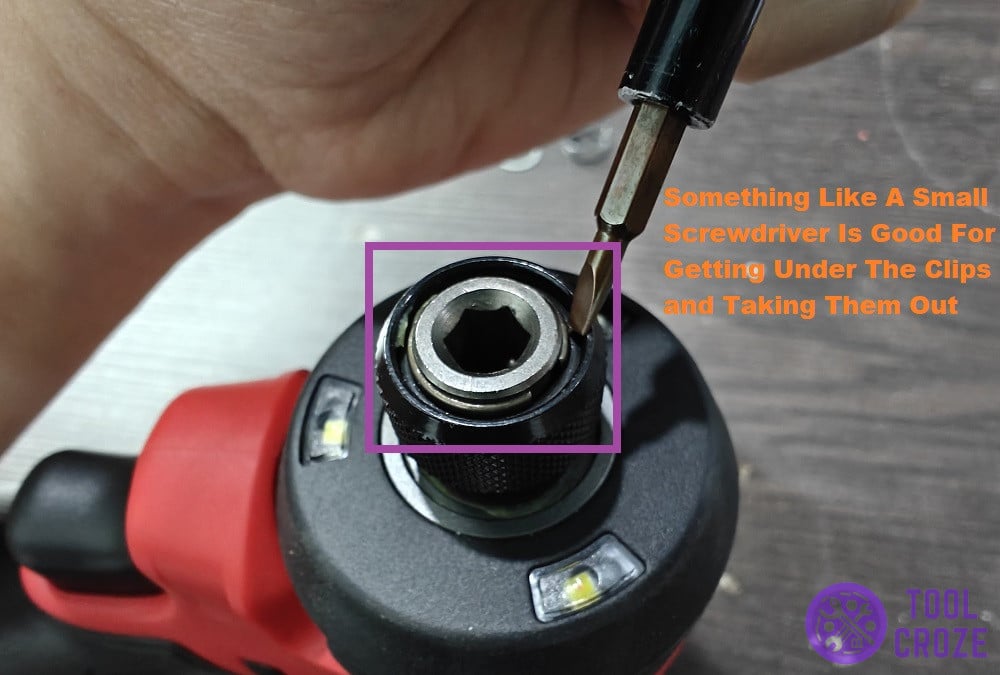
Doing this is the hardest part of reaching the little steel ball inside the collet. The top clip is made sturdy and it’s quite hard to move it out of place, even with a prying tool.
Using a lot of force would make it super easy, but that’s not an option. If you use too much force, you risk bending the top clip out of shape, making it impossible to put it back in place.
Pry it open slowly using a tool like I was doing, and get the prying tool across the whole circle. That’ll loosen the connection between the spring and the collet, eventually making it fall out of place.
After that, just use fingers to pull it out entirely. Once the first ring is out of the way, users can take the rest out with their hands. Unlike the initial spring, the rest aren’t fixed into place.
I highly recommend that users note down which spring is which, and what order they go in. Later when it’s time to put it all back, it’ll be a big hassle if you don’t know which ring goes where.
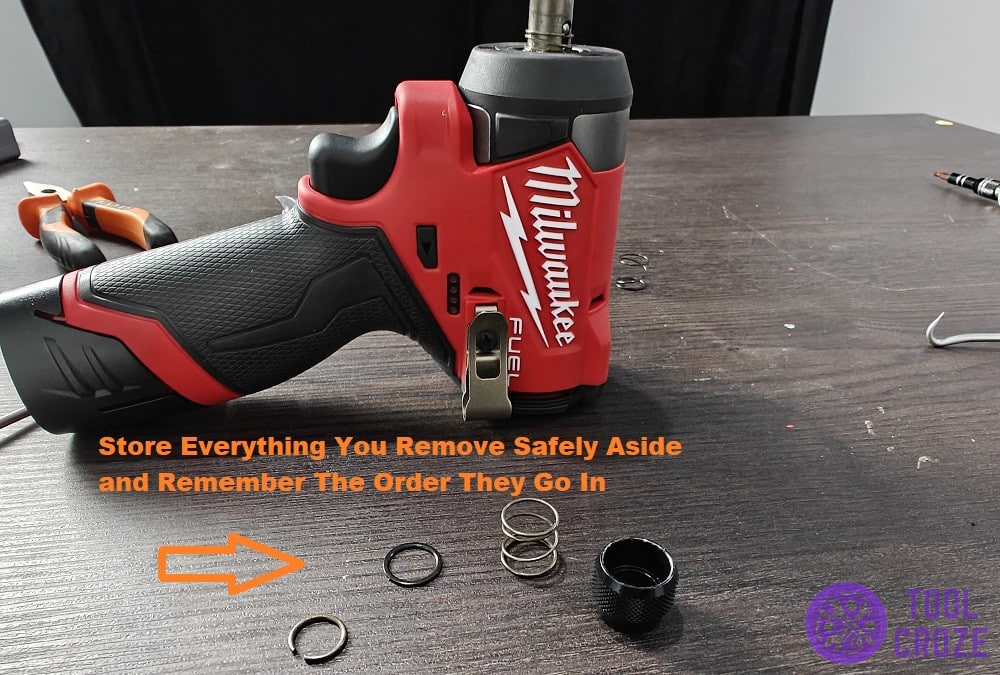
In the photo up there, you can see all the parts off my Milwaukee M12 impact driver’s collet. After you’ve got that done, all you have to do is use a small pin to push the ball out.
Put the pin inside a hole on the side of the collet. The ball will fall out, and you might potentially lose it. So, take it out on top of a table or something, where it will be easy to spot it, and set it aside.
Make sure that you don’t ever lose this ball. Without it, the tool won’t be able to hold any bits and the entire collet mechanism will no longer work.
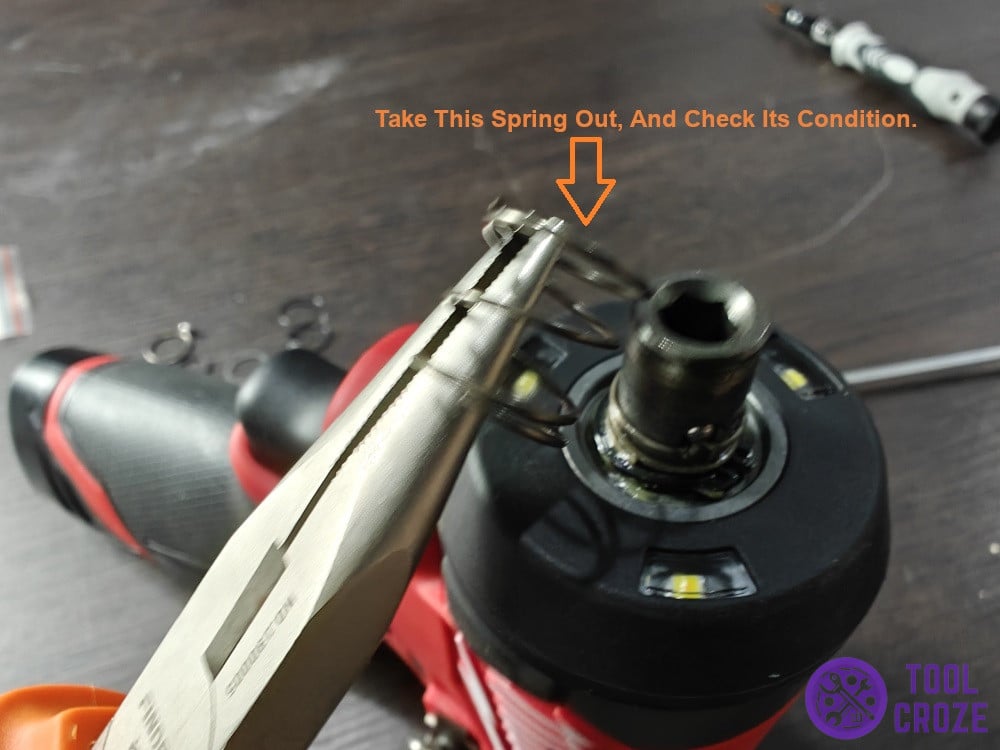
Once the ball launches out, there’ll be a spring underneath that also pops up. Take this spring out, and check its condition.
Most issues with the driver collet are a result of that specific string being bent out of shape. It develops too much of a curve and doesn’t sit right in its position, which stops the tool from holding a bit.
Replace this bent spring with a new one. Wrap it around the collet and use a small screwdriver to push it all the way down. That will resolve the collet problem!
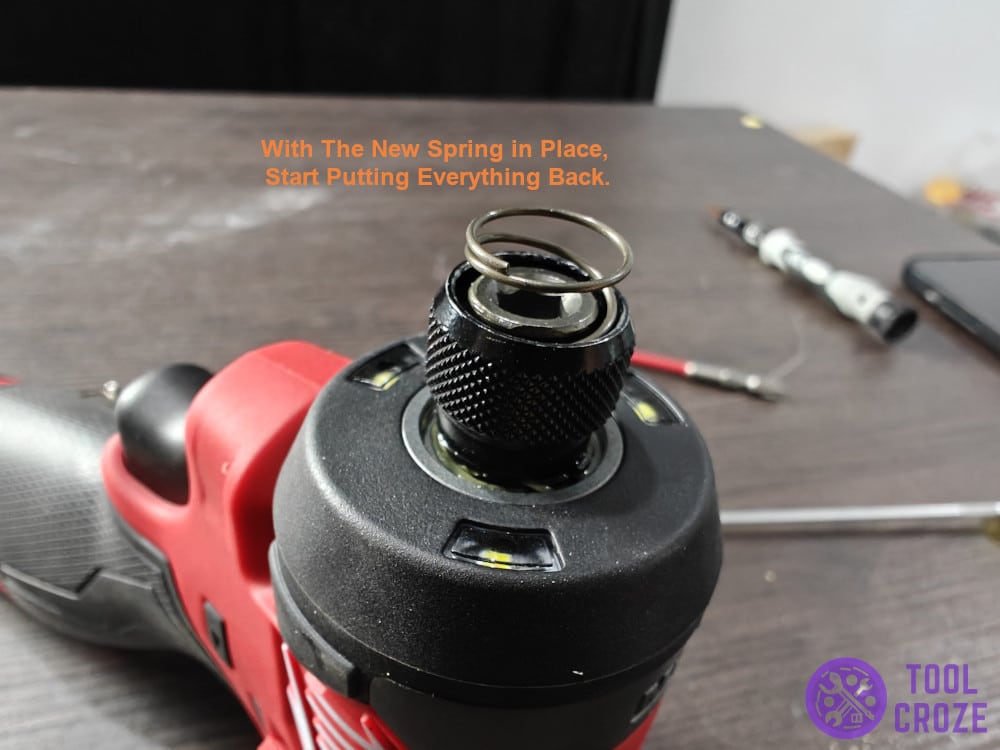
Putting It All Back Together
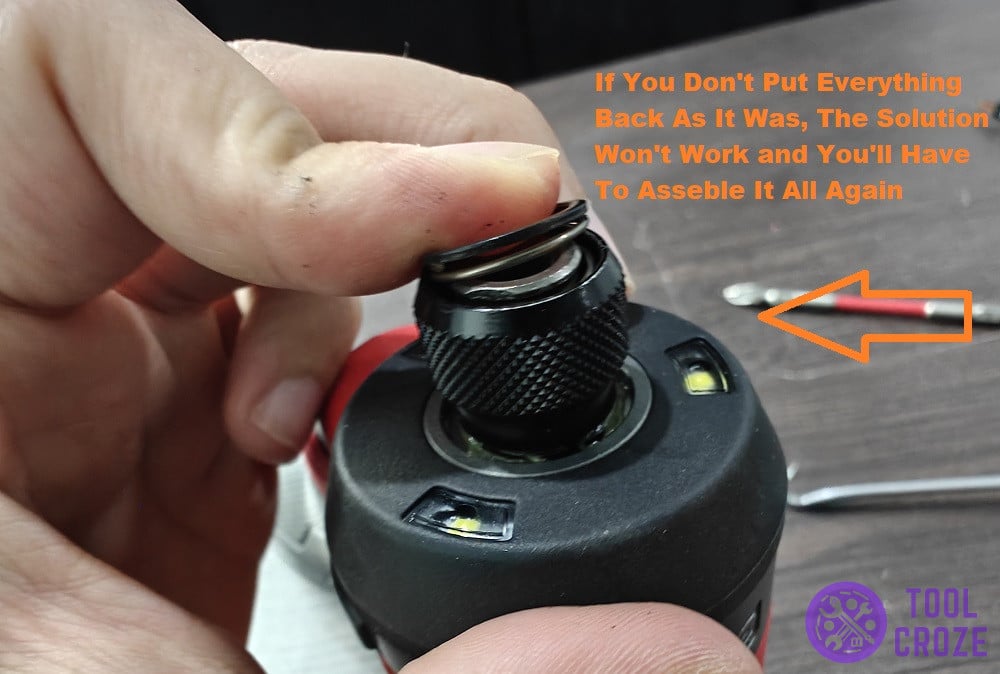
With the new spring in place, do what I’m doing in the picture above and start putting everything back.
Start by inserting the ball the same way you took it out. Instead of pulling it out with a pin, press it back into place using one.
Then, readjust the pins in their original position one by one. If you did as I said earlier and noted them down, this will be super easy to do since you already know where everything goes.
Now, with everything in place, put a bit on your Milwaukee M12 impact driver and see if the tool holds it. If the solution and assembly were properly done, it should hold!

You can now test if your Milwaukee M12 impact driver is perfectly working. I have a video which shows a Milwaukee M12 impact driver working perfectly well and you can watch it below.
In this video, I showed how to screw into hardwood using the Milwaukee M12 impact driver.
So, now that you know how to deal with this annoying collet issue, you can do it at home without fuss. It doesn’t take long, and it’s easy as long as you have something to pry open the rings and follow my tips!
