
Unless something goes wrong with it, you likely have never given much thought to the horizontal piece of wood sitting over your door frame. Maybe it has been slowly cracking open at corner of your window. Or perhaps you notice that bedroom door doesn’t swing shut like it used to; it stick every time. Those aren’t cosmetic issues.
Those are red flags that beam supporting all that weight above that opening has failed. Load bearing header size is one of those quiet construction details that can make all the difference between a solid house and a liability waiting to happen.
How to Choose the Right Header Size
Because the header hides behind drywall it’s easy to forget, but headers works harder than any other stud in the wall. Headers do one simple thing: they bear weight of floors or roofs overhead through an opening onto vertical supports on both sides. Cutting a hole in load bearing wall removes the vertical supports needed to carry those loads. Enter the header, which bridges gap.
Unless it’s sized correctly, it will bend. This is known as deflection. As the header bends, it twist the framing around it. This cracks plaster and door jambs.
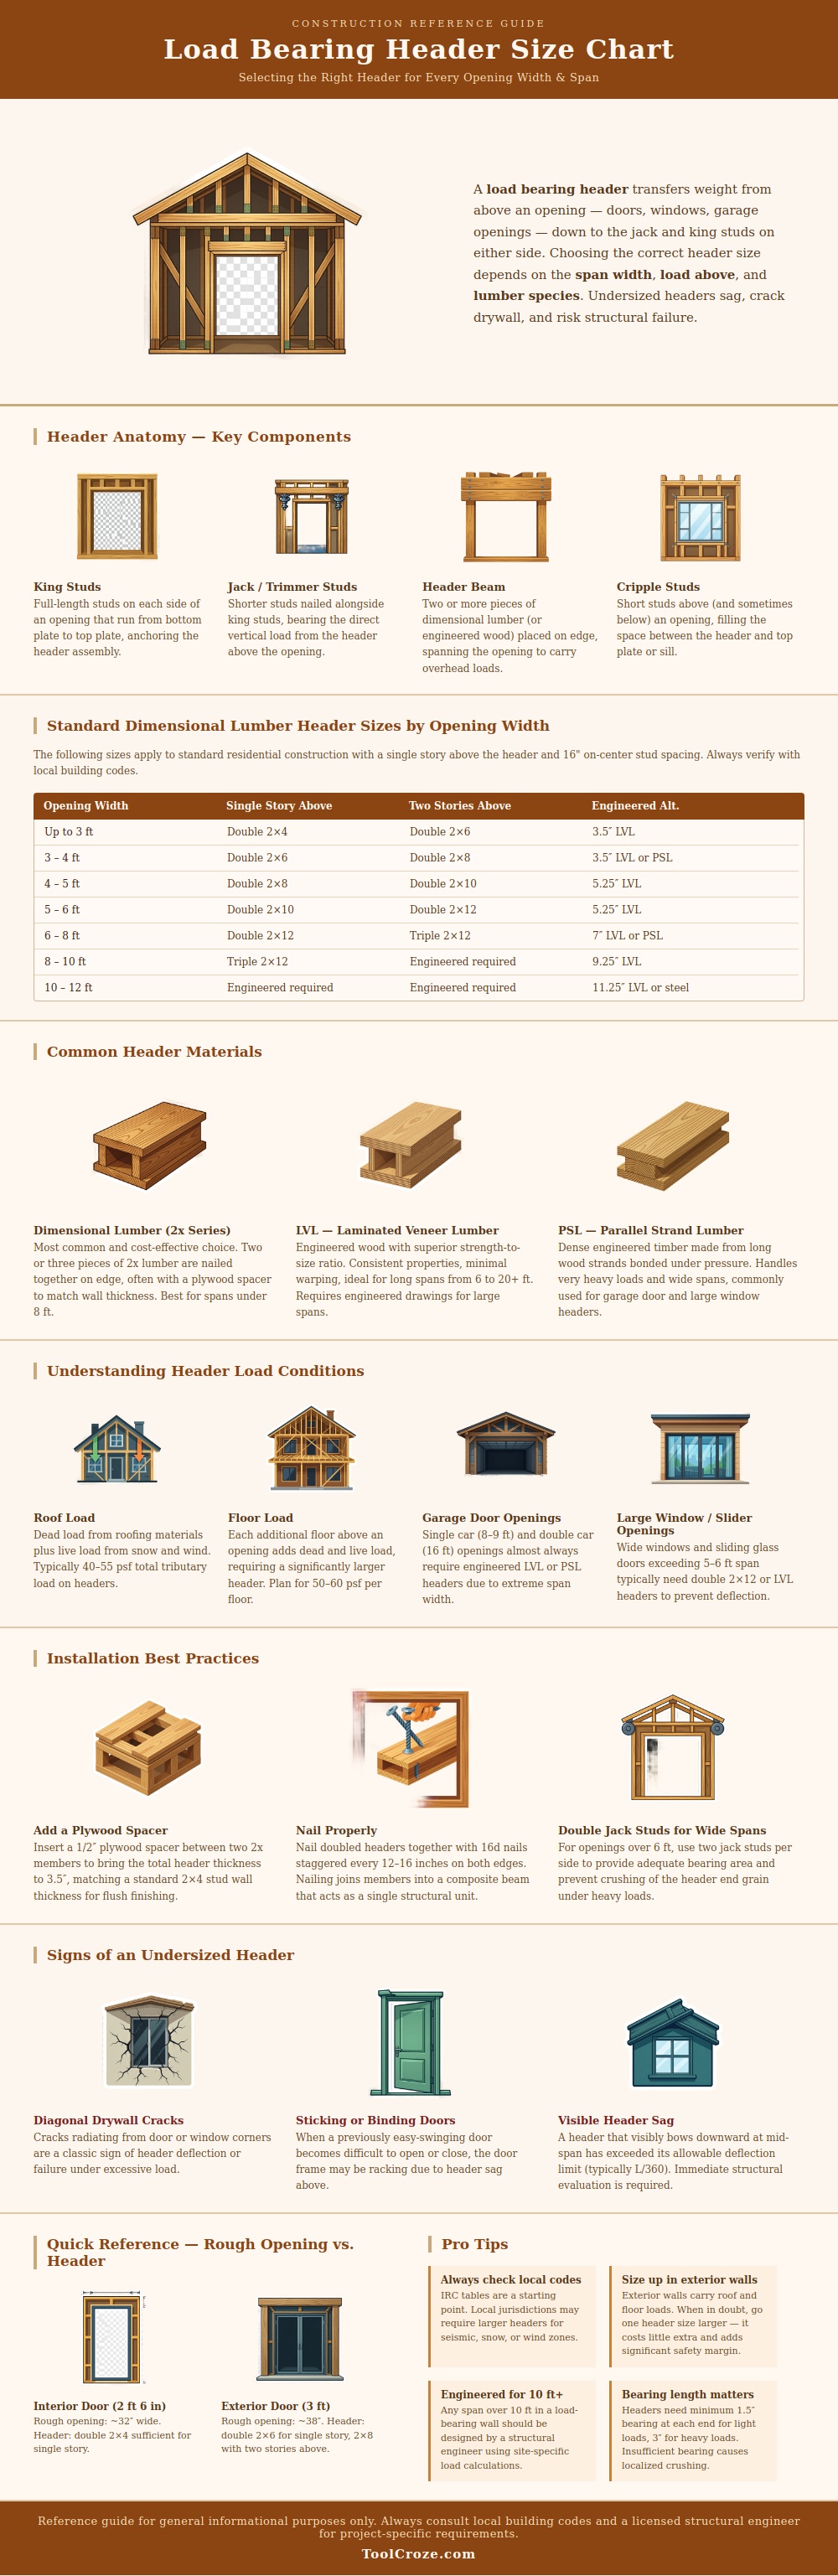
The chart above breaks it down visually, scaling up to required lumber size based off the span (how wide) and the load (how heavy). The takeaway: don’t grab whatever leftover 2×4s is lying around at job site and call it good.
Now, depending on how tall your home is (e.g. Single story versus multiple stories) sometimes a double 2×4 will suffice for smaller openings such as typical interior door. However, when you begin exceeding four feet wide, or when you push into two stories stacking onto that header, things escalate pretty fast. Notice the chart calling out double 2 x 8’s or perhaps even 2 x 10’s for these bigger opening.
Why? Well, again it goes back to physics. The longer the opening, the more the wood want to sag from its own weight and the weight of all that material above it. This is what brings in products like PSL or LVL, which are engineered woods that can withstand large loads while being much thinner than traditional dimensionel lumber. It’s an either/or of strength v height and something that many DIY’ers learn about too late once they’ve started demo.
The type of wood matters too but so does how it’s installed. Don’t forget to use the plywood spacer. If you put two 2×s together to create a beam, add a half inch sheet of plywood and you’re right back up to three and a half inches. That’s the same width as regular 2×4 stud stock.
If you don’t have this plywood, then your header will stick out past wall. It will leave a ridge in your drywall and look awful. Worse yet it will feel bad.
You should also consider if there is enough bearing length. Typically, end of the header must bear against the jack studs for at least an inch and a half and not crush. Guessing? Don’t.
When it comes to big remodels, a 10-foot wide sliding glass door is common, as are wide garage doors. Beyond that, even basic furnitures won’t do. Structural engineering requires specific calculations based on your local soil, snow load, and roof pitch. This isn’t DIY; this is why you hire an engineer, who’ll save you thousands on repair costs by clearly identifying the right size beam.
Better too much (a little) then too little, otherwise you’re looking at a sinking ceiling. You want a home that stands strong for decades, not slowly settling into a network of hairline fractures. Respect the span, be mindful of what’s overhead and those walls will stand test of time.
