FLEX 24v batteries are heavy-duty battery packs for stronger tools like the FLEX FX1351 Impact Driver. Like even the smallest batteries though, these things have issues with charging from time to time.
One of those issues is when a FLEX 24v battery is not charging and just starts blinking red instead. Read below to find out what that red light means, and how to get your battery to charge again.
But you can watch first the short video I’ve made about this topic. There, I demonstrated how I solved this issue by using the jump start method to reset the FLEX battery.
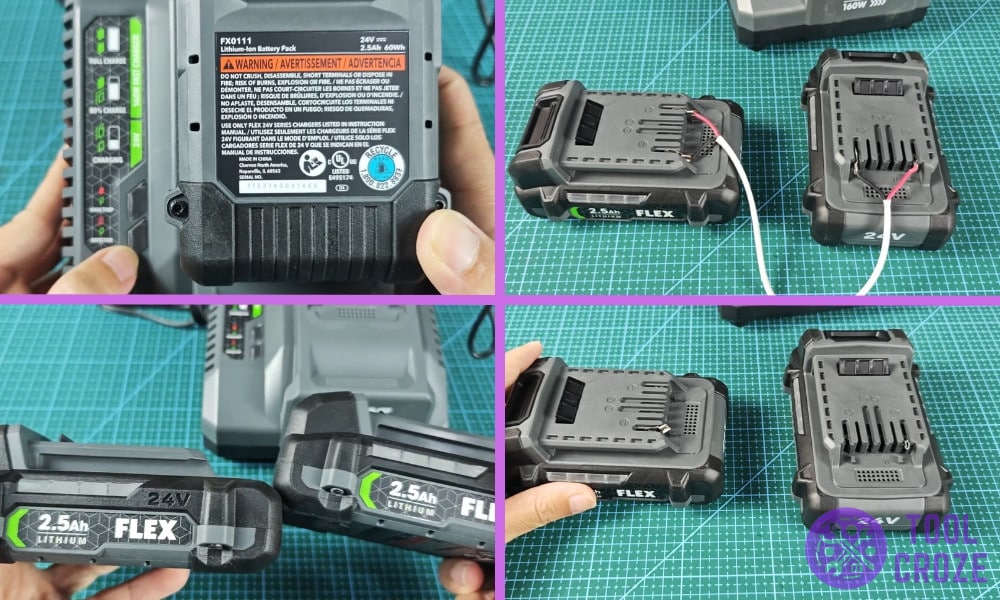
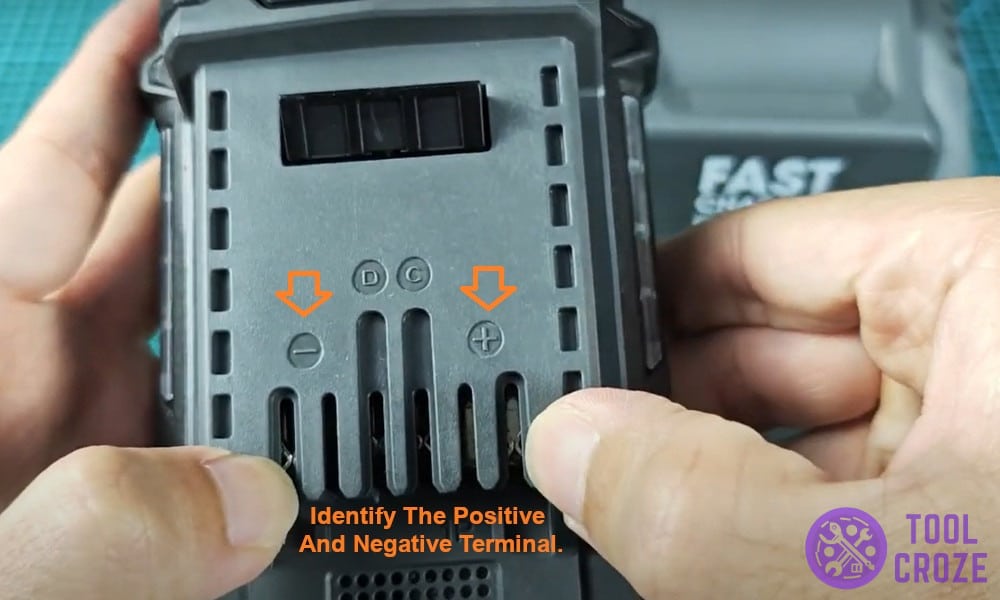
You would need another healthy FLEX 24V battery to do this. Use a pair of wire to connect the positive and negative terminals of the two FLEX 24V batteries.
Let the two batteries stay connected for around 15 seconds, then disconnect them. Now, put the problematic battery on the charger again and it should be charging normally.
How To Fix A FLEX 24V Battery Not Charging and Blinking Red
To start off, the most important thing you need to focus on is the red blinking light. If the battery just wasn’t charging and it was some kind of power issue, that would be normal.
Related: Meanings of Flex 24V Charger Lights
However, the blinking red light is a whole other story. This pattern serves as a warning sign for users when they put their FLEX 24v battery on its charger.
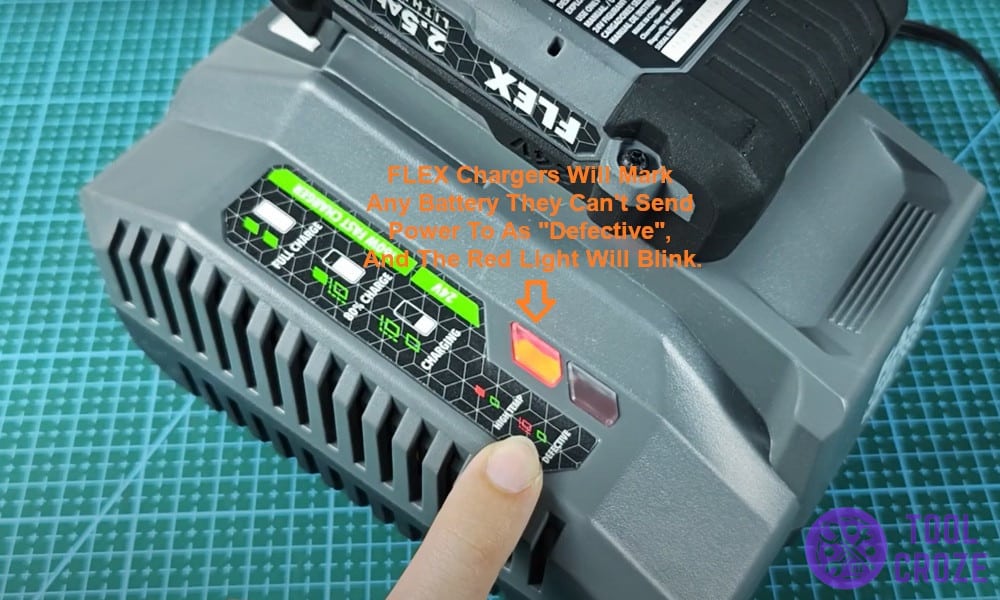
Specifically, it’s a warning sign that something is seriously wrong with the battery. That’s because the red blinking light only shows up when users put a defective battery on the charger.
Here’s what it’ll look like when users put one of those batteries on a FLEX charger. If the charger’s indicator is blinking like in this image, that means you have a bad battery.
FLEX chargers will mark any battery they can’t send power to as “defective”, and the red light will blink. If you’re lucky, that could just mean the contact points are dirty.
Dirt on contact points can stop power from flowing between the FLEX 24v battery and its charger. That’s worth checking out before thinking the battery is dead.
Clean the contact points using compressed air or microfibre cloths. Then try to charge the battery to see if the blinking red light is still there.
If that still doesn’t work, your FLEX 24v battery probably does have something wrong with it. Issues like these often have to do with the capacity of one of the cells inside the battery.
After constant use or parasitic battery drain, some of the cells can start to go bad. They can’t hold as much charge inside them anymore, and their voltage gets very low.
This causes a weaker current draw from the FLEX 24v battery. The only way to get rid of the light in that case is to revive the cells and bring them back to their original voltage.
Reviving Cells Inside The FLEX 24V Battery
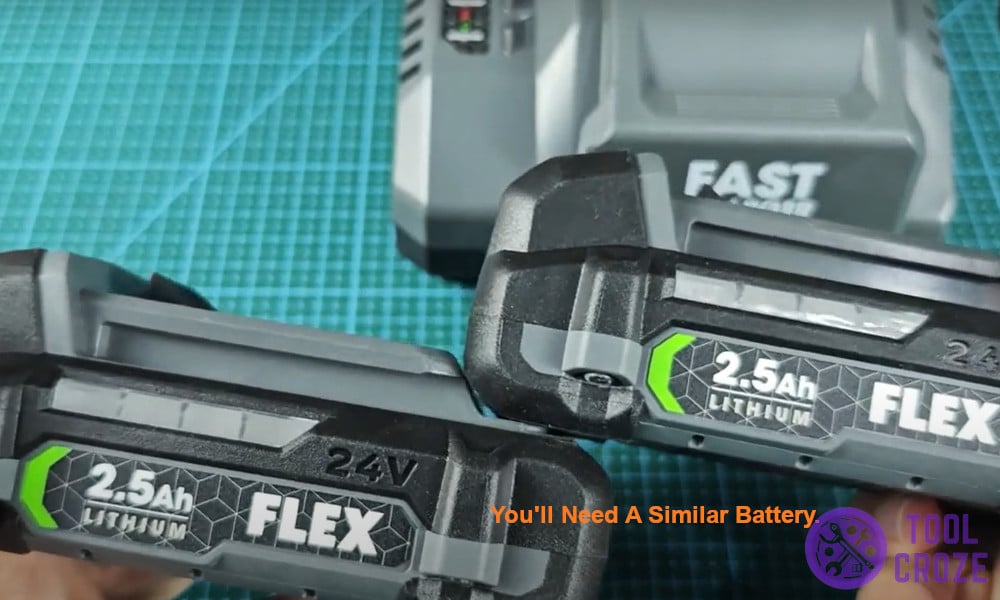
To follow this fix, you’ll need a similar battery. You’ll also need two connector cables. That’s because the faulty battery needs to draw power from the functional one to work again.
When my FLEX 24v battery was showing me a blinking red light instead of charging, I luckily had a spare one for this. But, it doesn’t have to be exactly identical for this method to work.
You can use any other 24v battery too if you have one on hand. Regardless of the brand, the battery needs to be 24v and at good health for this method to work.
Set both batteries on a desk and use the connector cables. Join the faulty battery with the functional one by connecting their terminals like I’m doing in the photo under this.
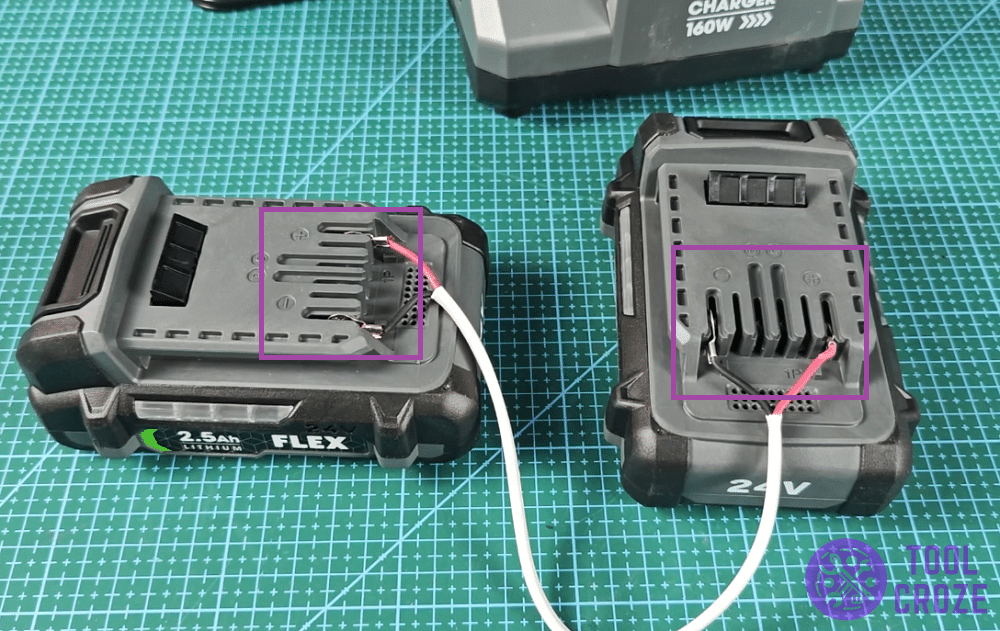
Make sure to only join identical terminals together. For example, the positive terminals should only connect with each other, and the negative terminals with each other.
Joining two different types of terminals will cause an imbalance and ruin both batteries. It could also lead to harm for the user.
When you place the cables on both batteries, keep them connected for at least 15 seconds. After that, you can remove the cables from both batteries.
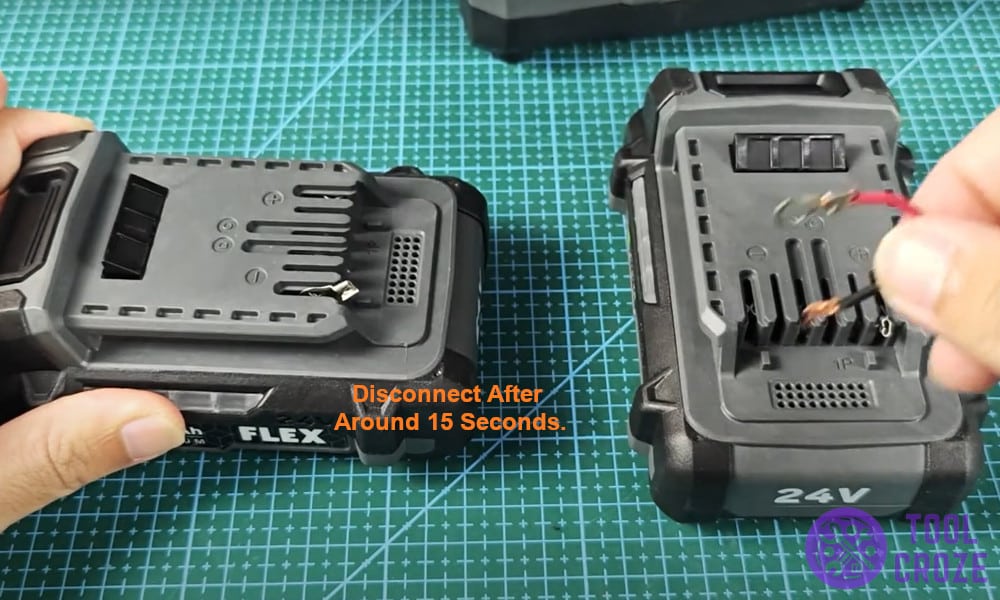
15 seconds of connection with a functional battery should be enough to reset the cells inside your FLEX 24v battery. Their voltage will be back to normal, and they’ll draw power normally.
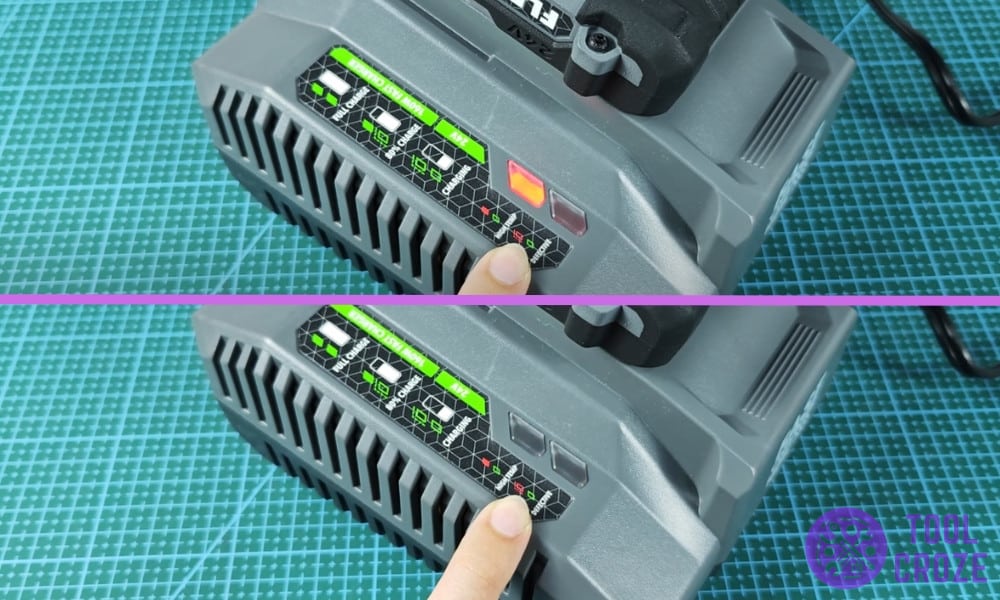
At least, that is the ideal outcome. You still need to test it out. After following this whole process, put the faulty battery on its charger to see if the red light still blinks.
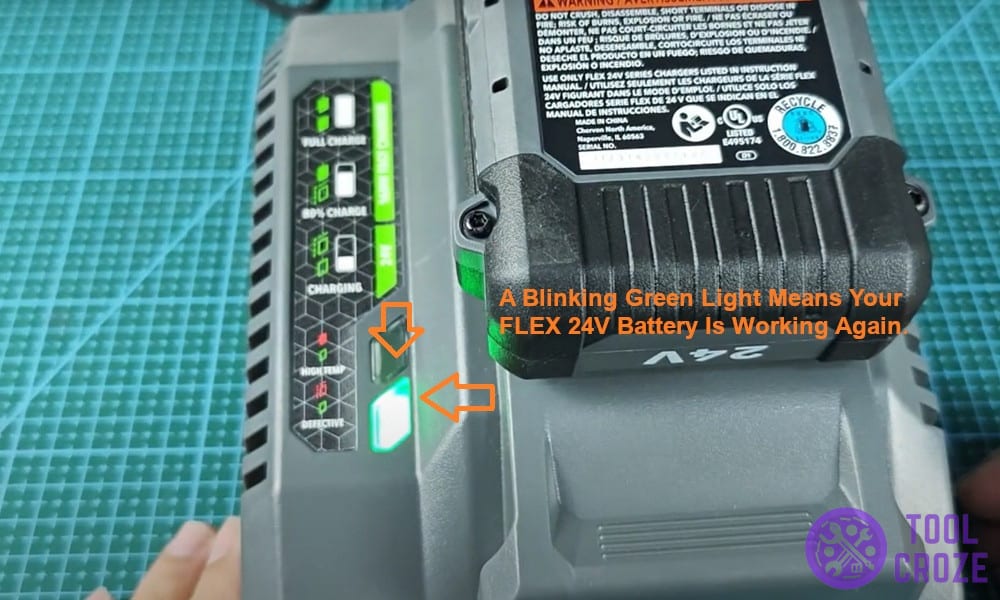
Your battery should start blinking green instead of red like in the image below. This blinking green light is a sign that charging is going as it’s normally supposed to.
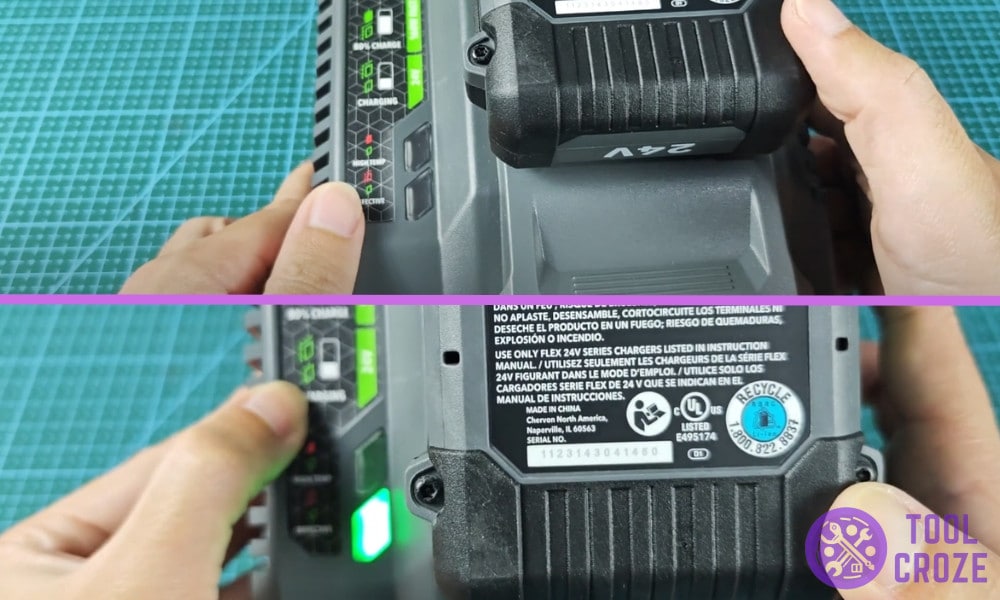
A blinking green light means the job is done, and your FLEX 24v battery is working again. It’ll charge without giving you trouble for a while now.
But if you put your FLEX 24v battery on its charger and it still shows a blinking red light instead, the cells inside are completely dead. There’s no way to get them to charge again.
You can either buy new cell packs to fit inside the battery or buy an entirely new FLEX 24v. I’d suggest spending money on a new battery if it comes down to that.
New batteries last longer than repaired ones, and won’t give you anywhere near as much trouble. Even if it does, the warranty will make sure that it’s not your problem to deal with!
