A loose chuck isn’t safe to work with when you’re using any drill. It effects the utility of the tool, and even worse, it can end up being a hazard for the user.
Usually, people have trouble with getting the chuck loose. So, a chuck that won’t tighten is a rarer issue. But, I’ve got all the answers for it right here in this small list!
Read: What to Do if DeWALT Drill Smoking: Solutions I Recommend
3 Things To Do When Your DeWALT Drill Chuck Won’t Tighten
- Corrosion Stopping It From Tightening
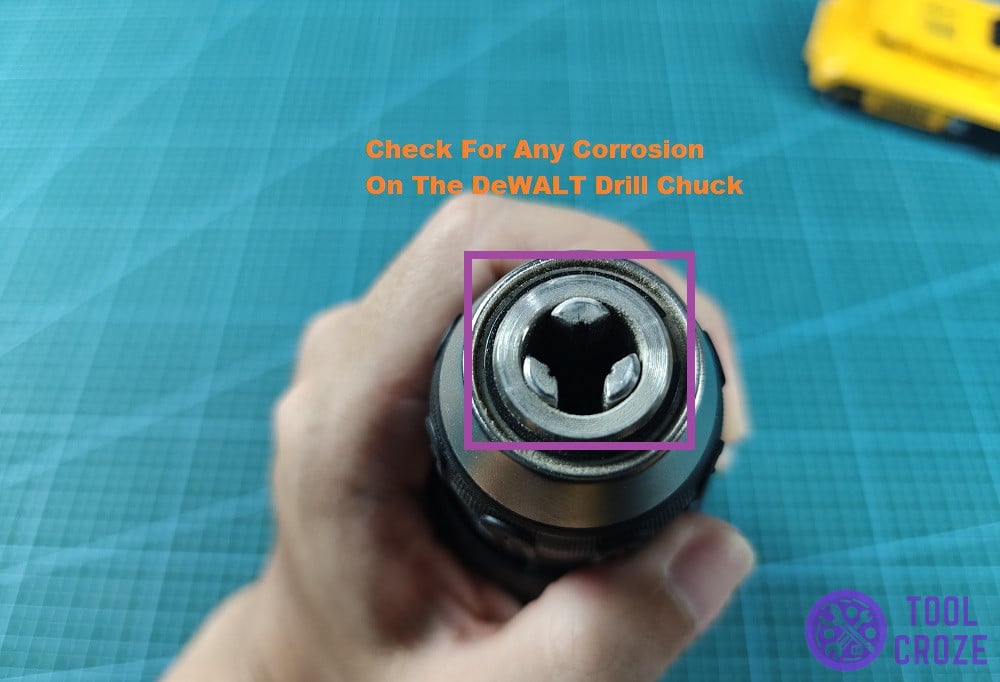
Rusting, or corrosion in general, is quite bad for metals. Along with all the obvious downsides, it’s also something that effects the surface of metals. Like the drill chuck that’s not tightening, for example.
Do you remember using it out in the rain, or any slightly wet environment? Anything that may cause corrosion? If you do, that would explain why the chuck isn’t tightening.
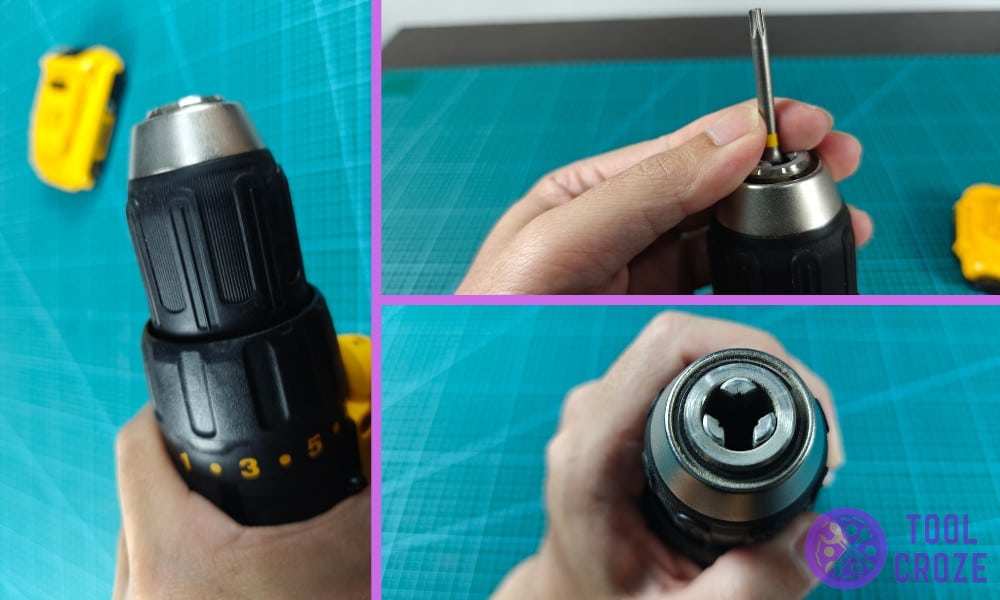
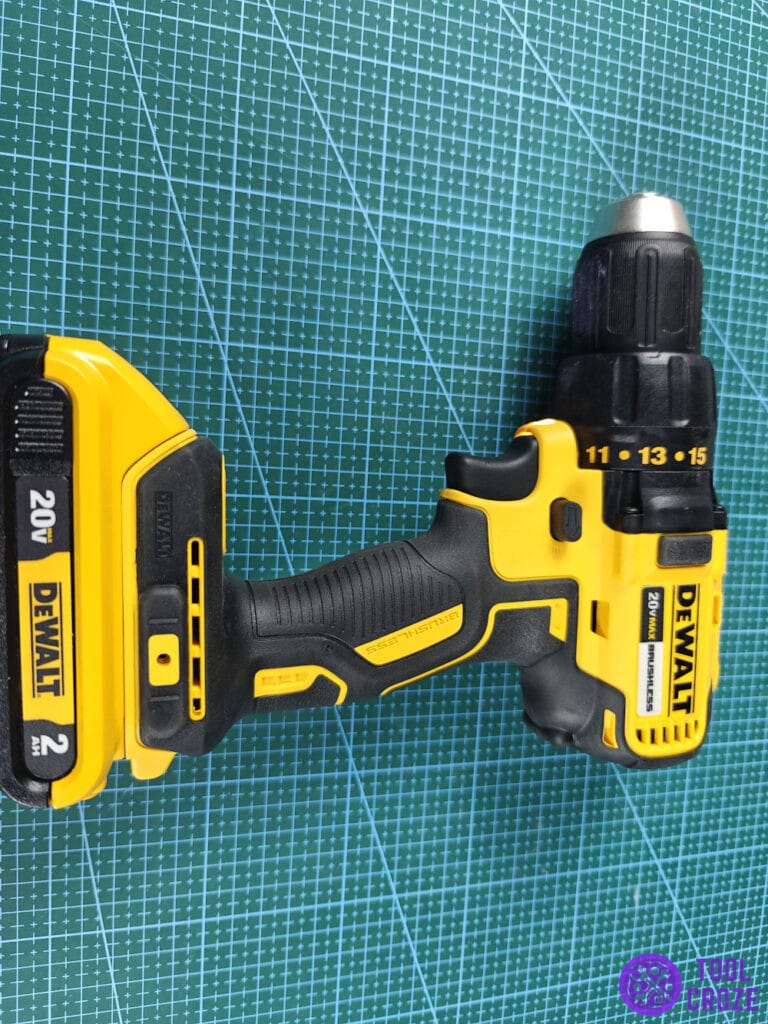
Even a tiny bit of corrosion can restrict the drill chuck’s movement. It’ll stop it from tightening because of the “damage” to the surface. That’s why it’s important to keep the chuck clean, like this one below.
White vinegar can help get corrosion off of most surfaces. But, something like WD-40 is what I’d recommend for the job. It’ll wipe off any rusting immediately, and fix the surface.
Try to tighten the chuck again after giving it a good cleaning and removing any signs of corrosion. Unless there’s any other issues, that should be enough.
Related: DeWALT Drill Bit Stuck in Chuck: Ways to Fix
- Use An Improvised Method
Using the drill to help you tighten its own chuck is something I’ve done a lot. It’s an easy way to deal with these kinds of problems, and works for booth loosening or tightening chucks.
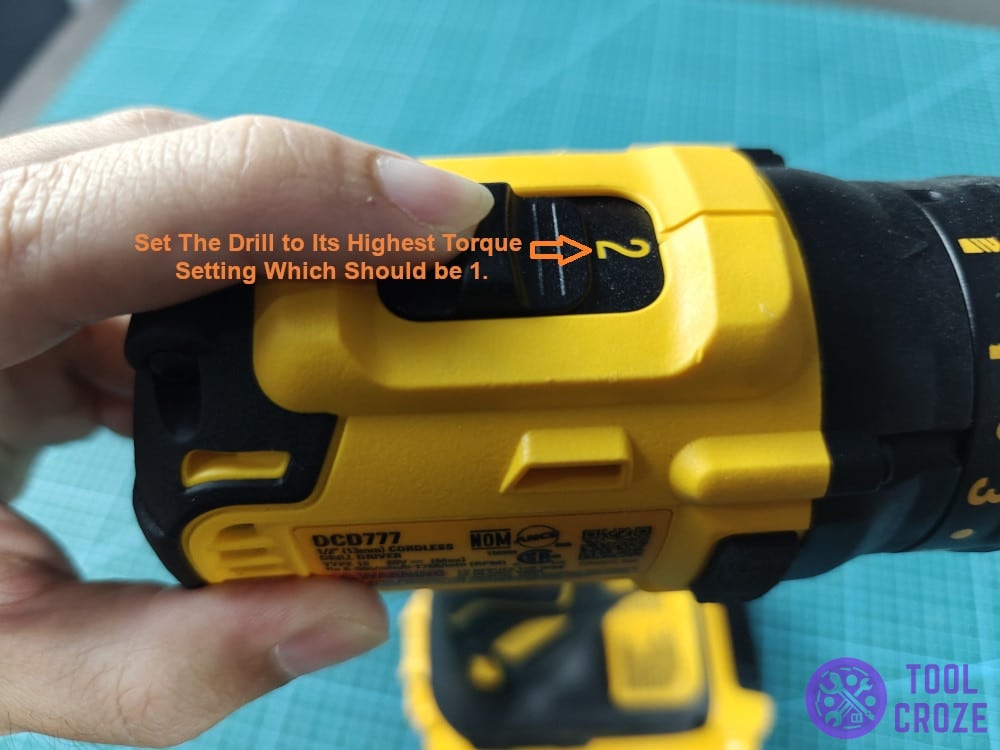
All you have to do is set the drill to its highest torque setting, which should be 1. Then, keep the drill chuck in position to go on the drill, as if you’re putting it on with your own hands.
Use your other hand to hold the trigger and handle of the tool. For tightening specifically, you’ll want the drill to spin clockwise. Keep a firm grip on it to avoid issues.
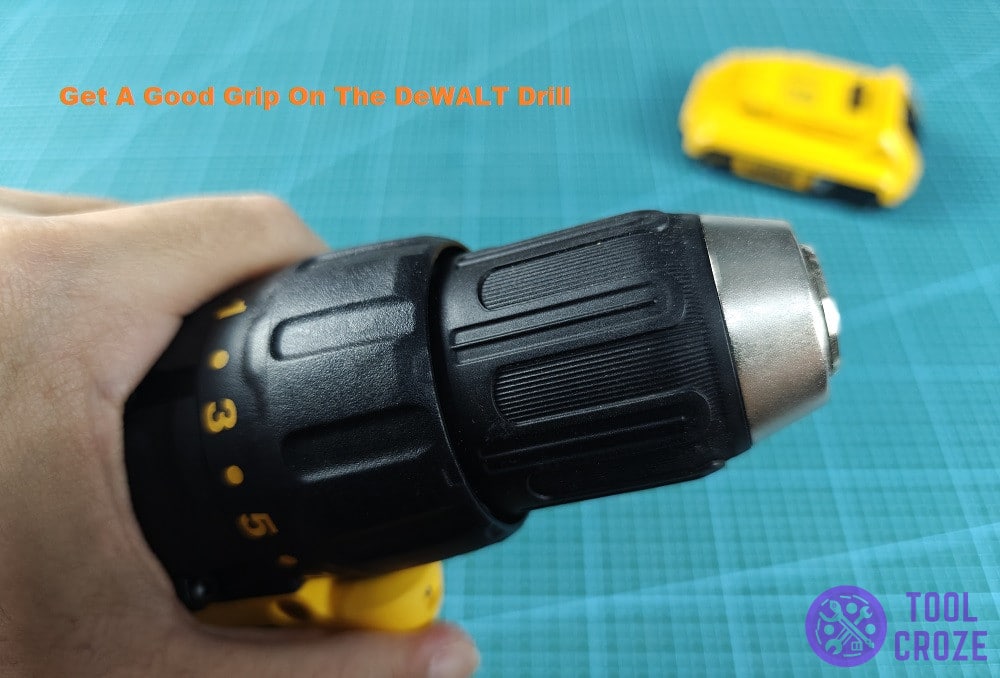
Now, with the chuck in place and everything else ready, run the drill. With the settings I told you about, the force of the tool should force the chuck to tighten.
As long as you hold the chuck in the right position, it should automatically go on to the drill with these settings. It’s like an easier way of putting it on, instead of using your own two hands.
- Get A New Chuck
If nothing seems to work, and even using my method from the last fix wasn’t any help, maybe it’s time to replace the chuck. It shouldn’t give this much trouble while simply tightening.
Damage to the chuck will stop it from seating properly on the DeWALT drill. No matter how much you clean it up or how much force you use, the chuck won’t go on the drill.
The best option is to get a new one that tightens easily, without giving you trouble like this. Just ensure you get one that fits your particular DeWALT drill, and holds all your drill bits.
Related: How You Can Drill a Hole Through Metal With a Hand Drill

Looking online or contacting DeWALT will help you find out which particular part you need. After getting the chuck, there’s not really much else to do.
You can just put the new chuck on as it is. Since it’s new and free of problems, it won’t have any issues tightening and you can use it freely!
