
Notice that little space between the molding and the ceiling? Yeah, you measured it twice. You cut it once. You think it’s big. But when you try to close the joint, it won’t close. What gives?
That’s what most people experience with crown molding installation. Most of the time, this is due to geometry, not your hands or your saw. When most homeowners do this, they make two assumptions: (1) walls are ninety degrees and (2) molding is forty-five degrees. Guess what? They’re both incorrect, which makes issue grow rapidy.
How to Cut Crown Molding Correctly
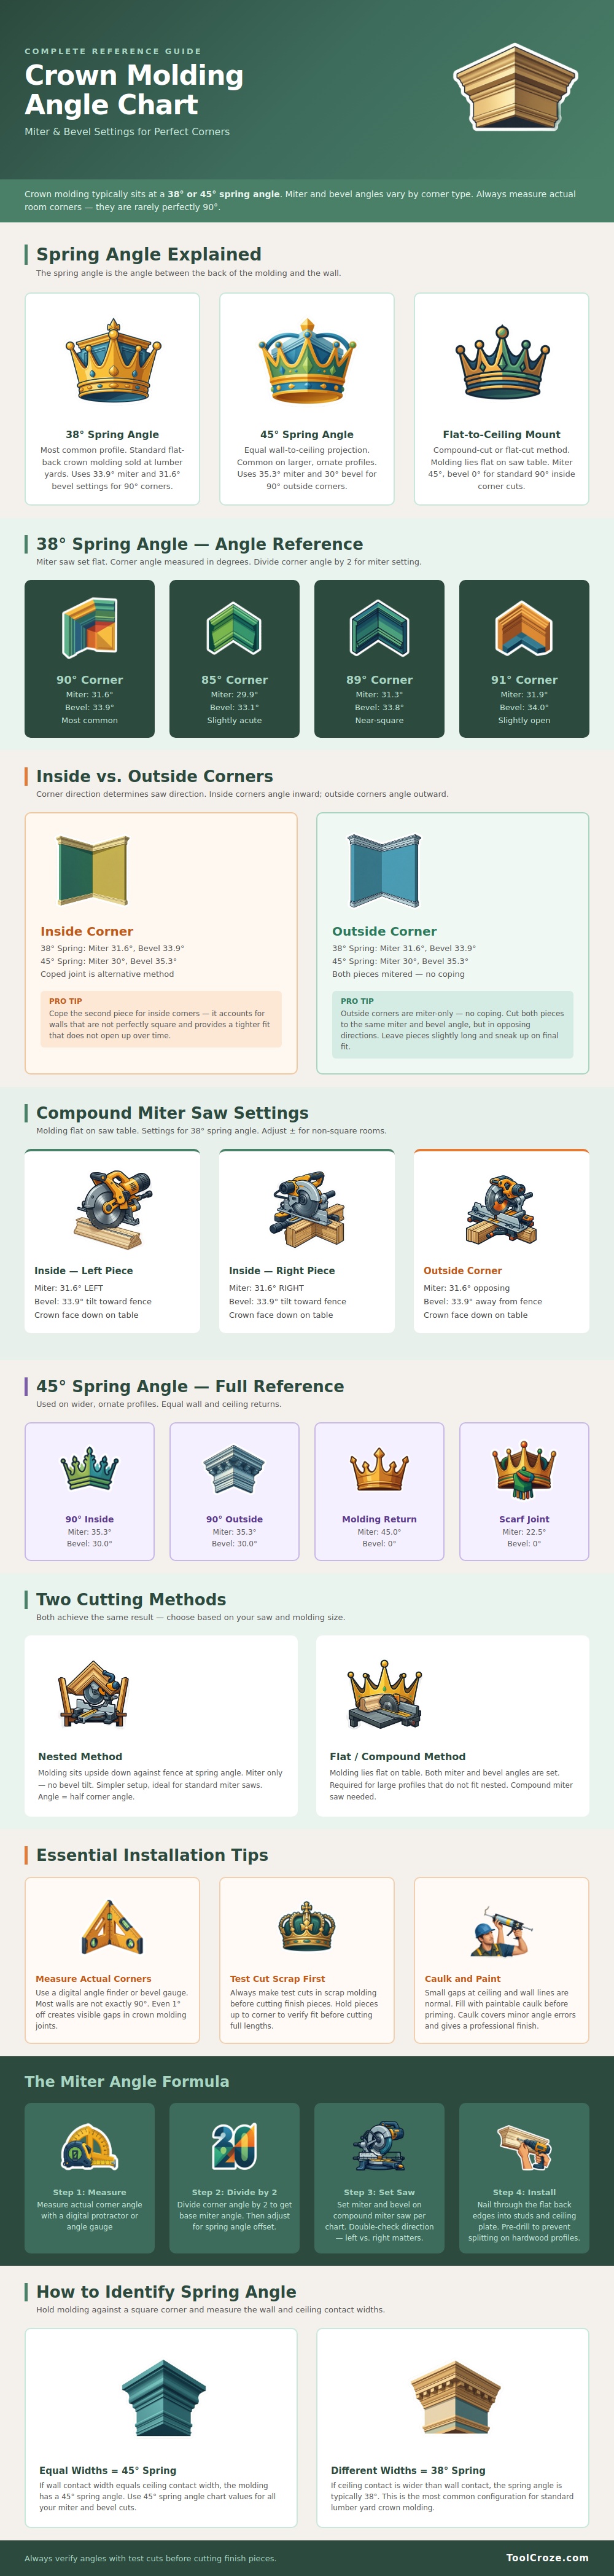
These assumptions require special miter and bevel angles as illustrated in the chart above. First is spring angle. The spring angle refers to the angle between the molding and the ceiling (and wall). A standard molding’s spring angle is typically thirty-eight degrees. A fancy profile might be forty-five degrees. Confuse those two and your cut won’t fit. To know which one is being used look at contact areas. If the piece matches on the wall and ceiling that means forty-five degrees. Otherwise if the ceiling contact is greater then the wall contact it’s probably thirty-eight degrees. That difference impacts all following calculations.
They don’t measure up The walls move, and they’re never square. What appears to be a true ninety-degree corner could realy be an eighty-nine or a ninety-one. Changes like this call for adjustments that the infographic spells out. If you have a typical thirty-eight-degree profile on your molding going into a true ninety-degree inside corner, you’ll want a bevel of about thirty-three point nine degrees and a miter of around thirty-one point six degrees. Not forty-five.
Lots of folks never adjust from forty-five because that’s what the mark says. They don’t bother with tilting the saw to follow profile of molding. If the wall angle changes by just one degree, you have to adjust the miter and bevel to still make a tight joint. As important as angle is the direction of the cut. For inside corners, one piece should rest on fence and the other should be cut or coped in the opposite direction. Both pieces must be mitered out for outside corner. The chart shows how to set the arm, which direction to swing it, and which way to tilt the blade. Reverse that tilt and the molding will stick up from the wall (or create a gaping hole at the ceiling). It works for a reason. The two planes the molding crosses at once are accounted for by the compound angle. Cut without the bevel and there’s no proper fit.
Your saw has two possible setups. Either flip the molding over so it sits nested upside down on the fence; this makes the math easier. Or, lay it flat and use compound angles which is more intuitive but requires setting your bevels accurately. Both options are shown in the reference guide. In the end, which one you pick may depend on your comfort level and also what size profile your saw can absorbs. Larger, heavier profiles is best flat on the table. Small trims is easy to nest. Always test it out first on some scrap wood.
Use a bevel gauge or a digital angle finder to measure actual corner. Don’t estimate. Divide that number in half to get your starting miter setting for the base. Include the offset of the spring angle as pictured in visual guide. Pre-drill holes for your fastener before driving them in, particularly with hard woods so they don’t split. Nail into the ceiling plate and into studs for hold-in-place strength. And know that there will be tiny gaps here and there. Cauk ’em up with a paintable sealer. Prime after that, it fills any imperfections and ensures a seamless look.
You should of tried it on more wood. There’s no way to cut a perfect joint where the walls aren’t perfectly straight. Perfection in fit is the goal, not perfection in cut.
