How to prevent wood from splitting when nailing or screwing? Read on until the end for a bonus tip!
I have prepared a simple experiment at home to put these questions to the test.
I also filmed my progress so you can follow along in my case studies:
Prevent Wood From Splitting (For Nails And Screws)
Article key points:
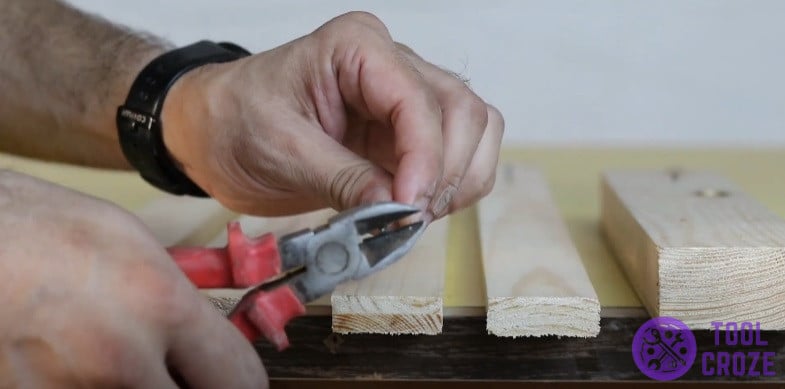
- Make a flush cut on the tip of nails and screws with side cutting pliers.
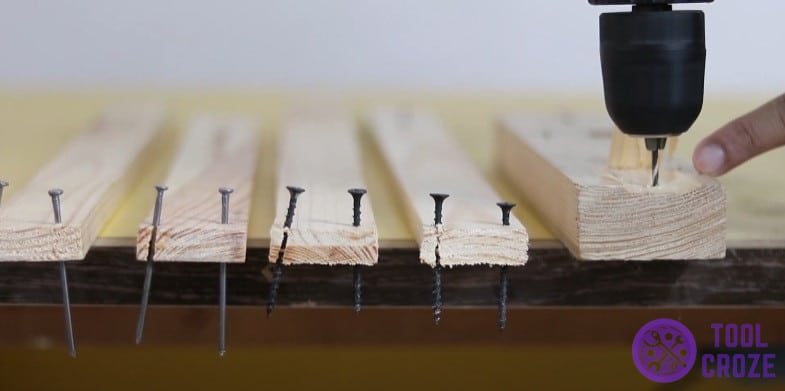
- Make a pilot hole on the wood before nailing and screwing.
- Bonus Tip: How To Hide Screws In Wood?
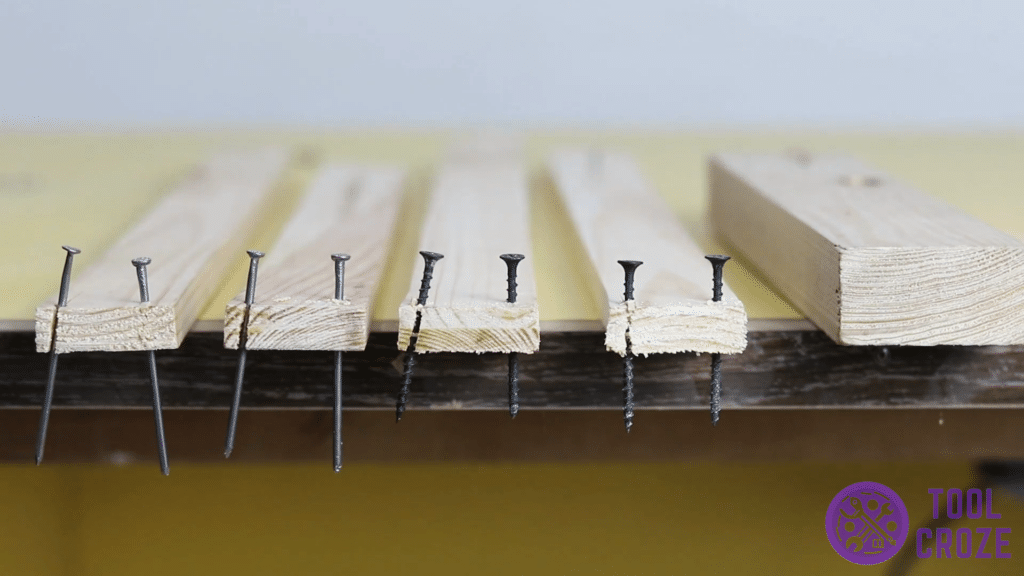
First of all, the sharp end of both nails and screws act like a wedge that causes wood fibers to break apart. The crack will then travel across the wood which results in wood splitting.
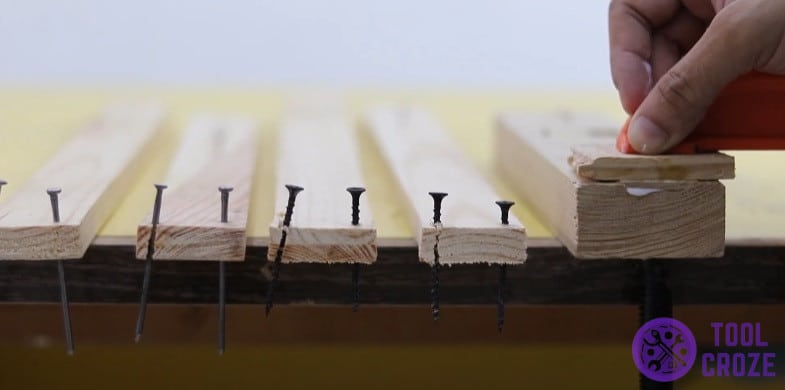
For this experiment, I simulated two joining methods to test out their effectiveness in preserving the wood structure.
- Make a flush cut on the tip of nails and screws with side cutting pliers.
Unlike a wedge, the flat end of nails and screws act like a punch that has lower risk of splitting wood fibers. If there is no side cutting pliers available, you can use a hammer as an alternative to flatten the sharp tip of the nail.
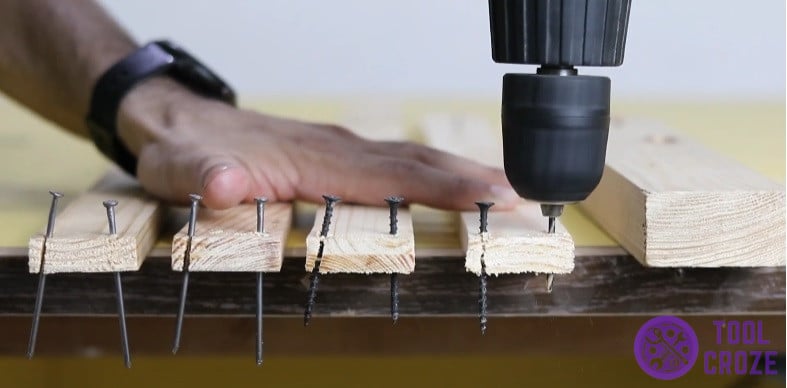
- Make a pilot hole on the wood before nailing and screwing.
Use a drill bit with the same diameter or a size smaller for your nails and screws.
Instead of applying direct force on the wood fibers, the wall of the pilot hole diverts the force evenly around the area. Thus, it lowers the risk of wood splitting.
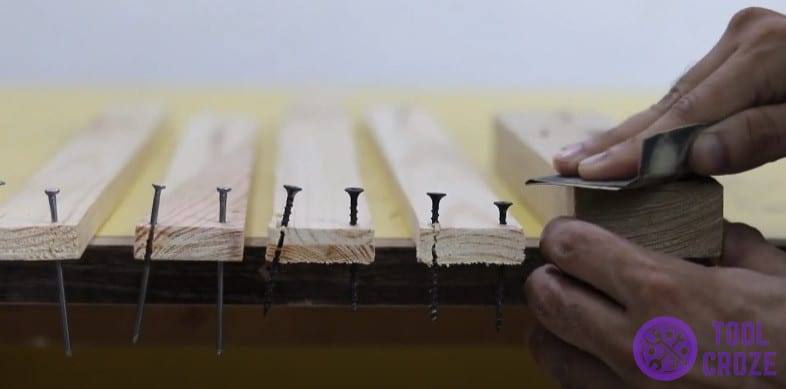
- Bonus Tip: How To Hide Screws In Wood?
When dealing on professional woodworking projects, aesthetics are important. A project that is not riddled with nails and screws is sure to leave a good impression for potential buyers.
Firstly, chisel out a piece of wood from the drill site. Then, make a pilot hole on the wood and start screwing.
Secondly, use a generous amount of glue to piece back the wood. Next, clamp the wood surface evenly with a wood board and G-clamp.
Finally, remove excess glue and sand the surrounding area with sandpaper for a smooth finish.
In conclusion, I find that using a blunt tip and a pilot hole works best for nails and screws in keeping wood from splitting.
I hope my bonus tip helps up your woodworking game. I love to hear if my article is helpful for you. Leave a comment below and give me encouragement to keep going. All the best!
