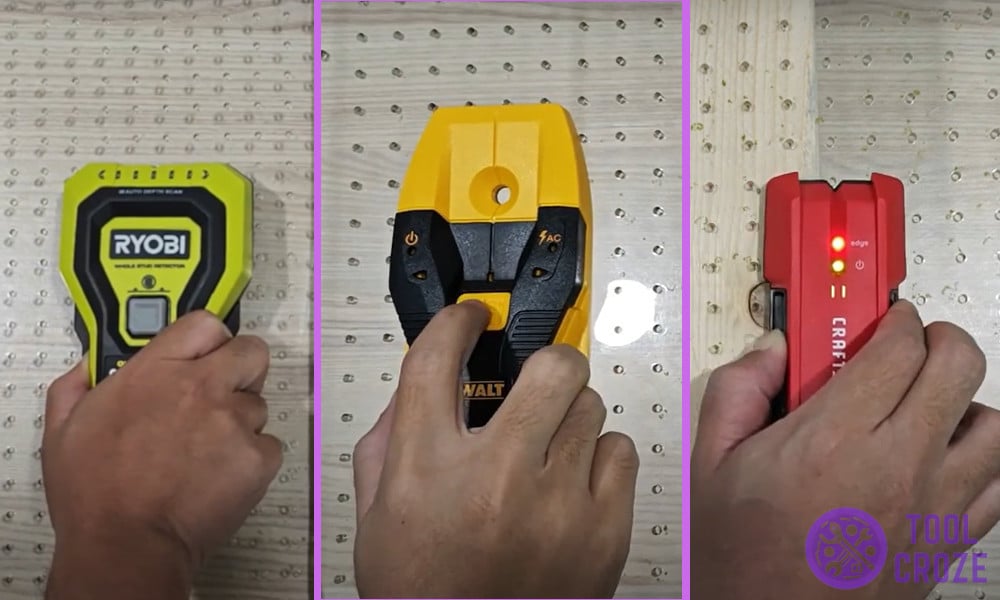
Last week I found myself juggling between three stud finders while helping a close friend of mine mount a heavy shelf. We had no room for any mistakes as we needed to find the studs position dead on.
So instead of testing I decided to put three of the stud finders on test, the Craftsman, the Ryobi and the DeWalt. Using a transparent plastic sheet on top of a stud, I tested them on both small and wide studs to see which one works the best and here are the results.
Craftsman vs Ryobi vs DeWALT Stud Finder Comparison: Which of Them Works Best?
First Test Using Narrow Stud
All three of the stud finders worked perfectly well on the small stud, but the Ryobi worked the best. Thanks to its big detection area it quickly helped me find the center of the stud in no time.
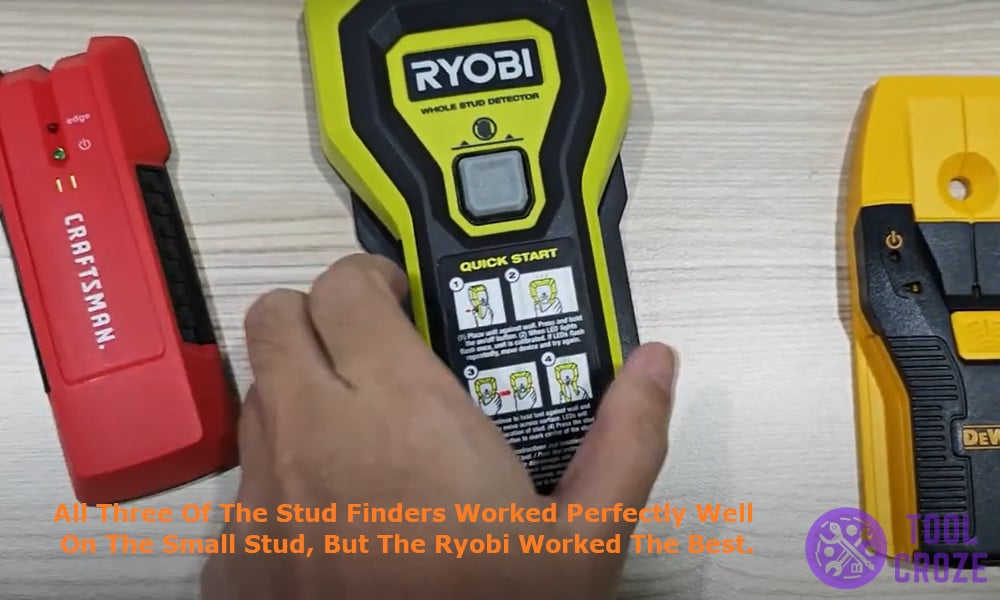
DeWalt also worked without any problems when it came to finding the center of the stud and provided me with the center in seconds. The best part of DeWalt is that it gives an opening to mark the center using a marker.
Then came Craftsman stud finder, it is small and pretty handy to work with but it comes with its own drawbacks. When I tried finding the middle of the stud with the Craftsman stud finder, I first had to first detect the left and the right edge of the stud to mark the middle.

I moved it slowly from left to right and then the other way around to mark both the edges and find the center.
Related: How I Troubleshooted My Craftsman Stud Finder Not Working: 5 Tips
In case you want to know more about how to use a Craftsman stud finder, I have made a short video about this and you can watch it below.
Place the Craftsman stud finder on flat surface. Press and hold the on button and wait for the calibration to be done. Then move slowly from left to right, and detect the left edge. After that, move slowly from right to left, and detect the right edge. The midpoint between two edges is the center of the stud.
Second Test Using Big Stud
Now that all the three Stud finders helped me detect the small stud it was time to put them on the real test. For this test I decided to use a bigger stud to find the center by moving it slowly from left to right in both directions to find the edges first.
While using the Ryobi stud finder I knew I found the edge when the last 2 LEDs from either of the sides went off. It worked perfectly fine by detecting both the edges and made it easier for me to find the center.

Then came the DeWalt, and boy were the results disappointing. It was perfectly fine when I tried to find the edges of the stud, it detected the left edge easily but as soon as I started to move it further to the right it started beeping, indicating it had found the center which was not accurate.
The center was way off from the mark where the DeWalt stud finder started flashing.
If you want to know how to use a DeWalt stud finder, I also have a video about it and you can watch it below. On the video, I showed how to use the DeWalt stud finder with small studs and large studs.
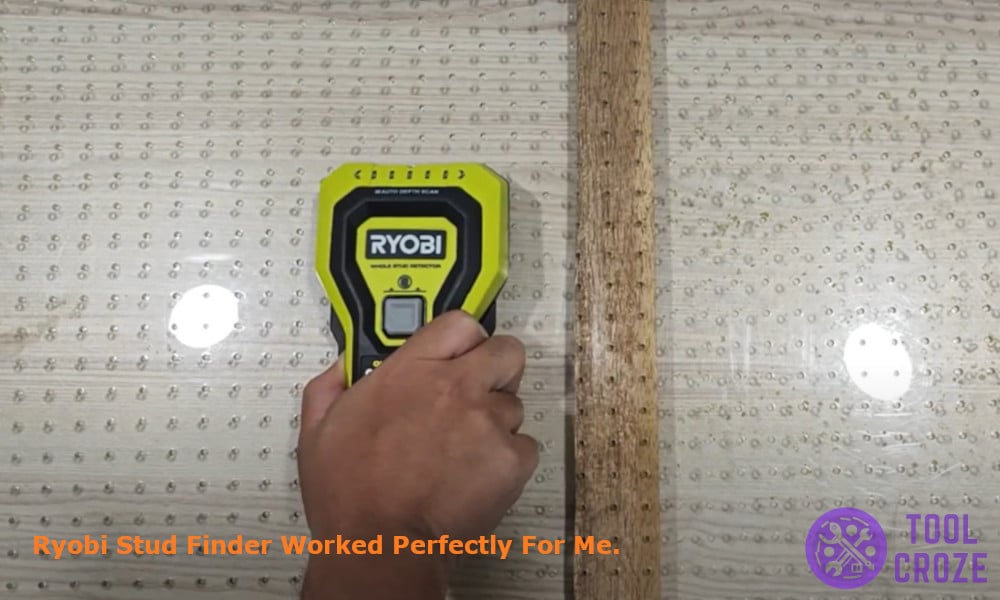
So, Which One Would I Recommend?
Ryobi Stud Finder worked perfectly for me. It worked smoothly on both narrow and wide studs and gave clear signals helping me find the middle of the studs. If you are stuck choosing between the three, Ryobi is the one I’d reach for again.
Related: How I Fixed My Ryobi Stud Finder Keeps Blinking, Not Calibrating, Not Working: 3 Tips
And before I end this post, I also would like to share to you the short video I made in which I demonstrated how to use the Ryobi stud finder. You can watch it below.
You put it on a flat surface. Then, press and hold the power button. Wait until the blinking green light turn off to indicate the calibration in completed. Slowly move it toward the direction you want to find the stud.
Then, the Ryobi stud finder would show solid green color and direction to indicate the direction of the stud behind the surface. Press the mark button to mark the location of the stud.
