📏 Crown Molding Angle Calculator
Set crown molding miter, bevel, and blade settings for inside or outside corners with a layout that stays practical on the saw.
✨Quick Presets
⚙Calculator
📖Reference Tables
🛠Material and Blade Guide
✅Practical Tips
⚠Safety Note
Installing crown molding can be truly challenging. Walls and ceilings rarely are square, and corners almost never have perfect 90 degrees. Because of that, the molding touches two surfaces (the wall and ceiling).
Each angle cut requires precise cut. It combines miter corner (the horizontal) and bevel corner (the vertical). Understand how they work is the first step for get intense, professionally looking corners.
How to Cut Crown Molding for Corners
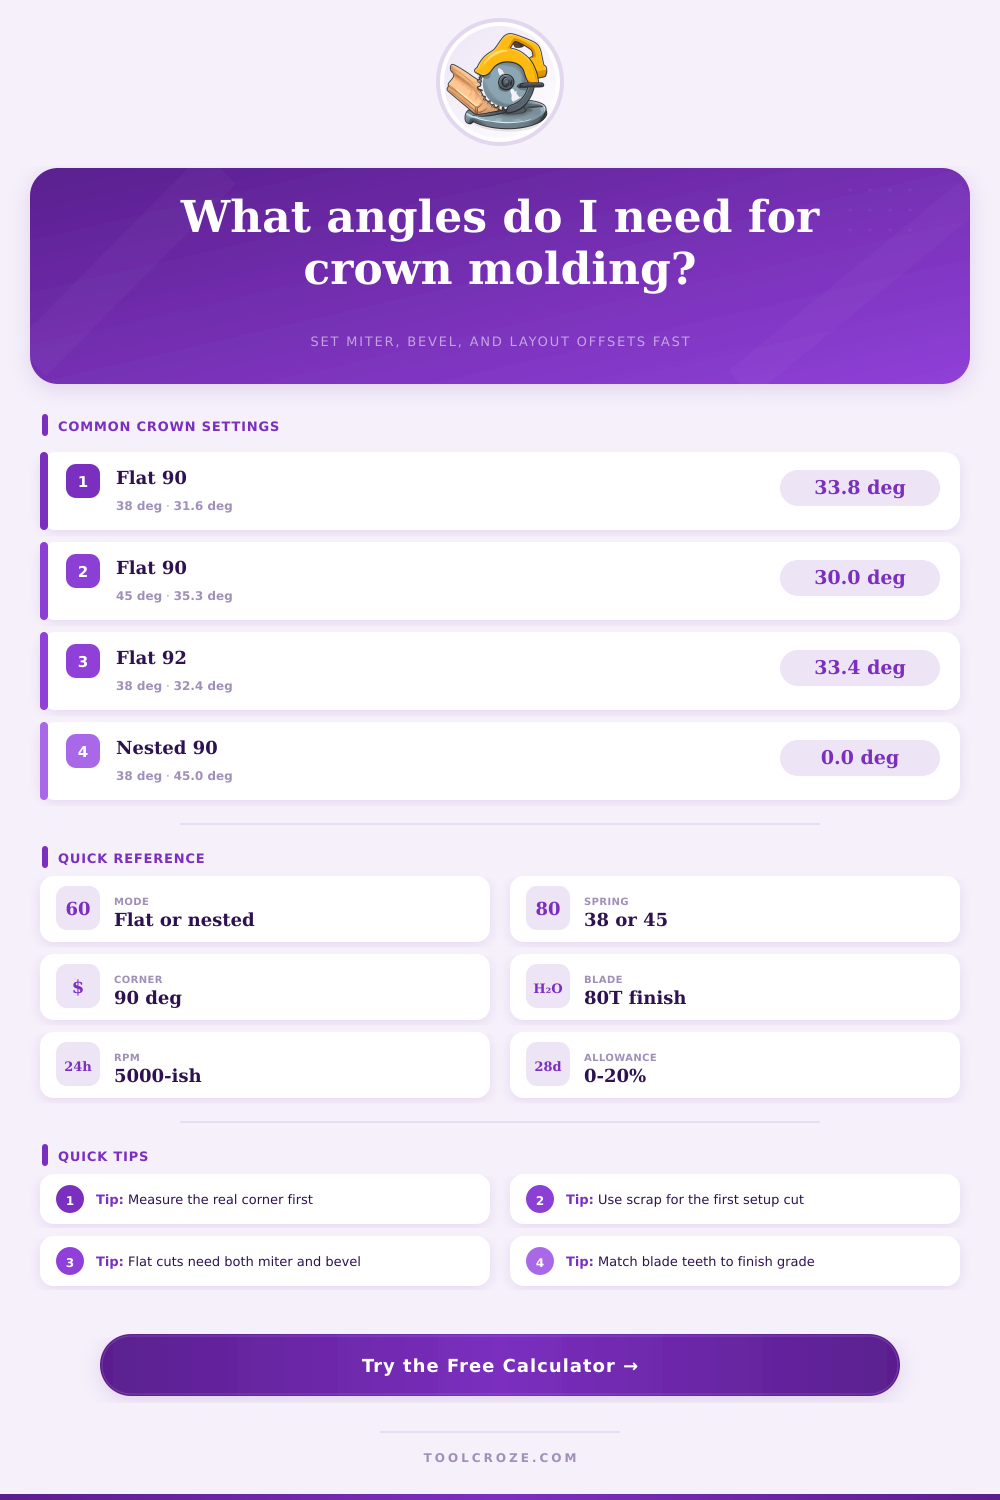
The geometry of crown molding depend of its spring angle. That is the permanent corner, in who it rests against wall and ceiling. Typical crowns have three possible spring angles: 38, 45 or 52 degrees.
For find the real install angle of your molding, you must know, as far as it inclines when it joins to the wall. Always check the spring angle of the molding and consult the chart for miter- and bevel angles. It will not be 45 degrees, as many assume, but 38 or 52 degrees.
Many folks, cutting crown molding, lay it flat on the table of the saw. For installation of usual crown molding in 90-degree corners with 38-degree spring angle, set the miter at 31.62 degrees and bevel at 33.86 degrees. On miter saw cut the crown pieces with bevel at 33.85 degrees and miter at 31.62 degrees.
Good saw, for instance DeWalt, maybe have stop at 31.62 degrees. Other opportunity for 90-degree corners are 33.6 degree miter and 31.9 degree bevel. The most saws mark those corners.
Using compound miter saw for 90-degree corners, set the miter angle to half of the wall angle. In 45 degrees miter on 90-degree walls, lay bevel at 0 degrees without incline. At inside corner the top of the molding will be shorter, while at outside corner the bottom part.
For 120-degree vaulted corner set the miter saw at 15 degrees and do both cuts at 15 degrees each. Ensure, that the crown molding piece rests well on the saw table for those cuts.
All good trim, as crown molding, cut to measure and install locally. American standard crown moldings with 52- and 38-degree corners assume 90 degrees between walls. Use jigs for set the bit of crown molding to the fence and table of the saw, as if it already would be installed.
Like this you cut direct 45-degree corner. Other option bid Starrett miter saw for help with corners. Kreg Crown Pro jig also simplify the process.