🧱 Thinset Coverage Calculator
Calculate how many bags of thinset mortar you need for your tile installation based on trowel size, tile size, and TCNA coverage standards.
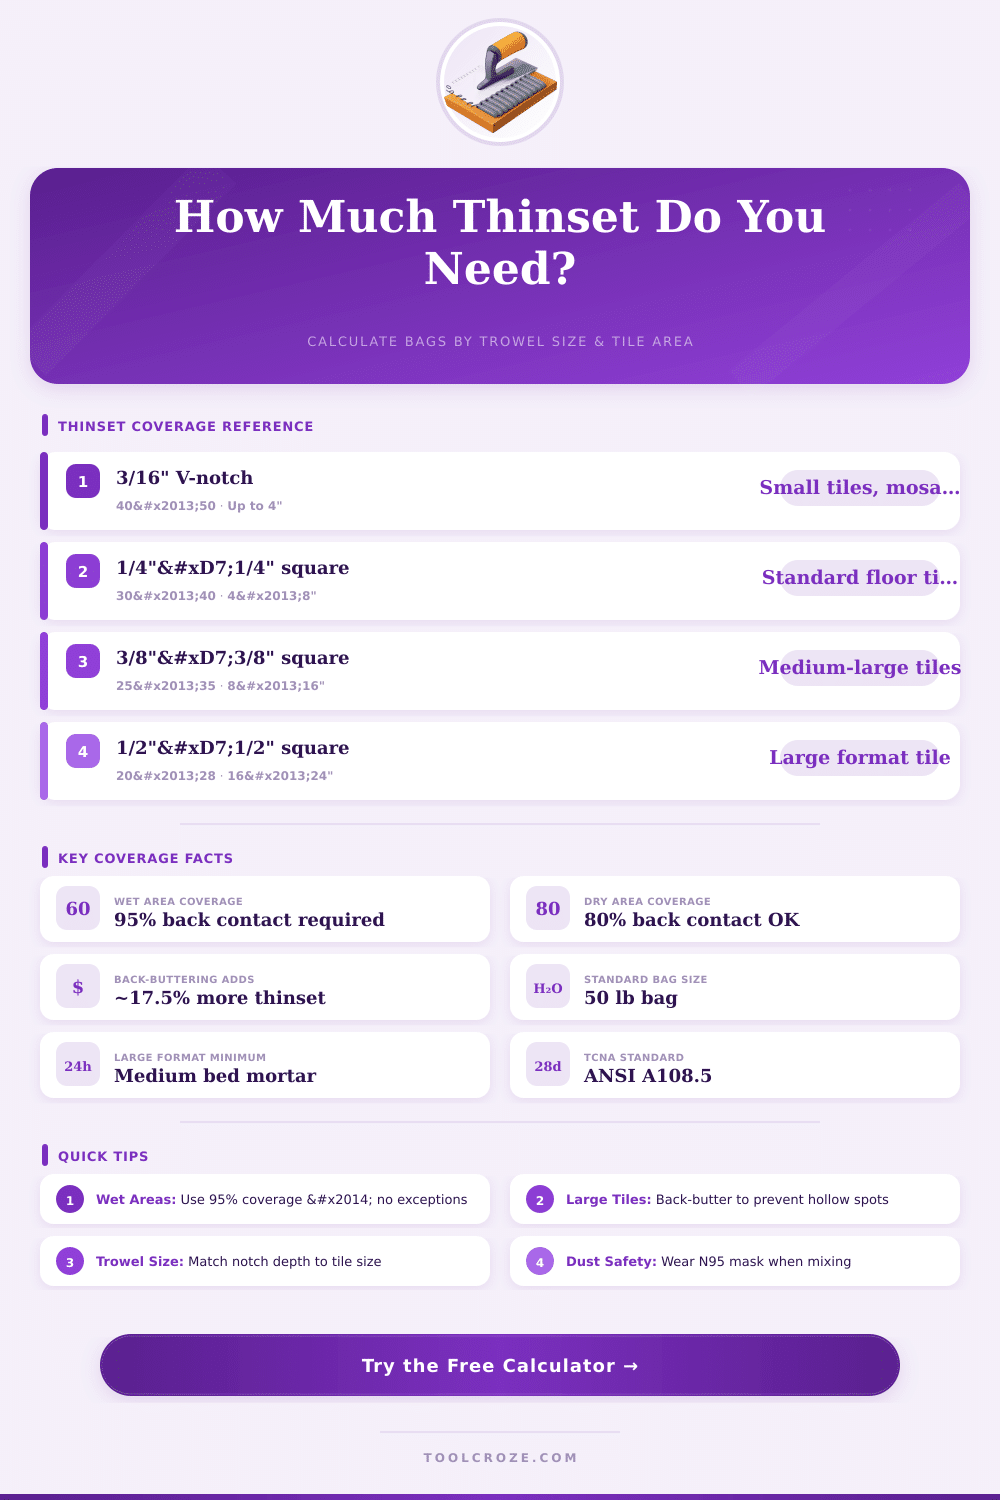
| Trowel Notch Size | Tile Size | Approx sq ft / 50 lb bag | Best For |
|---|---|---|---|
| 3/16" V-notch | Up to 4" | 40–50 | Mosaics, small wall tiles |
| 1/4" × 3/16" V-notch | Up to 6" | 35–45 | Small-medium floor tiles |
| 1/4" × 1/4" Square | 4"–8" | 30–40 | Standard floor & wall tile |
| 3/8" × 3/8" Square | 8"–16" | 25–35 | Medium-large floor tile |
| 1/2" × 1/2" Square | 16"–24" | 20–28 | Large format tile |
| 3/4" × 3/4" Square | 24"+ | 15–20 | Extra-large / porcelain slabs |
| Type | Best Use | Tile Types | Substrate |
|---|---|---|---|
| Gray Unmodified | Basic dry areas | Ceramic, porcelain | CBU, concrete |
| White Unmodified | Light tile, grout joints | Glass, light marble | Drywall, CBU |
| Gray Polymer-Modified | Most installations | Ceramic, porcelain, stone | Plywood, CBU, concrete |
| White Polymer-Modified | Light or translucent tile | Glass, marble, travertine | Plywood, CBU |
| Medium Bed (Thick Bed) | Large format & heavy tile | 24"+ porcelain slabs | CBU, concrete, Schluter |
| Installation Area | Required Back Coverage | Standard Reference | Notes |
|---|---|---|---|
| Dry Areas (floors, walls) | 80% minimum | ANSI A108.5 | Acceptable for most residential |
| Wet Areas (showers, pools) | 95% minimum | ANSI A108.5 / TCNA W244 | Mandatory to prevent water infiltration |
| Exterior / Freeze-Thaw | 95% minimum | TCNA F102 | Prevents freeze damage |
| Large Format Tile (>15") | 95% minimum | TCNA F102E | Back-butter recommended |
| Tile Size | Special Considerations | Lippage Limit | Mortar Requirement |
|---|---|---|---|
| 15" – 18" | Flat substrate essential | 1/16" max | Modified or medium bed |
| 18" – 24" | Back-butter required | 1/32" max | Medium bed preferred |
| 24" – 48" | Schluter or uncoupling mat | 1/32" max | Medium bed required |
| 48"+ | Professional install only | 1/32" max | Medium bed + epoxy option |
The good spread of thinset is one of those things that can help or hurt the setting of tiles. If you apply it right the tiles stay flat for years. If you do it badly, that can cause cracks in the tiles, loose spots or even bigger problems.
The basic rule says that dry insides need at least 80 percent spread under every tile. For wet places and outsides, at least 95 percent of spread must be. All edges of tiles deserve good support with thinset.
How to Get Good Thinset Coverage Under Tiles
When you install large porcelain tiles or panels on floors, the smallest spread in any square foot must reach 85 percent. Those demands must spread evenly under the tile. In places where you commonly use porcelain tiles, aim for 98 percent spread as a good target.
Back coating of tiles bigger than 10-inch squares also helps to get to that mark.
Picking the right trowel matters a lot. The size of the trowel controls how much thinset stays under the tile. For tiles in big formats, a euro notched trowel works well.
There are three kinds of euro notched trowels that match to half-inch depth and width, but give better spread. Shallow flat trowels of 8 mm work for small mosaic tiles. For big tiles, 10 mm flat trowel works more.
Trowels with deeper and narrow slices, like quarter-inch depth, half-inch width and quarter-inch space, can limit the move of tiles during the setting to only a small distance.
The way to check the spread is easy. Lay the tile as usual, then lift it and check the back. There should knot be lines from the trowel.
Full spread with thinset must show on the back of the tile and on the base surface. Spread in one direction and then press the tile with a back and forth move, which helps for good results.
Good mixing of the thinset is key. The makeup of the mix depends on the trowel. If the mix is too thick, even a good trowel will not work.
Also, thinset and grout have short life. They are made of more than just Portland cement, and some extras go bad over time.
For tiles in garages, the spread with thinset becomes even more key. Here no gaps are allowed in the bed of thinset. You want at least 90 percent spread, and back coating of tiles helps to reach it.
That protects against cracking under the weight of cars. Good spreading method is central for lasting garage tile.
To guess how much thinset to buy, a 120-square foot room with 16-inch tiles needs at least three bags. Split the square area by 95, to find the number of 50-pound bags. The bag itself shows spread based on the trowel, but inactual life it commonly covers less than the promises on the bag.